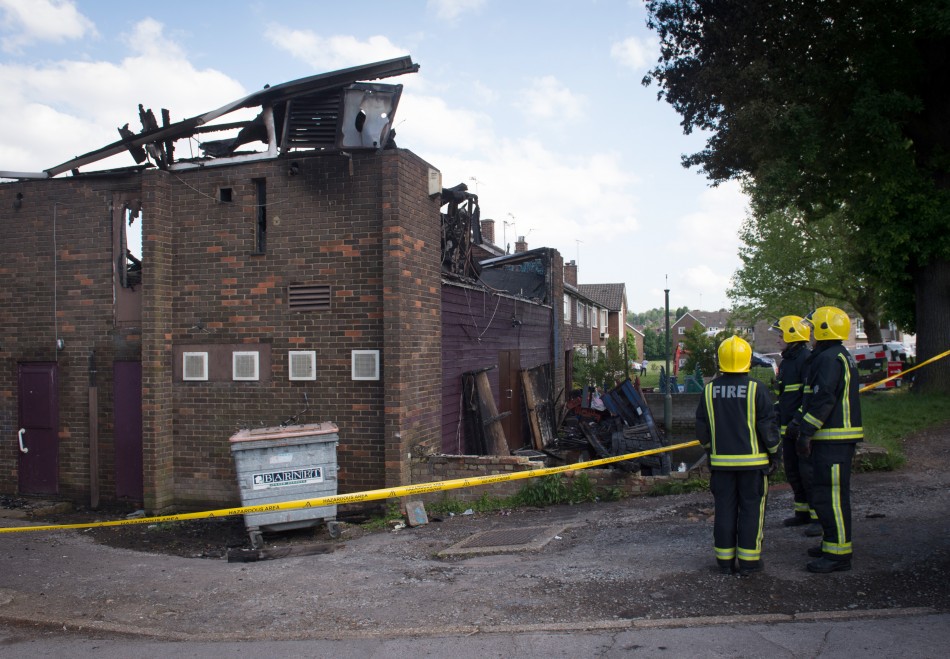
Football Hooligans Brest and Guingamp in 2013 France
————————————-
Football hooliganism in France is often rooted in social conflict, including racial tension. In the 1990s, fans of Paris Saint-Germain (PSG) fought with supporters from Belgium, England, Germany, Italy and Scotland.
—————————
French football hooligans wreak havoc in Dutch town ahead of Europa match
—————————
There is a long-standing north/south rivalry between PSG (representing Paris and by extension northern France) and Olympique de Marseille (representing the South of France) which has encouraged authorities to be extremely mobilised during games between the two teams.
Violent fights and post-game riots including car burning, and shop windows smashing have been a regular fixture of PSG-OM games. In 2000, the bitter rivalry turned particularly violent.
——————————-
Galatasaray Hooligans vs Psg – FİGHT
——————————-
On 24 May 2001, fifty people were injured when fighting broke out at a match between PSG and Turkish club Galatasaray at the Parc des Princes stadium.
PSG were initially given a record $571,000 fine, but it was reduced on appeal to $114,000. Galatasaray was initially fined $114,000 by UEFA, but it too was eventually reduced to $28,500.
In May 2001, six PSG fans from the Supporters Club, were arrested and charged with assault, carrying weapons, throwing items on the pitch and racism. The six were alleged to have deliberately entered a part of the Parc des Princes stadium where French fans of Turkish origin were standing, in order to attack them. The six were banned from all football stadiums for the duration of their trial.
On 24 November 2006 a PSG fan was shot and killed by police and another seriously injured during fighting between PSG fans and the police. The violence occurred after PSG lost 4–2 to Israeli club Hapoel Tel Aviv at the Parc des Prince in a UEFA Cup match. PSG fans chased a fan of Hapoel Tel Aviv, shouting racist and anti-semitic slogans. A plainclothes police officer who tried to protect the Hapoel fan was attacked, and in the chaos, one fan was shot dead and another seriously injured.
In response, the French Interior Minister, Nicolas Sarkozy held a meeting with the president of the French Football League, Frederic Thiriez to discuss racism and violence in football. The director-general of the French police, Michel Gaudin, insisted that measures against football hooliganism had reduced racist incidents to six that season from nineteen in the previous season. Gaudin also stated that 300 known hooligans could be banned from matches.
The fan who was shot, was linked with the Boulogne Boys, a group of fans who modelled themselves on British hooligans in the 1980s. The group’s name comes from the Kop of Boulogne (KOB), one of the two main home fan stand at the Parc des Princes.
The KOB themselves held a silent memorial march attended by 300 and accused the police office of murdering the fan. They cited bias in the French press who had only given a “one-sided” account of the incident.
French President Jacques Chirac condemned violence that led up to the shooting, stating that he was horrified by the reports of racism and anti-Semitism. French Prime Minister, Dominique de Villepin called for new, tougher measures to deal with football hooligans. Prosecutors opened an inquiry into the incident, to determine whether the officer involved should face criminal charges.
German football hooligans with masked faces in a 1990s match.
Before a home match against Sochaux on 4 January 2006, two Arab youths were punched and kicked by white fans outside the entrance to the KOB. During the match racist insults were aimed at black players and a PSG player of Indian origin, Vikash Dhorasoo was told to “go sell peanuts in the metro”.
In the recent years, following UK’s example, France’s legislation has changed, including more and more banning of violent fans from stadiums. The threat of dissolution of fan groups has also tempered the outward rivalry and violence of a number of fans. Known violent fans under ban sentences are to report to the nearest Police station on nights of game, to prove they are not anywhere in proximity to the stadium
The 1955 Le Mans disaster occurred during the 24 Hours of Le Mans motor race in Le Mans, France in June 1955, when a crash caused large fragments of debris to fly into the crowd. Eighty-three spectators and driver Pierre Levegh died and 120 more were injured in the most catastrophic accident in motorsport history.
—————————–
Le Mans 1955 accident: Raw footages of the crash in HD
There was much debate over the apportioning of blame. To reach his pit-stop, Mike Hawthorn had had to cut in front of Lance Macklin, causing Macklin to swerve into the path of Levegh in his much faster Mercedes. The collision propelled Levegh’s car upwards and into a concrete stairwell, where he was killed, and the wreck exploded in flames. The inquiry held none of the drivers responsible, and blamed the layout of the 30-year old track, which had not been designed for cars of this speed.
Pierre Levegh, aged 49, had been hired by Mercedes-Benz as a factory driver that year. Part of his appeal to Mercedes was his determination shown in the 1952 race when he had driven for 23 straight hours, even though the team had a driver who could have replaced him.
He failed to win only because of a missed gear change, due to exhaustion, with just 45 minutes remaining, resulting in a failed connecting rod in his Talbot-Lago.
Mercedes-Benz had debuted its new 300 SLR sportscar in the 1955 World Sportscar Championship season, with some notable success, including a win at the Mille Miglia. The 300 SLR featured a body made of an ultralightweight magnesium alloy called Elektron with a specific gravity of 1.8 (in comparison, aluminium has a S.G. of 2.7 and steel 7.8). This new material reduced the weight of the car and thus improved its performance.
The car lacked the more effective state-of-the-art disc brakes featured on the rival Jaguar D-Type, employing instead the traditional drum brake system. The high power of the car forced Mercedes’ engineers to incorporate a large air brake behind the driver that could be raised to increase drag and slow the car for most conditions.
Safety measures commonly in place today were relatively unknown in 1955. Aside from two layout changes to make the circuit shorter, the Le Mans circuit itself had remained largely unaltered since the inception of the race in 1923, when top speeds of cars were typically in the region of 100 km/h (60 mph). By 1955 top speeds were in excess of 300 kilometres per hour (190 mph).
The cars had no seatbelts, the drivers reasoning that it was preferable to be thrown clear in a collision rather than be crushed or trapped in a burning car.
The 1955 24 Hours of Le Mans began on 11 June 1955, with Pierre Levegh behind the wheel of the #20 Mercedes-Benz 300 SLR run by Daimler-Benz. American John Fitch was Levegh’s assigned partner in the car, and he would take over driving duties later. Competition between Mercedes, Jaguar, Porsche, Ferrari, Aston Martin and Maserati was close, with all the marques fighting for the top positions early on. The race was extremely fast, with lap records being repeatedly broken.
Accident
——————————–
The Deadliest Crash: The Le Mans 1955 Disaster BBC
——————————–
Immediate cause
Towards the end of Lap 35, Levegh was following Mike Hawthorn‘s leading Jaguar D-type. Approaching the pit straight, Hawthorn passed Lance Macklin’s slower Austin Healey 100S. Seeing the Jaguar crew signaling him for his first pit stop, Hawthorn moved across Macklin’s path and slowed suddenly to enter the pits.
Attempting to avoid Hawthorn, Macklin’s car briefly remained on the right side of the track behind Hawthorn, kicking up dust with its right wheels, then swerved across the center of the track. Macklin was apparently out of control as he started to swerve, but regained direction after crossing the centerline. But by then Macklin was in the path of Levegh, still at speed (about 240 km/h (150 mph)) in front of Fangio. Levegh did not have time to react. Levegh’s car made contact with the left rear of Macklin’s car as he closed rapidly upon the slowed car.
Collision
When Levegh’s 300 SLR hit Macklin’s Austin-Healey from behind, his car became airborne, soaring towards the left side of the track. It skipped the earthen embankment separating the spectator area from the track, bounced through spectator enclosures, then hit a concrete stairwell structure head-on. That impact disintegrated the front end of the car, which then somersaulted high, pitching debris into the spectator area, and landed atop the earthen embankment.
The debris included the bonnet, motor, and front axle, which separated from the frame and flew through the crowd.
The bonnet decapitated tightly jammed spectators like a guillotine. With the front of the spaceframe chassis—and thus crucial engine mounts—destroyed, the car’s heavy engine block also broke free and hurtled into the crowd. Spectators who had climbed onto ladders and scaffolding to get a better view of the track found themselves in the direct path of the lethal debris.
Levegh was thrown free of the tumbling car, but his skull was fatally crushed on landing.
When the rear section of the car landed on the embankment, the fuel tank exploded. The ensuing fuel fire raised the temperature of the remaining Elektron bodywork past its ignition temperature, which was lower than other metal alloys due to its high magnesium content. The alloy burst into white-hot flames, sending searing embers onto the track and into the crowd. Rescue workers, totally unfamiliar with magnesium fires, poured water on the inferno, greatly intensifying the fire.
As a result, the car burned for several hours. Official accounts put the death total at 84 (83 spectators plus Levegh), either by flying debris or from the fire, with a further 120 injured. Other observers estimated the toll to be much higher.
Whatever the total, it was the most catastrophic accident in motorsport history.
Fangio, driving behind Levegh, narrowly escaped the heavily damaged Austin-Healey, which was now skidding to the right of the track, across his path. Macklin then hit the pit wall, striking three people and killing one, and bounced back to the left, crossing the track again and striking the barrier. Macklin survived the incident without serious injury.
Aftermath
Conclusion of the race
Le Mans Memorial Plaque
The race was continued, officially in order to prevent departing spectators from crowding the roads and slowing down ambulances. An emergency meeting of the Daimler-Benz board of directors was convened by midnight at the request of Levegh’s co-driver, John Fitch.
Mindful of sensitivities involving German cars in a French race just 10 years after the end of World War II, the board decided to pull out from the race as a sign of respect to the victims. Eight hours after the accident, while leading the race (and two laps ahead of the Jaguar team), the Mercedes team withdrew the cars of Juan Manuel Fangio/Stirling Moss and Karl Kling/André Simon. Mercedes invited Jaguar to also retire, but they declined.
Mike Hawthorn and the Jaguar team, led by motorsport manager Lofty England, kept racing. Hawthorn won the race with teammate Ivor Bueb.
This slideshow requires JavaScript.
After the race
Funeral services were held the next day at the cathedral in the town of Le Mans.
The French press carried photographs of Hawthorn and Bueb celebrating their win with the customary champagne and treated them with scorn.
The rest of the 1955 World Sportscar Championship season was completed, with two more races at the British RAC Tourist Trophy and the Italian Targa Florio, although they were not run until September and October, several months after the accident. Mercedes-Benz won both of these events, and were able to secure the constructors championship for the season.
After winning the Targa Florio, the last major race of the 1955 season, Mercedes-Benz announced that they would no longer participate in factory sponsored motor-sport in order to concentrate on development of production cars. The self-imposed ban on circuit racing lasted until the 1980s. Several drivers, including Fangio and Jaguar’s Norman Dewis, never raced at Le Mans again.
Opinions differed widely amongst the other drivers as to who was directly to blame for the accident, and such differences remain even today. Macklin claimed that Hawthorn’s move to the pits was sudden, causing an emergency that led him to swerve into Levegh’s path. Years later Fitch claimed, based on “what I saw and what I heard” that Hawthorn caused the accident. Dewis ventured the opinions that Macklin’s move around Hawthorn was careless and that Levegh was not competent to meet the demands of driving at the speeds the 300SLR was capable of.
Macklin, on reading Hawthorn’s autobiography Challenge Me The Race in 1958, was embittered to find that Hawthorn disclaimed all responsibility for the accident without identifying who had actually caused it. With Levegh dead, Macklin presumed that Hawthorn’s implication was that he (Macklin) had been responsible, and he began a libel action. The action was unresolved when Hawthorn was killed in a crash on the Guildford bypass in 1959.
The official inquiry into the accident ruled that Hawthorn was not responsible for the crash, and that it was merely a racing incident. The death of the spectators was blamed on inadequate safety standards for track design. The Grandstand and pit areas were demolished and rebuilt soon after.
The death toll led to a ban on motorsports in France, Spain, Switzerland, Germany and other nations, until the tracks could be brought to a higher safety standard. In the United States, the American Automobile Association (AAA) dissolved their Contest Board that had been the primary sanctioning body for autosport in the US (including the Indianapolis 500) since 1904. Switzerland’s ban did not allow for the running of timed motorsports such as hillclimbs. This forced Swiss racing promoters to organize circuit events in foreign countries including France, Italy and Germany.
In 2003 the Swiss parliament started a lengthy discussion about whether this ban should be lifted. The discussion focused on traffic policy and environmental questions rather than on safety. On 10 June 2009, the Ständerat (one chamber of the parliament) defeated the proposal to lift the ban for the second time and thus definitively, which meant that the ban would stay.
Legacy
John Fitch became a major safety advocate and began active development of safer road cars and racing circuits. He invented traffic safety devices currently in use on highways.
Macklin’s Austin-Healey 100 was sold to several private buyers before appearing on the auction block. In 1969, it was purchased for £155. In December 2011, the car was sold at auction for £843,000. The car retained the original engine SPL 261-BN and was valued at £800,000 prior to the auction.
Pierre Eugène Alfred Bouillin (22 December 1905 – 11 June 1955) was a French sportsman and racing driver. He took the racing name Pierre Levegh (pronounced le-VECK) in memory of his uncle, a pioneering driver who died in 1904. Levegh is mainly remembered for a disaster that killed him and 83 spectators during the 1955 24 Hours of Le Mans automobile race.
Career
Levegh, who was born in Paris, France, was also a world-class ice hockey and tennis player. In motorsport he competed in Formula One for the Talbot-Lago team in 1950 and 1951, starting six races, retiring in three, and scoring no points.
At Le Mans he raced for Talbot in four races, finishing fourth in 1951. In 1952, driving single-handedly, his car suffered an engine failure in the last hour of the race with a four lap lead. The failure was due to a bolt in the central crankshaft bearing having come loose many hours earlier in the race, although many fans placed the blame on driver fatigue. Levegh had refused to let his co-driver take over because he felt only he could nurse the car home.
In 1953 he came in eighth, and in 1954 he was involved in an accident in the seventh hour of racing.
Death
In 1955 he was tempted away from Talbot and joined the American John Fitch in racing a Mercedes-Benz 300 SLR. During the 24 Hours of Le Mans, in the third hour of racing, while on the Tribunes Straight, the car of Mike Hawthorn cut into the pits, slowing in front of the Austin-Healey of Lance Macklin. Macklin was forced to make an evasive move away from Hawthorn, pulling across the track into the path of Levegh’s faster Mercedes, which was driving just in front of Mercedes teammate Juan Manuel Fangio.
Running up the side of Macklin’s car, Levegh’s car launched into the air, striking high on a retaining wall, disintegrating and scattering components into the crowd.
Levegh was killed when he was thrown from the car and his skull crushed by the impact. The flammable magnesium body of the Mercedes quickly ignited in the accident; the combination of the fire and flying car parts killed 83 spectators with over 100 injured. The race was continued in order to prevent the spectators from leaving, which would have blocked all access roads and the ambulances.
Though Levegh was unable to save himself, he may have saved the life of five-time Formula One world champion Fangio, who maintained that a hand-signal from Levegh to slow down, a moment before he struck Macklin’s car, was the deliberate warning that had saved Fangio’s life.
While Mercedes withdrew from the race as a sign of respect to the victims (and later from motor racing in general for the next 30 years), Mike Hawthorn and Ivor Bueb continued in their Jaguar to win the race. The accident was a major contributor to changing attitudes about the acceptance of danger in motor racing and an increase in the desire to make courses safer for spectators and drivers alike.
The small British firm of Bristol Cars, whose entrants achieved a 1–2–3 finish in the 2-litre class at Le Mans that year, decided to abandon racing altogether as a result of the tragedy, scrapping all but one of their racing cars. Fitch became a safety advocate and began research into automotive safety, some of which have advanced into motorsport.
The Killing Fields (Khmer: វាលពិឃាត, Khmer pronunciation: [ʋiəl pikʰiət]) are a number of sites in Cambodia where collectively more than a million people were killed and buried by the Khmer Rouge regime, during its rule of the country from 1975 to 1979, immediately after the end of the Cambodian Civil War (1970–1975). The mass killings are widely regarded as part of a broad state-sponsored genocide (the Cambodian genocide).
Analysis of 20,000 mass grave sites by the DC-Cam Mapping Program and Yale University indicate at least 1,386,734 victims of execution.
Estimates of the total number of deaths resulting from Khmer Rouge policies, including disease and starvation, range from 1.7 to 2.5 million out of a 1975 population of roughly 8 million. In 1979, Vietnam invaded Democratic Kampuchea and toppled the Khmer Rouge regime.
Cambodian journalist Dith Pran coined the term “killing fields” after his escape from the regime
Genocide
The Communist Khmer Rouge regime arrested and eventually executed almost everyone suspected of connections with the former government or with foreign governments, as well as professionals and intellectuals. Ethnic Vietnamese, ethnic Thai, ethnic Chinese, ethnic Cham, Cambodian Christians, and the Buddhist monkhood were the demographic targets of persecution. As a result, Pol Pot has been described as “a genocidal tyrant.”
Ben Kiernan estimates that about 1.7 million people were killed.
Researcher Craig Etcheson of the Documentation Center of Cambodia suggests that the death toll was between 2 and 2.5 million, with a “most likely” figure of 2.2 million. After 5 years of researching some 20,000 grave sites, he concludes that:
“these mass graves contain the remains of 1,386,734 victims of execution.”
A UN investigation reported 2–3 million dead, while UNICEF estimated 3 million had been killed. Demographic analysis by Patrick Heuveline suggests that between 1.17 and 3.42 million Cambodians were killed, while Marek Sliwinski suggests that 1.8 million is a conservative figure.
2,000,000
Dead
This slideshow requires JavaScript.
Even the Khmer Rouge acknowledged that 2 million had been killed—though they attributed those deaths to a subsequent Vietnamese invasion. By late 1979, UN and Red Cross officials were warning that another 2.25 million Cambodians faced death by starvation due to “the near destruction of Cambodian society under the regime of ousted Prime Minister Pol Pot,” who were saved by international aid after the Vietnamese invasion.
Cambodia’s ethnic minorities constituted 15 percent of the population in pre-Khmer Rouge era. Of the 400,000 Vietnamese who lived in Cambodia before 1975, some 150–300,000 were expelled by the previous Lon Nol regime. When Pol Pot‘s Khmer Rouge came to power, there remained about 100–250,000 Vietnamese in the country. Almost all of them were repatriated by December 1975.
The Chinese community (about 425,000 people in 1975) was reduced to 200,000 during the next four years. In the Khmer Rouge’s Standing Committee, four members were of Chinese ancestry, two Vietnamese, and two Khmers. Some observers argue that this mixed composition makes it difficult to argue that there was an intent to kill off minorities.
R.J. Rummel, an analyst of political killings, argues that there was a clear genocidal intent:
One estimate is that out of 40,000 to 60,000 monks, only between 800 and 1,000 survived to carry on their religion. We do know that of 2,680 monks in eight monasteries, a mere seventy were alive as of 1979. As for the Buddhist temples that populated the landscape of Cambodia, the Khmer Rouge destroyed 95 percent of them, and turned the remaining few into warehouses or allocated them for some other degrading use.
Amazingly, in the very short span of a year or so, the small gang of Khmer Rouge wiped out the center of Cambodian culture, its spiritual incarnation, its institutions….As part of a planned genocide campaign, the Khmer Rouge sought out and killed other minorities, such as the Moslem Cham. In the district of Kompong Xiem, for example, they demolished five Cham hamlets and reportedly massacred 20,000 that lived there; in the district of Koong Neas only four Cham apparently survived out of some 20,000.
Process
Rooms of the Tuol Sleng Genocide Museum contain thousands of photos taken by the Khmer Rouge of their victims.
The judicial process of the Khmer Rouge regime, for minor or political crimes, began with a warning from the Angkar, the government of Cambodia under the regime. People receiving more than two warnings were sent for “re-education,” which meant near-certain death.
People were often encouraged to confess to Angkar their “pre-revolutionary lifestyles and crimes” (which usually included some kind of free-market activity; having had contact with a foreign source, such as a U.S. missionary, international relief or government agency; or contact with any foreigner or with the outside world at all), being told that Angkar would forgive them and “wipe the slate clean.” This meant being taken away to a place such as Tuol Sleng or Choeung Ek for torture and/or execution.
The executed were buried in mass graves. In order to save ammunition, the executions were often carried out using poison, spades or sharpened bamboo sticks. In some cases the children and infants of adult victims were killed by having their heads bashed against the trunks of Chankiri trees, and then were thrown into the pits alongside their parents. The rationale was
“to stop them growing up and taking revenge for their parents’ deaths.”
Some victims were required to dig their own graves; their weakness often meant that they were unable to dig very deep. The soldiers who carried out the executions were mostly young men or women from peasant families.
Prosecution for crimes against humanity
In 1997 the Cambodian government asked for the UN’s assistance in setting up a genocide Tribunal. It took nine years to agree to the shape and structure of the court – a hybrid of Cambodian and international laws – before the judges were sworn in in 2006.
The investigating judges were presented with the names of five possible suspects by the prosecution on July 18, 2007. On September 19, 2007 Nuon Chea, second in command of the Khmer Rouge and its most senior surviving member, was charged with war crimes and crimes against humanity. He faced Cambodian and foreign judges at the special genocide tribunal and was convicted on 7 August 2014 and received a life sentence.
On July 26, 2010 Kang Kek Iew (aka Comrade Duch), director of the S-21 prison camp, was convicted of crimes against humanity and sentenced to 35 years’ imprisonment. His sentence was reduced to 19 years, as he had already spent 11 years in prison.
On February 2, 2012, his sentence was extended to life imprisonment by the Extraordinary Chambers in the Courts of Cambodia.
Today
———————————
The Killing Fields Peter Jennings Report
———————————
The best known monument of the Killing Fields is at the village of Choeung Ek.
Today, it is the site of a Buddhist memorial to the victims, and Tuol Sleng has a museum commemorating the genocide. The memorial park at Choeung Ek has been built around the mass graves of many thousands of victims, most of whom were executed after they had been transported from the S-21 Prison in Phnom Penh.
The utmost respect is given to the victims of the massacres through signs and tribute sections throughout the park. Many dozens of mass graves are visible above ground, many which have not been excavated yet. Commonly, bones and clothing surface after heavy rainfalls due to the large number of bodies still buried in shallow mass graves. It is not uncommon to run across the bones or teeth of the victims scattered on the surface as one tours the memorial park. If these are found, visitors are asked to notify a memorial park officer or guide.
A survivor of the genocide, Dara Duong, founded The Killing Fields Museum in Seattle, Washington, US.
—————————-
Killing fields movie Best movie clip
—————————-
John Dawson Dewhirst
1952 – c. August 1978
John Dawson Dewhirst (1952 – c. August 1978) was a Britishteacher and amateur yachtsman who was one of nine western adventurers, and two Britons, known to fall victim to the Khmer Rouge during the genocidal rule of Pol Pot.
Early life
Dewhirst was born in the Jesmond district of Newcastle Upon Tyne in 1952. His father was a headmaster, and his mother ran an antiques shop. In 1963, at age 11, the Dewhirst family moved to Cumbria. While growing up in Cumbria, Dewhirst became a sports enthusiast, and took a liking to outdoor activities. He spent most of his boyhood roaming the Cumbrian countryside.
At Appleby Grammar School, Dewhirst developed a love for poetry and aspired to be a novelist. After finishing his A Levels, he won an English scholarship to study at Loughborough University.
While studying at Loughborough University, he trained as a teacher. After receiving his degree in teaching, his desire for adventure and to become a writer drove him to travel to Tokyo, Japan to teach English in 1977.
Disappearance
Some time in July 1978, while visiting a friend in the eastern Malaysian town of Kuala Terengganu—on the slow road from Japan back to England—26-year-old Dewhirst met Canadian Stuart Glass and New Zealander Kerry Hamill, co-owners of a little Malaysian bedar (traditional, double-ended wooden boat) named Foxy Lady. The three spent several weeks or a month together in Kuala, and then headed north to Bangkok.
For reasons that are unclear, Foxy Lady ended up in Cambodian waters and was seized, off Koh Tang, by a patrol vessel attached to Division 164 of the Revolutionary Army of Kampuchea. Foxy Lady may have been on its way to Bangkok to pick up a load of Thai sticks. Glass had engaged in hashish smuggling before. Dewhirst’s history in this area is unknown. His Kuala Terengganu friend—now in her seventies—recalls Dewhirst speaking of planned adventures.
Glass was shot and killed, or drowned, during the seizure. Dewhirst and Hamill may have been held for several days on a nearby island, and were then trucked off to Democratic Kampuchea’s preeminent death house—S-21.
S-21 records
In early 1979, Vietnam invaded Democratic Kampuchea and overthrew the Pol Pot regime. They liberated Democratic Kampuchea’s S-21 prison in the capital Phnom Penh where over 14,000 Cambodians had been killed, many of them for supposedly spying against Cambodia.
Alleged photographs and forced confessions of nine missing Western yachtsmen (four Americans, two Australians, plus those of John Dewhirst and Kerry Hamill) were found in the prison files. The confessions of Dewhirst and Hamill revealed that they had been seized by a Khmer Rouge patrol vessel near the island of Koh Tang on the evening of 13 August 1978.
Stuart Glass, the Canadian befriended by Dewhirst and Hamill, had been shot and killed during Foxy Lady‘s capture. Hamill and Dewhirst were both brought ashore and then taken by truck to Phnom Penh. Like the other Western yachtsmen, they were almost certainly tortured. The extent of their mistreatment is not clear. Dewhirst wrote several long confessions that mixed true events in his life with wholly false accounts of his career as a CIA agent planning to subvert the Khmer Rouge regime.
He claimed that his father (also an agent) had been paid a large bribe for inducting his son into the CIA and that his college course in Loughborough was interspersed with training as a spy. Dewhirst and Hamill signed a series of confessions between September 3 and October 13, 1978.
John Dawson Dewhirst’s first page of a forced confession when being tortured by the Cambodian Pol Pot Regime in the S-21 prison in Phnom Penh.
The former administrator of the prison, Comrade Duch, said that he remembered Dewhirst as “very polite”.
News of his death
The circumstances of the deaths of Dewhirst and Hamill remain unclear. Their deaths were first reported in late 1979 and early 1980 by ABC News journalist Jim Laurie and freelance photographer Edward Rasen. Rasen provided more details, including photographs and portions of confessions in stories for the UK publication NOW! and the Australian Bulletin.
During the 2009 trial of S-21 chief Kang Kek Iew (aka Duch), a former S-21 guard named Cheam Sour claimed that one of the eight Western yachtsmen held at S-21 was burned to death. Sensational reports that this individual was John Dewhirst are unsubstantiated.
Like other S-21 inmates, Dewhirst may well have been killed with a blow to the head. Comrade Duch said that he received orders from his superiors that the bodies of the murdered westerners had to be burned to remove all traces of their remains, adding,
“I believe that nobody would dare to violate my orders.”
Aftermath
On 10 November 2005, in an interview, John Dewhirst’s sister, Hilary Dewhirst-Holland told interviewers that she wants her brother’s case to be detailed in the prosecution indictment against Duch.
During Comrade Duch’s trial beginning in 2007, Hillary did not attend the trial to testify against Duch. Instead, she handed a note to Rob Hamill, younger brother of Kerry Hamill, to share with the court.
On 27 August 2009, Rob Hamill appeared before the Extraordinary Chambers in the Courts of Cambodia (Khmer Rouge Tribunal) as a civil party in Case 001, against Comrade Duch.
In April 2011, Hamill applied to the ECCC once more for civil party status in ECCC Case 003, believed to involve former Khmer Rouge chief Meas Mut. As “Secretary” of Democratic Kampuchea’s Division 164—comprising the nation’s navy—Mut would have been responsible for the gunning down of Stuart Glass and the seizure of Foxy Lady‘s two other crew, Kerry Hamill and John Dewhirst—not to mention the arrest of the other six Western yachtsmen.
———————————–
Duch trial: 25 Jul 2010
The sister of Briton who died in Khmer Rouge killing fields says his murderer should never be freed
As the trial of a notorious Cambodian prison guard Duch draws to a close, the sister of the only Briton to die in the Killing Fields says Duch should never be freed.
When a slightly built, bespectacled former revolutionary is sentenced on Monday for ordering the deaths of more than 14,000 people, Cambodians will at last see justice being done for one of the 20th century’s greatest crimes.
Thousands of miles away on the moors of rural Cumbria, so will a solicitor whose brother fell victim to Pol Pot’s murderous regime in 1978 when an adventure went horribly wrong.
John Dewhirst, a 26-year-old teacher from Cumbria, was enjoying one last trip before returning home, sailing through the Gulf of Thailand in a motorised junk called Foxy Lady. All went well until he and his friends came too close to the coast of Cambodia, then a closed land whose rulers had instituted a chilling reign of terror.
They were seized by Khmer Rouge coastguards and taken from their boat to a torture centre in the capital Phnom Penh.
There Mr Dewhirst was brutally interrogated and forced to make the ludicrous confession that he was a CIA spy, before being slaughtered in what became known as the killing fields – the only Briton among the hundreds of thousands to die there.
John Cantlie has now been in captivity for almost four years and everyday day, minute and second of this time his life and daily routine has been controlled and at the mercy of the mad men of Islamic State – Imagine for a moment what that must be like ?
Please DON’T forget about John and his suffering and the pain and anguish his family and loved ones go through every day.
Poppy Douglass has set up a petition to Raise awareness and ensure the safe release of British ISIS hostage John Cantlie – I’ve signed it & if you would like to add your voice and have John’s plight considered for debate in the UK Parliament you can sign below .
Petition
John Cantlie is a British photo-journalist held captive by ISIS for over three years. He has been used in the “Lend Me your Ears” proganda videos directed and filmed by ISIS.
Stephen Peter “Steve” Marriott (30 January 1947 – 20 April 1991) was an English musician, songwriter and frontman of two notable rock and roll bands, spanning over two decades. Marriott is remembered for his powerful singing voice which belied his small stature, and for his aggressive approach as a guitarist in mod rock bands Small Faces (1965–1969) and Humble Pie (1969–1975 and 1980–1981).
————————————-
Steve Marriott’s Life in Pictures
————————————-
Marriott was inducted posthumously into the Rock and Roll Hall of Fame in 2012 as a member of Small Faces.
In Britain, Marriott became a popular, often-photographed mod style icon through his role as lead singer and guitarist with the Small Faces in the mid to late 1960s.
Marriott was influenced from an early age by his heroes including Buddy Holly, Booker T & the MG’s, Ray Charles, Otis Redding, Muddy Waters and Bobby Bland. In later life Marriott became disillusioned with the music industry and turned his back on the big record companies, remaining in relative obscurity. He returned to his music roots playing the pubs and clubs around London and Essex.
——————————
The Life & Times Of Steve Marriott
——————————
Marriott died on 20 April 1991 when a fire, thought to have been caused by a cigarette, swept through his 16th century home in Arkesden, Essex.
He posthumously received an Ivor Novello Award in 1996 for his Outstanding Contribution to British Music and was listed in Mojo as one of the top 100 greatest singers of all time.
Black Sabbath frontman, Ozzy Osbourne, named Marriott the fourth greatest singer and Clem Burke of Blondie named him the sixteenth greatest singer.
Paul Stanley of Kiss has said:
“He had a great voice” and went on to say, “Steve Marriott was unbelievable”.
Keith Richards listed Marriott as one of his five favourite artists of all time. Steve Perry of Journey has said that:
“One of my favourite vocalists was Steve Marriott”
Early Life
Steve Marriott few months old
Steve Marriott was born on 30 January 1947 at East Ham Hospital, Forest Gate, (now London, E7), England to parents Kay and Bill Marriott who lived at Strone Road, Manor Park. Born three weeks premature and weighing just 4 lb. 4 oz., he developed jaundice and was kept in hospital four weeks before being well enough to go home.
Marriott came from a working-class background and attended Monega Junior School. His father Bill worked as a printer and later owned a jellied eels stall called ‘Bill’s Eels’ outside the Ruskin Arms. For a short time he also sold pie and mash.
Kay worked at the Tate & Lyle factory in Silvertown. Bill was an accomplished pub pianist and the life and soul of many an ‘East End’ night. Bill bought Marriott a ukulele and harmonica which Marriott taught himself to play.
Marriott showed an early interest in singing and performing, busking at local bus-stops for extra pocket money and winning talent contests during the family’s annual holiday to Jaywick Holiday camp near Clacton-on-Sea.
In 1959 at the age of twelve, Marriott formed his first band with school friends Nigel Chapin and Robin Andrews. They were called ‘The Wheels’, later the ‘Coronation Kids’, and finally ‘Mississippi Five’. They later added Simon Simkins and Vic Dixon to their line-up.
From a young age, Marriott was a huge fan of American singer Buddy Holly and would mimic his hero by wearing large-rimmed spectacles with the lenses removed. He wrote his first song, called “Shelia My Dear,” after his aunt Shelia to whom he was close. Those who heard the song said it was played at a jaunty pace in the style of Buddy Holly and his bandmates also nicknamed him ‘Buddy’. They would play the local coffee bars in East Ham and perform Saturday morning gigs at the Essoldo Cinema in Manor Park.
Marriott was a cheeky, hyperactive child, according to his mother Kay, and well known by his neighbours in Strone Road for playing pranks and practical jokes.
While he was a pupil at local Sandringham Secondary Modern School, Marriott was said to be responsible for deliberately starting a fire in a classroom though he always denied this.
In 1960, Bill Marriott spotted an advertisement in a London newspaper for a new Artful Dodger replacement to appear in Lionel Bart’s popular musical Oliver!, based on the novel Oliver Twist by Charles Dickens, at the New Theatre (now called the Noël Coward Theatre) in London’s West End, and without telling his son, applied for him to audition.
At the age of thirteen, Marriott auditioned for the role. He sang two songs, “Who’s Sorry Now” by Connie Francis, and “Oh, Boy!” by Buddy Holly.
Bart was impressed with Marriott’s vocal abilities and hired him. Marriott stayed with the show for a total of twelve months, playing various boys’ roles during his time there, for which he was paid £8 a week. Marriott was also chosen to provide lead vocals for the Artful Dodger songs “Consider Yourself”, “Be Back Soon,” and “I’d Do Anything,” which appear on the official album to the stage show, released by World Record Club and recorded at the famous Abbey Road Studios. In 1961 the Marriott family moved from Strone Road to a brand new council flat in Daines Close, Manor Park.
Following Marriott’s successful acting debut in Oliver!, his family encouraged him to pursue an acting career. In 1961 he auditioned and was accepted as a student at the Italia Conti Academy of Theatre Arts in London. Because his family were unable to afford the private school fees, it was mutually agreed the fees would be deducted from acting work the school found him. After Marriott’s enrolment at the Italia Conti Academy, he quickly gained acting roles, working consistently in film, television and radio, often typecast as the energetic Cockney kid. Soon he lost interest in acting and turned his attention back to his first love, which was music.
His parents were devastated and his decision to give up acting caused a family rift. As a result, he left the family home for a short period to stay with friends.
In 1963, Marriott wrote “Imaginary Love” and touted it around the big record labels in London. On the strength of “Imaginary Love”, Marriott secured a Decca Records deal as a solo artist with Dick Reagan (also an agent for Cliff Richard). Marriott’s first single was a song written by Kenny Lynch, “Give Her My Regards”, with Marriott’s self-penned song as the B-side. The single was released in July 1963 and promptly vanished.
In the same year Marriott formed the Moments, originally called the Frantiks. The Frantiks recorded a cover version of Cliff Richard’s song “Move It” with ex-Shadows drummer Tony Meehan, who was brought in to help with production. Despite the single being hawked around the major record companies, no one was interested and the song was consequently never released. They then changed the band’s name to the Moments or ‘Marriott and his Moments’. They played support for artists such as the Nashville Teens, the Animals, Georgie Fame and John Mayall, playing venues such as the 100 Club in Soho, London, and the Crawdaddy Club in Richmond. The Moments gained a loyal following, and for a short time had their own fanzine Beat ’64, dedicated to ‘Steve Marriott’s Moments’, started by Stuart Tuck.
They are noted as performing a total of 80 gigs in 1964. The group was asked to record a single for the American market, a cover version of the Kinks’ UK hit song “You Really Got Me”, released on the World Artists record label (1964).
—————————-
The Kinks You really got me
—————————-
When their version of “You Really Got Me” failed to get attention, Marriott was dropped from the band, with members claiming he was too young to be a lead singer. According to London R&B band The Downliners Sect frontman Don Craine, Marriott applied to join the band as a replacement harmonica player. Craine did not invite him to audition as he knew Marriott wanted to be lead vocalist.
Between leaving the Moments and joining The Small Faces, Steve Marriott joined The Checkpoints. Chris Clements:
“He actually approached us (The Checkpoints) and said he needed to fulfill some gigs that were pending. This was in 1965, he was with us for a couple of months. We rehearsed at The Kentish Drovers in the Old Kent Road in South London. He got us to learn James Brown numbers, which at the time we weren’t very up in. One particular memory sticks in my mind. When we rehearsed with him, he almost spoke the words of the song, rather than sang the words. He was listening to us, making sure we got the backing right, so he didn’t put himself out vocally.
But when we did the first gig with him, out came this fantastic soul voice, we all looked at each other, and our mouths fell open! When doing the gigs, we would pick him up outside the Brewery in Romford road Essex. He always had a small case with his harmonicas in. His harmonica playing was excellent.
Our transport at that time was a converted ambulance, and Steve would always sit up front with the owner driver, (a man in his early 50s) rather than sit in the back talking to us. He seemed to me to be a bit of a loner. Even when I had a conversation with him, he always seemed to be looking past me, as though in a hurry to be somewhere else. He was quite a heavy smoker as I recall. We did various venues in Essex, around the Basildon area. He had no guitar, he would use our lead guitarist’s red Fender Strat. Steve would put many guitar breaks in the James Brown songs. So we would all huddle around our drummer Gary Hyde who would watch Steve.
When Gary stopped, we stopped, when Gary started, we started, so by using those tactics the gigs went well. We had photos taken at the various venues at that time, I wish someone would dig them out from wherever, I would love to see them.”
On 28 July 1964, Marriott first saw his future Small Faces partners, Ronnie Lane and 16-year-old drummer Kenney Jones. They were all performing at the Albion in Rainham, with their bands. Lane and Marriott met again by chance in the J60 Music Bar, a music shop in High Street North, Manor Park, where Marriott was working after his recent departure from the Moments. Lane came in looking to purchase a bass guitar, and afterwards was invited to Marriott’s home to listen to his extensive collection of rare American R&B import records.
With their shared love of R&B the trio were soon firm friends. Marriott was invited by Lane and Jones to perform with “the Outlaws” (previously called “the Pioneers”) at the band’s regular gig the Earl of Derby in Bermondsey.
However the trio each ended up completely drunk and Marriott enthusiastically destroyed the piano he was playing, much to the amusement of Lane and Jones. The landlord sacked them and the band was finished. According to David Bowie on a 1999 episode of VH1 Storytellers, in 1964 he and his good friend Marriott planned to form an R&B duo called ‘David and Goliath’.
Instead, Marriott, Lane and Jones decided to form their own band, with Steve bringing along his acquaintance, Jimmy Winston (Winston was later replaced by Ian McLagan). Marriott’s friend Annabel, an ex-student from the Italia Conti, came up with the band’s distinctive name after commenting that they all had “small faces”; the name stuck in part because they were all (apart from Winston) small (none being over 5 ft 6 in tall), and the term “face” in English mod culture was the name given to a well-known and respected mod.
Small Faces were signed to Don Arden within six weeks of forming and quickly became a successful mod band highly regarded by the youth cult’s followers when their debut single “Whatcha Gonna Do About It” hit the UK singles chart.
———————-
What’cha gonna do about it – Small Faces
———————-
Later, they were said to be one of many influences on the formation and musical style of British hard rock group Led Zeppelin . Marriott is reputed to have been Jimmy Page’s benchmark when selecting a lead singer, and there are unmistakable stylistic and timbral similarities between the voices of Marriott and Robert Plant, Led Zeppelin’s lead singer.
In fact, Plant was a fan of Small Faces and a regular at their early gigs where he also ran small errands for them. Zeppelin’s classic song “Whole Lotta Love” is a direct take of Marriott’s version of the classic song “You Need Lovin'”, originally written by Willie Dixon and recorded by American blues singer Muddy Waters.
————————
The Small Faces – You Need Loving
————————
Small Faces would regularly perform “You Need Lovin'” in their live set, and the song also appears on their debut album Small Faces, released by Decca in May 1966.
“It was fantastic, I loved it, Muddy Waters recorded it but I couldn’t sing like Muddy Waters so it wasn’t that much of a nick. I was a high range and Muddy was a low range so I had to figure out how to sing it. So I did and that was our opening number for all the years we were together. Every time we were on stage that was our opening number, unless we had a short set. That’s where Jimmy Page and Robert Plant heard it. Robert Plant used to follow us around. He was like a fan.”
– Marriott
However Marriott bore no animosity to Plant. He is quoted as shouting “Go on my son!” and wishing him luck when he first heard Plant’s version on the radio. Arden paid the band a wage of £20 a week each, along with accounts in clothes shops in Carnaby Street.
On Boxing Day, 1965, Arden arranged for them to move into a rented house, 22 Westmoreland Terrace, Pimlico. In his autobiography, McLagan describes the house as “party central”, a place where the likes of Marianne Faithfull, Brian Epstein, Pete Townshend and other celebrities would hang out. Marriott was just 18 years old.
———————————-
Small Faces – All or Nothing 1966
———————————-
Marriott wrote or co-wrote most of Small Faces’ hit singles. In an interview in 1984, Marriott was asked what his best Small Faces songs were:
“I think ‘All or Nothing’, that I wrote, takes a lot of beating. To me, if there’s a song that typifies that era, then that might be it. Words regardless, cos it’s only a silly love song, but the actual feel and arrangement of the thing, and maybe ‘Tin Soldier'”.
—————————-
Small Faces – Tin Soldier
—————————-
In 1967, Marriott wrote the evocative rock-ballad “Tin Soldier” to woo model Jenny Rylance. They first met in 1966 and Marriott was immediately smitten, but Rylance was dating up-and-coming singer Rod Stewart and so the two became friends. She later broke up with Stewart and had a brief romantic liaison with Marriott, but much to his disappointment ended it to go back to Stewart. Rylance and Stewart later split for good after a rocky four-year relationship; when Marriott found out he pursued her relentlessly, leading him to write “Tin Soldier”. The song was a hit for the band in 1967 and for Marriott a personal triumph.
He and Rylance were married at Kensington Register Office, London, on 29 May 1968.
—————————-
Small Faces – Itchycoo Park
—————————-
Relationships and family
With Jenny Rylance
Marriott had liaisons with many women and had four known children with four of them, including one of his three wives. His first wife was model Jenny Rylance (1968-1973).
Pam Stephens
He met American air hostess, Pam Stephens in 1975 and their son Toby was born in 1976. They married after Toby was born.
Toni Poulton
His third wife was Toni Poulton. They were married until Marriott’s death in 1991. He also had three daughters. The first, Lesley, was conceived to fellow teen Sally Foulger before Marriott became famous. She was originally known as Sarah Lisa Foulger (born 9 June 1966). She was adopted out, but later found out who her father was and has been accepted by her siblings. The second was Tonya, with Canadian Terri Elias in 1984. His third daughter Mollie Mae was born in 1985 when Marriott was with his childhood friend Manon Piercey.
Later Marriott moved into Beehive Cottage in Moreton, Essex, a property he had bought jointly with Ronnie Lane and wife Susan and where he established his “Clear Sounds” music studio.
In 1967, after a dispute over unpaid royalties, relations between the Small Faces and Don Arden broke down and Arden sold them on to Andrew Loog Oldham, who owned the Immediate Records label. The band were much happier at Immediate, spending more time in the recording studio and far less time playing live; however, they lost the dynamic live sound that had made them famous.
—————————-
Small Faces – Ogdens´ Nut Gone Flake – Full record
—————————-
After the success of the group’s number one hit concept album Ogdens’ Nut Gone Flake Marriott was keen for the group to evolve and wanted to bring in ex-Herd frontman Peter Frampton, but McLagan, Jones and Lane refused.
Marriott started to feel the band had reached the end creatively and began to spend more time with Frampton and Greg Ridley. After rumours in the press about the band splitting up, which were always officially denied, Marriott quit the group, storming off stage during a disastrous live performance on New Year’s Eve, 1968.
In a 1984 interview with NME reporter Paolo Hewitt on the subject of leaving the band, Marriott said:
“You grow apart for Christsakes. You’re talking about people living together from the ages of seventeen to twenty-two and that’s a growing up part of your life and we got to hate each other, no doubt about it. We didn’t speak to each other for fucking years. Maybe ten years.”
– Marriott
Frampton claims that after Marriott’s departure from the Small Faces, the remaining members, Lane, McLagan and Jones, turned up at his home and offered him Marriott’s role in the band. (Ian McLagan vehemently denied this story).
“The following day after the Alexandra Palace gig (where Steve walked off), I was back home and I got a call from Ronnie Lane who said, ‘Me, Kenney and Mac would like to come round and see you.’ I thought, Hello, what’s all this about? Anyway, they all came round to my horrible little flat in Earls Court and asked me to join the Small Faces. All I could say was it’s a bit late now. Why couldn’t you have asked me while we were in Paris? We’d all be in the same band together and Steve wouldn’t have left.”
– Peter Frampton.
Humble Pie
Marriott with Humble Pie during a 1972 performance
Shortly after leaving Small Faces, Marriott joined the newly formed rock band Humble Pie with Peter Frampton, drummer Jerry Shirley and bassist Greg Ridley. In the early years, Humble Pie allowed Marriott the artistic freedom he craved but was denied in Small Faces due, in part, to commercial pressures and individual differences.
———————————–
Humble Pie – As Safe As Yesterday – Full Album 1969
———————————–
After extensive secret rehearsals at his Clear Sounds home recording studio, the band released on Immediate their debut album As Safe As Yesterday Is, closely followed by the Marriott-penned debut single “Natural Born Bugie” (often mis-spelt “Boogie”), which peaked at No. 4 in the UK Singles Chart in the summer of 1969.
———————————–
Humble Pie – Natural born boogie 1969
———————————–
Humble Pie almost disbanded after their first American tour when they returned to Britain and discovered that Immediate had gone into liquidation. They transferred to A&M Records and focused all their attention on the lucrative US market. Their new manager, Dee Anthony, had the band scrap its ‘unplugged’ set and crank the volume up.
Humble Pie toured constantly over the next three years, completing nineteen tours in the US alone. The band’s next album releases, Humble Pie and Rock On, benefitted from their touring.
———————————–
Humble Pie Performance Rockin’ The Fillmore FULL ALBUM
———————————–
Their live album Performance Rockin’ the Fillmore (1971) became the band’s most successful release to date. During these recordings, Marriott’s strong vocal performances became the focal point of the band. Dee Anthony pushed Marriott to take more of the on-stage spotlight, something he had, up to then, been sharing with Frampton and Ridley. Marriott’s new prominence is said to have resulted in Frampton’s decision to leave the band. (Frampton was replaced by Clem Clempson.)
Some close to Marriott, such as his wife and even Marriott himself, would say that his personality changed for the worse when he toured America. Eventually, possibly as a result of excessive alcohol and drug use, Marriott started showing signs of mild schizophrenia. He had regularly taken amphetamines (speed) and smoked cannabis in his days in the Moments and Small Faces, and in the latter half of the 1960s he also tried LSD. But by the time Humble Pie began to tour America regularly in the early 1970s, Marriott allegedly developed a destructive cocaine and alcohol addiction, which is thought to have been the cause of his marriage break-ups and to have contributed to his premature death in a house fire.
“He (Steve) became another person to cope with the pressures, he would say things like, “Please tell me that you’ll leave me if I go on tour again because if you say that I’ll have justification not to go, if I go and have to be that other person again I’ll just go mad.”
” This would be said in a moment of truth but the next day had changed his mind and he’d be up and off…. He was married to his music and I didn’t mind that especially in the early years when he would play me new songs on an acoustic guitar but what didn’t make me happy was when he was in the home studio, out of his brain, trying to come up with the next album because he was being pressurised into it. He would just disappear into the studio for three or four days at a time. He never slept and there would be all sorts of strange people in there with him. It was a crazy business and even the nicest people get mixed up. All sorts of chemicals were presented to him and he became addicted to them in the end. It was drugs that destroyed our relationship. Before the home studio was built Beehive Cottage was our sanctuary, afterwards it just became his workplace.”
– Jenny Rylance
Rylance finally left Marriott in 1973. She said:
“The drugs and the drink I would tolerate no more. It broke my heart to leave Steve but it had to be done, I was ultimately the stronger”.
Due to the break-up of his marriage and growing drug use, some band members said that Marriott at times became domineering, aggressive and intolerable to work with. Humble Pie disbanded in 1975, citing musical differences as the reason for the split. Financial mismanagement and widespread substance abuse within the band also played a part. In an interview in 2000 with John Hellier,
Jerry Shirley said:
“We were all doing too many drugs, we’d lost sight of our business arrangements and no-one within the band had any control over money matters. But the main reason was that we were making bad records, it all came to a head in early 1975. The rot had set in so deep it was inevitable.”
Marriott always believed Dee Anthony had syphoned off band earnings to promote his new project, Frampton, and his album Frampton Comes Alive. After Marriott’s death, second wife Pam Stephens claimed in an interview that while they were making the Marriott solo album they were warned off accusing Anthony of any financial misdealings and received threatening phone calls. Anthony was alleged to have links with the Genovese crime family (among others). She also claimed that after Marriott confronted Anthony about the missing money, she and Marriott were summoned to a meeting at the Ravenite Social Club on Mulberry Street in New York’s Little Italy district.
Among those present were John Gotti, Frank Locascio and Paul Castellano, all members of the Gambino crime family. Marriott was informed that he would not be getting any money and was warned to drop the matter. Marriott took the threats seriously.
Solo and various bands
Marriott released his first solo album, Marriott, in 1976 and moved back to Britain. Stephens gave birth to their first child Toby on 20 February 1976 and they were married on 23 March 1977, at Chelsea Register Office in London.
The money from Humble Pie’s farewell tour soon ran out, and Marriott was reduced to stealing vegetables from a field next to his home. He went on to form the Steve Marriott Allstars with ex-Pie bassist Greg Ridley, drummer Ian Wallace and ex-Heavy Metal Kids’ guitarist Mickey Finn, and found a new manager, Laurie O’Leary.
—————————
STEVE MARRIOTT’S ALL STARS
—————————
In the 1980s O’Leary asked Marriott to meet a friend of his, the infamous Ronnie Kray, who was incarcerated in Broadmoor Hospital for the murder of George Cornell.
Marriott gave him a signed photo.
After the departure of Mick Taylor in 1975 from the Rolling Stones, Marriott was considered as his replacement; however, Mick Jagger allegedly blocked the move after Marriott upstaged him during the audition. According to Ronnie Wood in his autobiography Ronnie, Marriott was Richards’ first choice to replace Mick Taylor.
“Steve told me, ‘I was good and stood at the back for a while but then Keith would hit this lick and I just couldn’t keep my mouth shut.’ Keith wanted him in but there was no way that once Steve opened his mouth Mick would have him in the band. He knew Steve would never stay in the background. They were the one band in the world that Steve would have loved to have been in. He just wanted to work with Keith.”
– Pam Marriott
In 1976 a court ruled that Arden still owed the Small Faces £12,000 in unpaid royalties. He agreed to pay in monthly instalments, but disappeared after making just one payment.
Due to the success of re-released singles “Itchycoo Park” and “Lazy Sunday” in 1975 and 1976, McLagan, Jones and Marriott were persuaded to re-form Small Faces.
Rick Wills took the place of Lane, who pulled out after just two rehearsals. Unknown to the others, Lane was suffering from multiple sclerosis. The band recorded two albums, Playmates and ’78 in the Shade, but the albums were both critical and commercial failures and they disbanded. Marriott did not make any money out of the venture. His earnings were used to extricate him from old binding management contracts. Due to financial problems, Marriott was forced to sell Beehive Cottage, which had been his home since 1968, and move to a small terraced house in Golders Green, London.
Late in 1978, the Inland Revenue informed Marriott that he still owed £100,000 in back tax from his Humble Pie days; he thought manager Dee Anthony had made all the necessary payments.
O’Leary, Marriott’s manager, advised him to leave Britain or go to prison.
He sold the house in Golders Green and moved to California. Marriott, Pam and son Toby were staying with friends in Santa Cruz and Marriott formed a new band called The Firm, with Jim Leverton and (most notably) former Mountain guitarist Leslie West. But after Leverton had to leave the US due to visa problems, and disputes over potential royalties, the band broke up.
Marriott was by now completely broke and forced to collect empty glass bottles to redeem them for small change. According to Leslie West, Steve needed the money and accepted a lucrative offer to reform Humble Pie.
In 1980, Marriott contacted Jerry Shirley, who was living in New York City, to discuss a Humble Pie reunion. Shirley agreed and they recorded “Fool for a Pretty Face”, which Marriott had written earlier.
——————————
Fool For A Pretty Face – Humble Pie
——————————
The new line-up included Anthony “Sooty” Jones, who was well respected among American east coast musicians, also vocalist and guitarist Bobby Tench, former member of the Jeff Beck Group. The song proved good enough for them to secure a recording contract with Atco.
In the UK their material was released by Jet Records, owned by ex-Small Faces manager Don Arden. They recorded the heavy rock album On to Victory (1980), followed by Go for the Throat (1981), and both proved reasonably successful. They also toured America as part of the Rock ‘N’ Roll Marathon bill. In the latter half of 1981, Marriott was beset with personal problems. His marriage was almost over and after he broke his wrist in an accident and was hospitalised with a suspected burst ulcer, whilst opening for Judas Priest and the new Humble Pie line-up disintegrated.
During a visit to Britain in 1981, Marriott became eager to see Ronnie Lane. By this time Lane had begun to use a wheelchair. After an emotional meeting, Marriott suggested they gig together. They got together with Jim Leverton, Mick Weaver, Dave Hynes, Zoot Money and Mel Collins to record an album called Majik Mijits. The album features songs by Lane and Marriott, though none were co-written.
Due to Lane’s illness, they were unable to tour and promote the album.
“Steve and Ronnie went to America to see Clive Davis of Arista Records. They played him the tape. Clive Davis was tapping his foot and tapping his very expensive pen on his very expensive desk. He said “Yeah, that’s great man”. Steve said “So you like the tape, Clive”. Steve then stopped the tape, ejected it and said “WELL YOU CAN’T FUCKING HAVE IT!”
“The story that Steve told me was that it would have meant touring and Ronnie just wasn’t up to it. It would have meant pretty much carrying him everywhere, no tour, no album. That’s why the Mijits never came out at that point in time. It’s been gathering dust for ages”
– Jim Leverton
The album was released nineteen years later. After the Majik Mijits, Marriott went back to New York playing on the club circuit again. For the next year and a half, Marriott was on the road with Jim Leverton, Goldy McJohn and Fallon Williams. They played mostly Small Faces and Humble Pie material, touring non-stop for the next eighteen months. After the departure of McJohn, the trio changed the band’s name to the Three Trojans.
Despite attempts at reconciliation, Marriott’s marriage finally came to an end when his wife found out that Marriott was expecting a child with Terry Elias, a Canadian girl he had met while they were separated.
Accepting that his marriage was over, Marriott moved back to the UK. With no home and no money, he stayed in the spare bedroom of his sister Kay’s house. Marriott formed Packet of Three again playing the pub circuit. He insisted on being paid for each gig in cash as the Inland Revenue were still pursuing him for back taxes. In August 1984, Aura Records released Steve Marriott Live at Dingwalls 6.7.84.
Marriott contacted longtime friend Manon Piercey, and they quickly developed a close relationship and rented a house together. Piercey gave birth to daughter Mollie Mae on 3 May 1985.
With Piercey’s help, Marriott reduced his excessive drink and drug habits. His sister Kay said:
“Steve would say, I’m not drinking any more, and he’d stop, six weeks, two months, he was very strong willed; if he wanted to, he could”.
In 1985 Marriott was still touring with Packet of Three playing Canada, America and Europe.
During Live Aid in 1985, London-based Phoenix Modernist Society joined mod revival bands such as the Lambrettas and Purple Hearts, with 1960s stars such as Chris Farlowe and PP Arnold. Together they cut a version of “All or Nothing” for Band Aid Trust. Kenny Lynch persuaded Marriott to get involved, and the single was released under the collective name the Spectrum.
In 1985, Marriott ended his relationship with Piercey when he met Poulton at a Packet of Three gig.
Due to his financial situation, Marriott jokingly later renamed the group Steve Marriott and the Official Receivers. In the mid-1980s Marriott and Poulton moved to a rented cottage in the small village of Arkesden.
The 16th century cottage was also used for location shots for the home of the title character in the BBC’s long-running television series Lovejoy, starring Ian McShane. Marriott became well-known locally, often popping into the pub opposite his home to buy bottles of brandy and borrowing glasses. He once turned up wearing trainers and a dressing gown and became something of an eccentric figure, playing pranks, particularly on the owner of the pub.
Due to past experiences, in later years Marriott became wary of success and fame as well as involvement with big record companies, and turned down lucrative concert and recording deals with names such as EMI. Because of this attitude, the band grew resentful, believing that he was holding them back, and Packet of Three was disbanded. For the next year Marriott took time off.
By now he was 39 years old. He had health problems, was overweight, and had a scruffy appearance. There was little left of the striking 1960s mod icon. Film-maker Paolo Sedazzari recalled,
“I remember going to see him in the 1980s, and he was brilliant. Great voice, great guitarist but what I couldn’t get over were the dungarees and the mullet haircut. That was really disappointing.”
According to his wife, Marriott still smoked cannabis and took cocaine, but nothing compared to what he had once consumed. In his later years Marriott liked reading; his favourite authors included Stephen King, Philip K. Dick and anything on Noël Coward, whom Marriott had always admired.
In May 1988, Marriott started rehearsing with a band from Leicestershire, the DTs, though by the time they starting touring they were called Steve Marriott and the DTs.
Despite being out of the public gaze, Marriott was still asked to participate in various projects. Andrew Lloyd Webber asked Marriott to record two songs for his musical Evita, though after becoming drunk at the meeting Marriott ungraciously declined.
Film composer Stephen Parsons asked Marriott to sing the title track “Shakin’ All Over” for the low budget horror film Gnaw: Food of the Gods II (1989) Marriott agreed, seeing it as easy money.
While recording the song, Trax Records asked Marriott to record a solo album. Thirty Seconds to Midnite was recorded at Alexandra Palace. Marriott used the money to buy a narrowboat.
On 14 July 1989, Marriott and Toni Poultney were married at Epping Register Office. Afterwards, they threw a party at their cottage.
During this period Jim Leverton got in touch and Marriott formed a new group called Steve Marriott’s Next Band, with Leverton and ex-members of both the DTs and the Official Receivers.When several members left due to financial disagreements, the band name Packet of Three resurfaced.
By 1990 Marriott was playing an average 200 gigs a year, when Frampton flew into Britain and asked Marriott to reform Humble Pie to produce a one-off album and a reunion tour.
The payment would be enough to allow Marriott to take things easier. He agreed, and they flew out to Frampton’s recording studio in Los Angeles on 27 January 1991.
They began writing songs, but the project was never completed, as Marriott had a change of heart and returned home. Two recorded songs from this final effort, “The Bigger They Come” and “I Won’t Let You Down”, with Marriott on vocals (and guitar), appeared on Frampton’s album Shine On: A Collection. A third song, “Out of the Blue”, featuring both Marriott and Frampton, was featured on the first solo recording Frampton made after Marriott’s death. A fourth song, “An Itch You Can’t Scratch”, has been found on many illegal compilations and even on one of two “authorised” British releases. The recording date, and whether Frampton played on it, have never been verified.
——————————————
STEVE MARRIOTT INTERVIEW: LIVE FROM LONDON, 1985
——————————————
Death
On Friday 19 April 1991, Marriott and Poulton flew home from the USA, where Marriott had recorded songs for a future album with Frampton. During the flight, according to Poulton, Marriott was drinking heavily, was in a foul mood, and the two argued constantly. After arriving in the UK, a mutual friend met them and they all went to one of Marriott’s favourite restaurants, The Straw Hat in Sawbridgeworth for dinner, where he consumed more alcohol. After dinner, they returned to their friend’s house and decided to stay overnight, since it was late, but upstairs in bed, Marriott and Poulton continued to argue. Poulton finally fell asleep and later woke to discover that Marriott had taken a taxi home alone.
At about 6:30 am on 20 April, a passing motorist saw the roof of Marriott’s cottage ablaze and called the fire brigade. It was reported that four fire engines were needed to put out the fire. In newspaper interviews, Assistant Divisional Fire Officer Keith Dunatis, who found Marriott, said:
“It was a tough fight getting upstairs. We searched the bedroom areas and it was very hot, we knew immediately that no-one could have survived the fire. We began to feel around the walls and discovered him lying on the floor between the bed and the wall. I would say he had been in bed and tried to escape. As soon as I saw the body clearly I knew who it was. I used to be a fan, it’s difficult to put my feelings into words. The scene was horrific in that corner of the room. I saw him lying there and thought what a pity it all was. I deal with many fires but this one was like walking down memory lane. We managed to salvage all his guitars and musical equipment. I feel a bit upset, all the firemen do. It was like seeing part of our lives gone forever.”
– (Fire Officer)
It is believed that the most likely cause of the fire was that soon after arriving home, jet-lagged and tired, in the early hours, Marriott had lit a cigarette while in bed and almost immediately fallen into a deep sleep.
Since Marriott was found lying on the floor between the bed and wall, investigators concluded he may have tried unsuccessfully to escape after being awakened by the blaze. Disoriented and confused after inhaling large amounts of thick smoke, Marriott had turned left instead of right towards the bedroom door and safety. He had been unable to rectify his mistake before being overcome with smoke. At the inquest, a verdict of accidental death by smoke inhalation was recorded. Marriott’s blood was found to contain quantities of Valium (taken earlier for flight nerves), alcohol and cocaine.
“He (Marriott) was certainly the most talented person I ever worked with. He was like a brother to me and I was devastated when he died. He always lived on the edge and I was always waiting for a ‘phone call to say that he had died but I never dreamed it would be under those circumstances. He’s never got the credit he deserves. He should be in the Rock & Roll Hall of Fame because he was the greatest white soul singer that England ever produced. I’m certain that if you caught the likes of Rod Stewart and Paul Rodgers in a private moment and asked them who was the main man, they would say, Steve Marriott.”
– Jerry Shirley
The Small Faces song “All or Nothing” was played as the requiem at Marriott’s funeral held on 30 April 1991, at the Harlow crematorium. Amongst the mourners, noted attendees included ex-Small Faces drummer Kenney Jones, as well as Peter Frampton, Joe Brown, PP Arnold, Terence Stamp, Jerry Shirley and Greg Ridley. Among those who sent wreaths were David Gilmour (of Pink Floyd) and Rod Stewart and his then-wife Rachel Hunter. Nothing was heard from ex-Small Faces members Ian McLagan or Ronnie Lane.
To mark the 10th anniversary of Marriott’s death a tribute concert was held at the London Astoria on 20 April 2001. All the songs performed at this concert were from the Small Faces or Humble Pie catalogue. Pre-1980 Humble Pie alumni Peter Frampton, Clem Clempson, Greg Ridley and Jerry Shirley gave a one-off performance.
Other guest appearances included two original members of the Small Faces, Kenney Jones and Ian McLagan, Paul Weller, Noel Gallagher and Bobby Tench from Marriott’s 1980’s Humble Pie line-up and John’s Children. Other musicians such as Alan White, Gem Archer, Midge Ure, Zak Starkey, Rabbit Bundrick, Steve Ellis and Tony Rivers appeared in band line-ups during the two and half-hour concert, released on DVD as the Stevie Marriott Astoria Memorial concert.
The proceeds of the concert were donated to The Small Faces Charitable Trust set up by Kenney Jones in memory of Steve Marriott and Ronnie Lane.
In September 2007 Marriott, along with tshe other members of the Small Faces and manager Don Arden, were honoured with a plaque unveiled in Carnaby Street, on the site of Don Arden’s offices, the spiritual home of the band in the 1960s.
The 1994 Scotland RAF Chinook crash occurred on 2 June 1994 at about 18:00 hours when a Royal Air Force (RAF) Chinookhelicopter (serial number ZD576, callsign F4J40) crashed on the Mull of Kintyre, Scotland, killing all twenty-five passengers and four crew on board. Among the passengers were almost all the United Kingdom’s senior Northern Irelandintelligence experts. It was the RAF’s worst peacetime disaster.
An RAF board of inquiry in 1995 ruled that it was impossible to establish the exact cause of the crash. This ruling was subsequently overturned by two senior reviewing officers who said the pilots were guilty of gross negligence for flying too fast and too low in thick fog. This finding proved to be controversial, especially in light of irregularities and technical issues surrounding the then-new Chinook HC.2 variant which were uncovered. A Parliamentary inquiry conducted in 2001 found the previous verdict of gross negligence on the part of the crew to be ‘unjustified’. In 2011, an independent review of the crash cleared the crew of negligence.
Earlier on 2 June 1994 the helicopter and crew had carried out a trooping flight, as it was unsafe for British troops to move around in certain parts of Northern Ireland using surface transport at the time because of Provisional IRA attacks. The mission was safely accomplished and they returned to Aldergrove at 15:20.
Mull of Kintyre
They took off for Inverness at 17:42. Weather en route was forecast to be clear except in the Mull of Kintyre area. The crew made contact with military air traffic control (ATC) in Scotland at 17:55.
Around 18:00, Chinook ZD576 flew into a hillside in dense fog. The pilots were Flight Lieutenants Jonathan Tapper, 28, and Rick Cook, 30. Both of them were pilots in the United Kingdom Special Forces. There were two other crew. The helicopter was carrying 25 British intelligence experts from MI5, the Royal Ulster Constabulary and the British Army, from RAF Aldergrove (outside Belfast, Northern Ireland) to attend a conference at Fort George (near Inverness) in Scotland. At the time of the accident Air Chief MarshalSir William Wratten called it “the largest peacetime tragedy the RAF had suffered”.
One commentator stated that the loss of so many top level Northern Ireland intelligence officers in one stroke was a huge blow to the John Major government, “temporarily confounding” its campaign against the IRA. That the crash killed so many British intelligence experts, without any witnesses in the foggy conditions, encouraged speculation and conspiracy theories over a cover-up.
“The initial point of impact was 810 feet [250 m] above mean sea level and about 500 metres east of the lighthouse, but the bulk of the aircraft remained airborne for a further 187 metres horizontally north and 90 feet [27 m] vertically before coming to rest in pieces. Fire broke out immediately. All those on board sustained injuries from which they must have died almost instantaneously. The points of impact were shrouded in local cloud with visibility reduced to a few metres, which prevented those witnesses who had heard the aircraft from seeing it.”
Initial inquiry
In 1995, an RAF board of inquiry found that there was no conclusive evidence to determine the cause of the crash. An immediate suspicion that the helicopter could have been shot down by the Provisional IRA, with their known Strela 2surface-to-air missile capability, had been quickly ruled out by investigators. Two air marshals, on review of the evidence, found the two pilots guilty of gross negligence by flying too fast and too low in thick fog.
Both the incident and the first inquiry have been subject to controversy and dispute, primarily as to whether the crash had been caused by pilot error or by a mechanical failure. The 2011 Parliamentary report found the reviewing officers to have failed to correctly adhere to the standard of proof of “absolutely no doubt” in deciding the question of negligence.
The new inquiry took place in the House of Lords from September to November 2001. The findings were published on 31 January 2002, and found that the verdicts of gross negligence on the two pilots were unjustified.
Des Browne
In December 2007, Defence Secretary Des Browne agreed to conduct a fresh report into the crash. It was announced on 8 December 2008 by Secretary of State for Defence John Hutton that “no new evidence” had been presented and the findings of gross negligence against the flight crew would stand. On 4 January 2010, doubts of the official explanation were raised again with the discovery that an internal MOD document, written 9 months before the incident, described the engine software as ‘positively dangerous’ as it could lead to failure of both engines. The 2011 Review concluded that criticism that the original board had not paid enough attention to maintenance and technical issues was unjustified.
On 13 July 2011, Defence Secretary Liam Fox outlined to MPs the findings of an independent review into the 1994 crash, which found that the two pilots who were blamed for the crash had been cleared of gross negligence.
In doing so, the Government accepted Lord Philip’s confirmation that the Controller Aircraft Release (CAR) was “mandated” upon the RAF. Issued in November 1993, the CAR stated that the entire navigation and communications systems used on the Chinook HC2 were not to be relied upon in any way by the aircrew, and therefore it had no legitimate clearance to fly. Knowledge of the CAR had been withheld from the pilots; by withholding this when issuing their Release to Service (RTS) (the authority to fly), the RAF had made a false declaration of compliance with regulations. In December 2012, the Minister for the Armed Forces, Andrew Robathan, confirmed such a false declaration did not constitute “wrongdoing”, despite it leading directly to deaths of servicemen.
ZD576’s service history
Boeing CH-47C Chinook, construction number B-868, RAF serial number ZD576 was originally delivered to the Royal Air Force as a Chinook HC.1 on 22 December 1984.
It was re-delivered to No 7 Squadron as a Chinook HC.2 on 21 April 1994. On arrival at RAF Odiham, its No.1 engine had to be replaced. On 10 May 1994, a post-flight fault inspection revealed a dislocated mounting bracket causing the collective lever to have restricted and restrictive movement. This resulted in a “Serious Fault Signal”m being sent as a warning to other UK Chinook operating units. On 17 May 1994 emergency power warning lights flashed multiple times and the No.1 engine was again replaced. On 25 May 1994 a serious incident occurred indicating the No.2 engine was about to fail.
On 31 May 1994, two days before the accident, two Chinook HC.1s were withdrawn from RAF Aldergrove and replaced by a single HC.2, ZD576.
On 2 June 1994, ZD576 crashed into a hillside, killing the four crew members and all passengers on board.
RAF Chinook HC2 (ZA677) similar to accident aircraft
———————-
CH-47 Chinook Overview
———————-
Possible causes
Pilot error
Flight Lieutenants Jonathan Tapper (left) and Richard Cook (right) have
Aviation safety author Andrew Brookes wrote that the true cause will never be known, but that pilot error induced by fatigue is likely to have played a part; the crew had been on flight duty for 9 hours and 15 minutes, including 6 hours flying time, before they took off on the crash flight. Had they made it to Fort George, they would have needed special permission from a senior officer to fly back to Aldergrove.
“There is no evidence of any significant change of course and none of the decision, if any, that the crew made. When the crew released the computer from its fix on the Mull, the pilots knew how close to the Mull they were and, given the deteriorating weather and the strict visibility requirements under visual flight rules they should by that time already have chosen an alternative course. As they had not done so, they could, and, under the rules, should have either turned away from the Mull immediately or slowed down and climbed to a safe altitude.”
Baroness Symons, speaking on behalf of the Government in the House of Lords in 2000.
In his book, Steuart Campbell suggested that two errors by the pilots; failure to climb to a safe altitude upon entering cloud, and a navigational error made in the poor visibility (mistaking a fog signal station for a lighthouse), together caused the crash.
The Board of Inquiry had identified that several factors may have sufficiently distracted the crew from turning away from the Mull, and upon entering cloud, failed to carry out the correct procedure for an emergency climb in a timely manner.
RAF Visual Flight Rules (VFR) require the crew to have a minimum visibility of 5.5 kilometres above 140 knots (260 km/h), or minimum visibility of one kilometre travelling below 140 knots; if VFR conditions are lost an emergency climb must be immediately flown. Nine out of ten witnesses interviewed in the inquiry reported visibility at ground level in the fog as being as low as ten to one hundred metres at the time of the crash; in-flight visibility may have been more or less than this. The tenth witness, a yachtsman who was offshore, reported it as being one mile (1.6 km), though he is regarded as a less reliable witness as he changed his testimony.
If witness accounts of visibility are correct, the pilots should have transferred to Instrument Flight Rules, which would require the pilots to slow the aircraft and climb to a safe altitude at the best climbing speed.
In the area around the Mull of Kintyre, the safe altitude would be 2,400 feet (730 m) above sea level, 1,000 feet (300 m) above the highest point of the terrain. The height of the crash site of ZD576 was 810 feet (250 m), 1,600 feet (490 m) below the minimum safe level.[6] The Board of Inquiry into the accident recommended formal procedures for transition from Visual Flight Rules to Instrument Flight Rules in mid-flight be developed, and the RAF has since integrated such practices into standard pilot training.
Regarding negligence on the part of the pilots, the 2011 Report said:
“the possibility that there had been gross negligence could not be ruled out, but there were many grounds for doubt and the pilots were entitled to the benefit of it… [T]he Reviewing Officers had failed to take account of the high calibre of two Special Forces pilots who had no reputation for recklessness.”
FADEC problems
“The chances are that if software caused any of these accidents, we would never know. This is because when software fails, or it contains coding or design flaws… only the manufacturer will understand its system well enough to identify any flaws… Step forward the vulnerable equipment operators: the pilots… who cannot prove their innocence. That is why the loss of Chinook ZD576 is so much more than a helicopter crash. To accept the verdict against the pilots is to accept that it is reasonable to blame the operators if the cause of a disaster is not known.”
At the time of the crash, new FADEC (Full Authority Digital Engine Control) equipment was being integrated onto all RAF Chinooks, as part of an upgrade from the Chinook HC.1 standard to the newer Chinook HC.2 variant. The Ministry of Defence was given a £3 million settlement from Textron, the manufacturers of the system, after a ground-test of the FADEC systems on a Chinook in 1989 resulted in severe airframe damage. Contractors, including Textron, had agreed that FADEC had been the cause of the 1989 incident and that the system needed to be redesigned.
The committee investigating the crash were satisfied that the destructive error in 1989 was not relevant to the 1994 crash. Information provided from Boeing to the investigation led to the following conclusion regarding FADEC performance: “Data from the Digital Electronics Unit (DECU) of the second engine showed no evidence of torque or temperature exceedance and the matched power conditions of the engines post-impact indicate that there was no sustained emergency power demand. No other evidence indicated any FADEC or engine faults.”
It was expected that in a FADEC engine runaway, engine power would become asynchronous and mismatched. The investigation found the engines at the crash to have matched settings, decreasing the likelihood of a FADEC malfunction being involved.
EDS-SCICON was given the task of independently evaluating the software on the Chinook HC.2 in 1993. According to the House of Commons report:
“After examining only 18 per cent of the code they found 486 anomalies and stopped the review… intermittent engine failure captions were being regularly experienced by aircrew of Chinook Mk 2s and there were instances of uncommanded run up and run down of the engines and undemanded flight control movements”.
Tests upon the Chinooks performed by the MOD at Boscombe Down in 1994 reported the FADEC software to be
“unverifiable and … therefore unsuitable for its purpose”.
In June 1994, the MoD test pilots at Boscombe Down had refused to fly the Chinook HC.2 until the engines, engine control systems and FADEC software had undergone revision. In October 2001, Computer Weekly reported that three fellows of the Royal Aeronautical Society had said that issues with either control or FADEC systems could have led to the crash.
The main submission to Lord Philip (see above) revealed that the FADEC Safety Critical software did not have a Certificate of Design, and was therefore not cleared to be fitted to Chinook HC2. It further revealed that John Spellar MP had been wrong when claiming the software was not Safety Critical, providing the original policy document governing this definition to Lord Philip. MoD subsequently claimed it did not have its own copy, calling in to question how it could advise Spellar one way or the other.
Other factors
The onboard Tactical Air Navigation System, which only retained the last measured altitude, gave an altitude reading of 468 feet (143 m). The investigation observed that it was possible for some of the avionics systems to interfere with the Chinook’s VHF radio, potentially disrupting communications.
Flight data recorders and cockpit voice recorders were not fitted to all RAF Chinooks at the time of the accident. The absence of this data greatly reduced the amount and quality of data available to subsequent investigations. Information on speed and height were derived from the position of cockpit dials in the wreckage, and the wreckage’s condition. The RAF had begun to fit these recording devices across the Chinook HC.2 fleet in 1994, prior to the accident; this process was completed in 2002.
Germany’s High Seas Fleet’s intention was to lure out, trap and destroy a portion of the Grand Fleet, as the German naval force was insufficient to openly engage the entire British fleet. This formed part of a larger strategy to break the British blockade of Germany and to allow German naval vessels access to the Atlantic. Meanwhile, Great Britain’s Royal Navy pursued a strategy to engage and destroy the High Seas Fleet, thereby keeping the German force contained and away from Britain and her shipping lanes.
The German plan was to use Vice-Admiral Franz Hipper‘s fast scouting group of five modern battlecruisers to lure Vice-Admiral Sir David Beatty’s battlecruiser squadrons into the path of the main German fleet. Submarines were stationed in advance across the likely routes of the British ships. However, the British learned from signal intercepts that a major fleet operation was likely, so on 30 May Jellicoe sailed with the Grand Fleet to rendezvous with Beatty, passing over the locations of the German submarine picket lines while they were unprepared. The German plan had been delayed, causing further problems for their submarines which had reached the limit of their endurance at sea.
On the afternoon of 31 May, Beatty encountered Hipper’s battlecruiser force long before the Germans had expected. In a running battle, Hipper successfully drew the British vanguard into the path of the High Seas Fleet. By the time Beatty sighted the larger force and turned back towards the British main fleet, he had lost two battlecruisers from a force of six battlecruisers and four battleships, against the five ships commanded by Hipper. The battleships, commanded by Rear-Admiral Sir Hugh Evan-Thomas, were the last to turn and formed a rearguard as Beatty withdrew, now drawing the German fleet in pursuit towards the main British positions. Between 18:30, when the sun was lowering on the western horizon, back-lighting the German forces, and nightfall at about 20:30, the two fleets – totalling 250 ships between them – directly engaged twice.
HMS Invincible sinks
Fourteen British and eleven German ships were sunk, with great loss of life. After sunset, and throughout the night, Jellicoe manoeuvred to cut the Germans off from their base, hoping to continue the battle the next morning, but under the cover of darkness Scheer broke through the British light forces forming the rearguard of the Grand Fleet and returned to port.
Both sides claimed victory. The British lost more ships and twice as many sailors but succeeded in containing the German fleet. However, the British press criticised the Grand Fleet’s failure to force a decisive outcome while Scheer’s plan of destroying a substantial portion of the British fleet also failed. Finally, the British strategy to prevent Germany access to both Great Britain and the Atlantic did succeed which was the British long term goal.
The Germans’ “fleet in being” continued to pose a threat, requiring the British to keep their battleships concentrated in the North Sea, but the battle confirmed the German policy of avoiding all fleet-to-fleet contact. At the end of the year, after further unsuccessful attempts to reduce the Royal Navy’s numerical advantage, the German Navy accepted that their surface ships had been successfully contained, subsequently turning its efforts and resources to unrestricted submarine warfare and the destruction of Allied and neutral shipping which by April 1917 triggered the United States of America’s declaration of war on Germany.
Subsequent reviews commissioned by the Royal Navy generated strong disagreement between supporters of Jellicoe and Beatty concerning the two admirals’ performance in the battle. Debate over their performance and the significance of the battle continues to this day.
With 16 dreadnought-type battleships, compared with the Royal Navy’s 28, the German High Seas Fleet stood little chance of winning a head-to-head clash. The Germans therefore adopted a divide-and-conquer strategy. They would stage raids into the North Sea and bombard the English coast, with the aim of luring out small British squadrons and pickets, which could then be destroyed by superior forces or submarines.
In January 1916, Admiral von Pohl, commander of the German fleet, fell ill. He was replaced by Scheer, who believed that the fleet had been used too defensively, had better ships and men than the British, and ought to take the war to them.
According to Scheer, the German naval strategy should be:
to damage the English fleet by offensive raids against the naval forces engaged in watching and blockading the German Bight, as well as by mine-laying on the British coast and submarine attack, whenever possible. After an equality of strength had been realised as a result of these operations, and all our forces had been made ready and concentrated, an attempt was to be made with our fleet to seek battle under circumstances unfavourable to the enemy.
On 25 April 1916, a decision was made by the German admiralty to halt indiscriminate attacks by submarine on merchant shipping. This followed protests from neutral countries, notably the United States, that their nationals had been the victims of attacks. Germany agreed that future attacks would only take place in accord with internationally agreed prize rules, which required an attacker to give a warning and allow the crews of vessels time to escape, and not to attack neutral vessels at all. Scheer believed that it would not be possible to continue attacks on these terms, which took away the advantage of secret approach by submarines and left them vulnerable to even relatively small guns on the target ships. Instead, he set about deploying the submarine fleet against military vessels.
It was hoped that, following a successful German submarine attack, fast British escorts, such as destroyers, would be tied down by anti-submarine operations. If the Germans could catch the British in the expected locations, good prospects were thought to exist of at least partially redressing the balance of forces between the fleets. “After the British sortied in response to the raiding attack force”, the Royal Navy’s centuries-old instincts for aggressive action could be exploited to draw its weakened units towards the main German fleet under Scheer. The hope was that Scheer would thus be able to ambush a section of the British fleet and destroy it.
Submarine deployments
A plan was devised to station submarines offshore from British naval bases, and then stage some action that would draw out the British ships to the waiting submarines. The battlecruiser SMS Seydlitz had been damaged in a previous engagement, but was due to be repaired by mid May, so an operation was scheduled for 17 May 1916. At the start of May, difficulties with condensers were discovered on ships of the third battleship squadron, so the operation was put back to 23 May. Ten submarines—U-24, U-32, U-43, U-44, UC-47, U-51, U-52, U-63, U-66, and U-70—were given orders first to patrol in the central North Sea between 17 and 22 May, and then to take up waiting positions. U-43 and U-44 were stationed in the Pentland Firth, which the Grand Fleet was likely to cross leaving Scapa Flow, while the remainder proceeded to the Firth of Forth, awaiting battlecruisers departing Rosyth. Each boat had an allocated area, within which it could move around as necessary to avoid detection, but was instructed to keep within it. During the initial North Sea patrol the boats were instructed to sail only north–south so that any enemy who chanced to encounter one would believe it was departing or returning from operations on the west coast (which required them to pass around the north of Britain). Once at their final positions, the boats were under strict orders to avoid premature detection that might give away the operation. It was arranged that a coded signal would be transmitted to alert the submarines exactly when the operation commenced:
“Take into account the enemy’s forces may be putting to sea”
Additionally, UB-27 was sent out on 20 May with instructions to work its way into the Firth of Forth past May Island. U-46 was ordered to patrol the coast of Sunderland, which had been chosen for the diversionary attack, but because of engine problems it was unable to leave port and U-47 was diverted to this task. On 13 May, U-72 was sent to lay mines in the Firth of Forth; on the 23rd, U-74 departed to lay mines in the Moray Firth; and on the 24th, U-75 was dispatched similarly west of the Orkney Islands. UB-21 and UB-22 were sent to patrol the Humber, where (incorrect) reports had suggested the presence of British warships. U-22, U-46 and U-67 were positioned north of Terschelling to protect against intervention by British light forces stationed at Harwich.
On 22 May 1916, it was discovered that Seydlitz was still not watertight after repairs and would not now be ready until the 29th. The ambush submarines were now on station and experiencing difficulties of their own: visibility near the coast was frequently poor due to fog, and sea conditions were either so calm the slightest ripple, as from the periscope, could give away their position, or so rough as to make it very hard to keep the vessel at a steady depth. The British had become aware of unusual submarine activity, and had begun counter patrols that forced the submarines out of position. UB-27 passed Bell Rock on the night of 23 May on its way into the Firth of Forth as planned, but was halted by engine trouble. After repairs it continued to approach, following behind merchant vessels, and reached Largo Bay on 25 May.
There the boat became entangled in nets that fouled one of the propellers, forcing it to abandon the operation and return home. U-74 was detected by four armed trawlers on 27 May and sunk 25 mi (22 nmi; 40 km) south-east of Peterhead. U-75 laid its mines off the Orkney Islands, which, although they played no part in the battle, were responsible later for sinking the cruiser Hampshire carrying Lord Kitchener (head of the army) on a mission to Russia on 5 June. U-72 was forced to abandon its mission without laying any mines when an oil leak meant it was leaving a visible surface trail astern
Zeppelins
The throat of the Skagerrak, the strategic gateway to the Baltic and North Atlantic, waters off Jutland and Norway
The Germans maintained a fleet of Zeppelins that they used for aerial reconnaissance and occasional bombing raids. The planned raid on Sunderland intended to use Zeppelins to watch out for the British fleet approaching from the north, which might otherwise surprise the raiders.
By 28 May, strong north-easterly winds meant that it would not be possible to send out the Zeppelins, so the raid again had to be postponed. The submarines could only stay on station until 1 June before their supplies would be exhausted and they had to return, so a decision had to be made quickly about the raid.
It was decided to use an alternative plan, abandoning the attack on Sunderland but instead sending a patrol of battlecruisers to the Skagerrak, where it was likely they would encounter merchant ships carrying British cargo and British cruiser patrols. It was felt this could be done without air support, because the action would now be much closer to Germany, relying instead on cruiser and torpedo boat patrols for reconnaissance.
Orders for the alternative plan were issued on 28 May, although it was still hoped that last-minute improvements in the weather would allow the original plan to go ahead. The German fleet assembled in the Jade River and at Wilhelmshaven and was instructed to raise steam and be ready for action from midnight on 28 May.
Franz Hipper, commander of the German battlecruiser squadron
By 14:00 on 30 May, the wind was still too strong and the final decision was made to use the alternative plan. The coded signal “31 May G.G.2490” was transmitted to the ships of the fleet to inform them the Skagerrak attack would start on 31 May. The pre-arranged signal to the waiting submarines was transmitted throughout the day from the E-Dienst radio station at Brugge, and the U-boat tender Arcona anchored at Emden. Only two of the waiting submarines, U-66 and U-32, received the order.
British response
Unfortunately for the German plan, the British had obtained a copy of the main German codebook from the light cruiser SMS Magdeburg, which had been boarded by the Russian Navy after the ship ran aground in Russian territorial waters in 1914. German naval radio communications could therefore often be quickly deciphered, and the British Admiralty usually knew about German activities.
The British Admiralty’s Room 40 maintained direction finding and interception of German naval signals. It had intercepted and decrypted a German signal on 28 May that provided “ample evidence that the German fleet was stirring in the North Sea.” Further signals were intercepted, and although they were not decrypted it was clear that a major operation was likely. At 11:00 on 30 May, Jellicoe was warned that the German fleet seemed prepared to sail the following morning. By 17:00, the Admiralty had intercepted the signal from Scheer, “31 May G.G.2490”, making it clear something significant was imminent.
Not knowing the Germans’ objective, Jellicoe and his staff decided to position the fleet to head off any attempt by the Germans to enter the North Atlantic, or the Baltic through the Skagerrak, by taking up a position off Norway where they could possibly cut off any German raid into the shipping lanes of the Atlantic, or prevent the Germans from heading into the Baltic. A position further west was unnecessary, as that area of the North Sea could be patrolled by air using blimps and scouting aircraft.
Consequently, Admiral Jellicoe led the sixteen dreadnought battleships of the 1st and 4th Battle Squadrons of the Grand Fleet and three battlecruisers of the 3rd Battlecruiser Squadron eastwards out of Scapa Flow at 22:30 on 30 May. He was to meet the 2nd Battle Squadron of eight dreadnought battleships commanded by Vice-Admiral Martyn Jerram coming from Cromarty. Hipper’s raiding force did not leave the Outer Jade Roads until 01:00 on 31 May, heading west of Heligoland Island following a cleared channel through the minefields, heading north at 16 knots (30 km/h; 18 mph).
The main German fleet of sixteen dreadnought battleships of 1st and 3rd Battle Squadrons left the Jade at 02:30, being joined off Heligoland at 04:00 by the six pre-dreadnoughts of the 2nd Battle Squadron coming from the Elbe River. Beatty’s faster force of six ships of the 1st and 2nd Battlecruiser Squadrons plus the 5th Battle Squadron of four fast battleships left the Firth of Forth on the next day; Jellicoe’s intention was to rendezvous with him 90 mi (78 nmi; 140 km) west of the mouth of the Skagerrak off the coast of Jutland and wait for the Germans to appear or for their intentions to become clear. The planned position would give him the widest range of responses to likely German moves.[17]
Naval tactics in 1916
The principle of concentration of force was fundamental to the fleet tactics of this time (as in earlier periods). Tactical doctrine called for a fleet approaching battle to be in a compact formation of parallel columns, allowing relatively easy manoeuvring, and giving shortened sight lines within the formation, which simplified the passing of the signals necessary for command and control.
A fleet formed in several short columns could change its heading faster than one formed in a single long column. Since most command signals were made with flags or signal lamps between ships, the flagship was usually placed at the head of the centre column so that its signals might be more easily seen by the many ships of the formation. Wireless telegraphy was in use, though security (radio direction finding), encryption, and the limitation of the radio sets made their extensive use more problematic. Command and control of such huge fleets remained difficult.
Thus, it might take a very long time for a signal from the flagship to be relayed to the entire formation. It was usually necessary for a signal to be confirmed by each ship before it could be relayed to other ships, and an order for a fleet movement would have to be received and acknowledged by every ship before it could be executed. In a large single-column formation, a signal could take 10 minutes or more to be passed from one end of the line to the other, whereas in a formation of parallel columns, visibility across the diagonals was often better (and always shorter) than in a single long column, and the diagonals gave signal “redundancy”, increasing the probability that a message would be quickly seen and correctly interpreted.
However, before battle was joined the heavy units of the fleet would, if possible, deploy into a single column. To form the battle line in the correct orientation relative to the enemy, the commanding admiral had to know the enemy fleet’s distance, bearing, heading, and speed. It was the task of the scouting forces, consisting primarily of battlecruisers and cruisers, to find the enemy and report this information in sufficient time, and, if possible, to deny the enemy’s scouting forces the opportunity of obtaining the equivalent information.
Ideally, the battle line would cross the intended path of the enemy column so that the maximum number of guns could be brought to bear, while the enemy could fire only with the forward guns of the leading ships, a manoeuvre known as “crossing the T“. Admiral Tōgō, commander of the Japanese battleship fleet, had achieved this against Admiral Zinovy Rozhestvensky‘s Russian battleships in 1905 at the Battle of Tsushima, with devastating results.
Jellicoe was to achieve this twice in one hour against the High Seas Fleet at Jutland, but on both occasions Scheer managed to turn away and disengage, thereby avoiding a decisive action.
Ship design
Within the existing technological limits, a trade-off had to be made between the weight and size of guns, the weight of armour protecting the ship, and the maximum speed. Battleships sacrificed speed for armour and heavy naval guns (11 in (280 mm) or larger). British battlecruisers sacrificed weight of armour for greater speed, while their German counterparts were armed with lighter guns and heavier armour. These weight savings allowed them to escape danger or catch other ships. Generally, the larger guns mounted on British ships allowed an engagement at greater range. In theory, a lightly armoured ship could stay out of range of a slower opponent while still scoring hits. The fast pace of development in the pre-war years meant that every few years, a new generation of ships rendered its predecessors obsolete. Thus, fairly young ships could still be obsolete compared to the newest ships, and fare badly in an engagement against them.[20]
Admiral John Fisher, responsible for reconstruction of the British fleet in the pre-war period, favoured large guns, oil fuel, and speed. Admiral Tirpitz, responsible for the German fleet, favoured ship survivability and chose to sacrifice some gun size for improved armour. The German battlecruiser SMS Derfflinger had belt armour equivalent in thickness—though not as comprehensive—to the British battleship HMS Iron Duke, significantly better than on the British battlecruisers such as Tiger. German ships had better internal subdivision and had fewer doors and other weak points in their bulkheads, but with the disadvantage that space for crew was greatly reduced. As they were only designed for sorties in the North Sea they did not need to be as habitable as the British vessels and their crews could live in barracks ashore when in harbour.
Warships of the period were armed with guns firing projectiles of varying weights, bearing high explosive warheads. The sum total of weight of all the projectiles fired by all the ship’s guns is referred to as “weight of broadside”. At Jutland, the total of the British ships’ weight of broadside was 332,360 lb (150,760 kg), while the German fleet’s total was 134,216 lb (60,879 kg). This does not take into consideration the ability of some ships and their crews to fire more or less rapidly than others, which would increase or decrease amount of fire that one combatant was able to bring to bear on their opponent for any length of time.
Jellicoe’s Grand Fleet was split into two sections. The dreadnought Battle Fleet with which he sailed formed the main force and was composed of 24 battleships and three battlecruisers. The battleships were formed into three squadrons of eight ships, further subdivided into divisions of four, each led by a flag officer. Accompanying them were eight armoured cruisers (classified by the Royal Navy since 1913 as “cruisers”), eight light cruisers, four scout cruisers, 51 destroyers, and one destroyer-minelayer.
David Beatty, commander of the British battlecruiser fleet
The Grand Fleet sailed without three of its battleships: Emperor of India in refit at Invergordon, Queen Elizabeth dry-docked at Rosyth and Dreadnought in refit at Devonport. The brand new Royal Sovereign was left behind, with only three weeks in service, her untrained crew judged unready for battle.
The German High Seas Fleet under Scheer was also split into a main force and a separate reconnaissance force. Scheer’s main battle fleet was composed of 16 battleships and six pre-dreadnought battleships arranged in an identical manner to the British. With them were six light cruisers and 31 torpedo-boats, (the latter being roughly equivalent to a British destroyer).
The German scouting force, commanded by Franz Hipper, consisted of five battlecruisers, five light cruisers and 30 torpedo-boats. The Germans had no equivalent to Engadine and no heavier-than-air aircraft to operate with the fleet but had the Imperial German Naval Airship Service’s force of rigid airships available to patrol the North Sea.
All of the battleships and battlecruisers on both sides carried torpedoes of various sizes, as did the lighter craft. The British battleships carried three or four underwater torpedo tubes. The battlecruisers carried from two to five. All were either 18-inch or 21-inch diameter. The German battleships carried five or six underwater torpedo tubes in three sizes from 18 to 21 inch and the battlecruisers carried four or five tubes.
The German battle fleet was hampered by the slow speed and relatively poor armament of the six pre-dreadnoughts of II Squadron, which limited maximum fleet speed to 18 knots (33 km/h; 21 mph), compared to maximum British fleet speed of 21 knots (39 km/h; 24 mph). On the British side, the eight armoured cruisers were deficient in both speed and armour protection. Both of these obsolete squadrons were notably vulnerable to attacks by more modern enemy ships.
Battlecruiser action
——————————-
The Battle of Jutland Animation
——————————-
The route of the British battlecruiser fleet took it through the patrol sector allocated to U-32. After receiving the order to commence the operation, the U-boat moved to a position 80 mi (70 nmi; 130 km) east of May Island at dawn on 31 May. At 03:40, it sighted the cruisers HMS Galatea and Phaeton leaving the Forth at 18 knots (33 km/h; 21 mph). It launched one torpedo at the leading cruiser at a range of 1,000 yd (910 m), but its periscope jammed ‘up’, giving away the position of the submarine as it manoeuvred to fire a second. The lead cruiser turned away to dodge the torpedo, while the second turned towards the submarine, attempting to ram. U-32crash dived, and on raising its periscope at 04:10 saw two battlecruisers (the 2nd Battlecruiser Squadron) heading south-east. They were too far away to attack, but Kapitänleutnant von Spiegel reported the sighting of two battleships and two cruisers to Germany.
U-66 was also supposed to be patrolling off the Firth of Forth but had been forced north to a position 60 mi (52 nmi; 97 km) off Peterhead by patrolling British vessels. This now brought it into contact with the 2nd Battle Squadron, coming from the Moray Firth. At 05:00, it had to crash dive when the cruiser Duke of Edinburgh appeared from the mist heading toward it. It was followed by another cruiser, Boadicea, and eight battleships. U-66 got within 350 yd (320 m) of the battleships preparing to fire, but was forced to dive by an approaching destroyer and missed the opportunity. At 06:35, it reported eight battleships and cruisers heading north.
The courses reported by both submarines were incorrect, because they reflected one leg of a zigzag being used by British ships to avoid submarines. Taken with a wireless intercept of more ships leaving Scapa Flow earlier in the night, they created the impression in the German High Command that the British fleet, whatever it was doing, was split into separate sections moving apart, which was precisely as the Germans wished to meet it.
Jellicoe’s ships proceeded to their rendezvous undamaged and undiscovered. However, he was now misled by an Admiralty intelligence report advising that the German main battle fleet was still in port. The Director of Operations Division, Rear Admiral Thomas Jackson, had asked the intelligence division, Room 40, for the current location of German call sign DK, used by Admiral Scheer. They had replied that it was currently transmitting from Wilhelmshaven. It was known to the intelligence staff that Scheer deliberately used a different call sign when at sea, but no one asked for this information or explained the reason behind the query – to locate the German fleet.
The German battlecruisers cleared the minefields surrounding the Amrum swept channel by 09:00. They then proceeded north-west, passing 35 mi (30 nmi; 56 km) west of the Horn’s Reef lightship heading for the Little Fisher Bank at the mouth of the Skagerrak. The High Seas Fleet followed some 50 mi (43 nmi; 80 km) behind. The battlecruisers were in line ahead, with the four cruisers of the II scouting group plus supporting torpedo boats ranged in an arc 8 mi (7.0 nmi; 13 km) ahead and to either side.
The IX torpedo boat flotilla formed close support immediately surrounding the battlecruisers. The High Seas Fleet similarly adopted a line-ahead formation, with close screening by torpedo boats to either side and a further screen of five cruisers surrounding the column 5–8 mi (4.3–7.0 nmi; 8.0–12.9 km) away. The wind had finally moderated so that Zeppelins could be used, and by 11:30 five had been sent out: L14 to the Skagerrak, L23 240 mi (210 nmi; 390 km) east of Noss Head in the Pentland Firth, L21 120 mi (100 nmi; 190 km) off Peterhead, L9 100 mi (87 nmi; 160 km) off Sunderland, and L16 80 mi (70 nmi; 130 km) east of Flamborough Head. Visibility, however, was still bad, with clouds down to 1,000 ft (300 m).
Contact
HMS Warspite and Malaya, seen from HMS Valiant at around 14:00 hrs
By around 14:00, Beatty’s ships were proceeding eastward at roughly the same latitude as Hipper’s squadron, which was heading north. Had the courses remained unchanged, Beatty would have passed between the two German fleets, 40 mi (35 nmi; 64 km) south of the battlecruisers and 20 mi (17 nmi; 32 km) north of the High Seas Fleet at around 16:30, possibly trapping his ships just as the German plan envisioned. His orders were to stop his scouting patrol when he reached a point 260 mi (230 nmi; 420 km) east of Britain and then turn north to meet Jellicoe, which he did at this time. Beatty’s ships were divided into three columns, with the two battlecruiser squadrons leading in parallel lines 3 mi (2.6 nmi; 4.8 km) apart. The 5th Battle Squadron was stationed 5 mi (4.3 nmi; 8.0 km) to the north-west, on the side furthest away from any expected enemy contact, while a screen of cruisers and destroyers was spread south-east of the battlecruisers. After the turn, the 5th Battle Squadron was now leading the British ships in the westernmost column, and Beatty’s squadron was centre and rearmost, with the 2nd BCS to the west.
(1) 15:22 hrs, Hipper sights Beatty.
(2) 15:48 hrs, First shots fired by Hipper’s squadron.
(3) 16:00 hrs-16:05 hrs, Indefatigable explodes, leaving two survivors.
(4) 16:25 hrs, Queen Mary explodes, nine survive.
(5) 16:45 hrs, Beatty’s battlecruisers move out of range of Hipper.
(6) 16:54 hrs, Evan-Thomas’s battleships turn north behind Beatty.
At 14:20 on 31 May, despite heavy haze and scuds of fog giving poor visibility, scouts from Beatty’s force reported enemy ships to the south-east; the British light units, investigating a neutral Danish steamer (N J Fjord), which was stopped between the two fleets, had found two German destroyers engaged on the same mission (B109 and B110). The first shots of the battle were fired at 14:28 when HMS Galatea and Phaeton of the British 1st Light Cruiser Squadron opened on the German torpedo boats, which withdrew toward their approaching light cruisers. At 14:36, the Germans scored the first hit of the battle when SMS Elbing, of Rear-Admiral Friedrich Bödicker‘s Scouting Group II, hit her British counterpart Galatea at extreme range.
Beatty began to move his battlecruisers and supporting forces south-eastwards and then east to cut the German ships off from their base and ordered Engadine to launch a seaplane to try to get more information about the size and location of the German forces. This was the first time in history that a carrier-based aeroplane was used for reconnaissance in naval combat. Engadine‘s aircraft did locate and report some German light cruisers just before 15:30 and came under anti-aircraft gunfire but attempts to relay reports from the aeroplane failed.
Unfortunately for Beatty, his initial course changes at 14:32 were not received by Sir Hugh Evan-Thomas’s5th Battle Squadron (the distance being too great to read his flags), because the battlecruiser HMS Tiger—the last ship in his column—was no longer in a position where she could relay signals by searchlight to Evan-Thomas, as she had previously been ordered to do. Whereas before the north turn, Tiger had been the closest ship to Evan-Thomas, she was now further away than Beatty in Lion. Matters were aggravated because Evan-Thomas had not been briefed regarding standing orders within Beatty’s squadron, as his squadron normally operated with the Grand Fleet. Fleet ships were expected to obey movement orders precisely and not deviate from them. Beatty’s standing instructions expected his officers to use their initiative and keep station with the flagship.
As a result, the four Queen Elizabeth-class battleships—which were the fastest and most heavily armed in the world at that time—remained on the previous course for several minutes, ending up 10 mi (8.7 nmi; 16 km) behind rather than five. Beatty also had the opportunity during the previous hours to concentrate his forces, and no reason not to do so, whereas he steamed ahead at full speed, faster than the battleships could manage. Dividing the force had serious consequences for the British, costing them what would have been an overwhelming advantage in ships and firepower during the first half-hour of the coming battle.
With visibility favouring the Germans, Hipper’s battlecruisers at 15:22, steaming approximately north-west, sighted Beatty’s squadron at a range of about 15 mi (13 nmi; 24 km), while Beatty’s forces did not identify Hipper’s battlecruisers until 15:30. (position 1 on map). At 15:45, Hipper turned south-east to lead Beatty toward Scheer, who was 46 mi (40 nmi; 74 km) south-east with the main force of the High Seas Fleet.
Run to the south
Beatty’s conduct during the next 15 minutes has received a great deal of criticism, as his ships out-ranged and outnumbered the German squadron, yet he held his fire for over 10 minutes with the German ships in range. He also failed to use the time available to rearrange his battlecruisers into a fighting formation, with the result that they were still manoeuvring when the battle started.
At 15:48, with the opposing forces roughly parallel at 15,000 yd (14,000 m), with the British to the south-west of the Germans (i.e., on the right side), Hipper opened fire, followed by the British ships as their guns came to bear upon targets (position 2). Thus began the opening phase of the battlecruiser action, known as the “Run to the South”, in which the British chased the Germans, and Hipper intentionally led Beatty toward Scheer. During the first minutes of the ensuing battle, all the British ships except Princess Royal fired far over their German opponents, due to adverse visibility conditions, before finally getting the range. Only Lion and Princess Royal had settled into formation, so the other four ships were hampered in aiming by their own turning. Beatty was to windward of Hipper, and therefore funnel and gun smoke from his own ships tended to obscure his targets, while Hipper’s smoke blew clear. Also, the eastern sky was overcast and the grey German ships were indistinct and difficult to range.
Beatty’s flagship Lion burning after being hit by a salvo from Lützow
HMS Indefatigable sinking after being struck by shells from the German battlecruiser Von der Tann
Beatty had ordered his ships to engage in a line, one British ship engaging with one German and his flagshipHMS Lion doubling on the German flagship SMS Lützow. However, due to another mistake with signalling by flag, and possibly because Queen Mary and Tiger were unable to see the German lead ship because of smoke, the second German ship, Derfflinger, was left un-engaged and free to fire without disruption. SMS Moltke drew fire from two of Beatty’s battlecruisers, but still fired with great accuracy during this time, hitting Tiger 9 times in the first 12 minutes. The Germans drew first blood. Aided by superior visibility, Hipper’s five battlecruisers quickly registered hits on three of the six British battlecruisers. Seven minutes passed before the British managed to score their first hit.
The first near-kill of the Run to the South occurred at 16:00, when a 30.5 cm (12.0 in) shell from Lützow wrecked the “Q” turret amidships on Beatty’s flagship Lion. Dozens of crewmen were instantly killed, but far larger destruction was averted when the mortally wounded turret commander – Major Francis Harvey of the Royal Marines – promptly ordered the magazine doors shut and the magazine flooded. This prevented a magazine explosion at 16:28, when a flash fire ignited ready cordite charges beneath the turret and killed everyone in the chambers outside “Q” magazine. Lion was saved.
HMS Indefatigable was not so lucky; at 16:02, just 14 minutes into the gunnery exchange, she was hit aft by three 28 cm (11 in) shells from SMS Von der Tann, causing damage sufficient to knock her out of line and detonating “X” magazine aft. Soon after, despite the near-maximum range, Von der Tann put another 28 cm (11 in) shell on Indefatigable‘s “A” turret forward. The plunging shells probably pierced the thin upper armour, and seconds later Indefatigable was ripped apart by another magazine explosion, sinking immediately with her crew of 1,019 officers and men, leaving only two survivors. (position 3).
Hipper’s position deteriorated somewhat by 16:15 as the 5th Battle Squadron finally came into range, so that he had to contend with gunfire from the four battleships astern as well as Beatty’s five remaining battlecruisers to starboard. But he knew his baiting mission was close to completion, as his force was rapidly closing with Scheer’s main body. At 16:08, the lead battleship of the 5th Battle Squadron, HMS Barham, caught up with Hipper and opened fire at extreme range, scoring a 15 in (380 mm) hit on Von der Tann within 60 seconds. Still, it was 16:15 before all the battleships of the 5th were able to fully engage at long range.
At 16:25, the battlecruiser action intensified again when HMS Queen Mary was hit by what may have been a combined salvo from Derfflinger and Seydlitz; she disintegrated when both forward magazines exploded, sinking with all but nine of her 1,275 man crew lost.(position 4). Commander von Hase, the first gunnery officer aboard Derfflingler, noted:
The enemy was shooting superbly. Twice the Derfflinger came under their infernal hail and each time she was hit. But the Queen Mary was having a bad time; engaged by the Seydlitz as well as the Derfflinger, she met her doom at 1626. A vivid red flame shot up from her forepart; then came an explosion forward, followed by a much heavier explosion amidships. Immediately afterwards, she blew up with a terrific explosion, the masts collapsing inwards and the smoke hiding everything.
HMS Queen Mary blowing up
During the Run to the South, from 15:48 to 16:54, the German battlecruisers made an estimated total of forty-two 28 and 30.5 cm (11.0 and 12.0 in) hits on the British battlecruisers (nine on Lion, six on Princess Royal, seven on Queen Mary, 14 on Tiger, one on New Zealand, five on Indefatigable), and two more on the battleship Barham, compared with only eleven 13.5 in (340 mm) hits by the British battlecruisers (four on Lützow, four on Seydlitz, two on Moltke, one on von der Tann), and six 15 in (380 mm) hits by the battleships (one on Seydlitz, four on Moltke, one on von der Tann).
Shortly after 16:26, a salvo struck on or around HMS Princess Royal, which was obscured by spray and smoke from shell bursts. A signalman promptly leapt on to the bridge of Lion and announced “Princess Royal‘s blown up, Sir.” Beatty famously turned to his flag captain, saying “Chatfield, there seems to be something wrong with our bloody ships today.” (In popular legend, Beatty also immediately ordered his ships to “turn two points to port”, i.e., two points nearer the enemy, but there is no official record of any such command or course change.) Princess Royal, as it turned out, was still afloat after the spray cleared.
At 16:30, Scheer’s leading battleships sighted the distant battlecruiser action; soon after, HMS Southampton of Beatty’s 2nd Light Cruiser Squadron led by Commodore William Goodenough sighted the main body of Scheer’s High Seas Fleet, dodging numerous heavy-calibre salvos to report in detail the German strength: 16 dreadnoughts with six older battleships. This was the first news that Beatty and Jellicoe had that Scheer and his battle fleet were even at sea. Simultaneously, an all-out destroyer action raged in the space between the opposing battlecruiser forces, as British and German destroyers fought with each other and attempted to torpedo the larger enemy ships.
Each side fired many torpedoes, but both battlecruiser forces turned away from the attacks and all escaped harm except Seydlitz, which was hit forward at 16:57 by a torpedo fired by the British destroyer HMS Petard. Though taking on water, Seydlitz maintained speed. The destroyer HMS Nestor, under the command of Captain Barry Bingham, led the British attacks. The British disabled the German torpedo boat V27, which the Germans soon abandoned and sank, and Petard then torpedoed and sank V29, her second score of the day. S35 and V26 rescued the crews of their sunken sister ships. But Nestor and another British destroyer – HMS Nomad – were immobilised by shell hits, and were later sunk by Scheer’s passing dreadnoughts. Bingham was rescued, and won the Victoria Cross for his leadership in the destroyer action.
Run to the north
As soon as he himself sighted the vanguard of Scheer’s distant battleship line 12 mi (10 nmi; 19 km) away, at 16:40, Beatty turned his battlecruiser force 180°, heading north to draw the Germans toward Jellicoe. (position 5). Beatty’s withdrawal toward Jellicoe is called the “Run to the North”, in which the tables turned and the Germans chased the British. Because Beatty once again failed to signal his intentions adequately, the battleships of the 5th Battle Squadron – which were too far behind to read his flags – found themselves passing the battlecruisers on an opposing course and heading directly toward the approaching main body of the High Seas Fleet. At 16:48, at extreme range, Scheer’s leading battleships opened fire.
Meanwhile, at 16:47, having received Goodenough’s signal and knowing that Beatty was now leading the German battle fleet north to him, Jellicoe signalled to his own forces that the fleet action they had waited so long for was finally imminent; at 16:51, by radio, he informed the Admiralty so in London.
The difficulties of the 5th Battle Squadron were compounded when Beatty gave the order to Evan-Thomas to “turn in succession” (rather than “turn together”) at 16:48 as the battleships passed him. Evan-Thomas acknowledged the signal, but Lieutenant-CommanderRalph Seymour, Beatty’s flag lieutenant, aggravated the situation when he did not haul down the flags (to execute the signal) for some minutes. At 16:55, when the 5BS had moved within range of the enemy battleships, Evan-Thomas issued his own flag command warning his squadron to expect sudden manoeuvres and to follow his lead, before starting to turn on his own initiative. The order to turn in succession would have resulted in all four ships turning in the same patch of sea as they reached it one by one, giving the High Seas Fleet repeated opportunity with ample time to find the proper range. However, the captain of the trailing ship (HMS Malaya) turned early, mitigating the adverse results.
For the next hour, the 5th Battle Squadron acted as Beatty’s rearguard, drawing fire from all the German ships within range, while by 17:10 Beatty had deliberately eased his own squadron out of range of Hipper’s now-superior battlecruiser force.[55] Since visibility and firepower now favoured the Germans, there was no incentive for Beatty to risk further battlecruiser losses when his own gunnery could not be effective. Illustrating the imbalance, Beatty’s battlecruisers did not score any hits on the Germans in this phase until 17:45, but they had rapidly received five more before he opened the range (four on Lion, of which three were by Lützow, and one on Tiger by Seydlitz)
Now the only targets the Germans could reach, the ships of the 5th Battle Squadron, received simultaneous fire from Hipper’s battlecruisers to the east (which HMS Barham and Valiant engaged) and Scheer’s leading battleships to the south-east (which HMS Warspite and Malaya engaged). Three took hits: Barham (four by Derfflinger), Warspite (two by Seydlitz), and Malaya (seven by the German battleships). Only Valiant was unscathed.
The four battleships were far better suited to take this sort of pounding than the battlecruisers, and none were lost, though Malaya suffered heavy damage, an ammunition fire, and heavy crew casualties. At the same time, the 15 in (380 mm) fire of the four British ships was accurate and effective. As the two British squadrons headed north at top speed, eagerly chased by the entire German fleet, the 5th Battle Squadron scored 13 hits on the enemy battlecruisers (four on Lützow, three on Derfflinger, six on Seydlitz) and five on battleships (although only one, on SMS Markgraf, did any serious damage). (position 6).
————————————-
————————————-
The fleets converge
Jellicoe was now aware that full fleet engagement was nearing, but had insufficient information on the position and course of the Germans. To assist Beatty, early in the battle at about 16:05, Jellicoe had ordered Rear-AdmiralHorace Hood‘s 3rd Battlecruiser Squadron to speed ahead to find and support Beatty’s force, and Hood was now racing SSE well in advance of Jellicoe’s northern force. Rear-Admiral Arbuthnot‘s 1st Cruiser Squadron patrolled the van of Jellicoe’s main battleship force as it advanced steadily to the south-east.
At 17:33, the armoured cruiser HMS Black Prince of Arbuthnot’s squadron, on the far southwest flank of Jellicoe’s force, came within view of HMS Falmouth, which was about 5 mi (4.3 nmi; 8.0 km) ahead of Beatty with the 3rd Light Cruiser Squadron, establishing the first visual link between the converging bodies of the Grand Fleet.
At 17:38, the scout cruiser HMS Chester, screening Hood’s oncoming battlecruisers, was intercepted by the van of the German scouting forces under Rear-Admiral Bödicker.
Heavily outnumbered by Bödicker’s four light cruisers, Chester was pounded before being relieved by Hood’s heavy units, which swung westward for that purpose. Hood’s flagship HMS Invincible disabled the light cruiser SMS Wiesbaden shortly after 17:56. Wiesbaden became a sitting target for most of the British fleet during the next hour, but remained afloat and fired some torpedoes at the passing enemy battleships from long range. Meanwhile, Bödicker’s other ships turned toward Hipper and Scheer in the mistaken belief that Hood was leading a larger force of British capital ships from the north and east.
A chaotic destroyer action in mist and smoke ensued as German torpedo boats attempted to blunt the arrival of this new formation, but Hood’s battlecruisers dodged all the torpedoes fired at them. In this action, after leading a torpedo counter-attack, the British destroyer HMS Shark was disabled, but continued to return fire at numerous passing enemy ships for the next hour.
Fleet action
Deployment
(1) 18:00 Scouting forces rejoin their respective fleets.
(2) 18:15 British fleet deploys into battle line
(3) 18:30 German fleet under fire turns away
(4) 19:00 German fleet turns back
(5) 19:15 German fleet turns away for second time
(6) 20:00
(7) 21:00 Nightfall: Jellicoe assumes night cruising formation
In the meantime, Beatty and Evan-Thomas had resumed their engagement with Hipper’s battlecruisers, this time with the visual conditions to their advantage. With several of his ships damaged, Hipper turned back toward Scheer at around 18:00, just as Beatty’s flagship Lion was finally sighted from Jellicoe’s flagship Iron Duke. Jellicoe twice demanded the latest position of the German battlefleet from Beatty, who could not see the German battleships and failed to respond to the question until 18:14. Meanwhile, Jellicoe received confused sighting reports of varying accuracy and limited usefulness from light cruisers and battleships on the starboard (southern) flank of his force.
Jellicoe was in a worrying position. He needed to know the location of the German fleet to judge when and how to deploy his battleships from their cruising formation (six columns of four ships each) into a single battle line. The deployment could be on either the westernmost or the easternmost column, and had to be carried out before the Germans arrived; but early deployment could mean losing any chance of a decisive encounter. Deploying to the west would bring his fleet closer to Scheer, gaining valuable time as dusk approached, but the Germans might arrive before the manoeuvre was complete. Deploying to the east would take the force away from Scheer, but Jellicoe’s ships might be able to cross the “T”, and visibility would strongly favour British gunnery – Scheer’s forces would be silhouetted against the setting sun to the west, while the Grand Fleet would be indistinct against the dark skies to the north and east, and would be hidden by reflection of the low sunlight off intervening haze and smoke. Deployment would take twenty irreplaceable minutes, and the fleets were closing at full speed. In one of the most critical and difficult tactical command decisions of the entire war, Jellicoe ordered deployment to the east at 18:15.
Windy Corner
Meanwhile, Hipper had rejoined Scheer, and the combined High Seas Fleet was heading north, directly toward Jellicoe. Scheer had no indication that Jellicoe was at sea, let alone that he was bearing down from the north-west, and was distracted by the intervention of Hood’s ships to his north and east. Beatty’s four surviving battlecruisers were now crossing the van of the British dreadnoughts to join Hood’s three battlecruisers; at this time, Arbuthnot’s flagship, the armoured cruiser HMS Defence, and her squadron-mate HMS Warrior both charged across Beatty’s bows, and Lion narrowly avoided a collision with Warrior.
Nearby, numerous British light cruisers and destroyers on the south-western flank of the deploying battleships were also crossing each other’s courses in attempts to reach their proper stations, often barely escaping collisions, and under fire from some of the approaching German ships. This period of peril and heavy traffic attending the merger and deployment of the British forces later became known as “Windy Corner”.
Arbuthnot was attracted by the drifting hull of the crippled Wiesbaden. With Warrior, Defence closed in for the kill, only to blunder right into the gun sights of Hipper’s and Scheer’s oncoming capital ships. Defence was deluged by heavy-calibre gunfire from many German battleships, which detonated her magazines in a spectacular explosion viewed by most of the deploying Grand Fleet; she sank with all hands (903 officers and men). Warrior was also hit badly, but she was spared destruction by a mishap to the nearby battleship Warspite. Warspite had her steering gear overheat and jam under heavy load at high speed as the 5th Battle Squadron made a turn to the north at 18:19.
Steaming at top speed in wide circles, Warspite appeared as a juicy target to the German dreadnoughts and took 13 hits, inadvertently drawing fire from the hapless Warrior. Warspite was brought back under control and survived the onslaught, but was badly damaged, had to reduce speed, and withdrew northward; later (at 21:07), she was ordered back to port by Evan-Thomas.
Warspite went on to a long and illustrious career, serving also in World War II. Warrior, on the other hand, was abandoned and sank the next day after her crew was taken off at 08:25 on 1 June by Engadine, which towed the sinking armoured cruiser 100 mi (87 nmi; 160 km) during the night
Invincible blowing up after being struck by shells from Lützow and Derfflinger
As Defence sank and Warspite circled, at about 18:19, Hipper moved within range of Hood’s 3rd Battlecruiser Squadron, but was still also within range of Beatty’s ships. At first, visibility favoured the British: HMS Indomitable hit Derfflinger three times and Seydlitz once, while Lützow quickly took 10 hits from Lion, Inflexible and Invincible, including two below-waterline hits forward by Invincible that would ultimately doom Hipper’s flagship.
But at 18:30, Invincible abruptly appeared as a clear target before Lützow and Derfflinger. The two German ships then fired three salvoes each at Invincible, and sank her in 90 seconds. A 30.5 cm (12.0 in) shell from the third salvo struck Invincible‘s Q-turret amidships, detonating the magazines below and causing her to blow up and sink. All but six of her crew of 1,032 officers and men, including Rear-Admiral Hood, were killed.
Of the remaining British battlecruisers, only Princess Royal received heavy-calibre hits at this time (two 30.5 cm (12.0 in) by the battleship Markgraf). Lützow, flooding forward and unable to communicate by radio, was now out of action and began to attempt to withdraw; therefore Hipper left his flagship and transferred to the torpedo boat SMS G39, hoping to board one of the other battlecruisers later.
Crossing the T
By 18:30, the main battle fleet action was joined for the first time, with Jellicoe effectively “crossing Scheer’s T”. The officers on the lead German battleships, and Scheer himself, were taken completely by surprise when they emerged from drifting clouds of smoky mist to suddenly find themselves facing the massed firepower of the entire Grand Fleet main battle line, which they did not know was even at sea. Jellicoe’s flagship Iron Duke quickly scored seven hits on the lead German dreadnought, SMS König but in this brief exchange, which lasted only minutes, as few as 10 of the Grand Fleet’s 24 dreadnoughts actually opened fire.
The Germans were hampered by poor visibility, in addition to being in an unfavourable tactical position, just as Jellicoe had intended. Realising he was heading into a death trap, Scheer ordered his fleet to turn and disengage at 18:33. Under a pall of smoke and mist, Scheer’s forces succeeded in disengaging by an expertly executed 180° turn in unison (“battle about turn to starboard”, German Gefechtskehrtwendung nach Steuerbord), which was a well-practised emergency manoeuvre of the High Seas Fleet.
Scheer declared:
It was now obvious that we were confronted by a large portion of the English fleet. The entire arc stretching from north to east was a sea of fire. The flash from the muzzles of the guns was seen distinctly through the mist and smoke on the horizon, although the ships themselves were not distinguishable.
Conscious of the risks to his capital ships posed by torpedoes, Jellicoe did not chase directly but headed south, determined to keep the High Seas Fleet west of him. Starting at 18:40, battleships at the rear of Jellicoe’s line were in fact sighting and avoiding torpedoes, and at 18:54 HMS Marlborough was hit by a torpedo (probably from the disabled Wiesbaden), which reduced her speed to 16 knots (30 km/h; 18 mph).
Meanwhile, Scheer, knowing that it was not yet dark enough to escape and that his fleet would suffer terribly in a stern chase, doubled back to the east at 18:55. In his memoirs he wrote, “the manoeuvre would be bound to surprise the enemy, to upset his plans for the rest of the day, and if the blow fell heavily it would facilitate the breaking loose at night.” But the turn to the east took his ships, again, directly towards Jellicoe’s fully deployed battle line
Simultaneously, the disabled British destroyer HMS Shark fought desperately against a group of four German torpedo boats and disabled V48 with gunfire, but was eventually torpedoed and sunk at 19:02 by the German destroyer S54. Shark‘s Captain Loftus Jones won the Victoria Cross for his heroism in continuing to fight against all odds.
Commodore Goodenough’s 2nd Light Cruiser Squadron dodged the fire of German battleships for a second time to re-establish contact with the High Seas Fleet shortly after 19:00. By 19:15, Jellicoe had crossed Scheer’s “T” again. This time his arc of fire was tighter and deadlier, causing severe damage to the German battleships, particularly Rear-Admiral Behncke’s leading 3rd Squadron (SMS König, Grosser Kurfürst, Markgraf, and Kaiser all being hit, along with SMS Helgoland of the 1st Squadron),[81] while on the British side, only the battleship HMS Colossus was hit (twice, by SMS Seydlitz but with little damage done)
At 19:17, for the second time in less than an hour, Scheer turned his outnumbered and out-gunned fleet to the west using the “battle about turn” (German: Gefechtskehrtwendung), but this time it was executed only with difficulty, as the High Seas Fleet’s lead squadrons began to lose formation under concentrated gunfire.
To deter a British chase, Scheer ordered a major torpedo attack by his destroyers and a potentially sacrificial charge by Scouting Group I’s four remaining battlecruisers. Hipper was still aboard the torpedo boat G39 and was unable to command his squadron for this attack. Therefore, SMS Derfflinger, under Captain Hartog, led the already badly damaged German battlecruisers directly into “the greatest concentration of naval gunfire any fleet commander had ever faced”, at ranges down to 4 mi (3.5 nmi; 6.4 km).
In what became known as the “death ride”, all the battlecruisers except SMS Moltke were hit and further damaged, as 18 of the British battleships fired at them simultaneously.
Derfflinger had two main gun turrets destroyed. The crews of Scouting Group I suffered heavy casualties, but survived the pounding and veered away with the other battlecruisers once Scheer was out of trouble and the German destroyers were moving in to attack. In this brief but intense portion of the engagement, from about 19:05 to about 19:30, the Germans sustained a total of 37 heavy hits while inflicting only two; Derfflinger alone received 14.
While his battlecruisers drew the fire of the British fleet, Scheer slipped away, laying smoke screens. Meanwhile, from about 19:16 to about 19:40, the British battleships were also engaging Scheer’s torpedo boats, which executed several waves of torpedo attacks to cover his withdrawal. Jellicoe’s ships turned away from the attacks and successfully evaded all 31 of the torpedoes launched at them – though, in several cases, only just barely – and sank the German destroyer S35. British light forces also sank V48, which had previously been disabled by HMS Shark.
This action, and the turn away, cost the British critical time and range in the last hour of daylight – as Scheer intended, allowing him to get his heavy ships out of immediate danger.
The last major exchanges between capital ships in this battle took place just after sunset, from about 20:19 to about 20:35, as the surviving British battlecruisers caught up with their German counterparts, which were briefly relieved by Rear-Admiral Mauve’s obsolete pre-dreadnoughts (the German 2nd Squadron). The British received one heavy hit on Princess Royal but scored five more on Seydlitz and three on other German ships.
As twilight faded to night and HMS King George V exchanged a few final shots with SMS Westfalen, neither side could have imagined that the only encounter between British and German dreadnoughts in the entire war was already concluded.
Night action and German withdrawal
At 21:00, Jellicoe, conscious of the Grand Fleet’s deficiencies in night fighting, decided to try to avoid a major engagement until early dawn. He placed a screen of cruisers and destroyers 5 mi (4.3 nmi; 8.0 km) behind his battle fleet to patrol the rear as he headed south to guard Scheer’s expected escape route In reality, Scheer opted to cross Jellicoe’s wake and escape via Horns Reef. Luckily for Scheer, most of the light forces in Jellicoe’s rearguard failed to report the seven separate encounters with the German fleet during the night the very few radio reports that were sent to the British flagship were never received, possibly because the Germans were jamming British frequencies. Many of the destroyers failed to make the most of their opportunities to attack discovered ships, despite Jellicoe’s expectations that the destroyer forces would, if necessary, be able to block the path of the German fleet.
Jellicoe and his commanders did not understand that the furious gunfire and explosions to the north (seen and heard for hours by all the British battleships) indicated that the German heavy ships were breaking through the screen astern of the British fleet. Instead, it was believed that the fighting was the result of night attacks by German destroyers. The most powerful British ships of all (the 15-inch-gunned 5th Battle Squadron) directly observed German battleships crossing astern of them in action with British light forces, at ranges of 3 mi (2.6 nmi; 4.8 km) or less, and gunners on HMS Malaya made ready to fire, but her captain declined, deferring to the authority of Rear-Admiral Evan-Thomas – and neither commander reported the sightings to Jellicoe, assuming that he could see for himself and that revealing the fleet’s position by radio signals or gunfire was unwise.
While the nature of Scheer’s escape, and Jellicoe’s inaction, indicate the overall German superiority in night fighting, the results of the night action were no more clear-cut than were those of the battle as a whole. In the first of many surprise encounters by darkened ships at point-blank range, Southampton, Commodore Goodenough’s flagship, which had scouted so proficiently, was heavily damaged in action with a German Scouting Group composed of light cruisers, but managed to torpedo SMS Frauenlob, which went down at 22:23 with all hands (320 officers and men).
From 23:20 to approximately 02:15, several British destroyer flotillas launched torpedo attacks on the German battle fleet in a series of violent and chaotic engagements at extremely short range (often under 0.5 mi (0.80 km)). At the cost of five destroyers sunk and some others damaged, they managed to torpedo the light cruiser SMS Rostock, which sank several hours later, and the pre-dreadnought SMS Pommern, which blew up and sank with all hands (839 officers and men) at 03:10 during the last wave of attacks before dawn.
Three of the British destroyers collided in the chaos, and the German battleship SMS Nassau rammed the British destroyer HMS Spitfire, blowing away most of the British ship’s superstructure merely with the muzzle blast of its big guns, which could not be aimed low enough to hit the ship. Nassau was left with a 11 ft (3.4 m) hole in her side, reducing her maximum speed to 15 knots (28 km/h; 17 mph), while the removed plating was left lying on Spitfire‘s deck.
Spitfire survived and made it back to port. Another German cruiser, SMS Elbing, was accidentally rammed by the dreadnought Posen and abandoned, sinking early the next day. Of the British destroyers, HMS Tipperary, Ardent, Fortune, Sparrowhawk and Turbulent were lost during the night fighting.
Just after midnight on 1 June, SMS Thüringen and other German battleships sank HMS Black Prince of the ill-fated 1st Cruiser Squadron, which had blundered into the German battle line. Deployed as part of a screening force several miles ahead of the main force of the Grand Fleet, Black Prince had lost contact in the darkness and took a position near what she thought was the British line. The Germans soon identified the new addition to its line and opened fire. Overwhelmed by point-blank gunfire, Black Prince blew up, (857 officers and men – all hands – were lost), as her squadron leader Defence had done hours earlier. Lost in the darkness, the battlecruisers SMS Moltke and Seydlitz had similar point-blank encounters with the British battle line and were recognised, but were spared the fate of Black Prince when the captains of the British ships, again, declined to open fire, reluctant to reveal their fleet’s position.
At 01:45, the sinking battlecruiser Lützow – fatally damaged by Invincible during the main action – was torpedoed by the destroyer G38 on orders of Lützow‘s Captain Viktor von Harder after the surviving crew of 1,150 transferred to destroyers that came alongside. At 02:15, the German torpedo boat V4 suddenly had its bow blown off; V2 and V6 came alongside and took off the remaining crew, and the V2 then sank the hulk. Since there was no enemy nearby, it was assumed that she had hit a mine or had been torpedoed by a submarine.
At 02:15, five British ships of the 13th Destroyer Flotilla under Captain James Uchtred Farie regrouped and headed south. At 02:25, they sighted the rear of the German line. HMS Marksman inquired of the leader Champion as to whether he thought they were British or German ships. Answering that he thought they were German, Farie then veered off to the east and away from the German line. All but Moresby in the rear followed, as through the gloom she sighted what she thought were four pre-dreadnought battleships 2 mi (1.7 nmi; 3.2 km) away. She hoisted a flag signal indicating that the enemy was to the west and then closed to firing range, letting off a torpedo set for high running at 02:37, then veering off to rejoin her flotilla. The four pre-dreadnought battleships were in fact two pre-dreadnoughts, Schleswig-Holstein and Schlesien, and the battlecruisers Von der Tann and Derfflinger. Von der Tann sighted the torpedo and was forced to steer sharply to starboard to avoid it as it passed close to her bows. Moresby rejoined Champion convinced she had scored a hit.
Finally, at 05:20, as Scheer’s fleet was safely on its way home, the battleship SMS Ostfriesland struck a British mine on her starboard side, killing one man and wounding ten, but was able to make port. Seydlitz, critically damaged and very nearly sinking, barely survived the return voyage: after grounding and taking on even more water on the evening of 1 June, she had to be assisted stern first into port, where she dropped anchor at 07:30 on the morning of 2 June.
The Germans were helped in their escape by the failure of the British Admiralty in London to pass on seven critical radio intercepts obtained by naval intelligence indicating the true position, course and intentions of the High Seas Fleet during the night.
One message was transmitted to Jellicoe at 23:15 that accurately reported the German fleet’s course and speed as of 21:14. However, the erroneous signal from earlier in the day that reported the German fleet still in port, and an intelligence signal received at 22:45 giving another unlikely position for the German fleet, had reduced his confidence in intelligence reports. Had the other messages been forwarded, which confirmed the information received at 23:15, or had British ships reported accurately sightings and engagements with German destroyers, cruisers and battleships, then Jellicoe could have altered course to intercept Scheer at the Horns Reef. The unsent intercepted messages had been duly filed by the junior officer left on duty that night, who failed to appreciate their significance.
By the time Jellicoe finally learned of Scheer’s whereabouts at 04:15, the German was too far away to catch and it was clear that the battle could no longer be resumed.
Outcome
Reporting
At midday on 2 June, German authorities released a press statement claiming a victory, including the destruction of a battleship, two battlecruisers, two armoured cruisers, a light cruiser, a submarine and several destroyers, for the loss of Pommern and Wiesbaden. News that Lützow, Elbing and Rostock had been scuttled was withheld, on the grounds this information would not be known to the enemy. The victory of the Skagerrak was celebrated in the press, children were given a holiday and the nation celebrated. The Kaiser announced a new chapter in world history. Post-war, the official German history hailed the battle as a victory and it continued to be celebrated until after World War II.
—————————
Battle of Jutland 100th Celebrations – South Queensferry, Firth of Forth
—————————
In Britain, the first official news came from German wireless broadcasts. Ships began to arrive in port, their crews sending messages to friends and relatives both of their survival and the loss of some 6,000 others. Authorities considered suppressing the news, but it had already spread widely. Some crews coming ashore found rumours had already reported them dead to relatives, while others were jeered for the defeat they had suffered. At 19:00 on 2 June, the Admiralty released a statement based on information from Jellicoe containing the bare news of losses on each side. The following day British newspapers reported a German victory.
The Daily Mirror described the German Director of the Naval Department telling the Reichstag: “The result of the fighting is a significant success for our forces against a much stronger adversary”. The British population was shocked that the long anticipated battle had been a victory for Germany. On 3 June, the Admiralty issued a further statement expanding on German losses, and another the following day with exaggerated claims. However, on 7 June the German admission of the losses of Lützow and Rostock started to redress the sense of the battle as a loss. International perception of the battle began to change towards a qualified British victory, the German attempt to change the balance of power in the North Sea having been repulsed. In July, bad news from the Somme campaign swept concern over Jutland from the British consciousness.
Assessments
SMS Seydlitz was heavily damaged in the battle, hit by twenty-one main calibre shells, several secondary calibre and one torpedo. 98 men were killed and 55 injured.
At Jutland, the Germans, with a 99-strong fleet, sank 115,000 long tons (117,000 t) of British ships, while a 151-strong British fleet sank 62,000 long tons (63,000 t) of German ships. The British lost 6,094 seamen; the Germans 2,551. Several other ships were badly damaged, such as Lion and Seydlitz.
As of the summer of 1916, the High Seas Fleet’s strategy was to whittle away the numerical advantage of the Royal Navy by bringing its full strength to bear against isolated squadrons of enemy capital ships whilst declining to be drawn into a general fleet battle until it had achieved something resembling parity in heavy ships. In tactical terms, the High Seas Fleet had clearly inflicted significantly greater losses on the Grand Fleet than it had suffered itself at Jutland and the Germans never had any intention of attempting to hold the site of the battle, so some historians support the German claim of victory at Jutland.
However, Scheer seems to have quickly realised that further battles with a similar rate of attrition would exhaust the High Seas Fleet long before it reduced the Grand Fleet. Further, after the 19 August advance was nearly intercepted by the Grand Fleet, he no longer believed that it would be possible to trap a single squadron of Royal Navy warships without having the Grand Fleet intervene before he could return to port. Therefore, the High Seas Fleet abandoned its forays into the North Sea and turned its attention to the Baltic for most of 1917 whilst Scheer switched tactics against Britain to unrestricted submarine warfare in the Atlantic.
At a strategic level, the outcome has been the subject of a huge amount of literature with no clear consensus. The battle was widely viewed as indecisive in the immediate aftermath and this view remains influential.
Despite numerical superiority, the British had been disappointed in their hopes for a decisive victory[ comparable to Trafalgar and the objective of the influential strategic doctrines of Alfred Mahan. The High Seas Fleet survived as a fleet in being. Most of its losses were made good within a month – even Seydlitz, the most badly damaged ship to survive the battle, was repaired by October and officially back in service by November. However, the Germans had failed in their objective of destroying a substantial portion of the British Fleet, and no progress had been made towards the goal of allowing the High Seas Fleet to operate in the Atlantic Ocean.
Subsequently, there has been considerable support for the view of Jutland as a strategic victory for the British. While the British had not destroyed the German fleet and had lost more ships than their enemy, the Germans had retreated to harbour; at the end of the battle the British were in command of the area.
The German fleet would only sortie into the North Sea thrice more, with a raid on 19 August, one in October 1916 and another in April 1918. All three were unopposed by capital ships and quickly aborted as neither side were prepared to take the risks of mines and submarines.
Apart from these three abortive operations the High Seas Fleet – unwilling to risk another encounter with the British fleet – confined its activities to the Baltic Sea for the remainder of the war.Jellicoe issued an order prohibiting the Grand Fleet from steaming south of the line of Horns Reef owing to the threat of mines and U-boats. A German naval expert, writing publicly about Jutland in November 1918, commented, “Our Fleet losses were severe. On 1 June 1916, it was clear to every thinking person that this battle must, and would be, the last one”.
There is also significant support for viewing the battle as a German tactical victory, due to the much higher losses sustained by the British. The Germans declared a great victory immediately afterwards, while the British by contrast had only reported short and simple results. In response to public outrage, the First Lord of the Admiralty Arthur Balfour asked Winston Churchill to write a second report that was more positive and detailed.
A crew member of SMS Westfalen
At the end of the battle, the British had maintained their numerical superiority and had 23 dreadnoughts ready and four battlecruisers still able to fight, while the Germans had only 10 dreadnoughts.
One month after the battle, the Grand Fleet was stronger than it had been before sailing to Jutland. Warspite was dry docked at Rosyth, returning to the fleet on 22 July, while Malaya was repaired in the floating dock at Invergordon, returning to duty on 11 July. Barham was docked for a month at Devonport before undergoing speed trials and returning to Scapa on 8 July. Princess Royal stayed initially at Rosyth but transferred to dry dock at Portsmouth before returning to duty at Rosyth 21 July. Tiger was dry docked at Rosyth and ready for service 2 July. Queen Elizabeth, Emperor of India and HMAS Australia, which had been undergoing maintenance at the time of the battle, returned to the fleet immediately, followed shortly after by Resolution and Ramillies. Lion initially remained ready for sea duty despite the damaged turret, then underwent a month’s repairs in July when Q turret was removed temporarily and replaced in September.
A third view, presented in a number of recent evaluations, is that Jutland, the last major fleet action between battleships, illustrated the irrelevance of battleship fleets following the development of the submarine, mine and torpedo. In this view, the most important consequence of Jutland was the decision of the Germans to engage in unrestricted submarine warfare. Although large numbers of battleships were constructed in the decades between the wars, it has been argued that this outcome reflected the social dominance among naval decision-makers of battleship advocates who constrained technological choices to fit traditional paradigms of fleet action. Battleships played a relatively minor role in World War II, in which the submarine and aircraft carrier emerged as the dominant offensive weapon of naval warfare.
British self-critique
The official British Admiralty examination of the Grand Fleet’s performance recognised two main problems:
British armour-piercing shells exploded outside the German armour rather than penetrating and exploding within. As a result, some German ships with only 8 in (20 cm)-thick armour survived hits from 15-inch (38 cm) projectiles. Had these shells penetrated the armour and then exploded, German losses would probably have been far greater.
Communication between ships and the British commander-in-chief were comparatively poor. For most of the battle, Jellicoe had no idea where the German ships were, even though British ships were in contact. They failed to report enemy positions, contrary to the Grand Fleet’s Battle Plan. Some of the most important signalling was carried out solely by flag instead of wireless or using redundant methods to ensure communications—a questionable procedure, given the mixture of haze and smoke that obscured the battlefield, and a foreshadowing of similar failures by habit-bound and conservatively minded professional officers of rank to take advantage of new technology in World War II.
Shell performance
German armour-piercing shells were far more effective than the British ones, which often failed to penetrate heavy armour. The issue particularly concerned shells striking at oblique angles, which became increasingly the case at long range. Germany had adopted trinitrotoluene (TNT) as the explosive filler for artillery shells in 1902, while the United Kingdom was still using a picric acid mixture (Lyddite). The shock of impact of a shell against armour often prematurely detonated Lyddite in advance of fuze function while TNT detonation could be delayed until after the shell had penetrated and the fuze had functioned in the vulnerable area behind the armour plate.
The issue of poorly performing shells had been known to Jellicoe, who as Third Sea Lord from 1908 to 1910 had ordered new shells to be designed. However, the matter had not been followed through after his posting to sea and new shells had never been thoroughly tested. Beatty discovered the problem at a party aboard Lion a short time after the battle, when a Swedish Naval officer was present. He had recently visited Berlin, where the German navy had scoffed at how British shells had broken up on their ships’ armour.
The question of shell effectiveness had also been raised after the Battle of Dogger Bank, but no action had been taken.
Hipper later commented,
“It was nothing but the poor quality of their bursting charges which saved us from disaster”.
Admiral Dreyer, writing later about the battle, during which he had been captain of the British flagship Iron Duke, estimated that effective shells as later introduced would have led to the sinking of six more German capital ships, based upon the actual number of hits achieved in the battle. The system of testing shells, which remained in use up to 1944, meant that, statistically, a batch of shells of which 70% were faulty stood an even chance of being accepted. Indeed, even shells that failed this relatively mild test had still been issued to ships. Analysis of the test results afterwards by the Ordnance Board suggested the likelihood that 30–70% of shells would not have passed the standard penetration test specified by the Admiralty.
Efforts to replace the shells were initially resisted by the Admiralty, and action was not taken until Jellicoe became First Sea Lord in December 1916. As an initial response, the worst of the existing shells were withdrawn from ships in early 1917 and replaced from reserve supplies. New shells were designed, but did not arrive until April 1918, and were never used in action.
Battlecruiser losses
The British battlecruisers were designed to chase and destroy enemy cruisers from a range at which these ships could not reply. They were not designed to be ships of the line and exchange broadsides with the enemy. Although one German and three British battlecruisers were sunk, none of them were destroyed by enemy shells penetrating the belt armour and detonating the magazines; each of the British battlecruisers was penetrated through a turret roof and her magazines ignited by flash fires passing through the turret and shell-handling rooms. Lützow sustained 24 hits and her flooding could not be contained. She was eventually sunk by her escorts’ torpedoes after her crew had been safely removed. Derfflinger and Seydlitz sustained 22 hits each but reached port (although in Seydlitz’s case only just).
The disturbing feature of the battlecruiser action is the fact that five German battlecruisers engaging six British vessels of this class, supported after the first twenty minutes, although at great range, by the fire of four battleships of the “Queen Elizabeth” class, were yet able to sink ‘Queen Mary’ and ‘Indefatigable’….The facts which contributed to the British losses, first, were the indifferent armour protection of our battlecruisers, particularly as regards turret armour, and, second, deck plating and the disadvantage under which our vessels laboured in regard to the light.
— Sir John Jellicoe, Jellicoe’s official despatch
Jellicoe and Beatty, as well as other senior officers, gave an impression that the loss of the battlecruisers was caused by weak armour, despite reports by two committees and earlier statements by Jellicoe and other senior officers that Cordite and its management were to blame. This led to calls for armour to be increased, and an additional 1 in (2.5 cm) was placed over the relatively thin decks above magazines. To compensate for the increase in weight, ships had to carry correspondingly less fuel, water and other supplies. Whether or not thin deck armour was a potential weakness of British ships, the battle provided no evidence that it was the case. At least amongst the surviving ships, no enemy shell was found to have penetrated deck armour anywhere. The design of the new battlecruiser HMS Hood (which had started building at the time of the battle) was altered to give her 5,000 long tons (5,100 t) of additional armour.
Ammunition handling
British and German propellant charges differed in packaging, handling, and chemistry. The British propellant was of two types, MK1 and MD. The Mark 1 cordite had a formula of 37% nitrocellulose, 58% nitroglycerine, and 5% petroleum jelly. It was a good propellant but burned hot and caused an erosion problem in gun barrels. The petroleum jelly served as both a lubricant and a stabiliser. Cordite MD was developed to reduce barrel wear, its formula being 65% nitrocellulose, 30% nitroglycerine, and 5% petroleum jelly. While cordite MD solved the gun-barrel erosion issue, it did nothing to improve its storage properties, which were poor. Cordite was very sensitive to variations of temperature, and acid propagation/cordite deterioration would take place at a very rapid rate. Cordite MD also shed micro-dust particles of nitrocellulose and iron pyrite. While cordite propellant was manageable, it required a vigilant gunnery officer, strict cordite lot control, and frequent testing of the cordite lots in the ships’ magazines
British cordite propellant (when uncased and exposed in the silk bag) tended to burn violently, causing uncontrollable “flash fires” when ignited by nearby shell hits. In 1945, a test was conducted by the U.S.N. Bureau of Ordnance (Bulletin of Ordnance Information, No.245, pp. 54–60) testing the sensitivity of cordite to then-current U.S. Naval propellant powders against a measurable and repeatable flash source. It found that cordite would ignite at 530 mm/22″ from the flash and the current U.S. powder at 120 mm, /5″ the U.S. flashless powder at 25 mm./1″
This meant that about 75 times the propellant would immediately ignite when exposed to flash, as compared to the U.S. powder. British ships had inadequate protection against these flash fires. German propellant (RP C/12, handled in brass cartridge cases) was less vulnerable and less volatile in composition. German propellants show that they were not that different in composition from cordite—with one major exception: centralite. This was symmetrical Diethyl Diphenyl Urea, which served as a stabiliser that was superior to the petroleum jelly used in British practice. It stored better and burned but did not explode. Stored and used in brass cases, it proved much less sensitive to flash. RP C/12 – 64.13% nitrocellulose, 29.77% nitroglycerine, 5.75% centralite, 0.25% magnesium oxide and 0.10% graphite.
The Royal Navy Battle Cruiser Fleet had also emphasised speed in ammunition handling over established safety protocol. In practice drills, cordite could not be supplied to the guns rapidly enough through the hoists and hatches. To bring up the propellant in good time to load for the next broadside, many safety doors were kept open that should have been shut to safeguard against flash fires. Bags of cordite were also stocked and kept locally, creating a total breakdown of safety design features. By staging charges in the chambers between the gun turret and magazine, the Royal Navy enhanced their rate of fire but left their ships vulnerable to chain reaction ammunition fires and magazine explosions. This ‘bad safety habit’ carried over into real battle practices.
Furthermore, the doctrine of a high rate of fire also led to the decision in 1913 to increase the supply of shells and cordite held on the British ships by 50%, for fear of running out of ammunition. When this exceeded the capacity of the ships’ magazines, cordite was stored in insecure places.
The British cordite charges were stored two silk bags to a metal cylindrical container, with a 16-oz gunpowder igniter charge, which was covered with a thick paper wad, four charges being used on each projectile. The gun crews were removing the charges from their containers and removing the paper covering over the gunpowder igniter charges. The effect of having eight loads at the ready was to have 4 short tons (3,600 kg) of exposed explosive, with each charge leaking small amounts of gunpowder from the igniter bags. In effect, the gun crews had laid an explosive train from the turret to the magazines, and one shell hit to a battlecruiser turret was enough to end a ship.
A diving expedition during the summer of 2003 provided corroboration of this practice. It examined the wrecks of Invincible, Queen Mary, Defence, and Lützow to investigate the cause of the British ships’ tendency to suffer from internal explosions. From this evidence, a major part of the blame may be laid on lax handling of the cordite propellant for the shells of the main guns. The wreck of the Queen Mary revealed cordite containers stacked in the working chamber of the X turret instead of the magazine.
There was a further difference in the propellant itself. While the German RP C/12 burned when exposed to fire, it did not explode, as opposed to cordite. RP C/12 was extensively studied by the British and, after World War I, would form the basis of the later Cordite SC.
The memoirs of Alexander Grant, Gunner on Lion, suggest that some British officers were aware of the dangers of careless handling of cordite:
With the introduction of cordite to replace powder for firing guns, regulations regarding the necessary precautions for handling explosives became unconsciously considerably relaxed, even I regret to say, to a dangerous degree throughout the Service. The gradual lapse in the regulations on board ship seemed to be due to two factors. First, cordite is a much safer explosive to handle than gun-powder. Second, but more important, the altered construction of the magazines on board led to a feeling of false security….The iron or steel deck, the disappearance of the wood lining, the electric lights fitted inside, the steel doors, open because there was now no chute for passing cartridges out; all this gave officers and men a comparative easiness of mind regarding the precautions necessary with explosive material.
Grant had already introduced measures onboard Lion to limit the number of cartridges kept outside the magazine and to ensure doors were kept closed, probably contributing to her survival.
On 5 June 1916, the First Lord of the Admiralty advised Cabinet Members that the three battlecruisers had been lost due to unsafe cordite management.
On 22 November 1916, following detailed interviews of the survivors of the destroyed battlecruisers, the Third Sea Lord, Rear Admiral Tudor, issued a report detailing the stacking of charges by the gun crews in the handling rooms to speed up loading of the guns.
After the battle, the B.C.F. Gunnery Committee issued a report (at the command of Admiral David Beatty) advocating immediate changes in flash protection and charge handling. It reported, among other things, that:
Some vent plates in magazines allowed flash into the magazines and should be retro-fitted to a new standard.
Bulkheads in HMS Lion‘s magazine showed buckling from fire under pressure (overpressure) – despite being flooded and therefore supported by water pressure – and must be made stronger.
Doors opening inward to magazines were an extreme danger.
Current designs of turrets could not eliminate flash from shell bursts in the turret from reaching the handling rooms.
Ignition pads must not be attached to charges but instead be placed just before ramming.
Better methods must be found for safe storage of ready charges than the current method.
Some method for rapidly drowning charges already in the handling path must be devised.
Handling scuttles (special flash-proof fittings for moving propellant charges through ship’s bulkheads), designed to handle overpressure, must be fitted.
The United States Navy in 1939 had quantities of Cordite N, a Canadian propellant that was much improved, yet its Bureau of Ordnance objected strongly to its use onboard U.S. warships, considering it unsuitable as a naval propellant due to its inclusion of nitroglycerin.
Gunnery
British gunnery control systems, based on Dreyer tables, were well in advance of the German ones, as demonstrated by the proportion of main calibre hits made on the German fleet. Because of its demonstrated advantages, it was installed on ships progressively as the war went on, had been fitted to a majority of British capital ships by May, 1916, and had been installed on the main guns of all but two of the Grand Fleet’s capital ships.[152] The Royal Navy used centralised fire-control systems on their capital ships, directed from a point high up on the ship where the fall of shells could best be seen, utilising a director sight for both training and elevating the guns. In contrast, the German battlecruisers controlled the fire of turrets using a training-only director, which also did not fire the guns at once.
The rest of the German capital ships were without even this innovation. German range-finding equipment was generally superior to the British 9 ft (2.7 m) FT24, as its operators were trained to a higher standard due to the complexity of the Zeiss 3 m (9.8 ft) range finders. Their stereoscopic design meant that in certain conditions they could range on a target enshrouded by smoke The German equipment was not superior in range to the British Barr & Stroud 15 ft (4.6 m) rangefinder found in the newest British capital ships, and, unlike the British range finders, the German range takers had to be replaced as often as every thirty minutes, as their eyesight became impaired, affecting the ranges provided to their gunnery equipment.
The results of the battle confirmed the value of firing guns by centralised director. The battle prompted the Royal Navy to install director firing systems in cruisers and destroyers, where it had not thus far been used, and for secondary armament on battleships.
German ships were considered to have been quicker in determining the correct range to targets, thus obtaining an early advantage. The British used a ‘bracket system’, whereby a salvo was fired at the best-guess range and, depending where it landed, the range was progressively corrected up or down until successive shots were landing in front of and behind the enemy. The Germans used a ‘ladder system’, whereby an initial volley of three shots at different ranges was used, with the centre shot at the best-guess range. The ladder system allowed the gunners to get ranging information from the three shots more quickly than the bracket system, which required waiting between shots to see how the last had landed. British ships adopted the German system.
It was determined that 9-foot (2.7 m) range finders of the sort issued to most British ships were not adequate at long range and did not perform as well as the 15-foot (4.6 m) range finders on some of the most modern ships. In 1917, range finders of base lengths of 25 and 30 ft (7.6 and 9.1 m) were introduced on the battleships to improve accuracy .
Signalling
Throughout the battle, British ships experienced difficulties with communications, whereas the Germans did not suffer such problems. The British preferred signalling using ship-to-ship flag and lamp signals, avoiding wireless, whereas the Germans used wireless successfully. One conclusion drawn was that flag signals were not a satisfactory way to control the fleet. Experience using lamps, particularly at night when issuing challenges to other ships, demonstrated this was an excellent way to advertise your precise location to an enemy, inviting a reply by gunfire. Recognition signals by lamp, once seen, could also easily be copied in future engagements.
British ships both failed to report engagements with the enemy but also, in the case of cruisers and destroyers, failed to actively seek out the enemy. A culture had arisen within the fleet of not acting without orders, which could prove fatal when any circumstances prevented orders being sent or received. Commanders failed to engage the enemy because they believed other, more senior officers must also be aware of the enemy nearby, and would have given orders to act if this was expected. Wireless, the most direct way to pass messages across the fleet (although it was being jammed by German ships), was avoided either for perceived reasons of not giving away the presence of ships or for fear of cluttering up the airwaves with unnecessary reports.
Fleet Standing Orders
Naval operations were governed by standing orders issued to all the ships. These attempted to set out what ships should do in all circumstances, particularly in situations where ships would have to react without referring to higher authority, or when communications failed. A number of changes were introduced as a result of experience gained in the battle.
A new signal was introduced instructing squadron commanders to act independently as they thought best while still supporting the main fleet, particularly for use when circumstances would make it difficult to send detailed orders. The description stressed that this was not intended to be the only time commanders might take independent action, but was intended to make plain times when they definitely should. Similarly, instructions on what to do if the fleet was instructed to take evasive action against torpedoes were amended. Commanders were given discretion that if their part of the fleet was not under immediate attack, they should continue engaging the enemy rather than turning away with the rest of the fleet. In this battle, when the fleet turned away from Scheer’s destroyer attack covering his retreat, not all the British ships had been affected, and could have continued to engage the enemy.
A number of opportunities to attack enemy ships by torpedo had presented themselves but had been missed. All ships, not just the destroyers armed principally with torpedoes but also battleships, were reminded that they carried torpedoes intended to be used whenever an opportunity arose. Destroyers were instructed to close the enemy fleet to fire torpedoes as soon as engagements between the main ships on either side would keep enemy guns busy directed at larger targets. Destroyers should also be ready to immediately engage enemy destroyers if they should launch an attack, endeavouring to disrupt their chances of launching torpedoes and keep them away from the main fleet.
To add some flexibility when deploying for attack, a new signal was provided for deploying the fleet to the centre, rather than as previously only either to left or right of the standard closed-up formation for travelling. The fast and powerful 5th Battle Squadron was moved to the front of the cruising formation so it would have the option of deploying left or right depending upon the enemy position. In the event of engagements at night, although the fleet still preferred to avoid night fighting, a destroyer and cruiser squadron would be specifically detailed to seek out the enemy and launch destroyer attacks.
Controvers
At the time, Jellicoe was criticised for his caution and for allowing Scheer to escape. Beatty, in particular, was convinced that Jellicoe had missed a tremendous opportunity to annihilate the High Seas Fleet and win what would amount to another Trafalgar. Jellicoe was promoted away from active command to become First Sea Lord, the professional head of the Royal Navy, while Beatty replaced him as commander of the Grand Fleet.
The controversy raged within the navy and in public for about a decade after the war. Criticism focused on Jellicoe’s decision at 19:15. Scheer had ordered his cruisers and destroyers forward in a torpedo attack to cover the turning away of his battleships. Jellicoe chose to turn to the south-east, and so keep out of range of the torpedoes. If, instead, he had turned to the west, could his ships have dodged the torpedoes and destroyed the German fleet? Supporters of Jellicoe, including the historian Cyril Falls, pointed to the folly of risking defeat in battle when you already have command of the sea Jellicoe himself, in a letter to the Admiralty seventeen months before the battle, had stated that he intended to turn his fleet away from any mass torpedo attack (that being the universally accepted proper tactical response to such attacks, practised by all the major navies of the world ), and that in the event of a fleet engagement in which the enemy turned away he would assume that the intention was to draw him over mines or submarines and that he would decline to be so drawn. The Admiralty approved this plan and expressed full confidence in Jellicoe at the time (October 1914)
The stakes were high, the pressure on Jellicoe immense, and his caution certainly understandable. His judgement might have been that even 90% odds in favour were not good enough to bet the British Empire. The former First Lord of the AdmiraltyWinston Churchill said of the battle that Jellicoe “was the only man on either side who could have lost the war in an afternoon.”
The criticism of Jellicoe also fails to sufficiently credit Scheer, who was determined to preserve his fleet by avoiding the full British battle line, and who showed great skill in effecting his escape.
Beatty’s actions
On the other hand, some of Jellicoe’s supporters condemned the actions of Beatty for the British failure to achieve a complete victory. Although Beatty was undeniably brave, his mismanagement of the initial encounter with Hipper’s squadron and the High Seas Fleet cost considerable advantage in the first hours of the battle
His most glaring failure was in not providing Jellicoe with periodic information on the position, course, and speed of the High Seas Fleet. Beatty, aboard the battlecruiser Lion, left behind the four fast battleships of the 5th Battle Squadron – the most powerful warships in the world at the time – engaging with six ships when better control would have given him 10 against Hipper’s five. Though Beatty’s larger 13.5 in (340 mm) guns out-ranged Hipper’s 11 and 12 in (280 and 300 mm) guns by thousands of yards, Beatty held his fire for 10 minutes and closed the German squadron until within range of the Germans’ superior gunnery, under lighting conditions that favoured the Germans. Most of the British losses in tonnage occurred in Beatty’s force.
Losses
1916 German propaganda postcard, comparing nearly accurate data of the adversaries’ losses.
The total loss of life was 9,823 men, of which the British losses were 6,784 and German losses were 3,039.[173] No dreadnoughts were destroyed on either side during the battle.
In the years following the battle the wrecks were slowly discovered. Invincible was found by the Royal Navy minesweeper HMS Oakley in 1919. After the Second World War some of the wrecks seem to have been commercially salvaged. For instance, the Hydrographic Office record for SMS Lützow (No.32344) shows that salvage operations were taking place on the wreck in 1960. From 2000–2001 a series of diving expeditions involving veteran shipwreck historian and archaeologist Innes McCartney located the wrecks of Defence, Indefatigable and Nomad. It was discovered that Indefatigable too, had been ripped apart by salvors at some unknown time.[175][176] In 2003 McCartney led a detailed survey of the wrecks for the Channel 4 documentary “Clash of the Dreadnoughts”.
The film examined the last minutes of the lost ships and revealed for the first time how both ‘P’ and ‘Q’ turrets of Invincible had been blasted out of the ship and tossed into the sea before she broke in half. On the 90th anniversary of the battle, in 2006, the UK Ministry of Defence belatedly announced that the 14 British vessels lost in the battle were being designated as protected places under the Protection of Military Remains Act 1986.
The last surviving veteran of the battle, Henry Allingham, a British RAF (originally RNAS) airman, died on 18 July 2009, aged 113, by which time he was the oldest documented man in the world and one of the last surviving veterans of the whole war. Also among the combatants was the then 20-year-old Prince Albert, second in the line to the British throne, who would reign as King George VI of the United Kingdom from 1936 until his death in 1952. He served as a junior officer in the Royal Navy.
The Battle of Jutland was annually celebrated as a great victory by the right wing in Weimar Germany. This “victory” was used to repress the memory of the German navy’s initiation of the German Revolution of 1918–19, as well as the memory of the defeat in World War I in general. (The celebrations of the Battle of Tannenberg played a similar role in the Weimar Republic.) This is especially true for the city of Wilhelmshaven, where wreath-laying ceremonies and torch-lit parades were performed until the end of the 1960s.
In May 2016, the 100th Anniversary commemoration of the Battle of Jutland was held. On 29 May, a commemorative service was held at St Mary’s Church, Wimbledon, where the ensign from HMS Inflexible is on permanent display. On 31 May, the main service was held at St Magnus Cathedral in Orkney, attended by the British Prime Minister, David Cameron, and the German President, Joachim Gauck, along with Princess Anne and Vice Admiral Sir Tim Laurence.
The Home Office has launched an independent review into the application of sharia law in England and Wales.
Professor Mona Siddiqui
Professor Mona Siddiqui of Edinburgh University, a specialist in Islamic and inter-religious studies, will lead a panel of experts that includes family law barrister Sam Momtaz, of 1 Garden Court, retired high court judge Sir Mark Hedley and family lawyer Anne Marie Hutchinson QC, partner at Dawson Cornwell, whose expertise includes jurisdictional disputes on divorce, child abduction, forced marriage disputes, children’s law and honour-based violence.
Home Secretary Theresa May noted that, while many people benefit from the guidance of sharia councils, there was evidence that some councils may be legitimising forced marriage, discriminating against women in divorce settlements and acting in other unacceptable ways.
The review will explore whether, and to what extent, sharia law is incompatible with the law in England and Wales, and the ways in which it may be being misused or exploited. It is due to complete its review in 2017.
Rigby was off duty and walking along Wellington Street when he was attacked.
————————–
Jurors Shown Footage Of Callous Murder Of Soldier Lee Rigby
————————–
Adebolajo and Adebowale ran him down with a car, then used knives and a cleaver to stab and hack him to death. The men dragged Rigby’s body into the road and remained at the scene until police arrived. They told passers-by that they had killed a soldier to avenge the killing of Muslims by the British armed forces. Unarmed police arrived at the scene nine minutes after an emergency call was received and set up a cordon. Armed police officers arrived five minutes later. The assailants, armed with a cleaver and brandishing a gun, charged at the police, who fired shots that wounded them both. They were apprehended and taken to separate hospitals. Adebolajo and Adebowale are British of Nigerian descent, were raised as Christians, and converted to Islam.
On 19 December 2013, both of the attackers were found guilty of Rigby’s murder. On 26 February 2014, they were sentenced to life imprisonment, with Adebolajo given a whole life order and Adebowale ordered to serve at least 45 years. The attack was condemned by political and Muslim leaders in the United Kingdom and in the international press.
Murder of Lee Rigby
Tribute to Lee Rigby
Manchester Day Parade, 2 June 2013
Retaliation for British military’s presence in Islamic countries
Victim
Fusilier Lee Rigby of the 2nd Battalion Royal Fusiliers
————————–
Lee Rigby
Least We Forget
————————-
The soldier killed in the attack was 25-year-old Lee Rigby, a drummer and machine-gunner in the 2nd Battalion of the Royal Regiment of Fusiliers. Rigby, from Middleton, Greater Manchester, had served in Cyprus, Germany, and Afghanistan before becoming a recruiter and assisting with duties in the Tower of London. He was attacked when he was returning to barracks from working at the Tower. Rigby married in 2007 and had a two-year-old son, but had separated from his wife.
He was engaged to a new fiancée at the time of his death.
Rigby supported British Armed Forces charity Help for Heroes and was wearing a hoodie supporting the charity when he was attacked. In the five days after his death the charity received more than £600,000 in donations.
Rigby was given a military funeral at Bury Parish Church on 12 July 2013. The service was attended by several thousand people, including present and former soldiers, Prime Minister David Cameron, and Mayor of London Boris Johnson. A private burial service was then held at nearby Middleton Cemetery. The first permanent memorial to him was installed in February 2014 at The Valley, a football stadium less than 1 mile (1.6 km) from the site of his murder.
——————–
Lee Rigby jury shown Adebolajo #039;eye for eye #039; video, BBC News
——————–
On 1 September 2014, Rigby was honoured at a ceremony in Staffordshire, with his name added to the Armed Forces Memorial at the National Memorial Arboretum.
Plans for a memorial to Rigby in Woolwich initially ran into opposition from local MP Nick Raynsford, who expressed concerns that it would generate “undesirable interest” or become a target for vandals. Greenwich Council said that it had not received a request from the Army to erect a memorial at the site.
Following a campaign for a memorial supported by Boris Johnson and a petition with 25,000 signatures, plans for a memorial near the site of the attack were announced on 11 June 2014. In April 2015, Greenwich Council said that rather than creating a memorial specific to Rigby’s memory, it would “create two memorials to both soldiers and civilians from the Royal Borough who have given their lives for our country”.
A memorial to Rigby in his home town of Middleton was unveiled on 29 March 2015.
Attack
The site of the attack in Wellington Street, with floral tributes and flags
The attack took place shortly before 14:20 in Wellington Street, and near its junction with John Wilson Street, part of the South Circular Road (A205) in Woolwich, near the perimeter of the Royal Artillery Barracks where Rigby was stationed.
Rigby had arrived at Woolwich Arsenal station at 14:10 and was walking down Wellington Street towards the Barracks.
While Rigby was crossing the road to get to a shop, two men, who were later identified as Michael Adebolajo and Michael Adebowale, drove a Vauxhall Tigra car at him at 30 to 40 miles per hour (50 to 60 km/h), knocking him to the ground.
———————-
Passerby Film Woolwich Soldier Murder Attackers London Suspect is Michael Adebolajo
———————-
They attacked Rigby with knives and a cleaver, and attempted to behead him.
Immediately after the attack, several passers-by stood over Rigby’s body to protect him from further injury.
Ingrid Loyau-Kennett, a cub scout leader from Cornwall, disembarked from a passing bus with the intention of rendering first aid, after she saw what she thought was a road accident. On discovering that the victim was dead she engaged one of the assailants in conversation. The man said he was responsible for killing the man on the ground – a British soldier who the attacker claimed had:
“killed Muslims in Iraq and in Afghanistan”.
She asked one of the men to hand over his weapons, but he refused.
In a video shot by a bystander, Adebolajo said:
The only reason we have killed this man today is because Muslims are dying daily by British soldiers. And this British soldier is one … By Allah, we swear by the almighty Allah we will never stop fighting you until you leave us alone. So what if we want to live by the Sharia in Muslim lands?
Why does that mean you must follow us and chase us and call us extremists and kill us? … when you drop a bomb do you think it hits one person?
Or rather your bomb wipes out a whole family? …
Through many passages in the Koran we must fight them as they fight us …
I apologise that women had to witness this today but in our lands women have to see the same. You people will never be safe. Remove your governments, they don’t care about you. You think David Cameron is gonna get caught in the street when we start busting our guns?
Do you think politicians are going to die? No, it’s going to be the average guy, like you and your children. So get rid of them. Tell them to bring our troops back … leave our lands and you will live in peace.
Adebolajo also gave a bystander at the scene a handwritten two-page note which set out his justification for his actions. The assailants remained at the scene and asked bystanders to call the police.
The Metropolitan Police received the first 999 call about an assault at 14:20 and regular unarmed police were deployed. Subsequent 999 calls said the attackers had a firearm, and armed police were ordered to the scene at 14:24. Unarmed police arrived at 14:29, set up a cordon, and remained behind it.
Authorised Firearms Officers arrived at 14:34. Two men, one brandishing a cleaver and the other a revolver, charged at the police. Armed police fired eight times and both men were wounded. They were arrested and taken to separate hospitals. A revolver, knives, and a cleaver were seized at the scene. The victim, Rigby, was pronounced dead and formally identified. The revolver was later determined to be a non-functioning 90-year-old Dutch KNIL 9.4mm. Adebowale pointed the gun at responding armed police officers, who opened fire and shot off one of his thumbs.
Attackers and other suspect..
The two men who carried out the attack, Michael Olumide Adebolajo, 28, and Michael Oluwatobi Adebowale, 22, are British of Nigerian descent.
Both men were known to British security services.
On 23 May, a man aged 29 and two women aged 31 and 29 were arrested on suspicion of conspiracy to murder.The Metropolitan Police arrested three people aged between 21 and 28 in south-east London, at two separate locations on the evening of 25 May.
On 26 May, a 22-year-old male was arrested in Highbury. On 27 May, a 50-year-old male was arrested in Welling. Of the eight people arrested, six were freed on bail, and two released without charge.
Michael Adebolajo
—————————-
Inside the mind of Lee Rigby’s killer Michael Adebolajo
—————————-
Adebolajo, born in Lambeth to a Christian family, went to Marshalls Park School and studied sociology at the University of Greenwich. He has a history of involvement in radical Islamist activities and had been arrested at a violent protest and later released.
————————————–
Crazy Muslim Cleric Anjem Choudary chants his shit on GMTV and ends up looking a tit
————————————–
According to Anjem Choudary, a radical Muslim cleric, Adebolajo converted to Islam in 2003 and was linked to the outlawed Islamist group al-Muhajiroun. In 2006, Adebolajo was arrested outside the Old Bailey during a protest about the trial of Mizanur Rahman.
“Don’t be scared of them, do not be scared of the police or the cameras. You are here only to please Allah. You’re not here for any other reason, if you are here just for a fight, please leave our ranks. We only want those who are sincere to Allah. Purify your intention.”
In 2010, Adebolajo was arrested in Kenya with five others. He travelled using a British passport in the name Michael Olemendis Ndemolaj Boniface Mwaniki, head of Kenya’s anti-terrorism unit, said he believed Adebolajo was planning to train with Al-Shabaab, a militant group linked to al-Qaeda. He was released to British authorities in Kenya and deported. The British Foreign Office confirmed “a British national was arrested in Kenya in 2010” was given consular assistance. No charges were filed against Adebolajo.
Abu Nusaybah, a friend of Adebolajo, said on BBC’s Newsnight on 25 May that Adebolajo had complained of persistent questioning by the British Security Service (MI5) specifically concerning his knowledge of “certain individuals”. He said Adebolajo alleged that MI5 had asked him to work with them and he had refused. He also said Adebolajo claimed he had been tortured and sexually assaulted by Kenyan troops after his arrest.
Adebolajo was released from hospital on 31 May and taken into police custody. The following day he was charged with Rigby’s murder, two charges of attempting to murder police officers, and possession of a firearm. At a court appearance on 3 June, he asked to be known as Mujahid Abu Hamza.On 17 July, Adebolajo lost two of his front teeth while being restrained by five prison officers at Belmarsh prison. The officers were suspended from duty.
Michael Adebowale
Following media reports that Michael Adebowale had attended the University of Greenwich with Michael Adebolajo, the university issued a statement, in which it said that there were “no records relating to [Adebowale] in connection with the Woolwich incident”, and that the university had launched an investigation into the matter. Adebolawe’s mother is a probation officer and his father a member of staff at the Nigerian High Commission.
On 28 May Adebowale was released from hospital and taken to a police station in south London.e charged him with the murder of Rigby and possession of a firearm.
Investigation
Investigators searched four houses in Greenwich, south London; one in Romford, east London; another in north London; and a property in Saxilby, Lincolnshire.
An Independent Police Complaints Commission investigation into the use of firearms by Metropolitan Police Officers, which was published on 19 December 2013 once a verdict had been reached in the defendants’ trial, concluded that the officers who had used force on 22 May 2013 had :
“acted entirely appropriately” and had shown “skill and professionalism”.
Home Secretary Theresa May chaired a meeting of the Cabinet Office Briefing Room committee (COBRA) attended by Defence Secretary Philip Hammond, the Mayor of London Boris Johnson, the Metropolitan Police Commissioner Sir Bernard Hogan-Howe, the Metropolitan Police Assistant Commissioner Cressida Dick and other unnamed members of the intelligence agencies.
The Prime Minister David Cameron cut short a visit to Paris to chair a second COBRA meeting.
Legal proceedings
On 31 May, the inquest into Rigby’s death was opened and adjourned at Southwark Coroner’s Court. The inquest heard that Rigby had been identified by his dental records.
On 27 September 2013, the two accused men appeared via videolink in court at the Old Bailey, where they both pleaded not guilty to the murder of Lee Rigby, and to other charges relating to the incident. The trial began at the Old Bailey on 29 November 2013. Adebolajo asked to be known as Mujaahid Abu Hamza in court with Adebowale wishing to be known as Ismail Ibn Abdullah.
On 19 December 2013, Michael Adebolajo and Michael Adebowale were found guilty of the murder of Lee Rigby. The judge, Mr Justice Sweeney, said that he would pass sentence after a key appeal court ruling on the use of whole life terms. On 26 February 2014, both men were sentenced to life imprisonment. Adebolajo was given a whole life order excluding the possibility of parole, and Adebowale, the younger of the two, was given a minimum term of 45 years in prison.
During the sentencing, Mr Justice Sweeney said that the extremist views of the attackers were a “betrayal of Islam”, prompting Adebowale to shout “That’s a lie”, while Adebolajo shouted “Allahu Akbar“.
Following a scuffle with security guards in the dock, both men were removed from the court and the sentencing continued in their absence.
On 8 April 2014, Adebolajo launched an appeal against his whole life term.
On 29 July, he was refused permission to appeal, and the case was heard by a panel of Court of Appeal judges.
On 3 December 2014, Rigby’s killers lost legal challenges to their sentences. Michael Adebolajo had attempted to have his conviction overturned and whole-life sentence reduced, while Michael Adebowale attempted a reduction in his minimum sentence of 45 years. Both requests were rejected at the Court of Appeal.
Subsequent events
The Ministry of Defence investigated the incident. Immediately after the death, British service members were advised not to wear military uniforms in public, although the advice was later relaxed.
In the immediate aftermath, Julie Siddiqi of the Islamic Society of Britain expressed concern that the killing would be used to create ethnic and community divisions. Sir Bernard Hogan-Howe condemned the attack and called for calm and a “measured response”, adding “we have met with community representatives, and extra officers remain on duty there tonight.
Across London our officers are in contact with their communities too.” Commander Simon Letchford later noted community concerns following the incident and assured that an investigation was under way. He also appealed for calm and avoidance of speculation. An additional 1,200 police officers were deployed across London to prevent revenge attacks on Muslim communities.
The British National Party (BNP) leader, Nick Griffin, posted a series of Twitter messages blaming “mass immigration” for the attack and called for a protest rally in Woolwich. After the English Defence League called on its supporters to mobilise, some members staged a protest at Woolwich Arsenal station in which bottles were thrown at police.
The BNP scheduled their protest for 1 June, but Scotland Yard refused to permit them to march from Woolwich Barracks; the demonstration instead took place at Whitehall in central London.Unite Against Fascism mounted a counter-protest. Police arrested 58 people, all anti-fascist protesters, for breaches of the Public Order Act.
On 7 June 2013, a 21-year-old woman from Harrow was ordered to complete 250 hours of unpaid work after tweeting that people in Help for Heroes T-shirts “deserve to be beheaded”.
On 14 March 2014, a married couple from London – who pleaded guilty to disseminating a terrorist publication – were jailed for posting videos on YouTube which condoned the death of Lee Rigby, with one video describing it as a “brilliant day”.
Anti-Muslim backlash
In the aftermath of the attack, an anti-Muslim backlash occurred across the United Kingdom.A representative of Hope not Hate said the number of phone calls to its helpline concerning anti-Muslim incidents greatly increased after the murder.
Hope not Hate reported 193 Islamophobic incidents, including attacks on 10 mosques, as of 27 May.On 1 June, Tell MAMA, a government-funded project, reported 212 anti-Muslim incidents, including 125 online incidents, 17 incidents involving physical attack, and 11 attacks on mosques.
It was reported on 9 June that government funding for Tell MAMA would not be renewed, due to concern over the reliability of data reported by the organisation, although the decision had been made before Rigby’s death.
Incidents ranged from verbal abuse to physical assaults in which women’s headscarves were pulled off.
Graffiti was scrawled over mosques and Muslim-owned businesses.Hope not Hate claimed that online activity suggested some of the attacks on Muslims were co-ordinated.
At least seven people have been arrested for a range of social media-related issues.
During the night after Rigby’s death, two mosques were attacked. In Braintree, Essex, a man entered a mosque with two knives, threatened the congregation, and threw an explosive device. Witnesses say the explosive device was a grenade or gas canister. In Gillingham, Kent, a man ran into a mosque and smashed windows and bookcases, specifically targeting those containing copies of the Quran. Two men were arrested in connection with the attacks.
On 26 May, several petrol bombs were thrown into a mosque in Grimsby. No one was injured and the fires were rapidly extinguished.Two former soldiers were arrested in connection with the attack.
On 5 June, the Al-Rahma Islamic Centre in Muswell Hill – which was used by children after school – was destroyed by a fire.
The building had been sprayed with graffiti making reference to the English Defence League.
The fire investigation is being conducted by Scotland Yard‘s counter-terrorism command, because of a possible link to domestic extremism. On 8 June, a fire at Darul Uloom School, an Islamic boarding school in southeast London, forced the evacuation of 128 students and teachers. Police said they feared the incident may have been a revenge attack.
On 10 June, a senior Metropolitan Police officer confirmed there had been an eight-fold increase in the number of Islamophobic incidents since Rigby’s death, and that the real figure may be higher due to under-reporting.
In the London Borough of Hackney the Stamford Hill Shomrim, a Jewish volunteer Neighbourhood Patrol Group, made an offer of help to the local Muslim community . which was welcomed and subsequently commended by Hackney Police Borough Commander Chief Superintendent Matthew Horne.
Video footage controversy
————————
London police shoot attackers who killed British soldier Lee Rigby
————————
Video footage of one of the perpetrators justifying the killing of Lee Rigby was obtained by The Sun and ITN. ITN’s video, which was edited before it was broadcast, aired during the 18:30 ITV News bulletin before the 21:00 watershed, and again in its 22:00 bulletin. After being posted on the ITN website in the afternoon, the high level of visits caused the site to crash and go offline for around half an hour.
Total traffic on the site, which averages 860,000 unique users per week, reached 1.2 million for the day of the attack.
Managing editor of The Sun, Richard Caseby, said the newspaper had faced “a very difficult decision”. Both media outlets argued they had released the video “in the public interest”. BBC News showed some parts of the video. Sky News decided not to follow suit, as senior editors were of the opinion that the graphic images were “unnecessarily distressing”. Both ITV and the BBC ran warnings before showing the footage.
Most of Britain’s national daily newspapers grabbed still images from the video footage for their front pages the next morning.
A BBC executive said that the news organisation edited the footage before broadcasting, and “dealt with the material as carefully as we could.” The spokesman said they “thought very carefully about the pictures… and gave great consideration to how we used the footage”. They argued that the footage was an important element of the story and shed light on the perpetrators and the possible motives for the attack.”
The Guardian reported there were “around 800 complaints from distressed viewers”.Most complaints were targeted at the television coverage, with ITV receiving 400 complaints in the 24 hours following the broadcast.
Sky News, which showed a still image of one of the suspected attackers with bloodied hands, received “a handful of complaints”.
On 17 June, the broadcasting standards watchdog Ofcom launched an investigation into broadcast of footage from the attack after receiving about 700 complaints. Ofcom published its findings on 6 January 2014, ruling that the news footage had not breached broadcasting regulations. Ofcom issued new guidelines to news outlets on giving appropriate warnings before airing distressing content.
Anti-terrorism task force
The UK government established a task force to look at ways of stemming the growth of Islamic extremism in Britain, focusing on the radicalisation of worshippers in mosques, university students and prisoners. The task force – chaired by David Cameron – had its inaugural meeting at 10 Downing Street on 3 June 2013, and includes Cabinet Ministers, and representatives from the police and intelligence services. Later that day Cameron made a House of Commons statement on the Woolwich attack, saying that lessons must be learned.
“When young men born and bred in this country are radicalised and turned into killers, we have to ask some tough questions about what is happening in our country. It is as if that for some young people there is a conveyor belt to radicalisation that has poisoned their minds with sick and perverted ideas. We need to dismantle this process at every stage – in schools, colleges, universities, on the internet, in our prisons, wherever it is taking place.”
Parliamentary inquiry
On 25 November 2014, the findings of a British parliamentary inquiry into the murder of Lee Rigby were published. The report found that the death could not have been prevented, although his killers had appeared in seven intelligence investigations.
In December 2012, Michael Adebowale had discussed killing a soldier on Facebook with a foreign-based extremist known as “Foxtrot”. The UK authorities did not have access to the details of the conversation until June 2013, when they were disclosed to GCHQ.
The Intelligence and Security Committee stated “Had MI5 had access to this exchange, their investigation into Adebowale would have become a top priority.” Facebook said that it did not comment on individual cases, but responded that “Facebook’s policies are clear, we do not allow terrorist content on the site and take steps to prevent people from using our service for these purposes.”
In an interview with BBC News on 26 November 2014, Richard Barrett, the former Director of Global Counter-terrorism at MI6, said that it was unfair to expect companies to monitor websites for all potentially extremist content. Facebook had blocked seven of Adebowale’s accounts prior to the killing, five of which had been flagged for links with extremism. The accounts had been flagged by an automated process, and no person at Facebook had manually checked the accounts.
Reactions
Queen Elizabeth II, political leaders and religious leaders variously expressed concern and distress over the incident, and called for calm. Prime Minister David Cameron made the following statement:
This country will be absolutely resolute in its stand against extremism and terror. This action was a betrayal of Islam and the Muslim communities that give so much to our country. We will defeat violent extremism by standing together. We will not rest until we know every detail.
The attackers told Ingrid Loyau-Kennett that] they wanted to start a war in London and she replied, “You are going to lose, it is you against many.” She speaks for all of us.
Many Muslim leaders denounced the attack. The Prime Minister’s statement was echoed by Shaykh Ibrahim Mogra, with the Archbishop of Canterbury, Justin Welby, the co-chair of the Christian Muslim Forum, in a joint statement.The Muslim Council of Britain said the attack “has no basis in Islam and we condemn this unreservedly”.
The head of the Ramadhan Foundation, Mohammed Shafiq, also condemned the attack. The director of Faith Matters and co-ordinator of the government-backed anti-Islamophobic project Tell MAMA stated:
“We, as the Muslim community, will work against anyone who promotes such hatred.”
“I’m not in the business of condemnation or condoning. I think if anyone needs to be condemned it is the British government and their foreign policy. It’s so clear that that is the cause.”
———————
Anjem Choudary defends Woolwich Attackers on Newsnight 2405.2013
———————
On BBC’s Newsnight, when Choudary was questioned about his role in the radicalisation of Michael Adebolajo, he denied any responsibility, and talked about such radicalisation as a means to an end. He stated that he believed that not many Muslims would disagree with what Adebolajo had said in his videoed statement.[131]
Asghar Bukhari of the UK Muslim Public Affairs Committee said that both the British Government and the Muslim community were at fault in dealing with “extremism”. He criticised the British Government for being involved in wars in Iraq and Afghanistan while “completely denying that it has anything to do with the political situation around the Muslim world”, and said that Muslim organisations “have failed their own community by not teaching these young, angry men how to get a democratic change to this policy that’s ruining so many lives”.
He described Muslim leaders as unwilling to bring about change, focussing on points of theology, rather than the practical education of young people in ways to achieve political change.
Baroness Neville-Jones, a former security minister and chairman of the British Joint Intelligence Committee, and Colonel Richard Kemp, a former Army commander, suggested blame could be put on internet hate preaching. Neville-Jones told the BBC Radio 4‘s Today programme that “the inspiration that comes from internet hate preaching and jihadist rhetoric… is a very, very serious problem now.”
George Galloway, then an MP, said that the attack on Lee Rigby was “indefensible”. He criticised British support for the Syrian rebels, stating that similar attacks are likely to occur “as long as we are, as a country, involved in spreading murder and mayhem across the Muslim world.”
Former UK Prime Minister Tony Blair saw the attack not as an isolated expression of two crazed individuals but part of the broader “problem within Islam”.
In foreign press reports there was widespread outrage and condemnation of the killing. Yusif al-Shihab, in Kuwait‘s Al-Abas, stated that the assailants have “deformed the image of Islam” while Batir Mohammad Wardum in the Jordanian daily Al-Dustur, and other Middle Eastern newspapers, stressed that their actions have endangered the lives of thousands of Muslims.
The killing triggered a public outpouring of grief and hundreds of bunches of flowers, teddy bears, poems and other tributes were left near the scene of the crime.
In a statement issued on 28 May, Adebolajo’s relatives condemned terrorism and violence in the name of religion, and expressed their horror at Rigby’s death.
In October 2013 British anti-terrorist police warned several Muslims who had spoken out against Islamist extremism, some of them explicitly against the murder of Rigby, that they had been targeted in a video created by Al-Shabaab, the group responsible for the attack on the Westgate shopping mall in Kenya.
—————————–
Drummer Lee Rigby’s funeral
—————————–
Attempted copycat cases
On 19 February 2015, 19-year-old Brusthom Ziamani was found guilty of preparing a terrorist act. He was arrested in London in August 2014 while carrying a 12-inch knife, hammer and black jihadist flag. Ziamani had said that he intended to attack and kill soldiers, and had described Adebolajo as a “legend”.
On 20 March Ziamani was sentenced to 22 years in prison.On 29 April 2015, 18-year-old Kazi Islam, who was inspired by the murder, was convicted by a jury at the Old Bailey of grooming a vulnerable friend to kill two soldiers, and buying ingredients for a pipe bomb.
On 29 May, he was sentenced to eight years in a young offenders’ institution.
On 14 January 2015, 26-year-old white supremacist Zack Davies of Mold, Flintshire attacked a Sikh dentist in a Tesco supermarket with a machete and a hammer. He claimed in court that the attack was revenge for the murder of Rigby.
Davies was sentenced to life imprisonment on 11 September 2015
As I child I learned the stories & legends of the Battle of Boyne & Siege of Derry at my grandfather’s & father’s knees, becoming immersed in the Loyalist culture that would shape & dominate my whole existence.
Sergeant Talaiasi Labalaba with Omani children in Oman
Labalaba, aged 30, was shot dead whilst firing a 25-pounder gun at the attacking guerrilla forces.
He displayed notable bravery by continuing to fire the 25 pounder single handed in spite of being seriously wounded when a bullet hit him on the jaw, after his Omani loader was seriously wounded early in the battle.
Captain Mike Kealy, fellow troopers Tommy Tobin and Sekonaia Takavesi ran a gauntlet of enemy fire but arrived too late to save Labalaba. Both the troopers were also hit,
Sergeant Talaiasi Labalaba (left) and Sgt Sekonaia Takavesi (Right)
Takavesi was wounded in the back and Tobin was killed when a round crept through the sand-bagged walls and hit him in the face. Labalaba’s actions helped to keep the insurgents pinned down until Strikemaster jets of the SOAF arrived to drive back the attackers while reinforcements from Salalah could be organised.
BAC Strikemaster Mk82a
Fellow SAS trooper Roger Cole in his book of the battle, SAS: Operation Storm, paid tribute to Labalaba saying if the guerrilla force had taken the 25-pounder then the SAS would have surely lost the battle.
Labalaba was awarded a posthumous Mention in Dispatches for his actions in the Battle of Mirbat, although some of his former comrades have campaigned for him to be awarded a posthumous Victoria Cross. His body was returned to England and buried in the cemetery at St Martin’s Church, Hereford.
Grave of Sgt. T. Labalaba BEM, Special Air Service
Grave of Sgt. T. Labalaba BEM, Special Air Service
He was fighting a secret and brutal war in a dusty land far from home.
But while the 1972 clash between British forces and Communist rebels in Oman has long passed into history, the actions of Sergeant Talaiasi Labalaba have not.
Instead, the Fijian soldier’s exemplary courage under fire places him high on the pantheon of SAS heroes
Labalaba is remembered to this day. Next month, a statue of the soldier will be unveiled at SAS headquarters in Hereford in the run-up to Remembrance Sunday.
And in a week when the British National Party was accused of appropriating the British military for their own ends – and airbrushing ethnic minority personnel from history – his story seems particularly poignant.
The sergeant and his nine-strong SAS unit were part of a clandestine mission to protect the Sultan of Oman from the People’s Front for the Liberation of the Occupied Arab Gulf.
By July 1972, they had been in the country for a year and the assignment – codenamed Operation Jaguar – appeared to be going well.
But then the rebels stuck back. On the morning of July 19, around 250 elite fighters stormed MIrbat, a small town on the Arabian sea, leaving the SAS pinned down inside a fort.
As his comrades fought an increasingly desperate battle to hold off 250 insurgents, it dawned on Labalaba, 30, that they were about to be overrun.
With no cover and facing certain death, he sprinted across 800 metres of exposed ground to reach a 25-pound field-gun.
It was a brave – but apparently futile manouevre – as the huge weapon took three men to operate.
That, however, did not deter Labalaba. Nor did facial injuries which would have rendered a lesser man helpless.
As British forces watched in astonishment, Labalaba turned the cumbersome gun on the enemy and opened fire at near point blank range.
Prejudice: Walter Tull was made a second lieutenant despite a ban on the commissioning of soldiers with ‘Asiatic or negroid features’
He went on for six hours, decimating the rebels and ultimately paying for his courage with his life.
His comrades found him slumped face down by the massive gun. His selfless actions undoubtedly saved many of the British soldiers holed up inside the fort and won him a posthumous Mention in Despatches.
For many, his statue will be a long-overdue memorial to one of the SAS’s greatest heroes.
It is also some small recompense to thousands of ethnic minority servicemen, many from Commonwealth countries, who feel their courage and devotion has not been recognised in the same way as their white counterparts.
Labalaba and his comrade Trooper Sekonaia Takavesi, a fellow Fijian who rushed to his aid after he was wounded, are two of the most celebrated examples.
But there are countless others.
Among those are Second Lieutenant Walter Tull, born in Kent but the son of a former Barbados slave, who volunteered for the army just a week after the declaration of World War One.
He survived many battles, was the first British Army black officer to take charge of white troops and eventually died on the Western Front in 1918.
Tull’s career, however, was blighted by prejudice.
Despite being recommended for the Military Cross for ‘gallantry and coolness under fire’, he never received it.
Senior officers had defied a rule which prevented soldiers with ‘Asiatic or negroid features’ being commissioned to make Tull a second lieutenant.


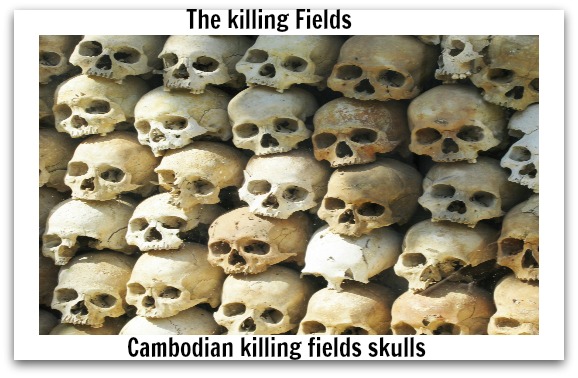


.JPG)


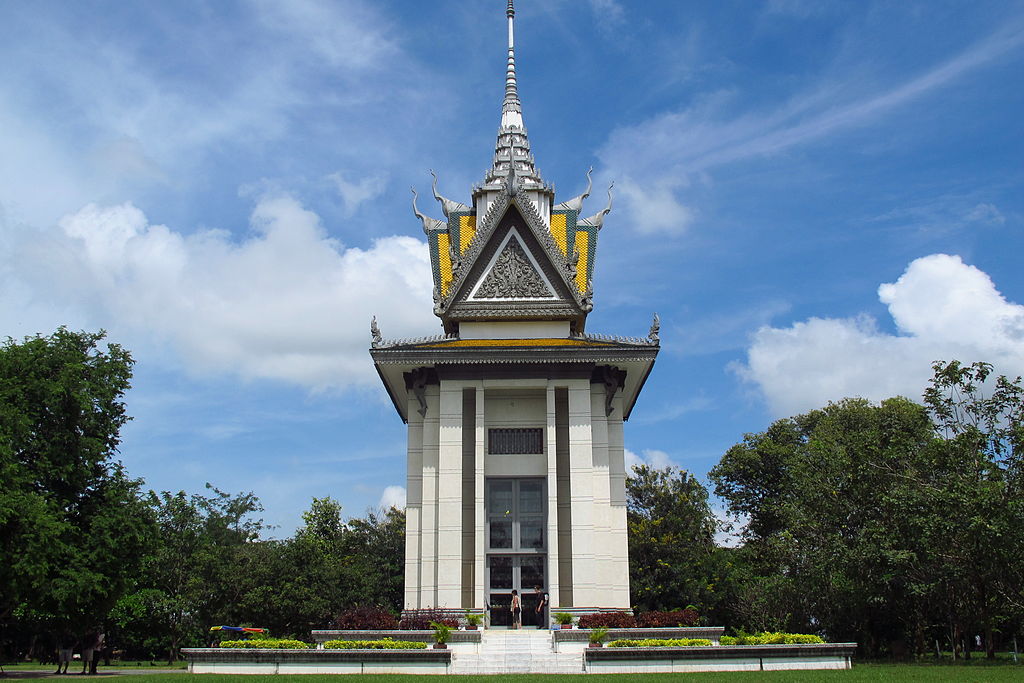


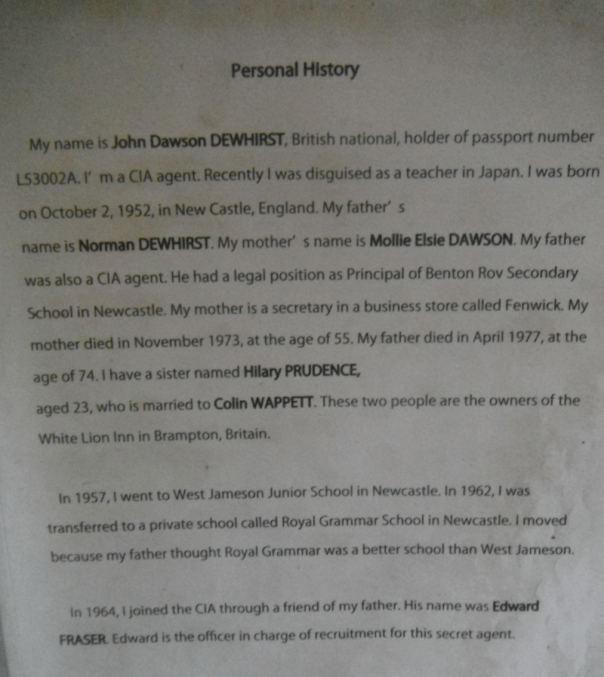


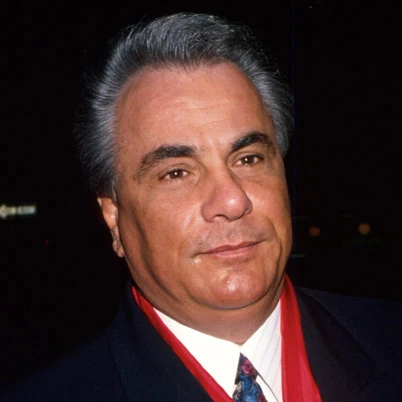
:format(jpeg):mode_rgb():quality(40)/discogs-images/R-4479108-1366037733-6556.jpeg.jpg)

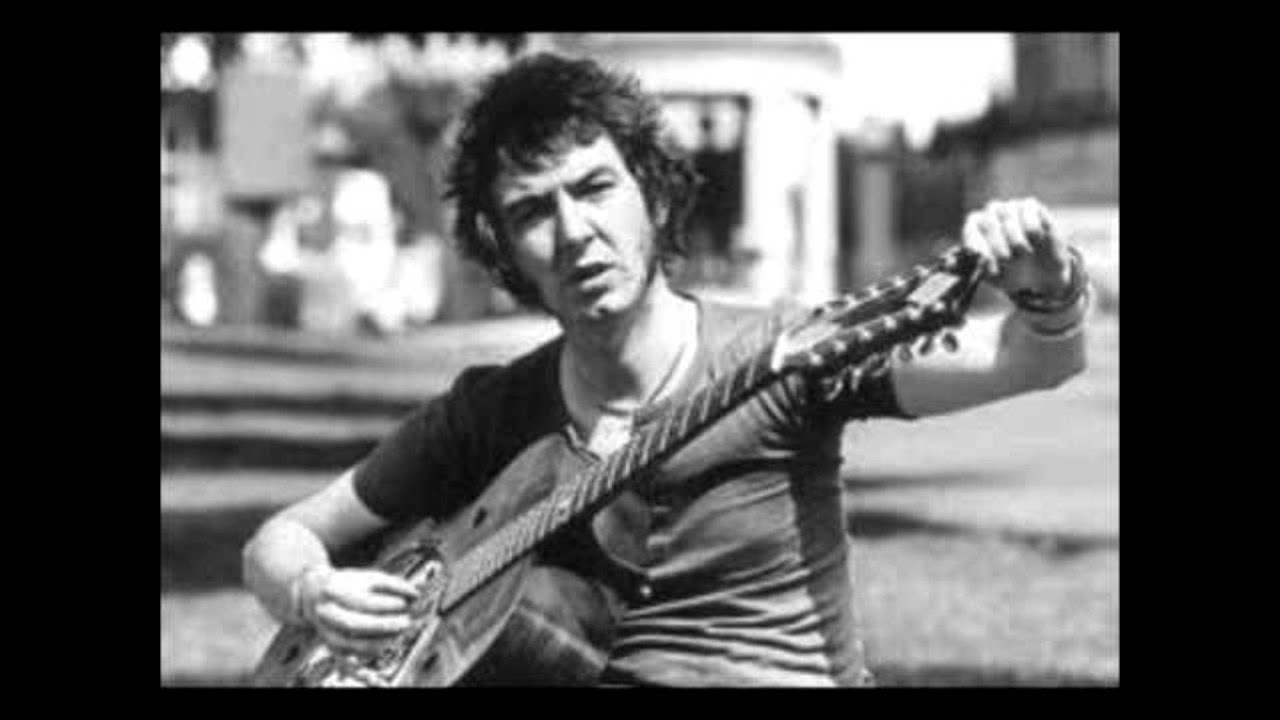

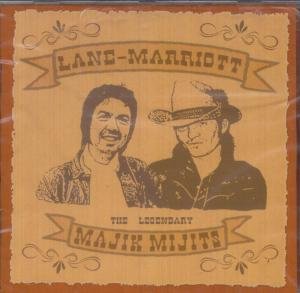


.jpg)


_Jutland.jpg)