Category Archives: History

Normandy Landings – D-Day – They Fought & Died for our Freedom

Normandy Landings –  D-Day

———————————————————————————–

Rare D Day Footage In Colour

———————————————————————————–

The Normandy landings (codenamed Operation Neptune) were the landing operations on 6 June 1944 (termed D-Day) of the Allied invasion of Normandy in Operation Overlord during World War II. The largest seaborne invasion in history, the operation began the liberation of German-occupied northwestern Europe from Nazi control, and contributed to the Allied victory on the Western Front.

————————————————————————————————————-

Archive Video Of The D-Day Normandy Landings

————————————————————————————————————-

Planning for the operation began in 1943. In the months leading up to the invasion, the Allies conducted a substantial military deception, codenamed Operation Bodyguard, to mislead the Germans as to the date and location of the main Allied landings. The weather on D-Day was far from ideal, but postponing would have meant a delay of at least two weeks, as the invasion planners had requirements for the phase of the moon, the tides, and the time of day that meant only a few days in each month were deemed suitable. Hitler placed German Field Marshal Erwin Rommel in command of German forces and of developing fortifications along the Atlantic Wall in anticipation of an Allied invasion.

The amphibious landings were preceded by extensive aerial and naval bombardment and an airborne assault—the landing of 24,000 British, US, and Canadian airborne troops shortly after midnight. Allied infantry and armoured divisions began landing on the coast of France at 06:30. The target 50-mile (80 km) stretch of the Normandy coast was divided into five sectors: Utah, Omaha, Gold, Juno, and Sword Beach. Strong winds blew the landing craft east of their intended positions, particularly at Utah and Omaha. The men landed under heavy fire from gun emplacements overlooking the beaches, and the shore was mined and covered with obstacles such as wooden stakes, metal tripods, and barbed wire, making the work of the beach clearing teams difficult and dangerous. Casualties were heaviest at Omaha, with its high cliffs. At Gold, Juno, and Sword, several fortified towns were cleared in house-to-house fighting, and two major gun emplacements at Gold were disabled using specialised tanks.

————————————————————————-

Surviving D-Day Omaha Beach 1944 – Full Documentary

————————————————————————-

The Allies failed to achieve all of their goals on the first day. Carentan, St. Lô, and Bayeux remained in German hands, and Caen, a major objective, was not captured until 21 July. Only two of the beaches (Juno and Gold) were linked on the first day, and all five bridgeheads were not connected until 12 June. However, the operation gained a foothold that the Allies gradually expanded over the coming months. German casualties on D-Day were around 1,000 men. Allied casualties were at least 10,000, with 4,414 confirmed dead. Museums, memorials, and war cemeteries in the area host many visitors each year.

Background

Between 27 May and 4 June 1940, over 338,000 troops of the British Expeditionary Force and the French Army, trapped along the northern coast of France, were evacuated in the Dunkirk evacuation.[12] After the Germans invaded the Soviet Union in June 1941, Soviet leader Joseph Stalin began pressing for the creation of a second front in western Europe.[13] In late May 1942 the Soviet Union and United States made a joint announcement that a “… full understanding was reached with regard to the urgent tasks of creating a second front in Europe in 1942.”[14] However, Churchill persuaded Roosevelt to postpone the promised invasion as, even with American help, the Allies did not have adequate forces for such a strike.[15]

Instead of an immediate return to France, the Western Allies staged offensives in the Mediterranean Theater of Operations, where British troops were already stationed. By mid-1943, the North African Campaign had been won. The Allies then launched the invasion of Sicily in July 1943, and Italy in September 1943. By then, Soviet forces were on the offensive and had won a major victory at the Battle of Stalingrad. The decision to undertake a cross-channel invasion within the next year was taken at the Trident Conference in Washington in May 1943.[16] Initial planning was constrained by the number of available landing craft, most of which were already committed in the Mediterranean and Pacific.[17] At the Tehran Conference in November 1943, Roosevelt and Churchill promised Stalin that they would open the long-delayed second front in May 1944.[18]

Meeting of the Supreme Headquarters Allied Expeditionary Force (SHAEF), 1 February 1944. Front row: Air Chief Marshal Arthur Tedder; General Dwight D. Eisenhower; General Bernard Montgomery. Back row: Lieutenant General Omar Bradley; Admiral Bertram Ramsay; Air Chief Marshal Trafford Leigh-Mallory; Lieutenant General Walter Bedell Smith

Four sites were considered for the landings: Brittany, the Cotentin Peninsula, Normandy, and Pas de Calais. As Brittany and Cotentin are peninsulas, it would have been possible for the Germans to cut off the Allied advance at a relatively narrow isthmus, so these sites were rejected.[19] As the Pas de Calais is the closest point in continental Europe to Britain, the Germans considered it to be the most likely initial landing zone, so it was the most heavily fortified region.[20] But it offered few opportunities for expansion, as the area is bounded by numerous rivers and canals,[21] whereas landings on a broad front in Normandy would permit simultaneous threats against the port of Cherbourg, coastal ports further west in Brittany, and an overland attack towards Paris and eventually into Germany. Normandy was hence chosen as the landing site.[22] The most serious drawback of the Normandy coast—the lack of port facilities—would be overcome through the development of artificial Mulberry harbours.[23] A series of specialised tanks, nicknamed Hobart’s Funnies, were created to deal with conditions expected during the Normandy campaign, such as scaling sea walls and providing close support on the beach.[24]

The Allies planned to launch the invasion on 1 May 1944.[21] The initial draft of the plan was accepted at the Quebec Conference in August 1943. General Dwight D. Eisenhower was appointed commander of Supreme Headquarters Allied Expeditionary Force (SHAEF).[25] General Bernard Montgomery was named as commander of the 21st Army Group, which comprised all of the land forces involved in the invasion.[26] On 31 December 1943, Eisenhower and Montgomery first saw the plan, which proposed amphibious landings by three divisions with two more divisions in support. The two generals immediately insisted that the scale of the initial invasion be expanded to five divisions, with airborne descents by three additional divisions, to allow operations on a wider front and speed up the capture of the port at Cherbourg.[27] The need to acquire or produce extra landing craft for the expanded operation meant that the invasion had to be delayed to June.[27] Eventually, thirty-nine Allied divisions would be committed to the Battle of Normandy: twenty-two American, twelve British, three Canadian, one Polish, and one French, totalling over a million troops[28] all under overall British command.[29]

Operations

Operation Overlord was the name assigned to the establishment of a large-scale lodgement on the Continent. The first phase, the amphibious invasion and establishment of a secure foothold, was codenamed Operation Neptune.[23] To gain the air superiority needed to ensure a successful invasion, the Allies undertook a bombing campaign (codenamed Operation Pointblank) that targeted German aircraft production, fuel supplies, and airfields.[23] Elaborate deceptions, codenamed Operation Bodyguard, were undertaken in the months leading up to the invasion to prevent the Germans from learning the timing and location of the invasion.[30]

The landings were to be preceded by airborne landings near Caen on the eastern flank to secure the Orne River bridges and north of Carentan on the western flank. The Americans, assigned to land at Utah Beach and Omaha Beach, were to attempt to capture Carentan and St. Lô the first day, then cut off the Cotentin Peninsula and eventually capture the port facilities at Cherbourg. The British at Sword Beach and Gold Beach and Canadians at Juno Beach would protect the American flank and attempt to establish airfields near Caen. A secure lodgement would be established and an attempt made to hold all territory north of the AvranchesFalaise line within the first three weeks.[31][32] Montgomery envisaged a ninety-day battle, lasting until all Allied forces reached the Seine.[33]

Deception plans

Shoulder patches were designed for units of the fictitious First United States Army Group under Patton.

Under the overall umbrella of Operation Bodyguard, the Allies conducted several subsidiary operations designed to mislead the Germans as to the date and location of the Allied landings.[34] Operation Fortitude included Fortitude North, a misinformation campaign using fake radio traffic to lead the Germans into expecting an attack on Norway,[35] and Fortitude South, a major deception involving the creation of a fictitious First United States Army Group under Lieutenant General George S. Patton, supposedly located in Kent and Sussex. Fortitude South was intended to deceive the Germans into believing that the main attack would take place at Calais.[30][36] Genuine radio messages from 21st Army Group were first routed to Kent via landline and then broadcast, to give Germans the impression that most of the Allied troops were stationed there.[37] Patton was stationed in England until 6 July, thus continuing to deceive the Germans into believing a second attack would take place at Calais.[38]

Many of the German radar stations on the French coast were destroyed in preparation for the landings.[39] In addition, on the night before the invasion, a small group of Special Air Service (SAS) operators deployed dummy paratroopers over Le Havre and Isigny. These dummies led the Germans to believe that an additional airborne landing had occurred. On that same night, in Operation Taxable, No. 617 Squadron RAF dropped strips of “window”, metal foil that caused a radar return which was mistakenly interpreted by German radar operators as a naval convoy near Le Havre. The illusion was bolstered by a group of small craft towing barrage balloons. A similar deception was undertaken near Boulogne-sur-Mer in the Pas de Calais area by No. 218 Squadron RAF in Operation Glimmer.[40][2]

Weather

The invasion planners determined a set of conditions involving the phase of the moon, the tides, and the time of day that would be satisfied on only a few days in each month. A full moon was desirable, as it would provide illumination for aircraft pilots and have the highest tides. The Allies wanted to schedule the landings for shortly before dawn, midway between low and high tide, with the tide coming in. This would improve the visibility of obstacles on the beach, while minimising the amount of time the men would be exposed in the open.[41] Eisenhower had tentatively selected 5 June as the date for the assault. However, on 4 June, conditions were unsuitable for a landing: high winds and heavy seas made it impossible to launch landing craft, and low clouds would prevent aircraft from finding their targets.[42]

Group Captain James Stagg of the Royal Air Force (RAF) met Eisenhower on the evening of 4 June. He and his meteorological team predicted that the weather would improve enough for the invasion to proceed on 6 June.[43] The next available dates with the required tidal conditions (but without the desirable full moon) would be two weeks later, from 18 to 20 June. Postponement of the invasion would have required recalling men and ships already in position to cross the Channel, and would have increased the chance that the invasion plans would be detected.[44] After much discussion with the other senior commanders, Eisenhower decided that the invasion should go ahead on the 6th.[45] A major storm battered the Normandy coast from 19 to 22 June, which would have made the beach landings impossible.[42]

Allied control of the Atlantic meant German meteorologists had less information than the Allies on incoming weather patterns.[39] As the Luftwaffe meteorological centre in Paris was predicting two weeks of stormy weather, many Wehrmacht commanders left their posts to attend war games in Rennes, and men in many units were given leave.[46] Field Marshal Erwin Rommel returned to Germany for his wife’s birthday and to meet Hitler to try to obtain more Panzers.[47]

German order of battle

Nazi Germany had at its disposal fifty divisions in France and the Low Countries, with another eighteen stationed in Denmark and Norway. Fifteen divisions were in the process of formation in Germany.[48] Combat losses throughout the war, particularly on the Eastern Front, meant that the Germans no longer had a pool of able young men from which to draw. German soldiers were now on average six years older than their Allied counterparts. Many in the Normandy area were Ostlegionen (eastern legions) – conscripts and volunteers from Russia, Mongolia, and elsewhere. They were provided mainly with unreliable captured equipment and lacked motorised transport.[49] Many German units were under strength.[50]

German Supreme commander: Adolf Hitler

Cotentin Peninsula

Allied forces attacking Utah Beach faced the following German units stationed on the Cotentin Peninsula:

Grandcamps Sector

German troops using captured French tanks (Beutepanzer) in Normandy, 1944

Americans assaulting Omaha Beach were faced the following troops:

  • 352nd Infanterie-Division logo.jpg 352nd Infantry Division under Generalleutnant Dietrich Kraiss, a full-strength unit of around 12,000 brought in by Rommel on 15 March and reinforced by two additional regiments.[53]
    • 914th Grenadier Regiment[54]
    • 915th Grenadier Regiment (as reserves)[54]
    • 916th Grenadier Regiment[54]
    • 726th Infantry Regiment (from 716th Infantry Division)[54]
    • 352nd Artillery Regiment[54]

Allied forces at Gold and Juno faced the following elements of the 352nd Infantry Division:

  • 914th Grenadier Regiment[55]
  • 915th Grenadier Regiment[55]
  • 916th Grenadier Regiment[55]
  • 352nd Artillery Regiment[55]

Forces around Caen

Allied forces attacking Gold, Juno, and Sword Beaches faced the following German units:

Atlantic Wall

Main articles: Atlantic Wall and English Channel

Map of the Atlantic Wall, shown in green

  German Reich and Axis powers
  Allies
  Neutral countries

Alarmed by the raids on St Nazaire and Dieppe in 1942, Hitler had ordered the construction of fortifications all along the Atlantic coast, from Spain to Norway, to protect against an expected Allied invasion. He envisioned 15,000 emplacements manned by 300,000 troops, but shortages, particularly of concrete and manpower, meant that most of the strongpoints were never built.[59] As it was expected to be the site of the invasion, the Pas de Calais was heavily defended.[59] In the Normandy area, the best fortifications were concentrated at the port facilities at Cherbourg and Saint-Malo.[27] Rommel was assigned to oversee the construction of further fortifications along the expected invasion front, which stretched from the Netherlands to Cherbourg,[59][60] and was given command of the newly re-formed Army Group B, which included the 7th Army, the 15th Army, and the forces guarding the Netherlands. Reserves for this group included the 2nd, 21st, and 116th Panzer divisions.[61][62]

Rommel believed that the Normandy coast could be a possible landing point for the invasion, so he ordered the construction of extensive defensive works along that shore. In addition to concrete gun emplacements at strategic points along the coast, he ordered wooden stakes, metal tripods, mines, and large anti-tank obstacles to be placed on the beaches to delay the approach of landing craft and impede the movement of tanks.[63] Expecting the Allies to land at high tide so that the infantry would spend less time exposed on the beach, he ordered many of these obstacles to be placed at the high water mark.[41] Tangles of barbed wire, booby traps, and the removal of ground cover made the approach hazardous for infantry.[63] On Rommel’s order, the number of mines along the coast was tripled.[27] The Allied air offensive over Germany had crippled the Luftwaffe and established air supremacy over western Europe, so Rommel knew he could not expect effective air support.[64] The Luftwaffe could muster only 815 aircraft[65] over Normandy in comparison to the Allies’ 9,543.[66] Rommel arranged for booby-trapped stakes known as Rommelspargel (Rommel’s asparagus) to be installed in meadows and fields to deter airborne landings.[27]

Armoured reserves

Rommel believed that Germany’s best chance was to stop the invasion at the shore. He requested that the mobile reserves, especially tanks, be stationed as close to the coast as possible. Rundstedt, Geyr, and other senior commanders objected. They believed that the invasion could not be stopped on the beaches. Geyr argued for a conventional doctrine: keeping the Panzer formations concentrated in a central position around Paris and Rouen and deploying them only when the main Allied beachhead had been identified. He also noted that, in the Italian Campaign, the armoured units stationed near the coast had been damaged by naval bombardment. Rommel’s opinion was that, because of Allied air supremacy, the large-scale movement of tanks would not be possible once the invasion was under way. Hitler made the final decision, which was to leave three Panzer divisions under Geyr’s command and give Rommel operational control of three more as reserves. Hitler took personal control of four divisions as strategic reserves, not to be used without his direct orders.[67][68][69]

Allied order of battle

D-day assault routes into Normandy

Commander, SHAEF: General Dwight D. Eisenhower
Commander, 21st Army Group: General Bernard Montgomery[70]

American zones

Commander, First Army (United States): General Omar Bradley[70]

The First Army contingent totalled approximately 73,000 men, including 15,600 from the airborne divisions.

———————————————–

D-Day – Omaha/Utah Beach

———————————————–

                                                                                                      
Utah Beach

———————————————–

Omaha beach amazing real pictures

———————————————–

Omaha Beach

British and Canadian zones

Royal Marine Commandos attached to 3rd Infantry Division move inland from Sword Beach, 6 June 1944.

Commander, Second Army (Britain and Canada): Lieutenant General Sir Miles Dempsey[70]

Overall, the Second Army contingent consisted of 83,115 men, 61,715 of them British.[11] The nominally British air and naval support units included a large number of personnel from Allied nations, including several RAF squadrons manned almost exclusively by overseas air crew. For example, the Australian contribution to the operation included a regular Royal Australian Air Force (RAAF) squadron, nine Article XV squadrons, and hundreds of personnel posted to RAF units and RN warships.[74] The RAF supplied two-thirds of the aircraft involved in the invasion.[75]

———————————————————————–

D-Day Gold Beach WWII British Landing Beach Normandy France

———————————————————————–

Gold Beach

———————————————————————–

WW2: Juno Beach

———————————————————————–

Juno Beach
                                              

———————————————————————————-

D-Day revisited: assault on Sword Beach

———————————————————————————-

Sword Beach

Some elements of the 79th Armoured Division (commanded by Major General Percy Hobart[79]) provided specialised armoured vehicles which supported the landings on all beaches in Second Army’s sector.

Coordination with the French Resistance

French Resistance members and Allied paratroopers discuss the situation during the Battle of Normandy in 1944

Through the London-based État-major des Forces Françaises de l’Intérieur (French Forces of the Interior), the British Special Operations Executive orchestrated a massive campaign of sabotage to be implemented by the French Resistance. The Allies developed four plans for the Resistance to execute on D-Day and the following days:

  • Plan Vert was a 15-day operation to sabotage the rail system.
  • Plan Bleu dealt with destroying electrical facilities.
  • Plan Tortue was a delaying operation aimed at the enemy forces that would potentially reinforce Axis forces at Normandy.
  • Plan Violet dealt with cutting underground telephone and teleprinter cables.[80]

The resistance was alerted to carry out these tasks by messages personnels transmitted by the BBC’s French service from London. Several hundred of these messages, which might be snatches of poetry, quotations from literature, or random sentences, were regularly transmitted, masking the few that were actually significant. In the weeks preceding the landings, lists of messages and their meanings were distributed to resistance groups.[81] An increase in radio activity on 5 June was correctly interpreted by German intelligence to mean that an invasion was imminent or underway. However, because of the barrage of previous false warnings and misinformation, most units ignored the warning.[82][83]

A 1965 report from the Counter-insurgency Information Analysis Center details the results of the French Resistance’s sabotage efforts: “In the southeast, 52 locomotives were destroyed on 6 June and the railway line cut in more than 500 places. Normandy was isolated as of 7 June.”[84]

Naval activity

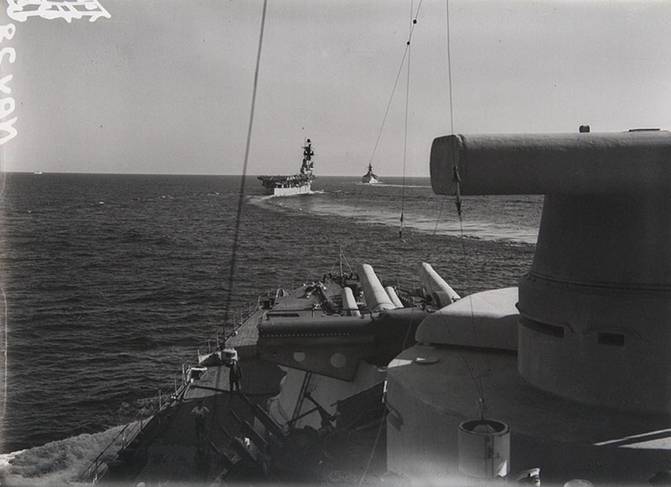
Large landing craft convoy crosses the English Channel on 6 June 1944.

Naval operations for the invasion were described by historian Correlli Barnett as a “never surpassed masterpiece of planning”.[85] In overall command was British Admiral Sir Bertram Ramsay, who had served as Flag officer at Dover during the Dunkirk evacuation four years earlier. He had also been responsible for the naval planning of the invasion of North Africa in 1942, and one of the two fleets carrying troops for the invasion of Sicily the following year.[86]

The invasion fleet was drawn from eight different navies, comprising 6,939 vessels: 1,213 warships, 4,126 landing craft of various types, 736 ancillary craft, and 864 merchant vessels.[11] The majority of the fleet was supplied by the UK and Canada, who provided 892 warships and 3,261 landing craft.[75] There were 195,700 naval personnel involved.[11] The invasion fleet was split into the Western Naval Task Force (under Admiral Alan G Kirk) supporting the American sectors and the Eastern Naval Task Force (under Admiral Sir Philip Vian) in the British and Canadian sectors.[87][86] Available to the fleet were five battleships, twenty cruisers, sixty-five destroyers, and two monitors.[88] German ships in the area on D-Day included three torpedo boats, twenty-nine fast attack craft, thirty-six R boats, and thirty-six minesweepers and patrol boats.[89] The Germans also had several U-boats available, and all the approaches had been heavily mined.[41]

Naval losses

At 05:10, four German torpedo boats reached the Eastern Task Force and launched fifteen torpedoes, sinking the Norwegian destroyer HNoMS Svenner off Sword beach but missing the battleships HMS Warspite and Ramillies. After firing, the German vessels turned away and fled east into a smoke screen that had been laid by the RAF to shield the fleet from the long-range battery at Le Havre.[90] Allied losses to mines included USS Corry off Utah and USS PC-1261, a 173-foot patrol craft.[91] In addition, many landing craft were lost.[92]

Bombing

Main article: Bombing of Normandy

Map of the invasion area showing channels cleared of mines, location of vessels engaged in bombardment, and targets on shore

Bombing of Normandy began around midnight with over 2,200 British and American bombers attacking targets along the coast and further inland.[41] The coastal bombing attack was largely ineffective at Omaha, because low cloud cover made the assigned targets difficult to see. Concerned about inflicting casualties on their own troops, many bombers delayed their attacks too long and failed to hit the beach defences.[93] The Germans had 570 aircraft stationed in Normandy and the Low Countries on D-Day, and another 964 in Germany.[41]

Minesweepers began clearing channels for the invasion fleet shortly after midnight and finished just after dawn without encountering the enemy.[94] The Western Task Force included the battleships Arkansas, Nevada, and Texas, plus eight cruisers, twenty-eight destroyers, and one monitor.[95] The Eastern Task Force included the battleships HMS Ramillies and Warspite and the monitor HMS Roberts, twelve cruisers, and thirty-seven destroyers.[6] Naval bombardment of areas behind the beach commenced at 05:45, while it was still dark, with the gunners switching to pre-assigned targets on the beach as soon as it was light enough to see, at 05:50.[96] Since troops were scheduled to land at Utah and Omaha starting at 06:30 (an hour earlier than the British beaches), these areas received only about 40 minutes of naval bombardment before the assault troops began to land on the shore.[97] Some of the landing craft had been modified to provide close support fire, and self-propelled amphibious Duplex-Drive tanks (DD tanks), specially designed for the Normandy landings, were to land shortly before the infantry to provide covering fire. However, few arrived in advance of the infantry, and many sank before reaching the shore, especially at Omaha.[98][99]

The landings

Airborne operations

The success of the amphibious landings depended on the establishment of a secure lodgement from which to expand the beachhead to allow the buildup of a well-supplied force capable of breaking out. The amphibious forces were especially vulnerable to strong enemy counter-attacks before the buildup of sufficient forces in the beachhead could be accomplished. To slow or eliminate the enemy’s ability to organise and launch counter-attacks during this critical period, airborne operations were used to seize key objectives such as bridges, road crossings, and terrain features, particularly on the eastern and western flanks of the landing areas. The airborne landings some distance behind the beaches were also intended to ease the egress of the amphibious forces off the beaches, and in some cases to neutralise German coastal defence batteries and more quickly expand the area of the beachhead.[100][101]

The US 82nd and 101st Airborne Divisions were assigned to objectives west of Utah Beach, where they hoped to capture and control the few narrow causeways through terrain that had been intentionally flooded by the Germans. Reports from Allied intelligence in mid-May of the arrival of the German 91st Infantry Division meant the intended drop zones had to be shifted eastward and to the south.[102] The British 6th Airborne Division, on the eastern flank, was assigned to capture intact the bridges over the Caen Canal and River Orne, destroy five bridges over the Dives 6 miles (9.7 km) to the east, and destroy the Merville Gun Battery overlooking Sword Beach.[103] Free French paratroopers from the British SAS Brigade were assigned to objectives in Brittany from 5 June through August in Operations Dingson, Samwest, and Cooney.[104][105]

BBC war correspondent Robert Barr described the scene as paratroopers prepared to board their aircraft:

Their faces were darkened with cocoa; sheathed knives were strapped to their ankles; tommy guns strapped to their waists; bandoliers and hand grenades, coils of rope, pick handles, spades, rubber dinghies hung around them, and a few personal oddments, like the lad who was taking a newspaper to read on the plane … There was an easy familiar touch about the way they were getting ready, as though they had done it often before. Well, yes, they had kitted up and climbed aboard often just like this – twenty, thirty, forty times some of them, but it had never been quite like this before. This was the first combat jump for every one of them.[106]

American airborne landings

Gliders are delivered to the Cotentin Peninsula by Douglas C-47 Skytrains. 6 June 1944.

The American airborne landings began with the arrival of pathfinders at 00:15. Navigation was difficult because of a bank of thick cloud, and as a result only one of the five paratrooper drop zones was accurately marked with radar signals and Aldis lamps.[107] Paratroopers of the US 82nd and 101st Airborne Divisions, numbering over 13,000 men, were delivered by Douglas C-47 Skytrains of the IX Troop Carrier Command.[108] To avoid flying over the invasion fleet, the planes arrived from the west over the Cotentin Peninsula and exited over Utah Beach.[109][107]

Paratroops from 101st Airborne were dropped beginning around 01:30, tasked with controlling the causeways behind Utah Beach and destroying road and rail bridges over the Douve River.[110] The C-47s could not fly in a tight formation because of thick cloud cover, and many paratroopers were dropped far from their intended landing zones. Many planes came in so low that they were under fire from both flak and machine gun fire. Some paratroopers were killed on impact when their parachutes did not have time to open, and others drowned in the flooded fields.[111] Gathering together into fighting units was made difficult by a shortage of radios and by the bocage terrain, with its hedgerows, stone walls, and marshes.[112][113] Some units did not arrive at their targets until afternoon, by which time several of the causeways had already been cleared by members of the 4th Infantry Division moving up from the beach.[114]

Troops of the 82nd Airborne began arriving around 02:30, with the primary objective of capturing two bridges over the River Merderet and destroying two bridges over the Douve.[110] On the east side of the river, 75 per cent of the paratroopers landed in or near their drop zone, and within two hours they captured the important crossroads at Sainte-Mère-Église (the first town liberated in the invasion[115]) and began working to protect the western flank.[116] Because of the failure of the pathfinders to accurately mark their drop zone, the two regiments dropped on the west side of the Merderet were extremely scattered, with only four per cent landing in the target area.[116] Many landed in nearby swamps, with much loss of life.[117] Paratroopers consolidated into small groups, usually a combination of men of various ranks from different units, and attempted to concentrate on nearby objectives.[118] They captured but failed to hold the Merderet River bridge at La Fière, and fighting for the crossing continued for several days.[119]

Reinforcements arrived by glider around 04:00 (Mission Chicago and Mission Detroit), and 21:00 (Mission Keokuk and Mission Elmira), bringing additional troops and heavy equipment. Like the paratroopers, many landed far from their drop zones.[120] Even those that landed on target experienced difficulty, with heavy cargo such as Jeeps shifting during landing, crashing through the wooden fuselage, and in some cases crushing personnel on board.[121]

After 24 hours, only 2,500 men of the 101st and 2,000 of the 82nd Airborne were under the control of their divisions, approximately a third of the force dropped. This wide dispersal had the effect of confusing the Germans and fragmenting their response.[122] The 7th Army received notification of the parachute drops at 01:20, but Rundstedt did not initially believe that a major invasion was underway. The destruction of radar stations along the Normandy coast in the week before the invasion meant that the Germans did not detect the approaching fleet until 02:00.[123]

British and Canadian airborne landings

Main article: Operation Tonga

An abandoned Waco CG-4 glider is examined by German troops.

The first Allied action of D-Day was Operation Deadstick, a glider assault at 00:16 at Pegasus Bridge over the Caen Canal and the bridge (since renamed Horsa Bridge) over the Orne, half a mile (800 metres) to the east. Both bridges were quickly captured intact, with light casualties, by members of the 5th Parachute Brigade and the 7th (Light Infantry) Parachute Battalion.[124][125] The five bridges over the Dives were destroyed with minimal difficulty by the 3rd Parachute Brigade.[126][127] Meanwhile, the pathfinders tasked with setting up radar beacons and lights for further paratroopers (scheduled to begin arriving at 00:50 to clear the landing zone north of Ranville) were blown off course, and had to set up the navigation aids too far east. Many paratroopers, also blown too far east, landed far from their intended drop zones; some took hours or even days to be reunited with their units.[128][129] Major General Richard Gale arrived in the third wave of gliders at 03:30, along with equipment, such as antitank guns and jeeps, and more troops to help secure the area from counter-attacks, which were initially staged only by troops in the immediate vicinity of the landings.[130] At 02:00, the commander of the German 716th Infantry Division ordered Feuchtinger to move his 21st Panzer Division into position to counter-attack. However, as the division was part of the armoured reserve, Feuchtinger was obliged to seek clearance from OKW before he could commit his formation.[131] Feuchtinger did not receive orders until nearly 09:00, but in the meantime on his own initiative he put together a battle group (including tanks) to fight the British forces east of the Orne.[132]

Only 160 men out of the 600 members of the 9th Battalion tasked with eliminating the enemy battery at Merville arrived at the rendezvous point. Lieutenant Colonel Terence Otway, in charge of the operation, decided to proceed regardless, as the emplacement had to be destroyed by 06:00 to prevent it firing on the invasion fleet and the troops arriving on Sword Beach. In the Battle of Merville Gun Battery, Allied forces disabled the guns at a cost of 75 casualties. The emplacement was found to contain 75 mm guns rather than the expected 150 mm heavy coastal artillery.[133]

With this action, the last of the D-Day goals of the British 6th Airborne Division was achieved.[134] They were reinforced at 12:00 by commandos of the 1st Special Service Brigade, who landed on Sword Beach, and by the 6th Airlanding Brigade, who arrived in gliders at 21:00 in Operation Mallard.[135]

Utah Beach

Main article: Utah Beach

Carrying full equipment, American assault troops move onto Utah Beach. Landing craft can be seen in the background.

Utah Beach was in the area defended by two battalions of the 919th Grenadier Regiment.[136] Members of the 8th Infantry Regiment of the 4th Infantry Division were the first to land, arriving at 06:30. Their landing craft were pushed to the south by strong currents, and they found themselves about 2,000 yards (1.8 km) from their intended landing zone. This site turned out to be better, as there was only one strongpoint nearby rather than two, and bombers of IX Bomber Command had bombed the defences from lower than their prescribed altitude, inflicting considerable damage. In addition, the strong currents had washed ashore many of the underwater obstacles. The assistant commander of the 4th Infantry Division, Brigadier General Theodore Roosevelt, Jr., the first senior officer ashore, made the decision to “start the war from right here”, and ordered further landings to be re-routed.[137][138]

The initial assault battalions were quickly followed by 28 DD tanks and several waves of engineer and demolition teams to remove beach obstacles and clear the area directly behind the beach of obstacles and mines. Gaps were blown in the sea wall to allow quicker access for troops and tanks. Combat teams began to exit the beach at around 09:00, with some infantry wading through the flooded fields rather than travelling on the single road. They skirmished throughout the day with elements of the 919th Grenadier Regiment, who were armed with antitank guns and rifles. The main strongpoint in the area and another 1,300 yards (1.2 km) to the south were disabled by noon.[139] The 4th Infantry Division did not meet all of their D-Day objectives at Utah Beach, partly because they had arrived too far to the south, but they landed 21,000 troops at the cost of only 197 casualties.[140][141]

Pointe du Hoc

Main article: Pointe du Hoc

Rangers scaling the wall at Pointe du Hoc.

Pointe du Hoc, a prominent headland situated between Utah and Omaha, was assigned to two hundred men of 2nd Ranger Battalion, commanded by Lieutenant Colonel James Rudder. Their task was to scale the 30-metre (98 ft) cliffs with grappling hooks, ropes, and ladders to destroy the coastal gun battery located at the top. The cliffs were defended by the German 352nd Infantry Division and French collaborators firing from above.[142] Allied destroyers Satterlee and Talybont provided fire support. After scaling the cliffs, the Rangers discovered that the guns had already been withdrawn. They located the weapons, unguarded but ready to use, in an orchard some 550 metres (600 yd) south of the point, and disabled them with explosives.[142]

The now-isolated Rangers fended off numerous counter-attacks from the German 914th Grenadier Regiment. The men at the point became isolated and some were captured. By dawn on D+1, Rudder had only 90 men able to fight. Relief did not arrive until D+2, when members of the 743rd Tank Battalion and others arrived.[143][144] By then, Rudder’s men had run out of ammunition and were using captured German weapons. Several men were killed as a result, because the German weapons made a distinctive noise, and the men were mistaken for the enemy.[145] By the end of the battle, the Rangers casualties were 135 dead and wounded, while German casualties were 50 killed and 40 captured. An unknown number of French collaborators were executed.[146][147]

Omaha Beach

Main article: Omaha Beach

Assault troops in an LCVP landing craft approach Omaha Beach, 6 June 1944.

Omaha, the most heavily defended beach, was assigned to the 1st Infantry Division and 29th Infantry Division.[148] They faced the 352nd Infantry Division rather than the expected single regiment.[149] Strong currents forced many landing craft east of their intended position or caused them to be delayed.[150] For fear of hitting the landing craft, American bombers delayed releasing their loads and, as a result, most of the beach obstacles at Omaha remained undamaged when the men came ashore.[151] Many of the landing craft ran aground on sandbars and the men had to wade 50 to 100 yards (46 to 91 m) in water up to their necks while under fire to get to the beach.[99] In spite of the rough seas, DD tanks of two companies of the 741st Tank Battalion were dropped 5,000 yards (4,600 m) from shore, and 27 of the 32 flooded and sank, with the loss of 33 crew.[152] Some tanks, disabled on the beach, continued to provide covering fire until their ammunition ran out or they were swamped by the rising tide.[153]

Casualties were around 2,000, as the men were subjected to fire from the cliffs above.[154] Problems clearing the beach of obstructions led to the beachmaster calling a halt to further landings of vehicles at 08:30. A group of destroyers arrived around this time to provide fire support so landings could resume.[155] Exit from the beach was possible only via five heavily defended gullies, and by late morning barely 600 men had reached the higher ground.[156] By noon, as the artillery fire took its toll and the Germans started to run out of ammunition, the Americans were able to clear some lanes on the beaches. They also started clearing the gullies of enemy defences so that vehicles could move off the beach.[156] The tenuous beachhead was expanded over the following days, and the D-Day objectives for Omaha were accomplished by D+3.[157]

Gold Beach

Main article: Gold Beach

British troops come ashore at Jig Green sector, Gold Beach.

At Gold, high winds made conditions difficult for the landing craft, and the amphibious DD tanks were released close to shore or directly on the beach instead of further out as planned.[158] Three of the four guns in a large emplacement at the Longues-sur-Mer battery were disabled by direct hits from the cruisers Ajax and Argonaut at 06:20. The fourth gun resumed firing intermittently in the afternoon, and its garrison surrendered on 7 June.[159] Aerial attacks had failed to hit the Le Hamel strongpoint, which had its embrasure facing east to provide enfilade fire along the beach and had a thick concrete wall on the seaward side.[160] Its 75 mm gun continued to do damage until 16:00, when a modified Armoured Vehicle Royal Engineers (AVRE) tank fired a large petard charge into its rear entrance.[161][162] A second casemated emplacement at La Rivière containing an 88 mm gun was neutralised by a tank at 07:30.[163]

Meanwhile, infantry began clearing the heavily fortified houses along the shore and advanced on targets further inland.[164] The No. 47 (Royal Marine) Commando moved toward the small port at Port-en-Bessin and captured it the following day in the Battle of Port-en-Bessin.[165] Company Sergeant Major Stanley Hollis received the only Victoria Cross awarded on D-Day for his actions while attacking two pillboxes at the Mont Fleury high point.[166] On the western flank, the 1st Battalion, Hampshire Regiment captured Arromanches (future site of Mulberry “B”), and contact was made on the eastern flank with the Canadian forces at Juno.[167] Bayeux was not captured the first day due to stiff resistance from the 352nd Infantry Division.[164] Allied casualties at Gold Beach are estimated at 1,000.[11]

Juno Beach

Main article: Juno Beach

Personnel of Royal Canadian Navy Beach Commando “W” land on Mike Beach sector of Juno Beach, 6 June 1944.

The landing at Juno was delayed because of choppy seas, and the men arrived ahead of their supporting armour, suffering many casualties while disembarking. Most of the offshore bombardment had missed the German defences.[168] Several exits from the beach were created, but not without difficulty. At Mike Beach on the western flank, a large crater was filled using an abandoned AVRE tank and several rolls of fascine, which were then covered by a temporary bridge. The tank remained in place until 1972, when it was removed and restored by members of the Royal Engineers.[169] The beach and nearby streets were clogged with traffic for most of the day, making it difficult to move inland.[92]

Major German strongpoints with 75 mm guns, machine-gun nests, concrete fortifications, barbed wire, and mines were located at Courseulles-sur-Mer, St Aubin-sur-Mer, and Bernières-sur-Mer.[170] The towns themselves also had to be cleared in house-to-house fighting.[171] Soldiers on their way to Bény-sur-Mer, 3 miles (5 km) inland, discovered that the road was well covered by machine gun emplacements that had to be outflanked before the advance could proceed.[172] Elements of the 9th Canadian Infantry Brigade advanced to within sight of the Carpiquet airfield late in the afternoon, but by this time their supporting armour was low on ammunition so the Canadians dug in for the night. The airfield was not captured until a month later as the area became the scene of fierce fighting.[173] By nightfall, the contiguous Juno and Gold beachheads covered an area 12 miles (19 km) wide and 7 miles (10 km) deep.[174] Casualties at Juno were 961 men.[175]

Sword Beach

Main article: Sword Beach

British troops take cover after landing on Sword Beach.

On Sword, 21 of 25 DD tanks of the first wave made it safely ashore to provide cover for the infantry, who began disembarking at 07:30.[176] The beach was heavily mined and peppered with obstacles, making the work of the beach clearing teams difficult and dangerous.[177] In the windy conditions, the tide came in more quickly than expected, so manoeuvring the armour was difficult. The beach quickly became congested.[178] Brigadier Simon Fraser, 15th Lord Lovat and his 1st Special Service Brigade arrived in the second wave, piped ashore by Private Bill Millin, Lovat’s personal piper.[179] Members of No. 4 Commando moved through Ouistreham to attack from the rear a German gun battery on the shore. A concrete observation and control tower at this emplacement had to be bypassed and was not captured until several days later.[180] French forces under Commander Philippe Kieffer (the first French soldiers to arrive in Normandy) attacked and cleared the heavily fortified strongpoint at the casino at Riva Bella, with the aid of one of the DD tanks.[180]

The ‘Morris’ strongpoint near Colleville-sur-Mer was captured after about an hour of fighting.[178] The nearby ‘Hillman’ strongpoint, headquarters of the 736th Infantry Regiment, was a large complex defensive work that had come through the morning’s bombardment essentially undamaged. It was not captured until 20:15.[181] The 2nd Battalion, King’s Shropshire Light Infantry began advancing to Caen on foot, coming within a few kilometres of the town, but had to withdraw due to lack of armour support.[182] At 16:00, the 21st Panzer Division mounted a counter-attack between Sword and Juno and nearly succeeded in reaching the Channel. It met stiff resistance from the British 3rd Division and was soon recalled to assist in the area between Caen and Bayeux.[183][184] Estimates of Allied casualties on Sword Beach are as high as 1,000.[11]

Analysis

Situation map for 24:00, 6 June 1944

The Normandy landings were the largest seaborne invasion in history, with nearly 5,000 landing and assault craft, 289 escort vessels, and 277 minesweepers participating.[185] Nearly 160,000 troops crossed the English Channel on D-Day,[29] with 875,000 men disembarking by the end of June.[186] Allied casualties on the first day were at least 10,000, with 4,414 confirmed dead.[187] The Germans lost 1,000 men.[188] The Allied invasion plans had called for the capture of Carentan, St. Lô, Caen, and Bayeux on the first day, with all the beaches (other than Utah) linked with a front line 10 to 16 kilometres (6 to 10 mi) from the beaches; none of these objectives were achieved.[32] The five bridgeheads were not connected until 12 June, by which time the Allies held a front around 97 kilometres (60 mi) long and 24 kilometres (15 mi) deep.[189] Caen, a major objective, was still in German hands at the end of D-Day and would not be completely captured until 21 July.[190] The Germans had ordered French civilians, other than those deemed essential to the war effort, to leave potential combat zones in Normandy.[191] Civilian casualties on D-Day and D+1 are estimated at 3,000 people.[192]

Victory in Normandy stemmed from several factors. German preparations along the Atlantic Wall were only partially finished; shortly before D-Day Rommel reported that construction was only 18 per cent complete in some areas as resources were diverted elsewhere.[193] The deceptions undertaken in Operation Fortitude were successful, leaving the Germans obligated to defend a huge stretch of coastline.[194] The Allies achieved and maintained air supremacy, which meant that the Germans were unable to make observations of the preparations underway in Britain and were unable to interfere via bomber attacks.[195] Transportation infrastructure in France was severely disrupted by Allied bombers and the French Resistance, making it difficult for the Germans to bring up reinforcements and supplies.[196] Some of the opening bombardment was off-target or not concentrated enough to have any impact,[151] but the specialised armour worked well except on Omaha, providing close artillery support for the troops as they disembarked onto the beaches.[197] Indecisiveness and an overly complicated command structure on the part of the German high command were also factors in the Allied success.[198]

War memorials and tourism

The La Cambe German war cemetery, near Bayeux

At Omaha Beach, parts of the Mulberry harbour are still visible, and a few of the beach obstacles remain. A memorial to the American National Guard sits at the location of a former German strongpoint. Pointe du Hoc is little changed from 1944, with the terrain covered with bomb craters and most of the concrete bunkers still in place. The Normandy American Cemetery and Memorial is nearby, in Colleville-sur-Mer.[199] A museum about the Utah landings is located at Sainte-Marie-du-Mont, and there is one dedicated to the activities of the American airmen at Sainte-Mère-Église. Two German military cemeteries are located nearby.[200]

Pegasus Bridge, a target of the British 6th Airborne, was the site of some of the earliest action of the Normandy landings. The bridge was replaced in 1994 by one similar in appearance, and the original is now housed on the grounds of a nearby museum complex.[201] Sections of Mulberry Harbour B still sit in the sea at Arromanches, and the well-preserved Longues-sur-Mer battery is nearby.[202] The Juno Beach Centre, opened in 2003, was funded by the Canadian federal and provincial governments, France, and Canadian veterans

Why Japan Attacked Pearl Harbour

Why Japan Attacked Pearl Harbour

This article was written & supplied by

Hoku Hawaii Tours

Luxury Pearl Harbor Tours.

Photo Credit: James Morley

Why Japan Attacked Pearl Harbour

Photo Credit: James Morley via https://www.flickr.com/photos/whatsthatpicture/4959390747/

See Pearl Harbour Page

See Atomic Bomb Page

While everyone thinks that the Japanese attack on the US Navy’s Pacific Fleet at Pearl Harbour on December 7, 1941, was unprovoked, that isn’t true. More than seven decades after the surprise attack, a lot of people still think that the Japanese were aggressive imperialists who wanted to dominate the Asia-Pacific region. Today, Americans believe that their forefathers were minding their own business when the crazy Japanese attacked them, out of the blue. Very few people know that the US provoked the Japanese to resort to this unannounced, sneak attack.

Imperial Japan’s Aggressive Overtures

Tensions between the US and Japan had been rising throughout 1941. Imperial Japan, had in 1937, initiated an unjustified war with China, a favored US ally. This war had been raging on for over 4 years before the Pearl Harbour strike. Further, Japan’s totalitarian government had occupied Indochina and was hell-bent on imposing its will in East Asia. The US resented these developments in Asia.

Imperial Japan’s Booming Economy

From 1900, Japan’s economy experienced unprecedented growth. The nation industrialized rapidly. Since Japan had limited natural resources, its burgeoning industries relied heavily on imports. Raw materials such as petroleum, coal, copper, tin, steel scrap, iron ore, bauxite, and rubber were the chief imports. Many of these were from the US or European colonies in Asia. Without access to these imports, Japan’s industrial economy would have collapsed. However, the Japanese engaged in international trade and had built a reasonably developed industrial economy by 1941.

Japan’s Military-Industrial Complex

Simultaneously, the Japanese promoted a military-industrial complex. Consequently, the nation’s army and navy became increasingly powerful. Imperial Japan’s armed forces permitted the rising nation to exert its military might into several places in the Asia-Pacific region. Northern China and Korea were prime among these regions. This exertion of military power was similar to the US using its industrial prowess to equip armed forces that demonstrated the nation’s power into Latin America and Caribbean Islands, and even as far as the Philippines.

The US President’s Personal Preferences and Foreign Policy

The US government was controlled by its President Franklin D. Roosevelt since 1933. He won an unprecedented four 4-year terms and was the President until his death in 1945. He disliked the Japanese but loved the Chinese because his forefathers had prospered in the China trade. Roosevelt also favoured the British, an ally of China in WWII. He didn’t like Germany’s Hitler. Since 1937, Roosevelt paid great attention to foreign policy, partly to fulfil his political ambitions.

The Economic Warfare of the US Provoked Imperial Japan’s Sneak Attack

In the late 1930s, as Hitler’s Germany began to rearm, the Roosevelt administration worked closely with Britain and France to oppose German expansion. The US assistance to these nations included the destroyer deal as well as the deceptive Lend-Lease program. The US military attempted to create an incident that would justify its entry into the WWII arena by working closely with the British Navy. But Hitler didn’t fall for this ploy.

Roosevelt and His Subordinates Put Japan in an Untenable Position

In June 1940, the US Secretary of War Henry L. Stimson supported the Open Door Policy for China. Stimson recommended economic sanctions to check Japan’s advance in Asia. The US President, Treasury Secretary, and Interior Secretary also favoured this economic warfare. Roosevelt was hopeful that these sanctions would instigate the Japanese into committing a rash mistake by starting a war against the US. He also hoped that this would bring Germany in because Japan had a treaty with Germany.

US Administration Throttles Imperial Japan’s War Machine

Accordingly, the US administration curtly dismissed Japanese diplomatic overtures to normalize relations. Conversely, the US imposed a set of increasingly harsh economic sanctions on Japan right from 1939 when the 1911 Commercial Treaty with Japan was terminated. On July 2, 1940, the Export Control Act came into force. This Act authorized the US President to regulate the export of important defence materials. Under this power, on July 31, 1940, US exports of heavy melting iron, steel scrap, and aviation motor fuels to Japan were restricted.

Key Economic Sanctions that Crippled Imperial Japan

October 16, 1940: Roosevelt slapped an embargo on exports of steel and scrap iron to all destinations. Only Britain and some nations located in the Western Hemisphere were excluded in this stifling measure.

July 26, 1941: The President froze all Japanese assets in the US. Roosevelt effectively ended commercial relations between Japan and the US.

August 3, 1941: Roosevelt imposed an embargo of all the grades of oil that were still in commercial flow to Japan. Holland and Britain also followed suit. The European nations also imposed an embargo on exports to Imperial Japan from their Southeast Asian colonies.

Summary

Months before attacking Pearl Harbour, the Japanese offered to withdraw troops from Indochina under two conditions. First, the Japanese would work out peace with China without US interference. Second, US would lift the economic sanctions. The US did not want to abandon China. So, the Roosevelt administration continued to insist that Japan withdraw troops from Indochina and also reconsider the agreement it had with Germany and Italy.

Although this happened long ago, you can still take Pearl Harbour tours & see the sunken ships. There are 1,177 people still under the water. In addition, the USS Arizona Battleship is STILL leaking drops of oil. It is said the droplets of oil coming out of the USS Arizona are the tears of the dead. When the oil droplets stop, the dead will stop crying. See this at Pearl Harbour.

———————————————————————————————————————————

Luxury Pearl Harbour Tours. Free Pickup from Waikiki!

Pearl Harbor but tour and guides
https://www.hokuhawaiitours.com

15% OFF Coupon Code: Hoku2015. Only available for the H1 & H4 Tours.

Starting with Pick-Up in Waikiki

Our Pearl Harbour Tours represent one of the most significant sites in United States History! Pay homage to the 1,177 fallen heroes of December 7, 1941 as you experience the museums, displays, exhibits, and movie short. You’ll have the choice of touring the USS Arizona Memorial, USS Missouri Battleship, USS Bowfin Submarine, and the Pacific Aviation Museum. With our expert tour guides the Pearl Harbour Tours are designed to fit your schedule.

Visit the website: www.hokuhawaiitours.com

———————————————————————————————————————————

The views and opinions expressed in this page and  documentaries are soley intended to educate and provide background information to those interested in WWII .They in no way reflect my own opinions and I take no responsibility for any inaccuracies or factual errors.

The Tudors & Henry VIII

The Tudor Dynasty

&

Henry VIII

Tudor Rose.svg
Tudor Rose

The Tudor dynasty or House of Tudor was a royal house of Welsh and English origin,[1] descended in the male line from the Tudors of Penmynydd. Tudor monarchs ruled the Kingdom of England and its realms, including their ancestral Wales and the Lordship of Ireland (later the Kingdom of Ireland) from 1485 until 1603. The first monarch, Henry VII, descended through his mother from a legitimised branch of the English royal House of Lancaster. The Tudor family rose to power in the wake of the Wars of the Roses, which left the House of Lancaster, to which the Tudors were aligned, extinct.

———————————————————————————–

Inside The Court Of Henry VIII – Documentary 2015

———————————————————————————–

Tudor
Tudor Rose.svg
Tudor Rose
Country England
Ireland
Wales
Parent house Tudors of Penmynydd
Titles
Founded 22 August 1485
Founder Henry VII
Final ruler Elizabeth I
Current head Extinct
Dissolution 24 March 1603
Ethnicity Welsh, English

Henry Tudor was able to establish himself as a candidate not only for traditional Lancastrian supporters, but also for the discontented supporters of their rival House of York, and he rose to capture the throne in battle, becoming Henry VII. His victory was reinforced by his marriage to Elizabeth of York, symbolically uniting the former warring factions under a new dynasty. The Tudors extended their power beyond modern England, achieving the full union of England and the Principality of Wales in 1542 (Laws in Wales Acts 1535–1542), and successfully asserting English authority over the Kingdom of Ireland. They also maintained the nominal English claim to the Kingdom of France; although none of them made substance of it, Henry VIII fought wars with France trying to reclaim that title. After him, his daughter Mary I lost control of all territory in France permanently with the fall of Calais in 1558.

———————————————————–

The Wars of The Roses: A Bloody Crown

———————————————————–

In total, five Tudor monarchs ruled their domains for just over a century. Henry VIII of England was the only male-line male heir of Henry VII to live to the age of maturity. Issues around the royal succession (including marriage and the succession rights of women) became major political themes during the Tudor era. The House of Stuart came to power in 1603 when the Tudor line failed, as Elizabeth I died without issue

Ascent to the throne

The Tudors are descended on Henry VII’s mother’s side from John Beaufort, 1st Earl of Somerset, one of the illegitimate children of the 14th century English Prince John of Gaunt, 1st Duke of Lancaster (the third surviving son of Edward III of England) by Gaunt’s long-term mistress Katherine Swynford. The descendants of an illegitimate child of English Royalty would normally have no claim on the throne, but the situation was complicated when Gaunt and Swynford eventually married in 1399, when John Beaufort was 25. The church retroactively declared the Beauforts legitimate by way of a papal bull the same year, confirmed by an Act of Parliament in 1397. A subsequent proclamation by John of Gaunt’s legitimate son, Henry IV of England, also recognised the Beauforts’ legitimacy, but declared them ineligible ever to inherit the throne. Nevertheless, the Beauforts remained closely allied with Gaunt’s legitimate descendants from his first marriage, the House of Lancaster.

On 1 November 1455, John Beaufort’s granddaughter, Margaret Beaufort, Countess of Richmond and Derby, married Henry VI of England‘s half-brother Edmund Tudor, 1st Earl of Richmond. It was his father, Owen Tudor (Welsh: Owain ap Maredudd ap Tewdur ap Goronwy ap Tewdur ap Goronwy ap Ednyfed Fychan), who abandoned the Welsh patronymic naming practice and adopted a fixed surname. When he did, he did not choose, as was generally the custom, his father’s name, Maredudd, but chose his grandfather’s instead. Tewdur or Tudor is derived from the words tud “territory” and rhi “king”.[2]

Owen Tudor was one of the body guards for Queen Dowager Catherine of Valois, whose husband, Henry V of England, had died in 1422. Evidence suggests that the two were secretly married in 1429. The two sons born of the marriage, Edmund and Jasper, were among the most loyal supporters of the House of Lancaster in its struggle against the House of York.

Henry VI ennobled his half brothers. Edmund became earl of Richmond and was married to Margaret Beaufort, the great-granddaughter of John of Gaunt, the progenitor of the house of Lancaster. Jasper became earl of Pembroke and by 1460 had collected so many offices in Wales that he had become the virtual viceroy of the country. Edmund died in November 1456. On 28 January 1457, his widow, who had just attained her fourteenth birthday, gave birth to a son, Henry VII of England, at her brother-in-law’s castle of Pembroke.

——————————————————————-

Henry VII of England

——————————————————————-

Henry Tudor spent his childhood at Raglan Castle, the home of William Herbert, 1st Earl of Pembroke, a leading Yorkist. Following the murder of Henry VI and his son, Edward, in 1471, Henry became the person upon whom the Lancastrian cause rested. Concerned for his young nephew’s life, Jasper Tudor took Henry to Brittany for safety. Lady Margaret remained in England and remarried, living quietly while advancing the Lancastrian, and her son’s cause. Capitalizing on the growing unpopularity of King Richard III of England, she was able to forge an alliance with discontented Yorkists in support of her son. Two years after Richard III was crowned, Henry and Jasper sailed from the mouth of the Seine to the Milford Haven Waterway and defeated Richard III at the Battle of Bosworth Field.[2] Upon this victory, Henry Tudor proclaimed himself King Henry VII.

Family tree of the principal members of the house of Tudor.

Henry VII

King Henry VII, the founder of the royal house of Tudor

Now King, Henry’s first concern was to secure his hold on the throne. On 18 January 1486 at Westminster, he honoured a pledge made three years earlier and married Elizabeth of York.[3] They were third cousins, as both were great-great-grandchildren of John of Gaunt. The marriage unified the warring houses of Lancaster and York and gave his children a strong claim to the throne. The unification of the two houses through this marriage is symbolized by the heraldic emblem of the Tudor rose, a combination of the white rose of York and the red rose of Lancaster.

Henry VII and Queen Elizabeth had several children, four of whom survived infancy: Arthur, Prince of Wales; Henry, Duke of Richmond; Margaret, who married James IV of Scotland; and Mary, who married Louis XII of France. One of the objectives of Henry VII’s foreign policy was dynastic security, which is portrayed through the alliance forged with the marriage of his daughter Margaret to James IV of Scotland and through the marriage of his eldest son. Henry VII married his son Arthur to Catherine of Aragon, cementing an alliance with the Spanish monarchs, Ferdinand II of Aragon and Isabella I of Castile, and the two spent their honeymoon at Ludlow Castle, the traditional seat of the Prince of Wales.[4] However, four months after the marriage, Arthur died, leaving his younger brother Henry as heir apparent. Henry VII acquired a papal dispensation allowing Prince Henry to marry Arthur’s widow; however, Henry VII delayed the marriage. Henry VII limited his involvement in European politics. He went to war only twice, once in 1489 during the Breton crisis and the invasion of Brittany, and in 1496–1497 in revenge for Scottish support of Perkin Warbeck and for their invasion of Northern England. Henry VII made peace with France in 1492 and the war against Scotland was abandoned because of the Western Rebellion of 1497. Henry VII came to peace with James IV in 1502, paving the way for the marriage of his daughter Margaret.[4]

One of the main concerns of Henry VII during his reign was the re-accumulation of the funds in the royal treasury. England had never been one of the wealthier European countries, and after the War of the Roses this was even more true. Through his strict monetary strategy, he was able to leave a considerable amount of money in the Treasury for his son and successor, Henry VIII. Although it is debated whether Henry VII was a great king, he certainly was a successful one if only because he restored the nation’s finances, strengthened the judicial system and successfully denied all other claimants to the throne, thus further securing it for his heir.[5]

Henry VIII

Catherine of Aragon: marriage was annulled – by the Church of England – for not producing a male heir to the Tudor dynasty

The new King Henry VIII married Catherine of Aragon on 11 June 1509; they were crowned at Westminster Abbey on 24 June the same year. Catherine was Henry’s older brother’s wife, making the path for their marriage a rocky one from the start. A papal dispensation had to be granted for Henry to be able to marry Catherine, and the negotiations took some time. Despite the fact that Henry’s father died before he was married to Catherine, he was determined to marry her anyway and make sure that everyone knew he intended on being his own master. When Henry first came to the throne, he had very little interest in actually ruling; rather, he preferred to indulge in luxuries and to partake in sports. He let others control the kingdom for the first two years of his reign, and then when he became more interested in military strategy, he took more interest in ruling his own throne.[6] In his younger years, Henry was described as a man of gentle friendliness, gentle in debate, and who acted as more of a companion than a king. He was generous in his gifts and affection and was said to be easy to get along with. However, the Henry that many people picture when they hear his name is the Henry of his later years, when he became obese, volatile, and was known for his great cruelty.[7] Unfortunately, Catherine did not bear Henry the sons he was desperate for; Catherine’s first child, a daughter, was stillborn, and her second child, a son named Henry, Duke of Cornwall, died 52 days after the birth. A further set of stillborn children were conceived, until a daughter Mary was born in 1516. When it became clear to Henry that the Tudor dynasty was at risk, he consulted his chief minister Cardinal Thomas Wolsey about the possibility of annulling his marriage to Catherine. Along with Henry’s concern that he would not have an heir, it was also obvious to his court that he was becoming tired of his aging wife, who was six years older than he. Wolsey visited Rome, where he hoped to get the Pope’s consent for an annulment. However, the church was reluctant to rescind the earlier papal dispensation and felt heavy pressure from Catherine’s nephew, Charles V, Holy Roman Emperor, in support of his aunt. Catherine contested the proceedings, and a protracted legal battle followed. Wolsey fell from favour as a result of his failure to procure the annulment, and Henry appointed Thomas Cromwell in his place.

Despite his failure to produce the results that Henry wanted, Wolsey actively pursued the annulment—divorce was synonymous with annulment at that time—however, he never planned that Henry would marry Anne Boleyn, with whom the king had become enamoured while she was lady-in-waiting in Queen Catherine’s household. It is unclear how far Wolsey was actually responsible for the Reformation, but it is very clear that Henry’s desire to marry Anne Boleyn precipitated the schism with the Church. Henry’s concern about having an heir to secure his family line and increase his security while alive would have prompted him to ask for a divorce sooner or later, whether Anne had precipitated it or not. Only Wolsey’s sudden death at Leicester[8] on his journey to the Tower of London saved him from the public humiliation and inevitable execution he would have suffered upon his arrival at the Tower.[9]

Break with Rome

Thomas Cromwell, 1st Earl of Essex, Henry VIII’s chief minister responsible for the Dissolution of the Monasteries

In order to allow Henry to divorce his wife, the English parliament enacted laws breaking ties with Rome, and declaring the king Supreme Head of the Church of England (from Elizabeth I the monarch is known as the Supreme Governor of the Church of England), thus severing the ecclesiastical structure of England from the Catholic Church and the Pope. The newly appointed Archbishop of Canterbury, Thomas Cranmer, was then able to declare Henry’s marriage to Catherine annulled. Catherine was removed from Court, and she spent the last three years of her life in various English houses under “protectorship,” similar to house arrest.[10]

This allowed Henry to marry one of his courtiers Anne Boleyn, the daughter of a minor diplomat Sir Thomas Boleyn. Anne had become pregnant by the end of 1532 and gave birth on 7 September 1533 to Elizabeth named in honour of Henry’s mother.[11] Anne may have had later pregnancies which ended in miscarriage or stillbirth. In May 1536, Anne was arrested, along with six courtiers. Thomas Cromwell stepped in again, claiming that Anne had taken lovers during her marriage to Henry, and she was tried for high treason, witchcraft and incest; these charges were most likely fabricated, but she was found guilty, and executed in May 1536.

—————————————————————-

The Last Days of Anne Boleyn

—————————————————————-

Henry VIII of England: Henry’s quarrels with the Pope led to the creation of the Church of England

Protestant alliance

Henry married again, for the third time, to Jane Seymour, the daughter of a Wiltshire knight, and with whom he had become enamoured while she was still a lady-in-waiting to Queen Anne. Jane became pregnant, and in 1537 produced a son, who became King Edward VI following Henry’s death in 1547. Jane died of puerperal fever only a few days after the birth, leaving Henry devastated. Cromwell continued to gain the king’s favour when he designed and pushed through the Laws in Wales Acts, uniting England and Wales.

Anne of Cleves,by Hans Holbein the Younger

In 1540 Henry married for the fourth time to the daughter of a Protestant German duke, Anne of Cleves, thus forming an alliance with the Protestant German states. Henry was reluctant to marry again, especially to a Protestant, but he was persuaded when the court painter Hans Holbein the Younger showed him a flattering portrait of her. She arrived in England in December 1539, and Henry rode to Rochester to meet her on 1 January 1540. Although the historian Gilbert Burnet claimed that Henry called her a Flanders Mare, there is no evidence that he said this; in truth, court ambassadors negotiating the marriage praised her beauty. Whatever the circumstances were, the marriage failed, and Anne agreed to a peaceful annulment, assumed the title My Lady, the King’s Sister, and received a massive divorce settlement, which included Richmond Palace, Hever Castle, and numerous other estates across the country. Although the marriage made sense in terms of foreign policy, Henry was still enraged and offended by the match. Henry chose to blame Cromwell for the failed marriage, and ordered him beheaded on 28 July 1540.[12] Henry kept his word and took care of Anne in his last years alive; however, after his death Anne suffered from extreme financial hardship because Edward VI’s councillors refused to give her any funds and confiscated the homes she had been given. She pleaded to her brother to let her return home, but he only sent a few agents who tried to assist in helping her situation and refused to let her return home. Anne died on 16 July 1557 in Chelsea Manor.[13]

Thomas Cranmer

Thomas Cranmer, Henry’s first Protestant Archbishop of Canterbury, responsible for the Book of Common Prayer during Edward VI’s reign

The fifth marriage was to the Catholic Catherine Howard, the niece of Thomas Howard, the third Duke of Norfolk, who was promoted by Norfolk in the hope that she would persuade Henry to restore the Catholic religion in England. Henry called her his “rose without a thorn”, but the marriage ended in failure. Henry’s fancy with Catherine started before the end of his marriage with Anne when she was still a member of Anne’s court. Catherine was young and vivacious, but Henry’s age made him less inclined to use Catherine in the bedroom; rather, he preferred to admire her, which Catherine soon grew tired of. Catherine, forced into a marriage to an unattractive, obese man over 30 years her senior, had never wanted to marry Henry, and conducted an affair with the King’s favourite, Thomas Culpeper, while Henry and she were married. During her questioning, Catherine first denied everything but eventually she was broken down and told of her infidelity and her pre-nuptial relations with other men. Henry, first enraged, threatened to torture her to death but later became overcome with grief and self-pity. She was accused of treason and was executed on 13 February 1542, destroying the English Catholic holdouts’ hopes of a national reconciliation with the Catholic Church. Her execution also marked the end of the Howard family’s power within the court.[14]

Catherine Parr

By the time Henry conducted another Protestant marriage with his final wife Catherine Parr in 1543, the old Roman Catholic advisers, including the powerful third Duke of Norfolk had lost all their power and influence. The duke himself was still a committed Catholic, and he was nearly persuaded to arrest Catherine for preaching Lutheran doctrines to Henry while she attended his ill health. However, she managed to reconcile with the King after vowing that she had only argued about religion with him to take his mind off the suffering caused by his ulcerous leg. Her peacemaking also helped reconcile Henry with his daughters Mary and Elizabeth and fostered a good relationship between her and the crown prince.

Meanwhile, Edward was brought up a strict and devout Protestant by numerous tutors, including Bishop Richard Cox, John Belmain, and Sir John Cheke. The lady in charge of his upbringing was Blanche Herbert Lady Troy, whose ancestors had residual Lollard connections.[15] Her elegy includes the lines: …To King Edward she was a true – (And) wise lady of dignity, – In charge of his fosterage (she was pre-eminent)….[16]

Edward VI:

Edward VI of England

Protestant zeal

———————————————

———————————————

Henry died on 28 January 1547. His will had reinstated his daughters by his annulled marriages to Catherine of Aragon and Anne Boleyn to the line of succession, but did not legitimise them. (Because his marriages had been annulled, they legally never occurred, so his children by those marriages were illegitimate.) In the event that all 3 of his children died without heir, the will stipulated that the descendant of his younger sister Mary would take precedence over the descendants of his elder sister, Margaret, Queen of Scotland. Edward, his nine-year-old son by Jane Seymour, succeeded as Edward VI of England. Unfortunately, the young King’s kingdom was usually in turmoil between nobles who were trying to strengthen their own position in the kingdom by using the Regency in their favour.[17]

The title page of Archbishop Cranmer’s Book of Common Prayer, 1549

Duke of Somerset’s England

Although Henry had specified a group of men to act as regents during Edward’s minority, Edward Seymour, Edward’s uncle, quickly seized complete control, and created himself Duke of Somerset on 15 February 1547. His domination of the Privy Council, the king’s most senior body of advisers, was unchallenged. Somerset aimed to unite England and Scotland by marrying Edward to the young Scottish queen Mary, and aimed to forcibly impose the English Reformation on the Church of Scotland. Somerset led a large and well equipped army to Scotland, where he and the Scottish regent James Hamilton, 2nd Earl of Arran, commanded their armies at the Battle of Pinkie Cleugh on 10 September 1547. Somerset’s army eventually defeated the Scots, but the young Queen Mary was smuggled to France, where she was betrothed to the Dauphin, the future Francis II of France. Despite Somerset’s disappointment that no Scottish marriage would take place, his victory at Pinkie Cleugh made his position appear unassailable.

Meanwhile, Edward VI, despite the fact that he was only a child of nine, had his mind set on religious reform. In 1549, Edward ordered the publication of the Book of Common Prayer, containing the forms of worship for daily and Sunday church services. The controversial new book was not welcomed by either reformers or Catholic conservatives; and it was especially condemned in Devon and Cornwall, where traditional Catholic loyalty was at its strongest. In Cornwall at the time, many of the people could only speak the Cornish language, so the uniform English Bibles and church services were not understood by many. This caused the Prayer Book Rebellion, in which groups of Cornish non-conformists gathered round the mayor. The rebellion worried Somerset, now Lord Protector, and he sent an army to impose military solution to the rebellion. One in ten of the indigenous Cornish population was slaughtered.[dubious ] The rebellion did not persuade Edward to tread carefully, and only hardened his attitude towards Catholic non-conformists. This extended to Edward’s elder sister, the daughter of Catherine of Aragon, Mary Tudor, who was a pious and devout Catholic. Although called before the Privy Council several times to renounce her faith and stop hearing the Catholic Mass, she refused. He had a good relationship with his sister Elizabeth, who was a Protestant, albeit a moderate one, but this was strained when Elizabeth was accused of having an affair with the Duke of Somerset’s brother, Thomas Seymour, 1st Baron Seymour of Sudeley, the husband of Henry’s last wife Catherine Parr. Elizabeth was interviewed by one of Edward’s advisers, and she was eventually found not to be guilty, despite forced confessions from her servants Catherine Ashley and Thomas Parry. Thomas Seymour was arrested and beheaded on 20 March 1549.

A small boy with a big mind: Edward VI, desperate for a Protestant succession, changed his father’s will to allow Lady Jane Grey to become queen

Problematic succession

Lord Protector Somerset was also losing favour. After forcibly removing Edward VI to Windsor Castle, with the intention of keeping him hostage, Somerset was removed from power by members of the council, led by his chief rival, John Dudley, the first Earl of Warwick, who created himself Duke of Northumberland shortly after his rise. Northumberland effectively became Lord Protector, but he did not use this title, learning from the mistakes his predecessor made. Northumberland was furiously ambitious, and aimed to secure Protestant uniformity while making himself rich with land and money in the process. He ordered churches to be stripped of all traditional Catholic symbolism, resulting in the simplicity often seen in Church of England churches today. A revision of the Book of Common Prayer was published in 1552. When Edward VI became ill in 1553, his advisers looked to the possible imminent accession of the Catholic Lady Mary, and feared that she would overturn all the reforms made during Edward’s reign. Perhaps surprisingly, it was the dying Edward himself who feared a return to Catholicism, and wrote a new will repudiating the 1544 will of Henry VIII. This gave the succession to his cousin Lady Jane Grey, the granddaughter of Henry VIII’s sister Mary Tudor, who, after the death of Louis XII of France in 1515 had married Henry VIII’s favourite Charles Brandon, the first Duke of Suffolk. Lady Jane’s mother was Lady Frances Brandon, the daughter of Suffolk and Princess Mary. Northumberland married Jane to his youngest son Guildford Dudley, allowing himself to get the most out of a necessary Protestant succession. Most of Edward’s council signed the Devise for the Succession, and when Edward VI died on 6 July 1553 from his battle with tuberculosis, Lady Jane was proclaimed queen. However, the popular support for the proper Tudor dynasty–even a Catholic member–overruled Northumberland’s plans, and Jane, who had never wanted to accept the crown, was deposed after just nine days. Mary’s supporters joined her in a triumphal procession to London, accompanied by her younger sister Elizabeth.

Mary I: A troubled queen’s reign

Mary I of England, who tried to return England to the Roman Catholic Church

However, Mary soon announced that she was intending to marry the Spanish prince Philip, son of her mother’s nephew Charles V, Holy Roman Emperor. The prospect of a marriage alliance with Spain proved unpopular with the English people, who were worried that Spain would use England as a satellite, involving England in wars without the popular support of the people. Popular discontent grew; a Protestant courtier, Thomas Wyatt the younger led a rebellion against Mary, with the aim of deposing and replacing her with her half-sister Elizabeth. The plot was discovered, and Wyatt’s supporters were hunted down and killed. Wyatt himself was tortured, in the hope that he would give evidence that Elizabeth was involved so that Mary could have her executed for treason. Wyatt never implicated Elizabeth, and he was beheaded. Elizabeth spent her time between different prisons, including the Tower of London.

Mary married Philip at Winchester Cathedral, on 25 July 1554. Philip found her unattractive, and only spent a minimal amount of time with her. Despite Mary believing she was pregnant numerous times during her five-year reign, she never reproduced. Devastated that she rarely saw her husband, and anxious that she was not bearing an heir to Catholic England, Mary became bitter. In her determination to restore England to the Catholic faith and to secure her throne from Protestant threats, she had many Protestants burnt at the stake between 1555 and 1558. Mary’s main goal was to restore the Catholic faith to England; however, the Marian Persecutions were unpopular with the Protestant majority of England, though naturally supported by the Catholic minority. Because of her actions against the Protestants, Mary is to this day referred to as “Bloody Mary”. English author Charles Dickens stated that “as bloody Queen Mary this woman has become famous, and as Bloody Queen Mary she will ever be remembered with horror and detestation”[18]

Protestants Hugh Latimer and Nicholas Ridley being burned at the stake during Mary’s reign

Mary’s dream of a resurrected Catholic Tudor dynasty was finished, and her popularity further declined when she lost the last English area on French soil, Calais, to Francis, Duke of Guise, on 7 January 1558. Mary’s reign, however, introduced a new coining system that would be used until the 18th century, and her marriage to Philip II created new trade routes for England. Mary’s government took a number of steps towards reversing the inflation, budgetary deficits, poverty, and trade crisis of her kingdom. She explored the commercial potential of Russian, African, and Baltic markets, revised the customs system, worked to counter the currency debasements of her predecessors, amalgamated several revenue courts, and strengthened the governing authority of the middling and larger towns.[19] Mary also welcomed the first Russian ambassador to England, creating relations between England and Russia for the first time. Had she lived a little longer, then the Catholic religion that she worked so hard to restore into the realm may have taken deeper roots than it did; however, Mary died on 17 November 1558 at the relatively young age of 42.[20]

The age of intrigues and plots: Elizabeth I

——————————————————————————–

Queen Elizabeth I “The Virgin Queen”

——————————————————————————–

Elizabeth I at her coronation on 15 January 1559

Elizabeth I, who was staying at Hatfield House at the time of her accession, rode to London to the cheers of both the ruling class and the common people.

When Elizabeth came to the throne, there was much apprehension among members of the council appointed by Mary, due to the fact that many of them (as noted by the Spanish ambassador) had participated in several plots against Elizabeth, such as her imprisonment in the Tower, trying to force her to marry a foreign prince and thereby sending her out of the realm, and even pushing for her death.[21] In response to their fear, she chose as her chief minister Sir William Cecil, a Protestant, and former secretary to Lord Protector the Duke of Somerset and then to the Duke of Northumberland. Under Mary, he had been spared, and often visited Elizabeth, ostensibly to review her accounts and expenditure. He was the cousin and friend of Blanche Parry, the closest person to Elizabeth for 56 years.[22] Elizabeth also appointed her personal favourite, the son of the Duke of Northumberland Lord Robert Dudley, her Master of the Horse, giving him constant personal access to the queen.

The early years

Elizabeth had a long, turbulent path to the throne. She had a number of problems during her childhood, one of the main ones being after the execution of her mother, Anne Boleyn. When Anne was beheaded, Henry declared Elizabeth an illegitimate child and she would, therefore, not be able to inherit the throne. After the death of her father, she was raised by his widow, Catherine Parr and her husband Thomas Seymour, 1st Baron Seymour of Sudeley. A scandal arose with her and the Lord Admiral to which she stood trial. During the examinations, she answered truthfully and boldly and all charges were dropped. She was an excellent student, well-schooled in Latin, French, Italian, and somewhat in Greek, and was a talented writer.[23][24] She was supposedly a very skilled musician as well, in both singing and playing the lute. After the rebellion of Thomas Wyatt the younger, Elizabeth was imprisoned in the Tower of London. No proof could be found that Elizabeth was involved and she was released and retired to the countryside until the death of her sister, Mary I of England.[25]

Imposing the Church of England

Elizabeth was a moderate Protestant; she was the daughter of Anne Boleyn, who played a key role in the English Reformation in the 1520s. She had been brought up by Blanche Herbert Lady Troy. At her coronation in January 1559, many of the bishops – Catholic, appointed by Mary, who had expelled many of the Protestant clergymen when she became queen in 1553 – refused to perform the service in English. Eventually, the relatively minor Bishop of Carlisle, Owen Oglethorpe, performed the ceremony; but when Oglethorpe attempted to perform traditional Catholic parts of the Coronation, Elizabeth got up and left. Following the Coronation, two important Acts were passed through parliament: the Act of Uniformity and the Act of Supremacy, establishing the Protestant Church of England and creating Elizabeth Supreme Governor of the Church of England (Supreme Head, the title used by her father and brother, was seen as inappropriate for a woman ruler). These acts, known collectively as the Elizabethan Religious Settlement, made it compulsory to attend church services every Sunday; and imposed an oath on clergymen and statesmen to recognise the Church of England, the independence of the Church of England from the Catholic Church, and the authority of Elizabeth as Supreme Governor. Elizabeth made it clear that if they refused the oath the first time, they would have a second opportunity, after which, if the oath was not sworn, the offenders would be deprived of their offices and estates.

Mary, Queen of Scots, who conspired with English nobles to take the English throne for herself

Pressure to marry

Even though Elizabeth was only twenty-five when she came to the throne, she was absolutely sure of her God-given place to be the queen and of her responsibilities as the ‘handmaiden of the Lord’. She never let anyone challenge her authority as queen, even though many people, who felt she was weak and should be married, tried to do so.[21] The popularity of Elizabeth was extremely high, but her Privy Council, her Parliament and her subjects thought that the unmarried queen should take a husband; it was generally accepted that, once a queen regnant was married, the husband would relieve the woman of the burdens of head of state. Also, without an heir, the Tudor dynasty would end; the risk of civil war between rival claimants was a possibility if Elizabeth died childless. Numerous suitors from nearly all European nations sent ambassadors to English court to put forward their suit. Risk of death came dangerously close in 1564 when Elizabeth caught smallpox; when she was most at risk, she named Robert Dudley as Lord Protector in the event of her death. After her recovery, she appointed Dudley to the Privy Council and created him Earl of Leicester, in the hope that he would marry Mary, Queen of Scots. Mary rejected him, and instead married Henry Stuart, Lord Darnley, a descendant of Henry VII, giving Mary a stronger claim to the English throne. Although many Catholics were loyal to Elizabeth, many also believed that, because Elizabeth was declared illegitimate after her parents’ marriage was annulled, Mary was the strongest legitimate claimant. Despite this, Elizabeth would not name Mary her heir; as she had experienced during the reign of her predecessor Mary I, the opposition could flock around the heir if they were disheartened with Elizabeth’s rule.

Pope St. Pius V, who issued the Papal bull excommunicating Elizabeth and relieving her subjects of their allegiance to her

Numerous threats to the Tudor dynasty occurred during Elizabeth’s reign. In 1569, a group of Earls led by Charles Neville, the sixth Earl of Westmorland, and Thomas Percy, the seventh Earl of Northumberland attempted to depose Elizabeth and replace her with Mary, Queen of Scots. In 1571, the Protestant-turned-Catholic Thomas Howard, the fourth Duke of Norfolk, had plans to marry Mary, Queen of Scots, and then replace Elizabeth with Mary. The plot, masterminded by Roberto di Ridolfi, was discovered and Norfolk was beheaded. The next major uprising was in 1601, when Robert Devereux, the second Earl of Essex, attempted to raise the city of London against Elizabeth’s government. The city of London proved unwilling to rebel; Essex and most of his co-rebels were executed. Threats also came from abroad. In 1570, Pope Pius V issued a Papal bull, Regnans in Excelsis, excommunicating Elizabeth, and releasing her subjects from their allegiance to her. Elizabeth came under pressure from Parliament to execute Mary, Queen of Scots, to prevent any further attempts to replace her; though faced with several official requests, she vacillated over the decision to execute an anointed queen. Finally, she was persuaded of Mary’s (treasonous) complicity in the plotting against her, and she signed the death warrant in 1586. Mary was executed at Fotheringay Castle on 8 February 1587, to the outrage of Catholic Europe.

There are many reasons debated as to why Elizabeth never married. It was rumoured that she was in love with Robert Dudley, 1st Earl of Leicester, and that on one of her summer progresses she had birthed his illegitimate child. This rumour was just one of many that swirled around the two’s long-standing friendship. However, more important to focus on were the disasters that many women, such as Lady Jane Grey, suffered due to being married into the royal family. Her sister Mary’s marriage to Philip brought great contempt to the country, for many of her subjects despised Spain and Philip and feared that he would try to take complete control. Recalling her father’s disdain for Anne of Cleves, Elizabeth also refused to enter into a foreign match with a man that she had never seen before, so that also eliminated a large number of suitors.[26]

The Spanish Armada: Catholic Spain’s attempt to depose Elizabeth and take control of England

Last hopes of a Tudor heir

Despite the uncertainty of Elizabeth’s – and therefore the Tudor dynasty’s – hold on England, she never married. The closest she came to marriage was between 1579 and 1581, when she was courted by Francis, Duke of Anjou, the son of Henry II of France and Catherine de’ Medici. Despite Elizabeth’s government constantly begging her to marry in the early years of her reign, it was now persuading Elizabeth not to marry the French prince for his mother, Catherine de’ Medici, was suspected of ordering the St Bartholomew’s Day massacre of tens of thousands of French Protestant Huguenots in 1572. Elizabeth bowed to public feeling against the marriage, learning from the mistake her sister made when she married Philip II of Spain, and sent the Duke of Anjou away. Elizabeth knew that the continuation of the Tudor dynasty was now impossible; she was forty-eight in 1581, and too old to bear children.

By far the most dangerous threat to the Tudor dynasty during Elizabeth’s reign was the Spanish Armada of 1588. Launched by Elizabeth’s old suitor Philip II of Spain, this was commanded by Alonso de Guzmán El Bueno, the seventh Duke of Medina Sidonia. The Spanish invasion fleet outnumbered the English fleet’s 22 galleons and 108 armed merchant ships; however, the Spanish lost as a result of bad weather on the English Channel and poor planning and logistics, and in the face of the skills of Sir Francis Drake and Charles Howard, the second Baron Howard of Effingham (later first Earl of Nottingham).

While Elizabeth declined physically with age, her running of the country continued to benefit her people. In response to famine across England due to bad harvests in the 1590s, Elizabeth introduced the poor law, allowing peasants who were too ill to work a certain amount of money from the state. All the money Elizabeth had borrowed from Parliament in 12 of the 13 parliamentary sessions was paid back; by the time of her death, Elizabeth not only had no debts, but was in credit. Elizabeth died childless at Richmond Palace on 24 March 1603. She never named a successor. However, her chief minister Sir Robert Cecil had corresponded with the Protestant King James VI of Scotland, son of Mary, Queen of Scots, and James’s succession to the English throne was unopposed. The Tudor dynasty survived only in the female line, and the House of Stuart occupied the English throne for most of the following century.

Before and after comparisons

Public interference regarding the Roses dynasties was always a threat until the 17th century Stuart/Bourbon re-alignment occasioned by a series of events such as the execution of Lady Jane Grey, despite her brother in law, Leicester’s reputation in Holland, the Rising of the North (in which the old Percy-Neville feud and even anti-Scottish sentiment was discarded on account of religion; Northern England shared the same Avignonese bias as the Scottish court, on par with Valois France and Castile, which became the backbone of the Counter-Reformation, with Protestants being solidly anti-Avignonese) and death of Elizabeth I of England without children.

The Tudors made no substantial changes in their foreign policy from either Lancaster or York, whether the alliance was with Aragon or Cleves, the chief foreign enemies continuing as the Auld Alliance, but the Tudors resurrected old ecclesiastic arguments once pursued by Henry II of England and his son John of England. Yorkists were tied so much to the old order that Catholic rebellions (such as the Pilgrimage of Grace) and aspirations (exemplified by William Allen) were seen as continuing in their reactionary footsteps, when in opposition to the Tudors’ reformation policies, although the Tudors were not uniformly Protestant according to Continental definition—instead were true to their Lancastrian Beaufort allegiance, in the appointment of Reginald Pole.

The essential difference between the Tudors and their predecessors, is the nationalization and integration of John Wycliffe‘s ideas to the Church of England, holding onto the alignment of Richard II of England and Anne of Bohemia, in which Anne’s Hussite brethren were in alliance to her husband’s Wycliffite countrymen against the Avignon Papacy. The Tudors otherwise rejected or suppressed other religious notions, whether for the Pope’s award of Fidei Defensor or to prevent them from being in the hands of the common laity, who might be swayed by cells of foreign Protestants, with whom they had conversation as Marian exiles, pursuing a strategy of containment which the Lancastrians had done (after being vilified by Wat Tyler), even though the phenomenon of “Lollard knights” (like John Oldcastle) had become almost a national sensation all on its own.

In essence, the Tudors followed a composite of Lancastrian (the court party) and Yorkist (the church party) policies. Henry VIII tried to extend his father’s balancing act between the dynasties for opportunistic interventionism in the Italian Wars, which had unfortunate consequences for his own marriages and the Papal States; the King furthermore tried to use similar tactics for the “via media” concept of Anglicanism. A further parallelism was effected by turning Ireland into a kingdom and sharing the same episcopal establishment as England, whilst enlarging England by the annexation of Wales. The progress to Northern/Roses government would thenceforth pass across the border into Scotland, in 1603, due not only to the civil warring, but also because the Tudors’ own dynasty was fragile and insecure, trying to reconcile the mortal enemies who had weakened England to the point of having to bow to new pressures, rather than dictate diplomacy on English terms.

Tudor monarchs of England and Ireland

The six Tudor monarchs were:

Portrait Name Birth Accession date Marriages Death Claim
Henry VII Henry VII 28 January 1457
Pembroke Castle
22 August 1485
(crowned at Westminster Abbey on 30 October 1485)
Elizabeth of York 21 April 1509
Richmond Palace
aged 52
Descent from Edward III of England through his mother Lady Margaret Beaufort.
Henry VIII Henry VIII
(first King of Ireland)[1]
28 June 1491
Greenwich Palace
21 April 1509
(crowned at Westminster Abbey on 24 June 1509)
(1) Catherine of Aragon
(2) Anne Boleyn
(3) Jane Seymour
(4) Anne of Cleves
(5) Catherine Howard
(6) Catherine Parr
28 January 1547
Palace of Whitehall
aged 55
Son of Henry VII and Elizabeth of York
Edward VI Edward VI1 12 October 1537
Hampton Court Palace
28 January 1547
(crowned at Westminster Abbey on 20 February 1547)
6 July 1553
Greenwich Palace
aged 15
Son of Henry VIII and Jane Seymour
Lady Jane Grey Jane1
(disputed)
1537
Bradgate Park
10 July 1553
(never crowned)
Lord Guildford Dudley 12 February 1554
executed at the Tower of London
aged 16–17
Great granddaughter of Henry VII; granddaughter of Henry VIII’s sister, Mary Brandon (née Tudor), Duchess of Suffolk; first-cousin once removed of Edward VI
Mary I Mary I1 18 February 1516
Palace of Placentia
19 July 1553
(crowned at Westminster Abbey on 1 October 1553)
Philip II of Spain 17 November 1558
St James’s Palace
aged 42
Daughter of Henry VIII and Catherine of Aragon; known as “Bloody Mary” for burning Protestants during her reign.
Elizabeth I Elizabeth I1 7 September 1533
Greenwich Palace
17 November 1558
(crowned at Westminster Abbey on 15 January 1559)
24 March 1603
Richmond Palace
aged 69
Daughter of Henry VIII and Anne Boleyn; known as “The Virgin Queen” or “Gloriana” during her reign.

1. ^ To the Tudor period belongs the elevation of the English-ruled state in Ireland from a Lordship to a Kingdom (1541) under Henry VIII.

Armorial[edit]

Before the succession[edit]

Arms of Owen Tudor.svg
Arms of Edmund Tudor, Earl of Richmond.svg
Arms of Jasper Tudor, Duke of Bedford.svg
Earlier arms of the Tudors as Welsh noble house. Coat of arms of Edmund Tudor, first Earl of Richmond. As he was the son of a princess of France and a minor Welsh Squire, the grant of these arms to him by his half-brother Henry VI recognizes his status as part of the Lancastrian Royal Family. Coat of Arms of Jasper Tudor, Duke of Bedford, and Earl of Pembroke, brother of Edmund Tudor

Patrilineal descent[edit]

Patrilineal descent, the descent from a male ancestor in which all intervening ancestors are also male, is the principle behind membership in royal houses, as it can be traced back through the paternal line. Note that as siblings, Edward, Mary and Elizabeth, share a generation number.

Royal House of Tudor[edit]
  1. Ednyfed Fychan, d. 1246
  2. Goronwy ab Ednyfed, Lord of Tres-gastell, d. 1268
  3. Tudur Hen, Lord of Penmynydd, d. 1311
  4. Goronwy ap Tudur Hen, d. 1331
  5. Tudur ap Goronwy, Lord of Penmynydd, d. 1367
  6. Maredudd ap Tudur, d. 1406
  7. Owen Tudor, 1400–1461
  8. Edmund Tudor, 1st Earl of Richmond, 1430–1456
  9. Henry VII of England, 1457–1509
  10. Henry VIII of England, 1491–1547
11a. Edward VI of England, 1537–1553
11b. Mary I of England, 1516–1558
11c. Elizabeth I of England, 1533–1603

Coat of arms as sovereigns

Coat of Arms of Henry VII of England (1485-1509).svg
Coat of Arms of England (1509-1554).svg
Coat of Arms of England (1554-1558).svg
Coat of Arms of England (1558-1603).svg
Coat of Arms of Henry VII of England (1485-1509) & Henry VIII of England (1509-1547) in the first part of his reign Coat of Arms of Henry VIII (1509-1547) in the later part of his reign & Edward VI (1547–1553) Coat of Arms of Mary I (1554-1558) impaled with those of her husband, Philip II of Spain Coat of Arms Elizabeth I (1558-1603) with her personal motto: “Semper eadem” or “always the same”

As Prince of Wales, Arthur, Henry, and Edward all bore these arms,

Coat of Arms of the Tudor Princes of Wales (1489-1574).svg
Coat of Arms of the Tudor Princes of Wales (1489-1574.

Tudor Badges

The Welsh Dragon supporter honored the Tudor’s Welsh origins. The most popular symbol of the house of Tudor was the Tudor rose (see top of page). When Henry Tudor took the crown of England from Richard III in battle, he brought about the end of the Wars of the Roses between the House of Lancaster (whose badge was a red rose) and the House of York (whose badge was a white rose). He married Elizabeth of York to bring all factions together. On his marriage, Henry adopted the Tudor Rose badge conjoining the White Rose of York and the Red Rose of Lancaster. It symbolized the Tudor’s right to rule as well the uniting of the kingdom after the Wars of the Roses. It was used by every British Monarch since Henry VII as a Royal Badge.

Royal Roses Badge of England.svg
Tudor Rose Royal Badge of England.svg
Tudor Rose (Heraldry).svg
Tudor Dragon Badge.svg
Beaufort Portcullis Badge of the Tudors.svg Crowned Fleur de lys (Tudor Crown).svg Crowned Harp (Tudor Crown).svg
Royal Roses Badge of England showing the red rose of Lancaster, the white rose of York, and the combined Tudor rose. Tudor Rose Royal Badge of England combining the Red Rose of Lancaster and White Rose of York. Tudor Rose Uncrowned Tudor dragon badge symbolizing the Tudor’s Welsh heritage and the Welsh union with England. Tudor Portcullis Badge taken from their Beaufort ancestors Crowned Fleur de lys (Tudor Crown) showing the claim to crown of France. Crowned Harp of Ireland(Tudor Crown)showing the Tudors as Kings of Ireland. The harp was later quartered into the royal arms.

Tudor Monograms

The Tudors also used monograms to denote themselves:

Royal Monogram of King Henry VIII of England.svg
Royal Monogram of Queen Elizabeth I of England.svg
Royal Monogram of King Henry VIII of England. Royal Monogram of Queen Elizabeth I of England.

Lineage and the Tudor name

Patrimonial Lineage

As noted above Tewdur or Tudor is derived from the words tud “territory” and rhi “king”. Owen Tudor took it as a surname on being knighted. It is doubtful whether the Tudor kings used the name on the throne. Kings and princes were not seen as needing a name, and a ” ‘Tudor’ name for the royal family was hardly known in the sixteenth century. The royal surname was never used in official publications, and hardly in ‘histories’ of various sorts before 1584. … Monarchs were not anxious to publicize their descent in the paternal line from a Welsh adventurer, stressing instead continuity with the historic English and French royal families. Their subjects did not think of them as ‘Tudors’, or of themselves as ‘Tudor people’”.[27] Princes and Princess would have been known as “of England”. The medieval practice of colloquially calling princes after their place birth (e.g. Henry of Bolingbroke for Henry IV or Henry of Monmouth for Henry V) was not followed. Henry VII was likely known as “Henry of Richmond” before his taking of the throne.

Ednyfed Fychan
d. 1246
Goronwy ab Ednyfed
d. 1268
Tudur Hen
(also known as Tudur ap Goronwy)
d. 1311
Tomos ap Llewelyn
d.1343
Goronwy ap Tudur Hen
d. 1331
Elen ferch Tomos
(mother of Owain Glyndŵr)
Marged ferch Tomos Tudur ap Goronwy
d. 1367
Goronwy ap Tudur Edynfed ap Tudur Maredudd ap Tudur
d.1406
Rhys ap Tudur
d. 1409
Gwilym ap Tudur
d. 1413
Owen Tudor
(Owain Tudur)
Edmund Tudor, 1st Earl of Richmond
d. 1456
Jasper Tudor
d.1495
Henry VII of England
d. 1509

Royal Lineage (Simplified)[edit]

The Tudors claim to the throne was the strongest one at the end of the Wars of the Roses, as it combined the Lancastrian claim in their descent from the Beauforts and the Royal Yorkist claim by the marriage of Henry VII to the heiress of Edward IV.

Crown of England Old.png
Edward III
1327–1377
Edward, the Black Prince Lionel of Antwerp, Duke of Clarence John of Gaunt, Duke of Lancaster Edmund of Langley, 1st Duke of York
Crown of England Old.png
Richard II
1377–1399
Philippa, 5th Countess of Ulster Crown of England Old.png
Henry IV
1399–1413
John Beaufort, 1st Earl of Somerset
Roger Mortimer, 4th Earl of March, 6th Earl of Ulster Crown of England Old.png
Henry V
1413–1422
Catherine of France Owen Tudor Richard of Conisburgh, 3rd Earl of Cambridge
Anne de Mortimer Crown of England Old.png
Henry VIRed Rose Badge of Lancaster.svg
1422–1461, 1470–1471
Edmund Tudor, 1st Earl of RichmondRed Rose Badge of Lancaster.svg Margaret Beaufort, Countess of Richmond and DerbyRed Rose Badge of Lancaster.svg Richard, 3rd Duke of YorkWhite Rose Badge of York.svg
Edward of Westminster, Prince of WalesRed Rose Badge of Lancaster.svg Crown of England Old.png
Edward IV of EnglandWhite Rose Badge of York.svg
George, 1st Duke of ClarenceWhite Rose Badge of York.svg Crown of England Old.png
Richard III of EnglandWhite Rose Badge of York.svg
Isabella I of Castile Ferdinand II of Aragon Tudor Crown (Heraldry).svg
Henry VII of EnglandRed Rose Badge of Lancaster.svg
Elizabeth of YorkWhite Rose Badge of York.svg Margaret Pole, Countess of Salisbury Edward of Middleham, Prince of WalesWhite Rose Badge of York.svg
Joanna of Castile Maria of Aragon Catherine of Aragon Tudor Crown (Heraldry).svg
Henry VIII of EnglandTudor Rose.svg
Arthur, Prince of Wales Tudor Rose.svg Margaret TudorTudor Rose.svg Mary TudorTudor Rose.svg Reginald Pole
Charles V, Holy Roman Emperor Isabella of Portugal James V of Scotland Lady Frances Brandon
Philip II of Spain Tudor Crown (Heraldry).svg
Mary I of EnglandTudor Rose.svg
Tudor Crown (Heraldry).svg
Elizabeth I of EnglandTudor Rose.svg
Tudor Crown (Heraldry).svg
Edward VI of EnglandTudor Rose.svg
Mary, Queen of Scots Lady Jane Grey
Tudor Crown (Heraldry).svg
James VI of Scotland and I of England Dimidiated Rose and Thistle Badge.svg


The Crusades – Christians vs Muslims – What”s it all about?

The Crusades – Muslims vs Christians

The Crusades were military campaigns sanctioned by the Catholic Church in the Middle Ages. Pope Urban II authorized the First Crusade in 1095 with the goal of restoring European access to the Holy Land, and an intermittent 200-year struggle ensued. Urban was also seeking to reunite the Catholic Church under his leadership by militarily supporting Emperor Alexios I. After centuries of competitive co-existence with the Arabs following the initial Muslim conquests the Byzantine Empire had been defeated by the Turks in 1071 at the Battle of Manzikert.

As a result, the Byzantines lost the fertile coastal area of Anatolia and were forced into competition with Turks migrating westward

—————————————————————————————

Jihad vs. Crusade – Holy Wars in Comparative Perspective

—————————————————————————————

Hundreds of thousands of Roman Catholics from many different classes and nations of Western Europe became crusaders by taking a public vow and receiving plenary indulgences from the church. Some crusaders were peasants hoping for Apotheosis at Jerusalem. Pope Urban II claimed that anyone who participated was forgiven of their sins. In addition to demonstrating devotion to God, as stated by the Catholic Church, participation satisfied feudal obligations and provided opportunities for economic and political gain. Crusaders often pillaged the countries through which they traveled, and contrary to their promises the leaders retained much of this territory rather than returning it to the Byzantines.]

The People’s Crusade prompted the murder of thousands of Jews, known as the Rhineland massacres. Constantinople was sacked during the Fourth Crusade rendering the reunification of Christendom impossible. Due to the weakening that resulted from the siege, the Byzantine Empire ultimately fell to the Ottomans.[5] The Catholic Church mounted no coherent response when their last stronghold in the region, Acre, fell in 1291.

Opinions concerning the conduct of crusaders have varied from laudatory to highly critical. The impact of the crusades was profound; they reopened the Mediterranean to commerce and travel, enabling Genoa and Venice to flourish. Crusader armies would trade with the local populations while travelling, and Orthodox Byzantine emperors often organized markets for crusaders moving through their territory. The Crusades consolidated the collective identity of the Latin Church under papal leadership, were a source of heroism, chivalry, and piety. This consequently spawned medieval romance, philosophy, and literature. However, the crusades reinforced the connection between Western Catholicism, feudalism, and militarism, which was counter to the Peace and Truce of God that Urban had promoted

—————————————————————————————

THE CRUSADES: CRESCENT & THE CROSS Documentary

—————————————————————————————

Terminology

A 12th-century Byzantine manuscript illumination depicting Byzantine Greeks punishing Cretan Saracens in the 9th century (from the Madrid Skylitzes)

  • Crusade is a modern term derived from the French croisade and Spanish cruzada and by 1750, the various forms of the word “crusade” had established themselves in English, French, and German.[9] The Oxford English Dictionary records its first use in English as occurring in 1757 by William Shenstone.[10] When a crusader swore a vow (a votus) to be fulfilled on successfully reaching Jerusalem they were granted a cloth cross (crux) to be sewn into their clothes. This “taking of the cross”, the crux, eventually became associated with the entire journey. They saw themselves as undertaking an iter, a journey, or a peregrinatio, an armed pilgrimage. The inspiration for this “messianism of the poor” was the expected mass apotheosis at Jerusalem.[5]
  • The numbering of the Crusades is matter of debate with some historians considering that between 1096 and 1291 there were seven major Crusades and numerous minor ones.[3] However, others consider the Fifth Crusade of Frederick II as two distinct crusades. This would make the crusade launched by Louis IX in 1270 the Eighth Crusade. In addition, sometimes even this crusade is considered as two, leading to a Ninth Crusade.
  • Popes frequently called political crusades and crusades were also declared as a means of conflict resolution amongst fellow Roman Catholics. The first of these was called by Pope Innocent III against Markward of Anweiler in 1202.[14] Further examples include a crusade against the Stedingers and several against Emperor Frederick II and his sons called by a number of popes.[15] Others include two crusades called against opponents of King Henry III of England enjoying the same privileges as those given to crusaders on the Fifth Crusade.[16]
  • The term widely used for Muslim was Saracen as before the 16th century the words “Muslim” and “Islam” were very rarely used by Europeans.[17] In Greek and Latin this term had a longer evolution from the beginning of the first millennium, where it referred to a people who lived in desert areas around the Roman province of Arabia who were distinguished from Arabs.[18][19] The term developed to include Arab tribes and by the 12th century had become an ethnic and religious marker synonymous with “Muslim” in Medieval Latin literature.[20][21]
  • The terms Frank and Latin given from the period of the Crusades to persons belonging to any of the Western nations of Europe, in contradistinction to the Greeks.[22][23]

Historiography

During the Reformation and Counter-Reformation of the 16th century, historians saw the Crusades through the prism of their own religious beliefs. Protestants saw them as a manifestation of the evils of the Papacy, while Catholics viewed the movement as a force for good.[24] During the Enlightenment, historians tended to view both the Crusades and the entire Middle Ages as the efforts of barbarian cultures driven by fanaticism.[25] By the 19th century, with the dawning of Romanticism, this harsh view of the crusades and its time period was mitigated somewhat.[26] with later 19th-century crusade scholarship focusing on increasing specialization of study and more detailed works on subjects.[27]

Enlightenment scholars in the 18th century and modern historians in the West have expressed moral outrage at the conduct of the crusaders. In the 1950s, Sir Steven Runciman wrote that “High ideals were besmirched by cruelty and greed … the Holy War was nothing more than a long act of intolerance in the name of God” .[28] In the 20th century, three important works covering the entire history of the crusades have been published, those of Rene Grousset, Runciman and the multi-author work edited by K. M. Stetton.[29] A pluralist view of the crusades has developed in the 20th century inclusive of all papal-led efforts, whether in the Middle East or in Europe[11] Historian Thomas Madden has made the contrary argument that “[t]he crusade, first and foremost, was a war against Muslims for the defense of the Christian faith…. They began as a result of a Muslim conquest of Christian territories.” Madden says the goal of Pope Urban was that “[t]he Christians of the East must be free from the brutal and humiliating conditions of Muslim rule.”[13]

After the fall of Acre in 1291, European support for the Crusades remained despite criticism by contemporaries such as Roger Bacon who felt the Crusades were ineffective since “those who survive, together with their children, are more and more embittered against the Christian faith.”[30] The historian Norman Davies summarised the case against the crusades as running counter to the Peace and Truce of God that Urban had promoted; instead they reinforced the connection between Western Christendom, feudalism, and militarism. The formation of military religious orders scandalised the Orthodox Christian Byzantine Greeks. Crusaders pillaged the countries they transited on their journey east. Rather than keeping their oath to restore lands to the Byzantines, they often kept the land for themselves.[3][31][32] The Peoples’ Crusade instigated the Rhineland massacres and the massacre of thousands of Jews. In the late 19th century this episode was used by Jewish historians to support Zionism.[33] The Fourth Crusade resulted in the sacking of Constantinople, effectively ending the chance of reuniting the Christian church by reconciling the East–West Schism and leading to the weakening and eventual fall of the Byzantine Empire to the Ottomans. Historians of the Enlightenment criticized the misdirection of the crusades. In particular they pointed to the Fourth Crusade which instead of attacking Islam attacked another Christian power—the (Eastern) Roman Empire. David Nicolle says the Fourth Crusade has always been controversial in terms of the “betrayal” of Byzantium.[34] Edward Gibbon in The History of the Decline and Fall of the Roman Empire said the crusaders efforts would have been more profitably employed in the improvement of their native country[3]

Background

The Great Seljuk Empire at its largest extent, in 1092

In the Eastern Mediterranean after Muslim forces defeated the Eastern Roman/Byzantines at the Battle of Yarmouk in 636, the control of Palestine passed through the Umayyad Dynasty, the Abbasid Dynasty. and the Fatimids.[35][36][37] Toleration, trade, and political relationships between the Arabs and the Christian states of Europe ebbed and flowed until 1072 when the Fatimids lost control of Palestine to the rapidly expanding Great Seljuk Empire.[38] For example, the Fatimid Caliph al-Hakim bi-Amr Allah ordered the destruction of the Church of the Holy Sepulchre, only to have his successor allow the Byzantine Empire to rebuild it.[39] The Muslim rulers allowed pilgrimages by Catholics to the holy sites. Resident Christians were considered people of the book and so were tolerated as Dhimmi or “subjugated people” accorded a second-class status, and inter-marriage was not uncommon.[40] Cultures and creeds coexisted as much as competed, but the frontier conditions were not conducive to Latin Catholic pilgrims and merchants.[41] The disruption of pilgrimages by conquering Seljuk Turks prompted support for the Crusades in Western Europe.[42]

Image of Seljuk emperor Alp Arslan humiliating Romanos IV in 1071 after Manzikert. Alp Arslan actually treated Romanos IV well and let him return to Constantinople, where he was killed by the Byzantines. Image from a 15th-century illustrated French translation of Boccaccio‘s De Casibus Virorum Illustrium.

The Byzantine Empire was resurgent from the end of the 10th century, with Basil II spending most of his 50-year reign on campaign, conquering a great amount of territory. He left a growing treasury, at the expense of neglecting domestic affairs and also ignoring the cost of incorporating his conquests into the Byzantine Ecumene. None of Basil’s successors had any particular military or political talent, and governing the Empire increasingly fell into the hands of the civil service. Their efforts to spend the Byzantine economy back into prosperity only resulted in burgeoning inflation. To balance the increasingly unstable budget, Basil’s large standing army was dismissed as unnecessary, and native thematic troops were cashiered and replaced by foreign mercenaries. Following the defeat of the Byzantine army at the Battle of Manzikert in 1071, the Seljuk Turks had taken over almost all of Anatolia, and the Empire descended into frequent civil wars.[43] In the Western Mediterranean the reconquest of the Iberian Peninsula from Muslims began in the 8th century and reached its turning point with the recapture of Toledo in 1085.[44] At the subsequent Council of Clermont in 1095.[45] Urban II tied the ongoing wars in Iberia to his preaching of the First Crusade and the crusading effort but it was not until the papal encyclical in 1123 by Pope Calixtus II that these wars attained the status of crusades.[46] After this, the papacy declared Iberian crusades in 1147, 1193, 1197, 1210, 1212, 1221 and 1229. Crusading privileges were also given to those people who were helping the military orders – both the traditional Templars and Hospitallers as well as the specifically Iberian orders that were founded and eventually merged into two main orders – that of the Order of Calatrava and the Order of Santiago. From 1212 to 1265, the Christian kingdoms of Iberia drove Muslim rule into the far south of the Iberian Peninsula, confined to the small Emirate of Granada. In 1492, this remnant was conquered and Muslims and Jews were expelled from the peninsula.[47]

In Western Europe an aggressive and reformist papacy came into conflict with both the Eastern Empire and Western secular monarchs, leading to the East-West Schism in 1054,[48] and the Investiture Controversy, which had started around 1075 and was still on-going during the First Crusade. The papacy began to assert its independence from secular rulers, marshaling arguments for the proper use of armed force by Catholics. The result was intense Catholic piety, interest in religious affairs, and religious propaganda advocating “Just War” in order to retake Palestine from the Muslims. The majority view was that non-Christians could not be forced to accept Christian baptism or should not be physically assaulted for having a different faith as opposed to a less common opinion that vengeance was a response to injuries such as the denial of Christian faith, government or the opportunity for justified forcible conversion.[49] Taking part in such a war was seen as a form of penance, which could remit sins.[50] Meanwhile, in Europe, the Germans were expanding at the expense of the Slavs .[51] While Sicily was conquered by the Norman adventurer Robert Guiscard in 1072.[52]

Illumination from the Livre des Passages d’Outre-mer (c. 1490) of Urban II at the Council of Clermont (Bibliothèque Nationale)

Emperor Alexios I Komnenos requested military assistance from Pope Urban II at the Council of Piacenza to fight the Seljuqs in 1095, probably envisaging this in the form of mercenaries to reinforce his tagmata and exaggerating the dangers facing the Eastern Empire in order to secure the needed troops[53] On the penultimate day of the subsequent council at Clermont, attended by nearly 300 clerics from throughout France from 19 to 28 November, Urban raised the problems in the Εast and the struggle of the Eastern Roman Empire against Muslims. There are six main sources of information on the Council: the anonymous Gesta Francorum (“The Deeds of the Franks”) dated c. 1100/1101, by Fulcher of Chartres who was present at the council; Robert the Monk, who may have been present; as well as Baldric, archbishop of Dol, and Guibert de Nogent, who were not. All the accounts were written retrsopectively and differ greatly.[54] Robert the Monk—Historia Iherosolimitana, written in 1106/7— writes that the pope asked western Christians, poor and rich, to come to the aid of the Byzantine Empire because “Deus vult,” (“God wills it”) adding that Urban promised Absolution for those who took part, although other sources claim instead, it was remission of all penance due from sins, later called an indulgence. In the accounts Urban emphasizes reconquering the Holy Land more than aiding the Emperor, listing gruesome offences committed by Muslims and focussing on the reconquest of the Holy Land. The propogand for this call to arms was preached across France with Urban himself writing those “waiting in Flanders” lamenting that Turks, in addition to ravaging the “churches of God in the eastern regions,” have seized “the Holy City of Christ, embellished by his passion and resurrection—and blasphemy to say it—have sold her and her churches into abominable slavery.” While not explicitly calling for the reconquest of Jerusalem he does call for the military “liberation” of the Eastern Churches and appoints Adhemar of Le Puy to lead the Crusade, commencing on the day of the Assumption of Mary, 15 August.[55]

History

First Crusade (1096–1099) and immediate aftermath

———————————————————————————-

The Dark Ages: Life, War and Death – Crusades

———————————————————————————-

Route of the First Crusade through Asia

Inspired by Pope Urban II‘s preaching, Peter the Hermit led as many as 20,000 people, mostly peasants, to the Holy Land shortly after Easter 1096.[56] When they arrived in Germany in spring 1096, units of crusaders commenced the Rhineland massacres in the cities of Speyer, Worms, Mainz and Cologne, despite the efforts by Catholic bishops to protect the Jews. Major leaders included Emicho and Peter the Hermit. The range of anti-Jewish activity was broad, extending from limited, spontaneous violence to full-scale military attacks on the Jewish communities of Mainz and Cologne.[57] This was the first major outbreak of anti-Jewish violence in Europe and was cited by 19th-century Zionists as showing the need for a Jewish state.[58] When the group finally reached the Byzantine Empire, Emperor Alexios urged them to wait for the western nobles, but they insisted upon proceeding and fell to a Turkish ambush outside Nicaea, from which only about 3,000 people escaped.[59]

The official crusader armies departed from France and Italy in August and September 1096. The bulk of the army divided into four parts, which travelled separately to Constantinople.[60][61] With non-combatants included, the western forces may have contained as many as 100,000 people.[62] The armies journeyed eastward by land toward Constantinople, where they received a wary welcome from the Byzantine Emperor.[63] The main army, mostly comprising French and Norman knights under baronial leadership, pledged to restore lost territories to the empire and marched south through Anatolia.[64][65][66] The leaders of the First Crusade included Godfrey of Bouillon, Robert Curthose, Hugh of Vermandois, Baldwin of Bouillon, Tancred de Hauteville, Raymond of Toulouse, Bohemond of Taranto, Robert II, Count of Flanders, and Stephen, Count of Blois. The king of France and Henry IV, Holy Roman Emperor, were in conflict with the Pope and did not participate.[67]

The crusader armies initially fought the Turks at the lengthy Siege of Antioch, which began in October 1097 and lasted until June 1098. When they entered Antioch, the crusaders massacred the Muslim inhabitants and pillaged the city. However, a large Muslim army led by Kerbogha immediately besieged the victorious crusaders, who were now inside Antioch. Bohemond of Taranto successfully rallied the crusader army and defeated Kerbogha on 28 June.[68] Bohemond and his men retained control of the city, despite his pledge to Alexios.[69] Most of the remaining crusader army marched south, moving from town to town along the coast, finally reaching Jerusalem on 7 June 1099 with only a fraction of their original forces.[70]

Jews and Muslims fought together to defend Jerusalem against the invading Franks, but the crusaders entered the city on 15 July 1099 . They proceeded to massacre the remaining Jewish and Muslim civilians and also pillaged or destroyed mosques or the city itself.[71] In his Historia Francorum qui ceperunt Iherusalem, Raymond D’Aguilers exalted actions which would be considered atrocities from a modern viewpoint.[72] As a result of the First Crusade, four primary crusader states were created: Edessa, Antioch, Tripoli, and Jerusalem.[73]

On a popular level, the preaching of the First Crusade unleashed a wave of impassioned, personally felt pious Catholic fury that was expressed in the massacres of Jews that accompanied and preceded the movement of the crusaders through Europe,[74] as well as the violent treatment of the “schismatic” Orthodox Christians of the east.[75]

Following this crusade was a second, less successful wave of crusaders, known as the Crusade of 1101, in which Turks led by Kilij Arslan defeated the crusaders in three separate battles in a response to the First Crusade.[76] Sigurd I of Norway was the first European king to visit the crusading states, as well as the first European king to take part in a crusading campaign, although his expedition was as much pilgrimage as crusade. His fleet helped at the Siege of Sidon. Also in 1107, Bohemond I of Antioch attacked the Byzantines at Avlona and Dyrrachium, in what is occasionally called Bohemond’s Crusade, which ended in September 1108 with a defeat for Bohemond and his retiring to Italy.

12th century

In the early 12th-century, smaller scale crusading continued: Pope Calixtus II promoted the Venetian Crusade of 1122–1124;[77] Count Fulk V of Anjou visited in 1120; Conrad III of Germany in 1124 and Fulk V again in 1129 leading to recognition of the Knights Templar by Pope Honorius II. In 1135 Pope Innocent II‘s grant of crusading indulgences to those who opposed papal enemies is seen by some historians as the beginning of politically motivated crusades.[78] The crusader states were initially secure, but Imad ad-Din Zengi, who was appointed governor of Mosul in 1127, captured Aleppo in 1128 and Edessa (Urfa) in 1144.[79] These defeats led Pope Eugenius III to call for another crusade on 1 March 1145.[80] The new crusade was called for by various preachers, most notably by Bernard of Clairvaux .[81] French and South German armies, under the Kings Louis VII and Conrad III respectively, marched to Jerusalem in 1147 but failed to win any major victories, launching a failed pre-emptive siege of Damascus.[82] On the other side of the Mediterranean a group of Northern European crusaders stopped in Portugal, allied with the Portuguese King, Afonso I of Portugal, and retook Lisbon from the Muslims in 1147.[83] A detachment from this group of crusaders helped Count Raymond Berenguer IV of Barcelona conquer the city of Tortosa the following year.[84] In the Holy Land by 1150, both the kings of France and Germany had returned to their countries without any result. Bernard of Clairvaux, who in his preachings had encouraged the Second Crusade, was upset with the amount of misdirected violence and slaughter of the Jewish population of the Rhineland[85] A followup to this crusade was the pilgrimage of Henry the Lion, Duke of Saxony, in 1172 that is sometimes labelled a crusade.[86] At the same time Saxons and Danes fought against Polabian Slavs in the Wendish Crusade or First Northern Crusade. The Wends defeated the Danes and the Saxons did not contribute much to the crusade.[87] The Wends did acknowledge the rule of Henry the Lion. Further crusading actions continued although no papal bulls were issued calling new crusades.[88] Henry restarted efforst to conquer the Wends in 1160 and in 1162 the Wends were defeated.[89]

Detail of a miniature of Philip II of France arriving in the Holy Land

Saladin created a single powerful state, uniting opposition and providing a new threat to the Latin states.[90] Following his victory at the Battle of Hattin he easily overwhelmed the disunited crusaders in 1187 and retook Jerusalem on 29 September 1187. Terms were arranged and the city surrendered, with Saladin entering the city on 2 October 1187.[91] Saladin’s victories shocked Europe. On hearing news of the Siege of Jerusalem (1187), Pope Urban III died of a heart attack on 19 October 1187.[92] On 29 October Pope Gregory VIII issued a papal bull, Audita tremendi, proposing the Third Crusade. To reverse the loss of Jerusalem, Frederick I, Holy Roman Emperor (r. 1152–1190) of Germany, King Philip II of France (r. 1180–1223), and King Richard I (The Lionheart) of England (r. 1189–1199) all organized forces. Frederick died en route, and few of his men reached the Holy Land. The other two armies arrived but were beset by political quarrels. Philip returned to France, leaving most of his forces behind. Richard captured the island of Cyprus from the Byzantines in 1191. He then recaptured the city of Acre after a long siege. The crusader army headed south along the Mediterranean coast, defeated the Muslims near Arsuf, recaptured the port city of Jaffa, and was in sight of Jerusalem, but supply problems forced them to end the crusade without taking Jerusalem.[93] Richard left the following year after negotiating a treaty with Saladin. The terms allowed trade for merchants and unarmed Catholic pilgrims to make pilgrimages to Jerusalem, while it remained under Muslim control.[94] Henry VI, Holy Roman Emperor initiated a German Crusade in 1197 to fulfil the promises made by his father, Frederick. Led by Conrad of Wittelsbach, Archbishop of Mainz the army landed at Acre and captured the cities of Sidon and Beirut before Henry died and most of the crusaders returned to Germany.[95]

13th century

Pope Celestine III called for a crusade against pagans in Northern Europe in 1193 resulting in Bishop Berthold of Hanover leading a large army of crusaders to defeat and his death in 1198. In response to this defeat Innocent III issued a papal bull declaring a crusade against the mostly pagan Livonians.[96] Albrecht von Buxthoeven, consecrated as bishop in 1199, arrived the following year with a large force and established Riga as the seat of his bishopric in 1201. In 1202 he formed the Livonian Brothers of the Sword to aid in the conversion of the pagans to Catholicism and, more importantly, to protect German trade and secure German control over commerce. The Livonians were conquered and converted between 1202 and 1209.[97] In 1217 Pope Honorius III called a crusade against the Prussians.[98] Konrad of Masovia gave Chelmno to the Teutonic Knights in 1226 to serve as a base for the Prussian crusade.[99] In 1236 the Livonian Sword Brothers were defeated by the Lithuanians at Saule, and in 1237 Pope Gregory IX merged the remaining Sword Brothers into the Teutonic Knights.[100] By 1249, the Teutonic Knights had completed their conquest of the Old Prussians, which they ruled as a fief of the German emperor. The Knights then moved on to conquer and convert the pagan Lithuanians, a process that lasted into the 1380s.[101] The Teutonic Order attempted but failed to conquer Orthodox Russia (particularly the Republics of Pskov and Novgorod), an enterprise endorsed by Pope Gregory IX, as part of the Northern Crusades. In 1240 the Novgorod army defeated the Swedes in the Battle of the Neva.[102] and in 1242 they defeated the Livonian knights in the Battle on the Ice.[103] Innocent III initiated recruitment for what became known as the Forth crusade in 1200 with preaching taking place in France, England, and Germany, although the bulk of the efforts were in France.[104] This became a vehicle for the political ambitions of Doge Enrico Dandolo and the German King Philip of Swabia who was married to Irene of Byzantium. Dandolo saw an opportunity to expand Venice’s possessions in the near east, while Philip saw the crusade as a chance to restore his exiled nephew, Alexios IV Angelos, to the throne of Byzantium.[105] The crusaders contracted with the Venetians for a fleet and provisions to transport them to the Holy Land, but they lacked the funds to pay when too few knights arrived in Venice. They agreed to divert the crusade to Constantinople and share what could be looted as payment. As collateral the crusaders seized the Christian city of Zara on 24 November 1202. Innocent was appalled and excommunicated the crusaders.[106] The crusaders met with limited resistance in their initial siege of Constantinople, sailing down the Dardanelles and breaching the sea walls. However, Alexios was strangled after a palace coup, robbing them of their success, and they had to repeat the siege in April 1204. This time the city was sacked, churches pillaged, and large numbers of the citizens butchered. The crusaders took their rewards, dividing the Empire into Latin fiefs and Venetian colonies. In the Venetian period, there was particular attention to improving defences of La Cava and Nicosia.[107] In April 1205, the crusaders were largely annihilated by Bulgars and remaining Greeks at Adrianople, where Kaloyan of Bulgaria captured and imprisoned the new Latin emperor Baldwin of Flanders.[108][109] While deploring the means, the papacy initially supported this apparent forced reunion between the Eastern and Western churches.[110] The Fourth Crusade effectively left two Roman Empires in the East: a Latin “Empire of the Straits”, existing until 1261, and a Byzantine enclave ruled from Nicea, which later regained control in the absence of the Venetian fleet. Venice was the sole beneficiary in the long run.[111]

Pope Innocent III excommunicating the Albigensians (left), Massacre against the Albigensians by the crusaders (right)

The Albigensian Crusade was launched in 1208 to eliminate the heretical Cathars of Occitania (modern-day southern France). It was a decades-long struggle that had as much to do with the desire of northern France to extend its control southwards as it did with battling heresy. In the end, the Cathars were driven underground, and the independence of southern France was eliminated.[112] In 1221 Honorius III called on King Andrew II to crusade against heretics in Bosnia and Hungarian forces responded to further papal calls in both 1234 and 1241. The later conflict ended because of the Mongol invasion of Hungary in 1241. The Bosnian church was Catholic in theology, but continued to be in schism with the Roman Catholic Church well past the end of the Middle Ages.[113] Pope Innocent III declared a new crusade to commence in 1217, along with his summoning of the Fourth Council of the Lateran in 1215. The majority of the crusaders came from Germany, Flanders, and Frisia, along with a large army from Hungary led by King Andrew II and other forces led by Duke Leopold VI. The forces of Andrew and Leopold arrived in Acre in October 1217 but little was accomplished and Andrew returned to Hungary in January 1218. After the arrival of more crusaders, Leopold and the king of Jerusalem, John of Brienne, laid siege to Damietta, Egypt.[114] which they captured finally in November 1219. Further efforts by the papal legate, Pelagius, to invade further into Egypt led to no gains.[115] Blocked by forces of the Ayyubid Sultan Al-Kamil, the crusaders were forced to surrender. Al-Kamil forced the return of Damietta and agreed to an eight-year truce and the crusaders left Egypt.[116]

Emperor Frederick II (left) meets al-Kamil (right), from a manuscript of the Nuova Cronica by Giovanni Villani

Emperor Frederick II repeatedly failed to fulfill his vows to crusade for which he was excommunicated.[117] Finally he sailed from Brindisi, landing at Acre in September 1228 via Cyprus.[118] There were no battles as Frederick made a peace treaty with Al-Kamil that allowed Latin Christians to rule over most of Jerusalem and a strip of territory from Acre to Jerusalem, while the Muslims were given control of their sacred areas in Jerusalem. In return, Frederick pledged to protect Al-Kamil against all his enemies, even if they were Christian.[119] A followup to this crusade was the effort by King Theobald I of Navarre in 1239 and 1240 that had originally been called in 1234 by Gregory IX to assemble in July 1239 at the end of a truce. Besides Theobald, Peter of Dreux and Hugh, Duke of Burgundy and other French nobles took part. They arrived in Acre in September 1239 and after a defeat in November, Theobald arranged a treaty with the Muslims that returned territory to the crusading states, but caused much disaffection within the crusaders. Theobald returned to Europe in September 1240. Also in 1240, Richard of Cornwall, younger brother of King Henry III of England, took the cross and arrived in Acre in October. He then secured the ratification of Theobald’s treaty and left the Holy Land in May 1241 for Europe.[120]

In the summer of 1244, a Khwarezmian force summoned by the son of al-Kamil, al-Salih Ayyub, stormed and took Jerusalem. The Franks allied with Ayyub’s uncle Ismail and the emir of Homs and their combined forces were drawn into battle at La Forbie in Gaza. The crusader army and its allies were defeated within forty-eight hours by the Khwarezmian tribesmen.[121] King Louis IX of France organized a crusade after taking the cross in December 1244, preaching and recruiting from 1245 through 1248.[122] Louis’ forces set sail from France in May 1249 and landed near Damietta in Egypt on 5 June 1249. Waiting until the end of the Nile flood, the army marched into the interior in November and by February were near Mansura. They were defeated near there, however, and King Louis was captured while retreating towards Damietta.[123] Louis was ransomed for 800,000 bezants and a ten-year truce was agreed. Louis then went to Syria, where he remained until 1254 working to solidify the kingdom of Jerusalem and constructing fortifications.[124]

In 1256, the Venetians were evicted from Tyre, prompting the War of Saint Sabas over territory in Acre claimed by both Genoa and Venice.[125] Venice conquered the disputed property, destroying Saint Sabas’ fortifications, but was unable to expel the Genoese. During a blockade of 14 months Genoa allied with Philip of Monfort, John of Arsuf and the Knights Hospitaller while Venice was supported by the Count of Jaffa and the Knights Templar,[126] By 1261, the Genoese were expelled, but Pope Urban IV, concerned about the impact of the war on the defences against the Mongols, organised a peace council.[127] The conflict resumed in 1264 when the Genoese received aid from Michael VIII Palaiologos, Emperor of Nicaea and Venice failed in an attempt to conquer Tyre. Both sides employed Muslim soldiers, mostly Turcopoles, against their Christian foes and the Genoese had made an alliance with Baybars.[128] The warfare between Genoa and Venice had a significant negative impact on the Kingdom’s ability to withstand external threats to its existence. Except for the religious buildings, most of the fortified buildings in Acre had been destroyed at one point and it looked like it had been ravaged by a Muslim army. According to Rothelin, the continuator of William of Tyre’s History, 20,000 men had lost their lives in the conflict at a time when the crusader states were chronically short on soldiery. The war ended in 1270 and in 1288 Genoa finally received its quarter in Acre back.[129]

Statue of Charles of Anjou in Hyeres

In 1266, Saint Louis’ brother Charles had seized, with Sicily, parts of the eastern Adriatic it had previously controlled as well as Corfu, Butrinto, Avlona and Suboto. The Treaty of Viterbo was agreed with the exiled Baldwin II of Constantinople and William II Villehardouin that the heirs of both Latin princes were to marry children of Charles, and Charles was to have the reversion of the Empire and principality should the couples have no heirs. He also turned his brother’s crusade to his own advantage, persuading Louis to direct the Eighth Crusade against his rebel vassals in Tunis. Louis’s death, illness among the crusaders and a storm that devastated his fleet forced Charles to postpone his designs against Constantinople. Michael VIII Palaeologus was alarmed by Charles’s planned crusade to restore the Latin Empire that had fallen in 1261 and Charles’ expansion in the Mediterranean. Palaeologus delayed Charles by beginning negotiations with Pope Gregory X for a union between the Greek and the Latin churches. At the Council of Lyon, a Union of Churches was declared; Charles and Philip of Courtenay were compelled to extend a truce with Byzantium. The union would later prove to be unacceptable to the Greeks. Palaeologus also provided Genoa with funds to encourage the revolts in Charles’s northern Italian territories.[130] In 1268 Charles executed Conradin — a great-grandson of Isabella I of Jerusalem, principal pretender to the throne of Jerusalem — when seizing Sicily from the Holy Roman Empire. Charles went on to purchase the rights to Jerusalem from Maria of Antioch — the only remaining grandchild of Queen Isabella— creating a rival claim to that of Hugh III of Cyprus, who was a great grandson of Queen Isabella. Charles spent his life striving to assemble a Mediterranean empire. He and Louis regarded themselves as God’s instruments to uphold the Papacy.[131] Ignoring his advisers, in 1270 Louis IX again attacked the Arabs in Tunis in North Africa. He picked the hottest season of the year for campaigning and his army was devastated by disease. The king himself died, ending the last major attempt to take the Holy Land.[132] The Mamluks, led by Baibars, eventually drove the Franks from the Holy Land. From 1265 through 1271, Baibars drove the Franks to a few small coastal outposts.[133] The future Edward I of England undertook to crusade with Louis IX, but he was delayed and did not arrive in North Africa until November 1270. After the death of Louis, Edward went to Sicily and then on to Acre in May 1271. His forces were too small to make much difference, though, and he was upset at the conclusion of a truce between Baibars and the king of Jerusalem, Hugh. Although Edward learned of his father’s death and his succession to the throne in December 1272, he did not return to England until 1274, although he accomplished little in the Holy Land.[134] The accession of a French pope, Martin IV, in 1281 brought the full power of the Papacy into line behind Charles’ plans. He campaigned unsuccessfully in Albania and Achaea before preparing to launch the body of his Crusade (400 ships carrying 27,000 mounted knights) against Constantinople. However, Palaeologus allied with Peter III of Aragon to encourage an uprising known as the Sicilian Vespers in which the crusader fleet was abandoned and burnt. The Sicilians appealed to King Peter, who was proclaimed king with the Angevin house exiled forever from Sicily. Pope Martin excommunicated Peter and called a crusade against Aragon before, in 1287, Charles died, allowing Henry II of Cyprus to reclaim Jerusalem. One factor in the eventual decline and fall was the disunity and conflict that were endemic between the various Latin Christian interests of the Eastern Mediterranean. Pope Martin IV hopelessly compromised the Papacy supporting Charles of Anjou; and the botched secular “crusades” against Sicily and Aragon greatly tarnished its spiritual power. The collapse of its moral authority and the rise of nationalism rang the death knell for crusading, and would ultimately lead to the Avignon Papacy and the Western Schism. The Crusade of Aragón was declared by Martin IV against Peter III in 1284 and 1285. Peter was supporting the anti-Angevin forces in Sicily following the Sicilian Vespers, and the papacy supported Charles of Anjou. Pope Boniface VIII proclaimed a crusade against Frederick III of Sicily, the younger brother of Peter, in 1298, but was unable to prevent Frederick’s crowning and recognition as King of Sicily.

The mainland Crusading states of the middle eastern Outremer were extinguished with the fall of Tripoli in 1289, and Acre in 1291.[136] The remaining Latin Christians largely left for various destinations in the Frankokratia, were killed or enslaved.[137] Minor crusading efforts lingered into the 14th century. Peter I of Cyprus captured and sacked Alexandria in 1365 in what became known as the Alexandrian Crusade though his motivation was as much commercial as it was religious.[138] Louis II, Duke of Bourbon led a French-Genoese campaign in 1390 against Muslim pirates in North Africa and based in Mahdia called the Mahdian Crusade. After a ten-week siege, the crusaders lifted their siege with the signing of a ten-year truce.[139]

Crusades of the 14th and 15th centuries

Execution of Christian prisoners after the Battle of Nicopolis (1396) in retaliation for the Rahovo massacre of Ottoman prisoners

Various crusades were launched in the 14th and 15th centuries to counter the expansion of the Ottoman Empire starting in 1396 with Sigismund of Luxemburg, king of Hungary. Many French nobles joined Sigismund’s forces, including John the Fearless, son of the Duke of Burgundy, who was appointed military leader of the crusade. Although Sigismund advised the crusaders to adopt a defensive posture once they reached the Danube, the crusaders instead besieged the city of Nicopolis. The Ottomans defeated the crusaders in the Battle of Nicopolis on 25 September 1396 capturing 3,000 prisoners.[140]

The battle between the Hussite warriors and the Crusaders, Jena Codex, 15th century

The Hussite Crusade(s), also known as the “Hussite Wars,” or the “Bohemian Wars,” involved the military actions against the followers of Jan Hus in Bohemia in the period 1420 to around 1431. Crusades were declared five times in that period – in 1420, 1421, 1422, 1427 and in 1431. The net effect of these expeditions was to force the Hussite forces, which disagreed on many doctrinal points, to unite to drive out the invaders. The wars were brought to a conclusion in 1436 with the ratification of the Compactata of Iglau by the Church.[141] In April 1487, Pope Innocent VIII called a crusade against the Waldensian heretics of Savoy, the Piedmont, and the Dauphiné in southern France and northern Italy. The only efforts actually undertaken were against heretics in the Dauphiné, and resulted in little change.[142]

The Polish-Hungarian king, Władysław Warneńczyk invaded the recently conquered Ottoman territory and reached Belgrade in January 1444. Negotiations over a truce eventually led to an agreement, that was repudiated by Sultan Murad II within days of its ratification. Further efforts by the crusaders ended in the Battle of Varna on 10 November 1444, which was a decisive Ottoman victory, led to the crusaders withdrawing. This withdrawal led to the fall of Constantinople in 1453, as it was the last Western attempt to help the Byzantine Empire.

In 1456, John Hunyadi and Giovanni da Capistrano organized a crusade to lift the Ottomon siege of Belgrade.[143]

Crusader states

Main article: Outremer

Latin and Byzantine Empires in 1205

The First Crusade established the first four crusader states in the Eastern Mediterranean: the County of Edessa (1098 until 1149), the Principality of Antioch (1098 until 1268), Kingdom of Jerusalem (1099 until 1291) and the County of Tripoli (1104, although Tripoli itself was not conquered until 1109, to 1289). The Armenian Kingdom of Cilicia had its origins before the Crusades, but was granted the status of a kingdom by Pope Innocent III, and later became fully westernized by the (French) Lusignan dynasty. These states were recognised by Jonathan Riley-Smith as the first experiments in “Europe Overseas”. The general name given to them is Outremer (French: outre-mer) for “overseas”.[144]

The fourth crusade established a Latin Empire in the East and arranged the partition of the Byzantine territory among the participants. The Latin Emperor had direct control of one fourth of the Byzantine territory, Venice three eighths including three eighths of the city of Constantinople and the remainder was divided among the other crusader leaders. Thus began the period of the history of Greece known as Frankokratia or Latinokratia (“Frankish/Latin rule”), where Catholic West European nobles, mostly from France and Italy, established states on former Byzantine territory and ruled over the mostly Orthodox native Byzantine Greeks. The Partitio Romànie is a valuable document for the administrative divisions (episkepseis) and estates of the various Byzantine magnate families ca. 1203, as well as the areas still controlled by the Byzantine central government at the time.[28]

Finance

Christian Dirham with Arabic inscriptions from between 1216 and 1241

Crusades were expensive and as the wars increased, the costs also escalated. Pope Urban II called upon the rich to help those who were “less well-off” and lords on the First Crusade such as Duke Robert of Normandy and Count Raymond of St. Gilles, who had subsidized knights in their own contingents. The total cost of the crusades of 1284–1285 to King Louis IX of France was at about 1,537,570 livres, which was six times his annual income. This may be an underestimation because there are records that show he spent 1,000,000 livres in Palestine after his campaign in Egypt was over. Furthermore, rulers had demanded subsidies from their subjects.[145] Eventually, alms and legacies from the outburst of enthusiasm in the conquest of Palestine were another source of finance. The popes had ordered chests to be placed in churches for their collection and from the middle of the twelfth century, they granted indulgences, to those who contributed to the movement this way, while also encouraging the faithful to make bequests to the Holy Land in their own wills.[146]

Military orders

Central to the debate on crusading ethics are the military orders, particularly the Hospitallers and the Templars. To a modern sensibility it is strange that the church could reconcile monasticism with soldiering. Both the Hospitallers and the Templars became international organisations with depots located across the countries of Western Europe as well as in the East. In contrast the Teutonic knights successfully moved their attentions to the Baltic and the Spanish military orders of Santiago, Calatrava, Alcantara and Montesa concentrated on the Iberian Peninsula. The Knights of the Order of the Hospital of St John of Jerusalem were founded in 1099 in the aftermath of the first crusade. The order included military, medical and pastoral brothers. Following the fall of Acre they escaped to Cyprus and successively conquered and ruled both Rhodes (1309–1522) and Malta (1530–1801). The Poor Knights of Christ and the Temple of Solomon were founded in 1118 to protect pilgrims en route to Jerusalem. However, they quickly became immensely rich and powerful through banking and real estate. In 1322 the King of France suppressed the order on spurious charges of sodomy, magic and heresy but more probably for financial and political reasons.[147]

Role of women, children, and class

Illustration of the Children’s Crusade by Gustave Doré, 1892

Women were intricately connected with the Crusades, aiding the recruitment of crusading men, taking on responsibility in their absence, and providing financial and moral support.[148][149] Historians argue that the most significant role played by women in the West was maintaining the status quo.[150] Landholders left for the Holy Land, leaving control of their estates with regents, often wives or mothers. The Church recognized that risk to families and estates might discourage crusaders, so special papal protection formed part of the crusading privilege.[151] A number of aristocratic women went on crusade such as Eleanor of Aquitaine who joined her husband, Louis VII.[152] Some non-aristocratic women were also served by undertaking tasks considered suitable such as working as washerwoman.[150] More controversial was women taking an active part, which threatened their femininity, with accounts of women fighting coming mostly from Muslim historians with the aim of portraying Christian women as barbaric and ungodly due to their acts of killing.[153]

Less historically certain was a Children’s Crusade Catholic movement in France and Germany in 1212 that attracted large numbers of peasant teenagers and young people, with some under the age of 15. They were convinced that they could succeed where older and more sinful crusaders had failed: the miraculous power of their faith would triumph where the force of arms had not. Many parish priests and parents encouraged such religious fervor and urged them on. The pope and bishops opposed the attempt but failed to stop it entirely. A band of several thousand youth and young men, led by a German named Nicholas, set out for Italy. About a third survived the march over the Alps and got as far as Genoa; another group went to Marseilles. The luckier ones eventually managed to return home, but many others were sold as lifetime slaves on the auction blocks of Marseilles slave dealers.[154]

Three crusading efforts among the peasants occurred in the middle 1250s and again in the early 1300s. The first, the Shepherds’ Crusade of 1251, was preached in northern France. After meeting with Blanche of Castile, however, it became disorganized and had to be disbanded by the government.[155] The second, in 1309, occurred in England, northeastern France, and Germany, and had as many as 30,000 peasants arriving at Avignon before being disbanded[156] The last one, in 1320, had similar origins as the first shepherds’ crusade but quickly turned into a series of attacks on clergy and Jews, and was forcibly dispersed.[157]

Legacy

20th-century depiction of a victorious Saladin

Western Europeans in the East adopted native customs, saw themselves as citizens and intermarried.[158] This led to a people and culture descended from remaining European inhabitants of the crusader states — especially French Levantines in Lebanon, Palestine, and Turkey — and of traders from the maritime republics of the MediterraneanVenice, Genoa and Ragusa, continued to live in Constantinople/Istanbul, Smyrna/Izmir and other parts of Anatolia and the eastern Mediterranean coast throughout the middle Byzantine and Ottoman eras. These people are known as Levantines or Franco-Levantines (pr:”Frankolevantini”)—French: Levantins, Italian: Levantini, Greek: Φραγκολεβαντίνοι, Turkish: Levantenler or Tatlısu Frenkleri—and are Roman Catholic. They are now mainly concentrated in Istanbul, in the districts of Galata, Beyoğlu and Nişantaşı; İzmir, in the districts of Karşıyaka, Bornova and Buca; and Mersin, where they had been influential for creating and reviving a tradition of opera. After the British occupied parts of Ottoman Syria in the aftermath of the First World War the term “Levantine” has been used pejoratively for inhabitants of mixed Arab and European descent and for Europeans — usually French, Italian or Greek — who adopted local dress and customs.

The crusades influenced the attitude of the western Church and people towards warfare. The frequent calling of crusades habituated the clergy to the use of violence. The crusades also sparked debate about the legitimacy of taking lands and possessions from pagans on purely religious grounds that would arise again in the 15th and 16th centuries with the Age of Discovery.[159] The needs of crusading warfare also stimulated secular governmental developments, although these were not necessarily positive. The resources collected for crusading could have been used by the developing states for local and regional needs instead of in far away lands.[160]

With its power and prestige raised by the crusades, the papal curia had greater control over the entire western Church and extended the system of papal taxation throughout the whole ecclesiastical structure of the West. The indulgence system grew significantly in late medieval Europe, later to spark the Protestant Reformation in the early 1500s.[161]

The Albigensian Crusade was designed to eliminate the Cathar heresy in Languedoc. One result was France’s acquisition of lands with closer cultural and linguistic ties to Catalonia. The Albigensian Crusade also had a role in the creation and institutionalization of both the Dominican Order and the Medieval Inquisition.[162] The Persecution of Jews in the First Crusade is part of the long history of anti-Semitism in Europe.[163] The need to raise, transport and supply large armies led to a flourishing of trade throughout Europe between Europe and the Outremer. Genoa and Venice flourished through profitable trading colonies in the crusader states, both in the Holy Land and later in captured Byzantine territory.[164]

Deal Barracks Bombing – 11 Royal Marines Bandsmen slaughtered by the IRA. 22nd September 1989

Today is the 26th Anniversary of the

Deal Barracks Bombing

Never Forgotten

The Deal barracks bombing was an attack by the Provisional Irish Republican Army (PIRA) on a Royal Marines barracks in Deal, England. It took place at 8:22 am on 22 September 1989, when the IRA exploded a time bomb at the Royal Marines School of Music building. The building collapsed, killing 11 marines from the Royal Marines Band Service and wounding another 21.

( If you have pictures of the victims I am happy to include in this post)

The Innocent Victims

————————————————–

22 September 1989


Trevor Davis,   (39) nfNIB
Status: Royal Marine

Killed by: Irish Republican Army (IRA)
Killed in time bomb attack on Royal Marines base, Deal, Kent, England

————————————————–

22 September 1989


Richard Jones,   (27) nfNIB
Status: Royal Marine

Killed by: Irish Republican Army (IRA)
Killed in time bomb attack on Royal Marines base, Deal, Kent, England.

————————————————–

22 September 1989


David McMillan,  (26) nfNIB
Status: Royal Marine

Killed by: Irish Republican Army (IRA)
Killed in time bomb attack on Royal Marines base, Deal, Kent, England.

————————————————–

22 September 1989


Mark Petch,  (24) nfNIB
Status: Royal Marine

Killed by: Irish Republican Army (IRA)
Killed in time bomb attack on Royal Marines base, Deal, Kent, England.

————————————————–

22 September 1989


Michael Ball,   (24) nfNIB
Status: Royal Marine

Killed by: Irish Republican Army (IRA)
Killed in time bomb attack on Royal Marines base, Deal, Kent, England.

————————————————–

22 September 1989


Dean Pavey,   (31) nfNIB
Status: Royal Marine

Killed by: Irish Republican Army (IRA)
Killed in time bomb attack on Royal Marines base, Deal, Kent, England.

————————————————–

22 September 1989


Timothy Reeves,  (24) nfNIB
Status: Royal Marine

Killed by: Irish Republican Army (IRA)
Killed in time bomb attack on Royal Marines base, Deal, Kent, England

————————————————–

22 September 1989


Richard Fice,   (22) nfNIB
Status: Royal Marine

Killed by: Irish Republican Army (IRA)
Killed in time bomb attack on Royal Marines base, Deal, Kent, England.

————————————————–

22 September 1989


Robert Simmonds,   (34) nfNIB
Status: Royal Marine ,

Killed by: Irish Republican Army (IRA)
Killed in time bomb attack on Royal Marines base, Deal, Kent, England

————————————————–

22 September 1989


John Cleatheroe,  (25) nfNIB
Status: Royal Marine

Killed by: Irish Republican Army (IRA)
Killed in time bomb attack on Royal Marines base, Deal, Kent, England.

————————————————–

22 September 1989


Christopher Nolan,  (21) nfNIB
Status: Royal Marine

Killed by: Irish Republican Army (IRA)
Injured in time bomb attack on Royal Marines base, Deal, Kent, England. He died 18 October 1989

————————————————–

Former Colour Sergent Terry Holland Holding his watch that stopped at the time of the Deal Bombings

Background

The Royal Marines School of Music is a professional training centre for musicians of the Royal Marines Band Service, the musical arm of the Royal Navy. It takes students at school-leavers age of 16 and trains them for 32 months to become both professional musicians and battlefield medics.

Originally created at Portsmouth in 1930, it moved to Deal in 1950 and in 1989 was still there as part of the Walmer Barracks. Throughout the 1980s, the IRA had been waging a paramilitary campaign against targets in Britain and Northern Ireland with the stated aim of achieving the separation of Northern Ireland from the rest of the United Kingdom. These operations had included an attempt to kill the British Prime Minister Margaret Thatcher in 1984 and a similar attack on a military band in London in 1982.

Explosion

At 8:22am on 22 September 1989, a 15 lb (6.8 kg) time bomb detonated in the recreational centre changing room at the Royal Marines School of Music. The blast destroyed the recreational centre, levelled the three-story accommodation building next to it and caused extensive damage to the rest of the base and nearby civilian homes.

The blast was heard several kilometres away, shaking windows in the centre of Deal, and created a large pall of smoke over the town. Most of the personnel who used the building as a barracks had already risen and were practising marching on the parade ground when the blast occurred. These marines witnessed the buildings collapse, and many of the teenaged personnel were in a state of shock for days afterwards.

Some marines had remained behind in the building, and thus received the full force of the explosion. Many were trapped in the rubble for hours and military heavy lifting equipment was needed to clear much of it. Kent Ambulance Service voluntarily agreed to end its industrial strike action to aid those wounded by the blast. Ten marines died at the scene with most trapped in the collapsed building, although one body was later found on the roof of a nearby house.

Another 21 were seriously injured and received treatment at hospitals in Deal and Canterbury. One of these men, 21-year-old Christopher Nolan, died of his wounds on 18 October 1989. Three of those killed were buried nearby at the Hamilton Road Cemetery, Deal.

Reactions

Grave of Mark Petch, one of the dead bandsmen

Memorial bandstand at Walmer Green

The IRA claimed responsibility for the bombing, saying it was a continuation of their campaign to rid Northern Ireland of all British troops who had been deployed there since 1969. Many British people were shocked at the attack, carried out on a ceremonial military band whose only military training was geared towards saving lives. The public were also shocked by the ages of those killed, as many were new recruits to the School and most of those injured were teenagers.

The British Government also condemned the IRA’s attack. Prime Minister Margaret Thatcher made a statement from Moscow, where she was on an official visit, saying that she was “shocked and extremely sad”. Leader of the opposition, Neil Kinnock, described the attack as an “awful atrocity” and said:

“Even the people who say they support what the IRA calls its cause must be sickened by the way in which such death and injury is mercilessly inflicted”.

The Commandant General Royal Marines Lieutenant-General Sir Martin Garrod appeared on television soon after the bombing condemning the bombers as “thugs, extortionists, torturers, murderers and cowards – the scum of the earth”. Further “”We will emerge stronger and more determined than ever before to end and destroy this foul and dark force of evil.”

The base’s security caused controversy as this was partly provided by a private security firm. This arrangement prompted a thorough review of security procedures at all British military bases and the replacement of the firm’s employees at Deal with Royal Marine guards.

One week after the bombing, the staff and students of the School of Music marched through the town of Deal, watched and applauded by thousands of spectators. They maintained gaps in their ranks to mark the positions of those unable to march through death or serious injury. A memorial bandstand was constructed at Walmer Green to the memory of those who “only ever wanted to play music”.

A memorial in the Walmer Barracks chapel was destroyed when the building burnt down in 2003, but the site is now a memorial garden.. The surviving barracks at Walmer were converted into flats when the base was decommissioned in 1996, and the School of Music is once again based in Portsmouth.

Every year the Royal Marines Band from Portsmouth visit the memorial bandstand in Deal to pay their respects to those who died in the bombing. In July 2009, a memorial concert and re-dedication ceremony was held at the bandstand on Walmer Green, attended by thousands.

No one has ever been arrested or convicted in connection with the Deal bombing.


Major Events in the Troubles

Battle of Britain – Triple Aces – Who were the ‘Triple Flying Aces’

Triple Aces were pilots who were credited with shooting down 15 or more enemy aircraft. The Battle of Britain produced many aces (men who shot down 5 or more enemy aircraft) but triple aces were very rare. The figures below for triple ace kills are from July 1st 1940 to October 31st 1940 and include where necessary, where a pilot was in more than one squadron

—————————————–

The views and opinions expressed in this page and  documentaries are soley intended to educate and provide background information to those interested in The Battle of Britain They in no way reflect my own opinions and I take no responsibility for any inaccuracies or factual errors.

——————————————-

————————————————————————————————————————————

The Best fighter pilot of Battle of Britain

————————————————————————————————————————————

WWII: Battle of Britain

————————————————————————————————————————————

Carbury, B (Flying Officer) – 15 kills, 1 shared

 Flight Lieutenant Brian John George Carbury DFC* (27 February 1918 – 31 July 1961) was a New Zealand fighter ace of the Royal Air Force during the Second World War.[1] He was credited with being one of three “aces in a day” in the Battle of Britain as he shot down five aircraft on 31 August 1940. The others were Archie McKellar, a British pilot, and Antoni Glowacki of Poland.

Biography

The 6 ft 4 in (1.93 m) son of a Wellington, New Zealand veterinarian, Brian John George Carbury was raised in Auckland where he attended King’s College from 1932 to 1934. He joined Farmers’ Trading Co. on leaving school, but sick of the job as a shoe salesman,[2] he headed to the United Kingdom in 1937 to join the Royal Navy. Being told he was too old, he joined the Royal Air Force on a short service commission as an Acting Pilot Officer.[3]

June 1938 – July 1940

Carbury joined No. 41 Squadron RAF in June 1938, his rank was confirmed on 27 September 1938,[4] flying the Hawker Fury. In August 1939 he was posted to RAF Turnhouse near Edinburgh, Scotland with No. 603 (City of Edinburgh) Squadron of the Auxiliary Air Force as training officer, flying Spitfires. As an Auxiliary Air Force squadron, No. 603 were week-end ‘part-time’ airmen doing other jobs during the week. But as war approached the squadron was put onto a full-time footing and Carbury was permanently attached from the outbreak of World War II in September 1939. During the Phoney War, No. 603 gained pilots P.O Richard Hillary—later the author of The Last Enemy; and B. G. ‘Stapme’ Stapleton who shot down Franz von Werra, the only German PoW to escape and return to the Third Reich.

Scotland was far away from the more accessible targets in the south of England, but was in range for the Luftwaffe’s long range bombers and reconnaissance aircraft shadowing the Royal Navy’s Home Fleet in Northern Scotland and the North Sea. On 16 October a section of 603 was scrambled and shot down a Junkers Ju-88 bomber into the North Sea east of Dalkeith, the first German aircraft to be shot down over British territory since 1918. Carbury probably destroyed an Heinkel He 111 on 7 December, and claimed a third share in the destruction of another He 111 during January 1940. Carbury was promoted to Flying Officer on 27 April 1940.[5]

August 1940 – October 1940

In light of RAF Fighter Command‘s dire need for pilots in the battles over southern England during August 1940, No. 603 redeployed to RAF Hornchurch, becoming active in the Battle of Britain from 27 August 1940.

Carbury claimed his first victory on 29 August, a Messerschmitt Bf 109 fighter. He claimed another on the 30th, and three more on the 31st, together with two He 111’s[6] – taking his total to 8 and 1/3, and making him a fighter ace. Hillary was shot down on 3 September in combat with Bf 109’s of Jagdgeschwader 26 off Margate at 10:04hrs – rescued by the Margate lifeboat, he was severely burned and spent the next three years in hospital.[7] In September Carbury claimed three more Bf 109’s, and after sustaining wounds to his feet during actions in September, his efforts were recognised by the award of the Distinguished Flying Cross (DFC). The award was gazetted on 24 September 1940:[8]

Air Ministry, 24th September, 1940.ROYAL AIR FORCE

The KING has been graciously pleased to approve the undermentioned appointment and awards in recognition of gallantry displayed in flying operations against the enemy : —

Awarded the Distinguished Flying Cross.

Flying Officer Brian John George CARBURY (40288).

During operations on the North East coast Flying Officer Carbury led his section in an attack on two enemy aircraft. Both were destroyed. From 28th August, 1940, to 2nd September, 1940, he has, with his squadron, been almost continuously engaged against large enemy raids over Kent, and has destroyed eight enemy aircraft. Five of these were shot down during three successive engagements in one day.

Carbury continued his toll of victories in October, as the German’s intensified their high-level fighter-bomber attacks on London. His first two victories for the month were a Bf109 over the Thames Estuary on the 2nd, and another in southeast London on 7 October. Based at RAF Manston on the 10th, Carbury noticed three Bf 109’s returning to northern France—leading three Spitfires into attack, he shot the first in to the English Channel, and a second on to the beach at Dunkirk. On 14 October, he damaged a Junkers Ju 88.

The official end of the Battle of Britain came at the end of October, when Carbury was awarded a Bar to the DFC—one of fewer than five pilots given the double award for victories claimed during the period of the Battle of Britain. With destruction of 15 enemy aircraft destroyed (and 2 victories shared destroyed), 2 probables and 5 damaged,[9] Carbury was among the five top-scoring pilots in RAF Fighter Command and the top scorer against Bf 109s [10] during the Battle of Britain along with Eric Lock. The award of the bar to his DFC was gazetted on 25 October 1940:[11]

Air Ministry, 25th October, 1940.ROYAL AIR FORCE.

The KING has been graciously pleased to approve the following appointment and awards in recognition of gallantry displayed in flying operations against the enemy:—

Awarded a Bar to the Distinguished Flying Cross

Flying Officer Brian John George CARBURY, D.F.C. (40288).

Flying Officer Carbury has displayed outstanding gallantry and skill in engagements against the enemy. Previous to 8th September, 1940, this officer shot down eight enemy aircraft, and shared in the destruction of two others. Since that date he has destroyed two Messerschmitt 109-5 and two Heinkel 113’s, and, in company with other pilots of his squadron, also assisted in the destruction of yet another two enemy aircraft. His cool courage in the face of the enemy has been a splendid example to other pilots of his squadron.

December 1940 onwards

No. 603 Squadron and Carbury returned to Scotland on scheduled rotation in December 1940. On Christmas Day Carbury was scrambled to intercept a Junker Ju 88 reported off St Abb’s Head, inflicting damage before the German aircraft turned for home.

Early in 1941 Carbury was posted to be an instructor at the Central Flying School and then 58 OTU at Grangemouth, and did not fly operationally in combat again. Unfortunately later that year he was charged with fraud after being accused of passing between 9 and 17 false cheques, an offence that at the time could attract a prison sentence. At his RAF court martial, he was found guilty and on 21 October 1941 the London Gazette announced: “Flg. Off. B. J. G. CARBURY, DFC (40288), to be dismissed the Service by sentence of General Court-Martial. 1 Oct 1941.” [12]

Hillary on Carbury

In his book The Last Enemy, Richard Hillary said of Carbury:[2]

I thought of the men I had known, of the men who were living and the men who were dead; and I came to this conclusion. It was to the Carburys and the Berrys [Alan Berry] of this war that Britain must look, to the tough practical men who had come up the hard way, who were not fighting this war for any philosophical principles or economic ideals; who, unlike the average Oxford undergraduate, were not flying for aesthetic reasons, but because of an instinctive knowledge that this was the job for which they were most suited. These were the men who had blasted and would continue to blast the Luftwaffe out of the sky while their more intellectual comrades would, alas, in the main be killed. They might answer, if asked why they fought, ‘To smash Hitler!’ But instinctively, inarticulately, they too were fighting for the things that Peter had died to preserve.

Combat Record

Date Service Flying Kills Probables Notes
7 December 1939 Royal Air Force Spitfire Damaged 1 *Heinkel He 111 Flying from RAF Turnhouse
7 March 1940 Royal Air Force Spitfire 1/2 * Heinkel He 111
3 July 1940 Royal Air Force Spitfire 1/3 * Junkers Ju 88
29 August 1940 Royal Air Force Spitfire 1 *Messerschmitt Bf 109 Flying from RAF Manston
30 August 1940 Royal Air Force Spitfire 1 * Messerschmitt Bf 109 Fw. Ernst Arnold of 3/JG27[13]
31 August 1940 Royal Air Force Spitfire 2 * Heinkel He 113
3 * Messerschmitt Bf 109
September, 1940 Awarded DFC
2 September 1940 Royal Air Force Spitfire 1 * Messerschmitt Bf 109
7 September 1940 Royal Air Force Spitfire 2 * Messerschmitt Bf 109
14 September 1940 Royal Air Force Spitfire 1 * Messerschmitt Bf 109
2 October 1940 Royal Air Force Spitfire 1 * Messerschmitt Bf 109
7 October 1940 Royal Air Force Spitfire 1 * Messerschmitt Bf 109
10 October 1940 Royal Air Force Spitfire 2 * Messerschmitt Bf 109
14 October 1940 Royal Air Force Spitfire Damaged Junkers Ju 88
October, 1940 Royal Air Force Spitfire Awarded DFC Bar
25 December 1940 Royal Air Force Spitfire Damaged Junkers Ju 88 Flying from RAF Turnhouse
TOTALS 15½ kills 0 probable

Post war

After leaving the RAF, he lived in England until his death in July 1962.[14] In 1949, he along with three others, in a trial at Princes Risborough Magistrates’ Court, was found guilty of two offences relating to the illegal export of Bristol Beaufighters to Palestine.[15] Each man was fined a total of £100.[15] The defence solicitor described the four as “stooges” of a fifth man who had remained in Palestine.[15]

Death

In 1961, Carbury was diagnosed with terminal acute leukaemia and died soon after in High Wycombe Hospital (then the War Memorial Hospital). He was later cremated at Breakspear crematorium near Ruislip. A memorial to his memory was erected in his home town of Wellington, New Zealand.

————————————————————————————————————————————

Frantisek, J (Sergeant) – 17 kills –

Killed in Action 08/10/40

 Sergeant Josef František DFM * (7 October 1914, Otaslavice – 8 October 1940) was a Czech fighter pilot and World War II flying ace who flew for the air forces of Czechoslovakia, Poland and the United Kingdom. He is famous as being one of the highest scoring Allied aces in the Battle of Britain.

Career

Born in Otaslavice in 1913, Josef František joined the Czechoslovak Air Force in 1934. After basic training he joined the Czechoslovak Air Force Air Regiment 2. In 1935 he was a Corporal in Air Regiment 1 and returned to Air Regiment 2 as a Sergeant in 1937. In June 1938 he became a fighter pilot serving in the 40th squadron in Prague flying the Avia B-534 and Bk-534 fighter. After Czechoslovakia fell under German occupation (15 March 1939) like many other Czechoslovak airmen he escaped to Poland. Most Czechoslovak airmen then left Poland for France before the start of the Second World War, though František decided to stay and serve with the Polish Air Force.

During the German invasion of Poland in September 1939, František initially evacuated training aircraft from the air base at Dęblin. From 7 September he flew reconnaissance missions in an unarmed training plane, a RWD-8. On 19–20 September he attacked enemy columns near Kamionka Strumiłowa, throwing hand grenades on the troops below. On 20 September he was shot down near Złoczów, but was saved by a Polish crew that landed nearby. On 22 September František’s unit was ordered to withdraw with their remaining aircraft to Romania. František managed to abscond from an internment camp in Romania and reached France via North Africa in October 1939.

In France František elected to remain with the Poles instead of joining the exiled Czechoslovak air force (a probable reason for this decision was a conflict with a Czech officer, who tried to arrest him for insubordination.)

He was flying only old fashioned planes with fixed undercarriage and there are no official French records to confirm he flew combat missions during the Battle of France. After the fall of France František fled to Britain and after training on 2 August was assigned to No. 303 Polish Squadron based at RAF Northolt, flying Hawker Hurricane fighters. The squadron entered action in the last phase of the Battle of Britain. The first confirmed victory of Sgt. František was a German Bf 109E fighter on 2 September 1940.

A very ill-disciplined pilot,[1] he was seen by his commanding officers as a danger to his colleagues when flying in formation. His British CO Squadron Leader R. Kellett, offered to arrange for František’s transfer to a Czech squadron, but František preferred to stay and fight alongside his Polish colleagues. As all pilots were valuable, a compromise was created whereby František was allotted a “spare” aircraft so he could fly as a “guest” of the Squadron as and when he wanted to. Thus, František fought his own private war – accompanying the squadron into the air, but peeling off to fly a lone patrol over Kent, patrolling in the area through which he knew the German aircraft being intercepted would fly on their way back to base, possibly damaged and low on fuel and ammo. During the following month he shot down 17 German aircraft and 1 probable, of which 9 were Bf 109s, becoming one of the top scoring Allied fighter pilots of the Battle of Britain. His last victory was on 30 September 1940 and he was awarded the Distinguished Flying Medal.

On 8 October 1940, František’s Hurricane crashed in Ewell, Surrey during a landing approach after a patrol. Reasons for the crash are not known, but according to some theories, he may have been making aerobatic figures to impress his girlfriend,[citation needed] or it might have been a result of battle fatigue and physical exhaustion.

He was buried in a Polish military cemetery. He was awarded several decorations, among them the Virtuti Militari 5th class and he was the first foreigner awarded the Distinguished Flying Medal with Bar.

Honours and awards

Virtuti Militari Ribbon.png Virtuti Militari Silver Cross (Poland)
POL Krzyż Walecznych 3r BAR.svg Cross of Valour 3 times (Poland)
Ruban de la croix de guerre 1939-1945.PNG Croix de guerre (France)
DFM w Bar ribbon.svg Distinguished Flying Medal and bar (United Kingdom)
                             ————————————————————————————————————————————

Gray, C (Pilot Officer) – 15 kills, 1 shared

Colin Gray.jpg

Group Captain Colin Falkland Gray DSODFC & Two Bars (9 November 1914 – 1 August 1995) was the top New Zealand fighter ace of the Second World War.

Born in 1914, Gray was accepted into the Royal Air Force (RAF) in 1939 after two previous attempts failed on medical grounds. He flew with No. 54 Squadron during the Battles of France and Battle of Britain, and had shot down 14 aircraft and had a half share in another by September 1940. He later added another 13 kills while leading fighter squadrons and wings in the North African and Italian Campaigns, and finished the war with a confirmed 27½ kills. After the war he held a number of staff and command positions in the RAF before his eventual retirement in 1961. He returned to New Zealand to work for Unilever. He died in 1995 at the age of 80.

Early life

Colin Falkland Gray and his twin brother Ken were born in Christchurch, New Zealand on 9 November 1914, the sons of an electrical engineer and his wife. He attended schools in the lower North Island and in Christchurch. He gained employment as a stock clerk in 1933, working at Dalgety and Company. In 1937, Gray, along with Ken, attempted to join the Royal Air Force (RAF) in 1937. While Ken was accepted, Colin failed for medical reasons.[1]

A second attempt also resulted in failure on medical grounds and after this, to improve his fitness, Gray took up sheep mustering. He was successful on a third application to join the RAF and was granted a short-term commission at the beginning of 1939. His flight training was conducted at the de Havilland flying school at Hatfield in Hertfordshire, England. He was posted to No 11 Flying Training School from which he graduated as a probationary pilot officer in October 1939.[1]

Second World War

Gray was posted to No. 54 Squadron, at the time equipped with Supermarine Spitfires and based at Hornchurch, in November.[1] He was confirmed in his rank of pilot officer on 17 January 1940.[2] During the Phoney War he participated in patrols over the English Channel up until May 1940. The death of his brother Ken, in a flying accident on 1 May 1940, affected his morale.[1]

After initial combat on 24 May (claiming two ‘probable’ victories), Gray had a share in his first confirmed enemy aircraft, a Messerschmitt Bf 109, on 25 May 1940, while escorting a formation of Fairey Swordfish to dive-bomb Gravelines. His Spitfire was badly damaged in the engagement, and damage to the port aileron forced the aircraft into a dive that was controlled only with great difficulty. His aircraft had also lost its airspeed indicator and control of guns, flaps or brakes.[3] Despite this damage, Gray managed to force land safely at Hornchurch.[1]

On 13 July 1940, Gray shot down his second Bf 109 near Calais after a long chase at sea level. The pilot, Leutnant Hans-Joachim Lange of III./JG 51, was killed.[4] 54 Squadron was heavily engaged in the Battle of Britain, tasked with the defence of the approaches to London. On 24 July, he shot down Staffelkapitän Lothar Ehrlich of 8./JG 52. Gray observed Ehrlich to bail out into the Channel and swim for what Gray believed to be a dingy. He radioed the man’s position, but the pilot did not survive the water conditions.[5] Alternately, it is possible his victim was Leutnant Schauff from III./JG 26.[6] On 16 August, he claimed two Bf 109s destroyed. No. 54’s opponents were JG 54. I./JG 54 lost one Bf 109—the unnamed pilot being killed in a crash at Saint-Inglevert airfield after returning from the battle. 3./JG 54 and 9./JG 54 suffered the loss of one Bf 109 each and their pilots (one killed and one missing) over English territory. Their names are unknown.[7] On 24 August, his flight was attacked by elements of I./JG 54 near RAF Manston. During the battle, he shot down Oberleutnant Heinrich Held.[8] On 31 August, he downed Oberleutnant Karl Westerhof from 6./JG 3.[9] Another source identifies 9./JG 26 pilot Oberleunant Willy Fronhöfer as his victim.[10] By early September, Gray had claimed 14½ kills, and his squadron was sent north to rest and re-equip. He was awarded the Distinguished Flying Cross (DFC) on 15 August 1940.[1]

Gray was promoted to flying officer on 23 October 1940.[11] He then served with 43 Squadron, before returning to 54 Squadron. Gray remained with the squadron until he was posted to 1 Squadron.[12] He was promoted to flight lieutenant in August 1941[13] and the following month was awarded a Bar to his DFC. The same month, he was posted to No. 616 Squadron to serve as its commander until February 1942, at which time he took up a staff posting at 9 Group.[1]

Returning to operations in September 1942, Gray, promoted to acting squadron leader, took over No. 64 Squadron, which operated over the English Channel and France. At the end of the year, he was posted to the Mediterranean Theatre,[1] firstly to 333 Group[12] and then in January 1943, to command of No. 81 Squadron, based in Algeria, the first unit to fly the Spitfire Mk. IX in the Middle East. During his service with the squadron, he shot down a further eight aircraft bring his personal tally to 22.[1] For his leadership and actions during this period, Gray was awarded the Distinguished Service Order.[12]

Gray was promoted to acting wing commander on 1 June 1943 and took over No. 322 Wing, which at the time was based on Malta. Conducting patrols over the Italian coast and supporting the Allied invasion of Sicily, he shot down a further five aircraft. His final kills came on 25 July 1943, when he shot down two Junkers Ju 52 transports.[1] He was promoted to war substantive squadron leader on 1 September 1943.[14] Later that month, he returned to England for a rest from active duty.[1]

A second Bar to Gray’s DFC was awarded in November.[1] He returned to operational duty in England, with 9 Group.[12] In August 1944, he was appointed Wing Commander of the Lympne Wing, which carried out operations over France and the occupied Netherlands.[1] He did not increase his tally of kills and finished the war with 27 aerial kills, two shared destroyed, six probable kills, with a further four shared probables,[15] the top New Zealand fighter ace of the Second World War.[16]

Post-war

Gray returned to New Zealand on secondment to the Royal New Zealand Air Force from July 1945 to March 1946.[12] He was retroactively promoted to the permanent rank of flight lieutenant from 23 January 1943,[17] and received a retroactive promotion to temporary squadron leader from 1 July 1945.[18] He was promoted to the substantive rank of squadron leader on 1 September 1945.[19] Back in England after the end of his secondment, he was promoted to wing commander on 1 July 1947.[20] He served in the Air Ministry until 1949.[12] He then served in Washington, D.C. on the Joint Services Mission United States as an air liaison officer.[1] In 1954, after a period of time training in the Gloster Meteor, he commanded RAF Church Fenton in Yorkshire for two years,[12] during which he was promoted to group captain on 1 January 1955.[21] He was posted to HQ Far East Air Force in Singapore for three years before a return to the Air Ministry in 1959 and his subsequent retirement in March 1961.[12]

Later life

Gray returned to New Zealand to work for Unilever in Petone as its personnel director until 1979, at which time he retired. He settled in Waikanae and in his later years, he wrote Spitfire Patrol, an autobiography detailing his time in the RAF and which was published in 1990.

Gray died in Kenepuru Hospital, Porirua, on 1 August 1995, survived by his wife, Betty, whom he had married in October 1945, and his four children and a stepdaughter.

————————————————————————————————————————————

Lacey, J (Sergeant) – 18 kills

Ginger Lacey.jpg

 Squadron Leader James Harry “Ginger” Lacey DFM & Bar (1 February 1917 – 30 May 1989) was one of the top scoring Royal Air Force fighter pilots of the Second World War and was the second highest scoring British RAF fighter pilot of the Battle of Britain, behind Pilot Officer Eric Lock of No. 41 Squadron RAF. Lacey was credited with 28 enemy aircraft destroyed, five probables and nine damaged.[1]

Early years

Lacey left King James Grammar School, Knaresborough[2] in 1933 continuing his education at Leeds Technical College.[3] After four years as an apprentice pharmacist, he joined the RAFVR (Royal Air Force Volunteer Reserve) in January 1937 as a trainee pilot at Perth, Scotland. In 1938, he then took an instructor’s course, becoming an instructor at the Yorkshire Flying School, accumulating 1,000 hours of flight time before the war.[4] Called up at the outbreak of war, he joined No. 501 Squadron RAF.

Second World War

Battle of France

On 10 May 1940, the Squadron moved to Bétheniville in France where Lacey experienced his first combat. On the afternoon of 13 May over Sedan, he destroyed a Heinkel He 111 of KG 53 [5] and an escorting Messerschmitt Bf 109 on one sortie, followed by a Messerschmitt Bf 110 later in the afternoon.[6] He claimed two more He 111s on 27 May, before the squadron was withdrawn to England on 19 June, having claimed nearly 60 victories. On 9 June, he crash landed and was almost drowned in a swamp. During his operational duties in France, he was awarded the French Croix de guerre.

Battle of Britain

Flying throughout the Battle of Britain with No. 501 based at Gravesend or Croydon, Lacey became one of the highest scoring pilots of the battle. His first kill of the battle was on 20 July 1940, when he shot down a Bf 109E of Jagdgeschwader 27. He then claimed a destroyed Ju 87 and a “probable” Ju 87 on 12 August along with a damaged Bf 110 and damaged Do 17 on 15 August, a probable Bf 109 on 16 August. He destroyed a Ju 88, damaged a Dornier Do 17 on 24 August and shot down a Bf 109 of Jagdgeschwader 3 on 29 August. He bailed out unharmed after being hit by return fire from a Heinkel He 111 on 13 August.

On 23 August 1940, Lacey was awarded the Distinguished Flying Medal after the destruction of 6 enemy aircraft.[7]

On 30 August 1940, during combat over the Thames Estuary, Lacey shot down a He 111 and damaged a Bf 110 before his Hurricane was badly hit from enemy fire. His engine stopped and he decided to glide the stricken aircraft back to the airfield at Gravesend instead of bailing out into the Estuary.

A highly successful August was completed when he destroyed a Bf 109 on 31 August.

On 2 September 1940, Lacey shot down two Bf 109s and damaged a Do 17. He then shot down another two Bf 109s on 5 September. During a heavy raid on 13 September, he engaged a formation of Kampfgeschwader 55 He 111s over London where he shot down one of the bombers that had just bombed Buckingham Palace. He then bailed out of his aircraft, sustaining slight injuries, as he could not find his airfield in the worsening visibility.

Returning to the action shortly thereafter, he shot down a He 111, three Bf 109s and damaged another on 15 September 1940, one of the heaviest days of fighting during the whole battle, which later became known as “Battle of Britain Day”. During the battle he attacked a formation of 12 Bf 109s, shooting down two before the other had noticed before escaping into cloud[8]

Two days later on 17 September, he was shot down over Ashford, Kent during a dogfight with Bf 109s and bailed out without injury. On 27 September, he destroyed a Bf 109 and damaged a Junkers Ju 88 on 30 September. During October he claimed a probable Bf 109 on 7 October, shot down a Bf 109 on 12 October, another on 26 October and on 30 October, he destroyed a Bf 109 before damaging another.

During the Battle of France and the Battle of Britain, Lacey had been shot down or forced to land due to combat no less than nine times.

On 26 November 1940, with 23 claims (18 made during the Battle of Britain) Lacey received a Bar to his Distinguished Flying Medal [9] for his continued outstanding courage and bravery during the Battle of Britain. The citation in the London Gazette stated:

“Awarded a Bar to the Distinguished Flying Medal. 740042 Sergeant James Harry LACEY, D.F.M., Royal Air Force Volunteer Reserve, No. 501 Squadron. Sergeant Lacey has shown consistent efficiency and great courage. He has led his section on many occasions and his splendid qualities as a fighter pilot have enabled him to destroy at least 19 enemy aircraft”.

After 1940

Lacey works on a model aeroplane in No 501 Squadron’s dispersal hut at Colerne on 30 May 1941

His final award for outstanding service during 1940 was a Mention in Dispatches announced on 1 January 1941.[10] Lacey was commissioned a pilot officer (on probation) on 25 January 1941 (seniority from 15 January)[11] and promoted to acting flight lieutenant in June. On 10 July 1941, as “A” flight commander, he shot down a Bf 109 and damaged another a few days later on 14 July. On 17 July, he claimed a Heinkel He 59 seaplane shot down and on 24 July, two Bf 109s (by causing them to collide). He was posted away from combat operations during August 1941, serving as a flight instructor with 57 Operational Training Unit. He was promoted to war substantive flying officer on 22 September.[12]

During March 1942, Lacey joined No. 602 Squadron, based at Kenley flying the Spitfire Mk V and by 24 March had claimed a Fw 190 as damaged. He damaged another Fw 190 on 25 April 1942 before a posting to 81 Group as a tactics officer. Promoted to war substantive flight lieutenant on 27 August,[13] in November he was posted as Chief Instructor at the No. 1 Special Attack Instructors School, Milfield.

In March 1943, Lacey was posted to No. 20 Squadron, Kaylan in India before joining 1572 Gunnery Flight in July of the same year to convert from Blenheims to Hurricanes and then to Republic P-47 Thunderbolts. He stayed in India, being posted to command 155 Squadron flying the Spitfire VIII in November 1944 and then as CO No. 17 Squadron later that month. While based in India, Lacey claimed his last aircraft on 19 February 1945, shooting down a Japanese Army Air Force Nakajima Ki 43 “Oscar” with only nine 20mm cannon rounds.

“Ginger” Lacey was one of the few RAF pilots on operational duties on both the opening and closing day of the war. His final tally was 28 confirmed, four probables and nine damaged.

Postwar

After the war was over, Lacey went to Japan with No. 17 Squadron, becoming the first Spitfire pilot to fly over Japan on 30 April 1946. He returned to the UK in May 1946. He received a permanent commission in the rank of flight lieutenant on 8 December 1948 (seniority from 1 September 1945),[14] and retired from the RAF on 5 March 1967 as a flight lieutenant; he retained the rank of squadron leader.[15]

After retirement, Lacey ran an air freight business and instructed at a flight school near Bridlington, UK.

Death

“Ginger” Lacey died on 30 May 1989 at the age of 72. In September 2001, a plaque was unveiled at Priory Church, Bridlington, Yorkshire in memory of the fighter pilot and ace.

There was/is also a plaque at the location of the house Lacey grew up in, on the old site of Nidd Vale Motors, Sandbeck Lane, Wetherby, sadly the house where he was raised was knocked down a few years ago.

————————————————————————————————————————————

Lock, E (Pilot Officer) – 21 kills

Eric Stanley Lock DSODFC & Bar (19 April 1919 – 3 August 1941) was a Royal Air Force (RAF) fighter pilot and flying ace of the Second World War.

Born near Shrewsbury in 1919 Lock had his first experience of flying as a teenager. In the late 1930s with war a possibility and the likely event of him being called to arms, Lock decided that he would prefer to fight as an airman. He joined the RAF in 1939. He completed his training in 1940 and was posted to No. 41 Squadron RAF in time for the Battle of Britain. Lock became the RAF’s most successful Allied pilot during the battle, shooting down 21 German aircraft and sharing in the destruction of one.[1][2]

After the Battle of Britain Lock served on the Channel Front, flying offensive sweeps over France. Lock went on to bring his overall total to 26 aerial victories, one shared destroyed and eight probable in 25 weeks of operational sorties over a one-year period—during which time he was hospitalised for six months.[3][4] Included in his victory total were 20 German fighter aircraft, 18 of them Messerschmitt Bf 109s. In mid-1941 Lock was promoted to the rank of flight lieutenant.

Lock earned the nickname “Sawn Off Lockie”, because of his extremely short stature.[5] Within less than six months of becoming one of the most famous RAF pilots in the country, he crash–landed in the English Channel after his Supermarine Spitfire was damaged by ground–fire. Lock was posted missing in action. He was never seen again.

Early life and career

Eric Stanley Lock, younger son of Charles Edward Lock, was born in 1919 to a farming and quarrying family, whose home was then in the rural Shropshire village of Bayston Hill at Bomere Farm, and who later farmed nearby at Allfield, Condover. He was privately educated, at a boarding school called Clivedon at Church Stretton, at Shrewsbury Boys’ High School and at Prestfelde School, London Road, Shrewsbury. At the latter, he was a proficient swimmer and ice skater.[6] On his 14th birthday his father treated him to a five-shilling, 15-minute flight with Sir Alan Cobham’s Air Circus. Unlike most teenagers, Lock was unimpressed by flying and had soon lost interest. At 16 he left school and joined his father’s business.[7] He later changed his mind and attempted to enlist in the RAF as early as the age of 17, but his father refused to sign the papers.[8]

Although as a child he had lost the former strength of his left arm after a horse riding accident,[6] in 1939 he made the decision that if there was going to be a war, he wanted to be a fighter pilot, and so immediately joined the Royal Air Force Volunteer Reserve. Within three months Lock had been called up and began flight training.

Second World War

Training and Early Posting

On the outbreak of war in September 1939, as a trained pilot Lock joined the RAF as a sergeant pilot. After further training at No. 6 Flying School RAF Little Rissington,[9] he was commissioned as a pilot officer (Service Number 81642)[10] and posted to No. 41 Squadron at RAF Catterick, North Yorkshire, flying Spitfires.[7]

Lock completed his training in late May 1940. Officially qualified as a fighter pilot, he was posted to No. 41 Squadron at RAF Catterick as acting pilot officer. Lock spent several weeks with his Squadron before taking two weeks leave pass in July 1940 to marry his girlfriend Peggy Meyers, a former “Miss Shrewsbury”. Lock returned to his unit and soon began combat patrols over the North of England, defending British airspace against Luftflotte 5 (Air Fleet 5) based in Norway. Lock was bored by the patrols as it involved chasing lone enemy raiders without success.[7]

Battle of Britain

The Battle of Britain began in July 1940 with the Luftwaffe making attacks on British shipping in the English Channel and Britain’s East Coast. In August RAF Fighter Command‘s bases came under attack as the Germans attempted to establish air superiority over southern England. The battles grew larger in scale, but 41 Squadron, based in the north, were well clear of the main combat zone and saw little action for the first four weeks of the German air offensive.[11]

Lock’s frustration ended on 15 August 1940. On this date the Luftwaffe attempted to stretch Fighter Command by launching a wave of aircraft against targets in northern England where German intelligence believed there to be little opposition. It was in this battle Lock gained his first victory. Climbing at 20,000 feet (6,100 m) north of Catterick Lock spotted a massed formation of Messerschmitt Bf 110s and Junkers Ju 88s. The Squadron was ordered into line-astern formation and made an attack. In the first attack Lock followed his Section Leader. In the second he had an opportunity to fire at a Bf 110 heavy fighter. After two short bursts the starboard engine caught fire. Following the enemy fighter down to 10,000 feet (3,000 m), Lock fired into the fuselage and set the port engine on fire. The machine-gunner ceased firing and Lock left it at 5,000 feet (1,500 m). Lock was going to claim only a probable, but another No. 41 pilot saw it crash into Seaham Harbour and confirmed his victory. Lock soon attacked the Ju 88s, downing one of their number.[7]

In light of Fighter Command’s need units in the south of the country, No. 41 Squadron was redeployed to RAF Hornchurch in Essex on 3 September 1940. On 5 September, Lock flew as Red 2, positioned behind and protecting the Squadron’s Leader. He shot down two Heinkel He 111s over the Thames Estuary. One of his victims crashed into a river, the other caught fire and its undercarriage fell down. Lock followed it down.[12][13] He quickly realised his mistake—reducing height to pursue a damaged enemy put a pilot at risk from enemy fighters—but it was too late.[12] A Messerschmitt Bf 109 attacked him and he sustained damage to his Spitfire and a wound to his leg.[12] Lock immediately zoom-climbed. The Bf 109 attempted to follow but the pilot stalled and fell away. Lock reversed direction and dived. Waiting for the German fighter to come out of its dive he fired several short bursts and it exploded.[12] Looking around he saw the second He 111 land in the English Channel, about ten miles from the first.[12] Lock circled above the He 111 and noticing a boat he alerted the boat to its presence by flying over it and led the vessel to the crash site. As he left the scene he saw the crew surrendering to the occupants of the boat. On the way home he saw his first victim in the river, with a dingy nearby.[12] A further Bf 109 was claimed destroyed on that date.[14]

The following day, despite pain from his leg and against medical advice, Lock claimed his seventh victory, a Ju 88 off Dover at 09:00.[12] On 9 September he claimed two Bf 109s destroyed over Kent and he followed the success with two victories—over a Ju 88 and Bf 110—on 11 September 1940. The victory brought his tally to nine enemy aircraft destroyed, eight of them in less than seven days. He was awarded the Distinguished Flying Cross (DFC).[12] The award was gazetted on 1 October 1940 with a citation reading:[12][15]

Air Ministry, 1st October, 1940.ROYAL AIR FORCE.

The KING has been graciously pleased to approve the undermentioned appointment and awards in recognition of gallantry displayed in flying operations against the enemy:—

Awarded the Distinguished Flying Cross.

Pilot Officer Eric Stanley LOCK .(81642), Royal Air Force Volunteer Reserve.

This officer has destroyed nine enemy aircraft, eight of these within a period of one week. He has displayed great vigour and determination in pressing home his attacks.

Lock continued to shoot enemy aircraft down regularly. On 14 September he recorded two victories over Bf 109s and the following day shared in the destruction of a Dornier Do 17 before destroying a Bf 109 on 15 September 1940—the Battle of Britain Day—over Clacton-on-Sea. Two rest days followed. On 18 September he claimed a Bf 109 probably destroyed on his first patrol then another destroyed plus one probably destroyed in the afternoon over Gravesend.[12]

On 20 September he filed a curious report that saw him attack three “Heinkel He 113s“, shooting down one and forcing the others to flee back to France.[16] During that sortie he sighted a Henschel Hs 126 which he pursued across the English Channel before finally downing it over the German gun batteries at Boulogne-sur-Mer.[16] Upon landing he was told by his commanding officer that he had been awarded a Bar to his DFC for 15 victories in 16 days.[16] Published on 22 October 1940, the citation read:[17]

Air Ministry, 22nd October, 1940.ROYAL AIR FORCE.

The KING has been graciously pleased to approve the following appointment and awards in recognition of gallantry displayed in flying operations against the enemy:—

Awarded a Bar to the Distinguished Flying Cross.

Pilot Officer Eric Stanley LOCK, D.F.C. (81642), Royal Air Force Volunteer Reserve.

In September, 1940, whilst engaged on a patrol over the Dover area, Pilot Officer Lock engaged three Heinkel 113‘s one of which he shot down into the sea. Immediately afterwards he engaged a Henschel Hs 126 and destroyed it. He has displayed great courage in the face of heavy odds, and his skill and coolness in combat have enabled him to destroy fifteen enemy aircraft within a period of nineteen days.

No. 41 Squadron’s pilots were placed on four weeks’ rotation rest following the intense period of operational sorties, returning to RAF Hornchurch in early October 1940. Lock immediately commenced where he had left off. On 5 October he was credited with another Bf 109 with two probables over Kent; on 9 October another Bf 109 was claimed 10 miles from Dover and a probable followed seconds later. Off Dungeness he dispatched yet another Bf 109 on 11 October then on 20 October 1940 shot down a Bf 109 directly above RAF Biggin Hill. This victory brought his total to 20, making Lock a ‘Quadruple Ace’. On 25 October Lock destroyed a Bf 109 to bring his tally to 21 aerial victories. The Battle of Britain ended on 31 October 1940 and Lock, with 21 enemy aircraft destroyed, was the most successful Allied ace of the campaign.[16]

Channel Front

On 8 November 1940 his Spitfire was badly damaged during a skirmish with several Bf 109s over Beachy Head in East Sussex. The Spitfire was so badly damaged that Lock crash-landed in a ploughed field, but was able to walk away. On 17 November 1940 No. 41 Squadron attacked a formation of 70 Bf 109s that were top cover for a bomber raid on London. After shooting down one Bf 109 and setting another on fire, Lock’s Spitfire was hit by a volley of cannon shells, which severely injured Lock’s right arm and both legs. The rounds also knocked the throttle permanently open by severing the control lever. The open throttle enabled the Spitfire to accelerate swiftly to 400 mph (640 km/h), leaving the Bf 109s in his wake without Lock having to attempt to operate it with his injured right arm. At 20,000 feet (6,100 m), he began to descend. With little control and no means of slowing the fighter down, he could not execute a safe landing. Too badly injured to parachute to safety, Lock was in a perilous situation. After losing height to 2,000 feet (610 m), Lock switched the engine off and found a suitable crash site near RAF Martlesham Heath, Suffolk, into which he glided the stricken fighter for a “wheels down” landing.[18]

Lying in the aircraft for some two hours, he was found by two patrolling British Army soldiers and carried two miles (3 km) on an improvised stretcher made of their Enfield rifles and Army issue winter coats—made after instruction from Lock. By this point, Lock had lost so much blood that he was unconscious, and so unable to feel the additional pain of being dropped three times, once into a dyke of water.[18] After being transferred to the Princess Mary’s Hospital at RAF Halton, he was awarded the Distinguished Service Order (DSO) on 17 December 1940, the citation read:[18][19]

Air Ministry, 17th December, 1940.ROYAL AIR FORCE.

The KING has been graciously pleased to approve the following appointment and awards in recognition of gallantry displayed in flying operations against the enemy:—

Appointed a Companion of the Distinguished Service Order.

Pilot Officer Eric Stanley Lock, D.F.C. (81642). Royal Air Force Volunteer Reserve, No. 41 Squadron.

This officer has shown exceptional keenness and courage in his attacks against the enemy. In November, 1940, whilst engaged with his squadron in attacking a superior number of enemy forces, he destroyed two Messerschmitt 109’s, thus bringing his total to at least twenty-two. His magnificent fighting spirit and personal example have been in the highest traditions of the service.

Lock underwent fifteen separate operations over the following three months to remove shrapnel and other metal fragments from his wounds.[18] For the following three months he remained at Halton recuperating from his injuries, leaving on only one occasion to travel on crutches and in full uniform to Buckingham Palace, where King George VI presented him with his DSO, DFC and Bar.[20] He was also Mentioned in Despatches in March 1941.[21]

Last battles and death

Lock spent several months in hospital. He stayed at the Royal Masonic Hospital with Richard Hillary, another Battle of Britain ace. They were operated on by Archibald McIndoe, a famous surgeon. While there, Hillary wrote his memoirs The Last Enemy, before his death in a flying accident on 8 January 1943. He remembered Lock having Sulfapyridine treatment and being “vociferous”.[22][23] The nurses wore anti-infection masks and gloves, and Eric, “with an aimiable grin” would curse them for it “from dawn till dusk”.[24]

In June 1941 he received notification that he had been promoted to flying officer[25] and was requested to report back for immediate flying duty with 41 Squadron. Four weeks later he was promoted again to flight lieutenant and posted to No. 611 Squadron in command of B Flight.[20] In July 1941 he gained three victories against Bf 109s flying offensive sweeps over France—on 6 July at 15:00, on 8 July at 06:30 and 11:00 on 14 July near Le Touquet.[26]

The road sign for Eric Lock Road in Bayston Hill, Shropshire

On 3 August 1941, Lock was returning from a fighter “Rhubarb” when he spotted a column of German troops and vehicles on a road near the Pas-de-Calais. Signalling the attack to his wingman, Lock was seen to peel off from the formation and prepare for the ground strafing attack—the last time he was seen.

He was believed to have been shot down by ground–fire,[14] a line supported by a Ministry of Defence report that concluded his plane was damaged by anti-aircraft fire, without establishing exactly what happened and the location of his crash.[6]

In 2000 research by historian Dilip Sarkar cross-referenced Lock’s disappearance with Luftwaffe combat records for the day. Lock’s was the only British plane lost that day and the only claim from a Luftwaffe pilot of shooting down such a plane had been made by Oberleutnant Johann Schmid, who reported he had shot down a Spitfire into the sea near Calais.[6][27]

Neither his body or his Spitfire Mk V, W3257, have ever been found, despite a thorough search of the area in the years following the war by both the RAF and the Commonwealth War Graves Commission.[28]

Lock was the first of three successful RAF aces who were shot down during this period: Douglas Bader was shot down in error and taken prisoner on 9 August 1941; Robert Stanford Tuck‘s Spitfire was hit by enemy ground-based flak near Boulogne-sur-Mer on 28 January 1942 and he was forced to crash land and taken prisoner.[29] In July 1942, Paddy Finucane would be lost in similar circumstances to Lock.[30]

Memorial

Lock’s name is carved in Panel 29 on the Runnymede Memorial along with the 20,400 other British and Commonwealth airmen who were posted missing in action during the war. A new road was named after him in Bayston Hill, Shropshire where his family’s former home lies, as well as the members’ bar at the Shropshire Aero Club based at a former wartime airfield, RAF Sleap.[31][32]

List of victories

Lock was credited with 26 air victories and eight probable victories. The total included 17 Bf 109s, one ‘Heinkel He 113‘ (probably a Bf 109), one Henschel Hs 126, two Bf 110s, two He 111s, two Ju 88s and a Do 17 destroyed.[2]

Victory No. Date Flying Kills Notes
1–2. 15 August 1940 Spitfire 1 x Messerschmitt Bf 110
1 x Junkers Ju 88
Operating from RAF Catterick. Bf 110 belonged to I./Zerstörergeschwader 76 (ZG 76—Destroyer Wing 76). ZG 76 suffered heavy losses; 14 Bf 110s were shot down with 22 crew members killed and four captured. Among the victims was the Gruppenkommandeur (Group Commander) Hauptmann Restemeyer—likely lost in action against No. 72 Squadron RAF—and pilots Oberleutnant Ketling, Bremer and Leutnant Kohler and their gunners killed.[33]
3–6. 5 September 1940 Spitfire 2 x Heinkel He 111
2 x Messerschmitt Bf 109
Becomes fighter ace. Claimed one He 111 and one Bf 109 in the space of a minute over the Isle of Sheppey at 15:00. Other claim times not recorded.[34] Opponents at 15:00 hours are unknown. In the morning battle, at approximately 10:00, No. 41 Squadron engaged Bf 109s from Jagdgeschwader 54 (JG 54—Fighter Wing 54) over the Thames Estuary. Two Bf 109s were shot down. A Bf 109E-4, Werknummer 5353 crashed and pilot Unteroffizier Behse was killed in action. Bf 109E-4 Werknummer 5291 also crashed. Hauptmann (Captain) Ultsch was killed. Both were from II./JG 54 (Second Gruppe or Group).[35]
7. 6 September 1940 Spitfire 1 x Junkers 88 Victim identified as Ju 88A-1, code F1 + DP, Werknummer 8070 belonging to I./Kampfgeschwader 30 (KG 30 — or Bomber Wing 30) crashed in France. Aircraft 60 percent destroyed. Crew unhurt.[36]
8–9. 9 September 1940 Spitfire 2 x Messerschmitt Bf 109 Claimed over Maidstone, south of London at 18:00.[37] Identity not known.Seven Bf 109s are known to have been shot down on 9 September that cannot be matched to any specific RAF unit or pilot. Lock’s possible opponents were from, Jagdgeschwader 3 (JG 3 — or Fighter Wing 3), Jagdgeschwader 27 (JG 27 — or Fighter Wing 27), Jagdgeschwader 54 (JG 53 — or Fighter Wing 53) or Jagdgeschwader 54 (JG 54 — or Fighter Wing 54). German casualties in the air battles were; Oberfeldwebel Muller of 4. Staffel (Squadron) JG 3 flying Werknummer 6138 posted missing. Feldwebel Bauer, 7 Staffel JG 3 flying Werknummer 5351, posted missing. Unteroffizier Massmann, Werknummer 6316, missing in action. Stab, I./JG 27’s Oberleutnant Bode, flying Werknummer 6316 posted missing. Oberleutnant Daig, II./JG 27, missing. Feldwebel Höhnisch, Werknummer 1508 missing. Feldwebel Biber, I Staffel JG 54, Werknummer 6103, missing.[38]
10–11. 11 September 1940 Spitfire 1 x Junkers Ju 88
1 x Messerschmitt Bf 110
Awarded DFC. Claimed both victories at 17:30 over Kent.[39] Opponents unknown. Ju 88 claim unknown. Three Bf 110s known to have been shot down but not credited to a specific pilot. I./Zerstörergeschwader 2 (ZG 2 or Destroyer Wing 2) lost two machines. Werknummer 3376, code A2+MH, Gefreiter Kling and Sossner missing. Another Bf 110 crash-landed at St. Aubin. Werknummer 3623 50 percent destroyed, crew unhurt. Another II./Zerstörergeschwader 76 (ZG 76 or Destroyer Wing 76) crash-landed in the sea off Étaples. Werknummer 3285, Code M8+KC lost. Crew rescued Seenotdienst (Air Sea Rescue) service.[40]
12–13. 14 September 1940 Spitfire 2 x Bf 109 Claimed over DungenessRamsgate at 19:15.[41] Victims unknown.
14. 15 September 1940 Spitfire 1 x Bf 109
1 x Do 17 shared
Claimed both kills at 14:30 over Shoeburyness.[42] Identity of Bf 109 unknown. The Do 17 victory was assisted by Pilot Officer Neil but credited to Lock as one shared destroyed. One crew member was killed and one posted missing. The machine, Werknummer— (factory number) —3401 from III./Kampfgeschwader 2 (KG 2—Bomber Wing 2), crashed into the sea off Clacton at 15:30. German air-sea-rescue service, the Seenotdienst, rescued the remainder.[43]
15. 18 September 1940 Spitfire 1 x Bf 109 Claimed a Bf 109 probably destroyed over Kent at 10:10 and another destroyed at 13:15 over Gravesend.[44] Lock’s opponents in the afternoon air battle were 9 Staffel JG 27. The unit suffered two known losses in combat with 41 Squadron Spitfires. During the air battle Werknummer 2674 crashed at approximately 13:15. Gefreiter Glöckner was posted missing. Werknummer 6327 crashed in the same area. The pilot,Feldwebel Schulz, was killed.[45]
16–17. 20 September 1940 Spitfire 1 x ‘He 113′(sic), 1 x Hs 126 Awarded Bar to DFC. Claimed one He 113 and one Hs 126 northwest of Boulogne, France[disambiguation needed] at 11:15.[46] Lock most likely misidentified the ‘He 113’ as a Bf 109. A Bf 109E-1, Werknummer 5175, force-landed after combat near Boulogne. The machine, belonging to 7 Staffel JG 53, was slightly damaged and the pilot unhurt. The identity of the Hs 126 is unknown.[47]
18. 5 October 1940 Spitfire 1 x Bf 109 Claimed two Bf 109s at 14:30 over the English Channel and another Bf 109 probably destroyed south of Dungeness at 16:00.[48] One of the 14:30 claims can be identified as Feldwebel von Bittenfeld. After being shot down by Lock, Bittenfeld crashed near Canterbury at 14:27. Bittenfeld was posted missing in action.[49]
19. 9 October 1940 Spitfire 1 x Bf 109 Claimed two probable victories and one destroyed off Dover at 16:00.[50] Victim identified as Feldwebel Fritz Schweser. Schweser’s Werknummer 5327, White 6 of 7 Staffel JG 54, crashed near Rochester. Schweser posted missing in action.[51] Schweser crash–landed on Meridan Hunt Farm and was captured.[52]
20. 11 October 1940 Spitfire 1 x Bf 109 Victim identified as Bf 109E-1 Werknummer 6267 belonging to 5 Staffel JG 27 crashed near Deal. The pilot was wounded and taken prisoner.[53]
21. 20 October 1940 Spitfire 1 x Bf 109 Victim identified as Feldwebel Ludwig Bielmaier of 5 Staffel Jagdgeschwader 52 (JG 52 — or Fighter Wing 52). His Bf 109E-7 Werknummer 5930 Black 4 crashed near RAF Biggin Hill at 13:50. Bielmaier posted missing.[54]
22–23. 17 November 1940 Spitfire 2 x Bf 109 Awarded DSO. Lock wounded in action in P7544.[55] Lock’s opponents were from 5 Staffel JG 54. No. 41 Squadron claimed five Bf 109s, but only two losses are recorded.[56]
24. 6 July 1941 Spitfire MkV 1 x Messerschmitt Bf 109
25. 8 July 1941 Spitfire MkV 1 x Messerschmitt Bf 109
26. 14 July 1941 Spitfire MkV 1 x Messerschmitt Bf 109
TOTALS 26 kills 8 probable

————————————————————————————————————————————

McGrath, J (Pilot Officer) – 15 kills

————————————————————————————————————————————

McKellar, A (Flight Lieutenant) – 17 kills, 1 shared

Squadron Leader Archibald Ashmore McKellar[1] DSO DFC & Bar (10 April 1912 – 1 November 1940) was a flying ace of the Royal Air Force (RAF) during the Second World War.

McKellar grew up and joined the family business in his native Scotland, but in 1936, aged 24, he joined the RAF and began pilot training. He completed his training in 1938 and was assigned to No. 602 (City of Glasgow) Squadron RAF, an Auxiliary Unit. In 1939 he converted to the Supermarine Spitfire fighter. He experienced his first combat with No. 602 Squadron, credited with two victories soon after the outbreak of war in 1939 against German bombers attacking Royal Navy ships and installations over northern Britain during the “Phoney War” period. McKellar’s first victory earned him the distinction of being the first pilot to shoot down a German aircraft over the British Isles during the war.

A year later, he gained fame in 1940 during the Battle of Britain as a part of, and later Squadron Leader of, No. 605 Squadron RAF, equipped with the Hawker Hurricane fighter. The Auxiliary Unit was moved to southern England and participated in the large air battles. McKellar’s combat career proved to be very brief, lasting just over a year. He claimed all but two of his victories within the last two and a half months of his life; 15 August–1 November 1940. On 7 October 1940 he shot down five Messerschmitt Bf 109s, thus becoming an ace in a day; one of only 24 Allied aces to achieve the feat. At the time of his last mission he had claimed 21 aerial victories and another two shared destroyed against enemy aircraft. Included in this total of 21 air victories are 11 Bf 109s.[2][3] McKellar, along with Brian Carbury, were the only British pilots to achieve the feat of “Ace in a Day” during the Battle of Britain.[4][5][6][7]

On 1 November 1940—one day after the official end of the Battle of Britain—he was killed in action. He took off and engaged a formation of German fighters, one of which he possibly shot down for his 22nd—albeit uncredited—and final victory. McKellar was then shot down himself.[3]

Early life

Archibald Ashmore (“Archie”) McKellar was born in Paisley, Renfrewshire, Scotland on the 10 April 1912, the son of John and Margaret McKellar, of Bearsden, Dunbartonshire and was then educated at Shawlands Academy in the Southside of Glasgow. Upon leaving school he joined a local stockbroker‘s firm. This did not suit McKellar, who preferred an open–air life style. Keen to leave, but unsure of what direction to take in life, he joined his father’s general contractor and construction business as a plasterer.[8] He spent five years as an apprentice plasterer. During this time he was given no special privileges despite being the boss’ son.[1]

McKellar was also a keen fitness enthusiast and, despite his short stature, built up a great physical strength. Though he enjoyed wine and smoked the occasional pipe or cigar he kept in peak physical shape until his death. Even at the height of the Battle of Britain he was always clean shaven and immaculately dressed.[1] McKellar’s spare time was used reading about sport and First World War fighter pilots. His interest in the flying personalities of the past spurred him to take up flying. He joined at his own expense the Scottish Flying Club,[8] which had been founded in 1927; it leased and managed Renfrew Airport from 1933 until it was requisitioned during the Second World War.[9] McKellar quickly acquired a pilot’s licence. By the time he began his military career, McKellar was a very experienced pilot, and he soon began earning relatively quick promotions.[8]

Joining the AAF and RAF

His flying skills earned him the attention of Lord Hamilton, Commanding Officer of No. 602 Squadron AAF. Hamilton invited McKellar to join the Auxiliary Air Force (AAF) and was soon commissioned into the RAF as a Pilot Officer on 8 November 1936, joining No. 602 (City of Glasgow) Squadron RAF. McKellar’s comrades affectionately nicknamed him “Shrimp” owing to his short, 5 feet 3 inches (1.60 m), stature.[10] McKellar stayed with the Squadron and on 8 May 1938 was promoted to Flying Officer.

Based at RAF Abbotsinch near Paisley, the squadron operated the Hawker Hind light bomber. The members of squadron—both pilots and ground staff—were reservists and completed their service on a part-time basis, in the evenings, weekends and an annual two–week summer camp. With the approach of war, the squadron converted to a fighter role and re-equipped with the Supermarine Spitfire. It mobilised on the outbreak of war at RAF Grangemouth on 6 October 1939 and then to RAF Drem a month later, charged with defending Edinburgh and the shipping area around the Firth of Forth.[11][12]

Upon completing training McKellar was deemed to have exceptional eyesight which earned him a reputation as a good marksman in air-to-air combat. Yet, paradoxically, when shooting with his rifle he was a well below average shot – a trait he shared with some other successful pilots. MacKellar was a keen sportsman. He believed physical fitness was a critical attribute in aerial combat; fitness, he believed, would ensure that the mind and body were always at their peak of alertness, and enable a pilot to react swiftly within a fluid battle situation.[13]

McKellar was also considered a capable leader in combat. Aggressive and instinctive, his fighting spirit was an inspiration to his squadron but according to one biographer, he was highly strung, vociferous and blunt with members of his unit. Nevertheless, his directness and socially confident nature singled him out for command. His dedication to his job as a fighter pilot and leader led him to refuse any leave from his Squadron while the Battle of Britain lasted. Invariably McKellar led from the front of his unit.[14] He spent a large proportion of his time with his squadron practising combat tactics. While intensely loyal to anyone he considered a friend, McKellar’s attitude to others outside the squadron was either of utmost friendliness or utter dislike. He is said to have tended to see everything and everyone in black and white.[15]

Second World War

602 Squadron

On 16 October 1939, the Luftwaffe made its first attack on target in Great Britain. I./Kampfgeschwader 30 (KG 30—Bomber Wing 30) targeted Royal Navy ships in the Firth of Forth. The target was HMS Hood. However, she was in dry dock and the cruiser HMS Southampton and destroyer HMS Mohawk were attacked.[16] Though none of the bombs that struck exploded Mohawk’s commander was killed. Spitfires from No. 603 (City of Edinburgh) Squadron joined 602 Squadron, The Queen’s “City of Glasgow” Squadron, in intercepting the raid. During one attack, the cockpit canopy of Hauptmann Helmut Pohl‘s Junkers Ju 88 released itself. Pohl was an experienced test pilot and Gruppenkommandeur (Group Commander) of KG 30. He had helped develop the Ju 88 and had taken part in the Polish Campaign. Pohl tried to fly northwards to take an observation position, but the aircraft was hit by the fire of Spitfires piloted by George Pinkerton and McKellar. The Ju 88 crashed into the sea, Pohl being the only survivor of his crew. The victory was credited to McKellar. Thus, McKellar is officially credited with the downing the first enemy aircraft to fall in British waters during the war.[11][17][18][19][20]

Following the 16 October success, Commander-in-Chief of Fighter Command, Air Marshal Hugh Dowding sent word to 602 Squadron; “Well done, first blood to the auxiliaries.”[21][22] This area around Firth of Forth became nicknamed “suicide alley” by Luftwaffe pilots.[23]

On 28 October 1939 McKellar intercepted a Heinkel He 111H-2 of Stab./Kampfgeschwader 26 (KG 26—Bomber Wing 26), code 1H+JA piloted by Unteroffizier Lehmkuhl. Acting on the advice of his navigator Leutnant Niehoff, dropped down towards cloud layers. The cover, however, quickly dispersed. Their gunners were killed, Lehmkul was hit in the back by machine gun fire and was wounded while Niehoff suffered a fractured spine during the crash–landing.[24] Debate continues to this day as to which squadron or pilot was the victor. Post–war sources credit the victory to McKellar.[25] It was also the War’s first German aircraft shot down onto British soil.[26]

605 Squadron

In early 1940, No. 605 (County of Warwick) Squadron moved to RAF Drem, as they converted to Hurricanes. McKellar was transferred to No. 605 and promoted to Flight Lieutenant, assuming the responsibilities of a flight leader on 21 June 1940.[11][27] McKellar imposed strict discipline, both in standard of dress on the ground and in tactical discipline in the air. Despite his strict methods McKellar was held in high regard. His popularity arose from his desire to help mould his unit into a well-disciplined fighting team.[11]

On 15 August 1940 No. 605 intercepted a German raid against Tyneside mounted by He 111s based in Norway with Luftflotte 5 (Air Fleet 5). McKellar was credited with three He 111s destroyed during the encounter. For this action he was awarded the Distinguished Flying Cross (DFC) and was gazetted on 13 September 1940 and made reference to the “outstanding leadership and courage” displayed by Mckellar.[28][29]

Hawker Hurricane I R4118 of No 605 Squadron, flown by Bob Foster, McKellar’s Squadron comrade who also flew on McKellar’s last mission.[30]

On 7 September 1940, No. 605 moved on rotation to Croydon Aerodrome under the command of Squadron Leader Walter Churchill. McKellar scored a further four victories in a single mission on 9 September.[31] McKellar attacked with the sun at his back with his Squadron, save for one Section which was left to provide top cover against Bf 109s. The attack was made head-on to break up the German bomber formation which consisted of a large mass of He 111s.[32] He destroyed three He 111s with a single, 12–second burst. The first He 111 exploded. It damaged a second which rolled over and dived down into the ground. McKellar then moved his fire to a third. Its port wing snapped off.[31] He then destroyed a Bf 109 in the afternoon giving him a fourth success.[1]

McKellar took over from Squadron Leader Churchill on the 11 September. He achieved a further three victories 15 September. The raids were made in large formation leading the fighting that day to be christened the Battle of Britain Day. McKellar led 605 into combat twice on that date claiming two Bf 109s and a Do 17. That night, at an hour past midnight, 16 September, he claimed another He 111 shot down. A Medal bar to the DFC followed which cited his “excellent fighting spirit … particularly brilliant tactician, and his led his Squadron with skill and resource”.[33]

On 3 October McKellar became one of the select few pilots of Fighter Command to sit for one of Cuthbert Orde‘s charcoal portraits. On 7 October his score rose by five victories, all Bf 109s—becoming an Ace in a day. McKellar explained three of the five victories in the combat that day in his combat report;

I attacked the Number One and saw a bomb being dropped from this machine. I fired and pieces fell off his wing and dense white smoke and vapour came from him and he went into a violent outside spin. In my mirror I could see another ‘109 coming to attack me and therefore turned sharply right and found myself behind another ‘109. I opened fire and saw my De Wilde (explosive ammunition) hitting his machine. It burst into flames and went down inverted east of Biggin Hill. As I again had a ‘109 on my tail I spiralled down to 15,000 feet and by this time there appeared to be ‘109s straggling all over the sky. I followed one, pulled my boost control and made up on him. I gave him a burst from dead astern and at once his radiator appeared to be hit as dense white vapour came back at me and my windscreen fogged up. This speedily cleared and I gave him another burst and this machine burst into flames and fell into a wood with a quarry near it, west of Maidstone.[34]

Thirteen days later, on 20 October 1940, McKellar brought down another Bf 109. Its pilot, Feldwebel Adolf Iburg from 9 Staffel Jagdgeschwader 54 (JG 54—Fighter Wing 54), was slightly wounded in action. Iburg managed to force–land near New Romney and was captured. The victory was credited to him in a post-war account, but there is no official accreditation of the Iburg victory to McKellar by the RAF, though he was credited with another Bf 109 victory on that date.[35][36]

Death

By 1 November 1940 McKellar had claimed 21 victories. Taking a section of No. 605 that included Flight Lieutenant Bob Foster, up to meet a flight of Bf 109 Jabos (Bf 109s equipped with bombs). The section climbed to high altitude to meet the enemy aircraft. In the ensuing battle it is believed McKellar was shot down by II./Jagdgeschwader 27 (JG 27—Fighter Wing 27) Hauptmann (Captain) Wolfgang Lippert.[2][37] McKellar’s Hurricane MkI (V6879) crashed at the side of Woodlands Manor near Adisham, Kent at 18:20hrs.[38]

On 8 November 1940 his actions brought a final award—the Distinguished Service Order (DSO).[39] His DSO was gazetted posthumously on 26 November 1940 and again cited both ‘outstanding courage and determination’ in leading his squadron.[40] Further recognition came in a Mention in Despatches gazetted on 31 December 1940.[41]

On 16 January 1941 Sir Archibald Sinclair, Secretary of State for Air, visited Glasgow to deliver the eulogy;

Not long ago I visited a fighter squadron which was taking part during the dark days in the battle of this island. That squadron lost its leader in an air fight—and they felt the loss. He had been wounded in combat and had been withdrawn from service. I found in his place, taking to the air with daring resolve, proving himself a leader amongst leaders, a young Scot. His name was Archie McKellar. He had come from the City of Glasgow Squadron to lift up this squadron in its dark hour and to carry it on to fresh victories and achievement by his spirit. It was quite apparent to me that he had the whole squadron with him. He was regarded with the greatest admiration and affection by his officers. I will never forget the impression he made upon me when I saw him.[14]

As McKellar died outside the Air Ministry “nominal” dates for the Battle of Britain (10 July—31 October 1940), he is not listed on the Battle of Britain roll of honour at The RAF Chapel, Westminster Abbey. McKellar is buried at New Eastwood Cemetery, Thornliebank, East Renfrewshire, by Glasgow.[42][43]

photograph of headstone

List of victories

Historian Alfred Price credited McKellar with 17 air victories, three shared destroyed, five probably destroyed and three damaged.[44] Historians Christopher Shores and Clive Williams credit him with 21 air victories, three probably destroyed and three damaged as does E.C.R Baker.[45] In his last combat they credit him with a possible 22nd victory, since a Bf 109 crashed in the area of his last combat and no RAF pilot made a claim. John Foreman credits him with at least 17 victories and acknowledges the unclaimed Bf 109 that crashed on 1 November 1940 near to McKellar might have been his last victory.[46] Chaz Bowyer, another prolific historian and writer on RAF personnel credits McKellar with at least 20 victories.[14]

During the period he flew Hurricane P3308, McKellar scored 13 victories and shared one more destroyed, four probable and one damaged, between 15 August and 7 October 1940. Thus earned the distinction of being the Hurricane with the highest number of kills during the Battle of Britain. It was later handed over to a Czech unit, No. 312 Squadron RAF on 4 January 1941 and written off in an accident on 30 April 1941.[47]

Victory No. Date Kills Notes
1. 16 October 1939 1 x Junkers Ju 88 First enemy aircraft shot down in British waters. Gruppenkommandeur I./KG 30 Hauptmann Helmut Pohl’s Junkers Ju 88 destroyed. Pohl survived and was captured by the Royal Navy; the rest of his crew were killed in action.[11][17][18][19][20]
2. 28 October 1939 1 x Heinkel He 111 First enemy aircraft to fall on British soil since 1918;[11] Stab./KG 26 code 1H+JA destroyed. Pilot Unteroffizier Lehmkuhl and Leutnant Niehoff were wounded and two other crew members killed. The fate of the fifth is unknown.[48]
3–5. 15 August 1940 3 x He 111s Unknown. Claimed at 13:15.[49] Opponents from KG 26. Of the eight He 111s lost by KG 26, two have not been attributed to any particular squadron, two are credited to ground fire and four to No. 79 Squadron RAF and No. 235 Squadron RAF. The two outstanding victims were from 8 and 9 Staffel. In the first aircraft, He 111H-4, Leutnant Burk and his crew were missing and presumed dead. The second, He 111H-4, was lost with its unnamed crew. The two He 111s believed to have been shot down by ground fire were both from 8 Staffel. Oberleutnant von Lübke and Oberleutnant Besser were lost with all of their unnamed crew members.[50]
6–9. 9 September 1940 3 x He 111s
1 x Bf 109
Claimed over the Brooklands area at 17:45.[51]The identity of the He 111s are unknown. Seven Bf 109s are known to have been shot down on 9 September that cannot be matched to any specific RAF unit or pilot. McKellar engaged enemy aircraft over Canterbury and Croydon region at around 17:45. After patrolling at 15,000 feet, 605 engaged. The account of the air battle is confusing.[52]

McKellar’s possible opponents were from Jagdgeschwader 3 (JG 3, Fighter Wing 3), Jagdgeschwader 27, Jagdgeschwader 54 or Jagdgeschwader 54 (JG 54). German casualties in the air battles were: Oberfeldwebel Müller of 4. Staffel (Squadron) JG 3 flying Werknummer 6138 posted missing. Feldwebel Bauer, 7 Staffel JG 3 flying Werknummer 5351 posted missing. Unteroffizier Massmann, Werknummer 6316, missing in action. Stab, I./JG 27’s Oberleutnant Bode, flying Werknummer 6316 posted missing. Oberleutnant Daig, II./JG 27, missing. Feldwebel Höhnisch, Werknummer 1508 missing. Feldwebel Biber, I Staffel JG 54, Werknummer 6103, missing.[53]

10–12. 15 September 1940 2 x Bf 109s
1 x Do 17
Claimed two Bf 109s over Edenbridge, Kent at 12:00. Later, at 14:30, claimed a Do 17 over Rochester, Kent.[54]

605 Squadron engaged Jagdgeschwader 51 (JG 51—Fighter Wing 51). Pilot Officer Currant dispatched Werknummer 3266, from 7 Staffel and flown by Leutnant Bildau was posted missing. Another Bf 109 from 9 Staffel, Werknummer 2803 was also shot down. Feldwebel Klotz was wounded and taken prisoner.[55] Also involved in the action were Bf 109s from Jagdgeschwader 3 (JG 3—Fighter Wing 3), Jagdgeschwader 53 (JG 53—Fighter Wing 53) and Jagdgeschwader 77 (JG 77—Fighter Wing 77). Lehrgeschwader 2 (LG 2—Learning Wing 2) provided top cover.[56]

JG 26 suffered no losses. JG 3 lost three Bf 109s in aerial combat. I./JG 3 lost Werknummer 1563, pilot unhurt. 1 Staffel lost Werknummer 0945 and Feldwebel Volmer missing. 2 Staffel lost Werknummer 1606, pilot Staffelkapitän (Squadron Leader) Oberleutnant Helmuth Reumschüssel missing.[55]

JG 53 lost eight Bf 109s, with seven completely destroyed. Seven were not directly credited to RAF units. In air combat, I./JG 53 lostUnteroffizier Schersand, killed in Weknummer 6160. 1 Staffel Bf 109, Werknummer 5111 crash-landed in France, 15% destroyed and the pilot unhurt. 3 Staffel lost Oberleutnant and Staffelkapitän Julius Jase, killed in Werkummer 1590. The same unit lost Unteroffizier Feldmann. Two more Bf 109s — Werknummer 1174 and 5251 from III./JG 53 – were destroyed, but their pilots were unhurt. One was rescued from the Channel.[55]

JG 77 lost a 1 Staffel Bf 109, pilot unhurt, Werknummer 4847 force-landed after combat over Dungeness. Another, Werknummer 4802 from 3 Stafel, was lost with its pilot Unteroffizier Meixner.[55]

At 14:00, McKellar led 605 on an attack against II./Kampfgeschwader 3 (KG 3—Bomber Wing 3), II and III./Kampfgeschwader 2 (KG 2—Bomber Wing 2), I and II./Kampfgeschwader 53 (KG 53—Bomber Wing 53) and I and II./Kampfgeschwader 26.[57]

He claimed one of the Do 17s before being recalled by No. 11 Group RAF commanding officer Keith Park to create a reserve for further operations.[58] McKellar would be credited with one Do 17 destroyed whose identity is uncertain. Among the Do 17 losses, that have not been credited to a specific squadron, were: Do 17 Werknummer 3405 (code U5+FT) and 3230 (code U5+JT) from 9 Staffel KG 2. In the first crew, Oberleutnant Staib, Unteroffizier Hoppe were killed, Gefreiter Zierer and Hoffman posted missing. In the second crew, Unteroffizier Krummheuer, Feldwebel Glaser, Unteroffizier Lenz were killed and Unteroffizier Sehrt missing.[59]

Two more Do 17s were lost around the same time. 8 Staffel KG 2’s Werknummer 4245 U5+GS, piloted by Oberleutnant Hugo Holleck-Weitmann, was lost. Holleck-Weitmann was killed, Unteroffizier Schweighart wounded, and Unteroffizier Lindemeier was missing. The remaining crewmen’s fates are unknown. The second, Werknummer 3440, U5+PS, was lost. Oberleutnant Werner Kittmann, Unteroffizier’s Stampfer and Langer posted missing. The remaining crewmen’s fates are unknown.[59]

13. 16 September 1940 1 x He111 Awarded DFC*[28]DSO[40] Victory claimed at night, 01:00. Location of victory not recorded.[60]
14–18. 7 October 1940 5 x Bf 109s Claimed four in one battle at 13:30—one near the village of Brasted, Westerham; one east of Biggin Hill; Maidstone; and the final opponent near Ashford, Kent. The last and fifth claim of the day was made at 16:30 over Mayfield and Five Ashes.[61]The Germans lost 12 Bf 109s on this date. Most can be credited to other RAF Squadrons. Two of McKellar’s victories can be identified. Werknummer (factory number) 3665, of 5 Staffel (Squadron) Jagdgeschwader 27 was shot down between Maidstone and Westerham. Unteroffizier Lederer posted missing, presumed killed. The second was Werknummer 3881—Unteroffizier Paul Lege killed in action. Another loss was Werknummer 5391, of 4 Staffel Lehrgeschwader 2 (LG 2—Learning Wing 2). Pilot Unteroffizier Ley missing, presumed killed in action by 605 Hurricanes. Also lost that day was a 2 Staffel Jagdgeschwader 51 (JG 51—Fighter Wing 51) Bf 109, Werknummer 5805, which crash–landed near Calais after combat and was 65% destroyed. A second Bf 109 from the same unit, Werknummer 4103, was also destroyed. The pilot Oberleutnant Viktor Mölders—brother of the famous ace Werner Mölders—was posted as missing in action by the Luftwaffe. No times are given for these losses.[62][63]
19. 20 October 1940 1 x Bf 109 His first victory that day can be identified as belonging to 3 Staffel Lehrgeschwader 2 (LG 2—Learning Wing). Unteroffizier Franz Mairl was killed in action in Bf 109 Werknummer 2059 Yellow 8 over Ashford, Kent at 10:00.[64] A second enemy also fell that afternoon. Feldwebel Adolf Iburg from 9 Staffel Jagdgeschwader 54 (JG 54—Fighter Wing 54) crash–landed and was captured. The victory McKellar claimed was credited as damaged only.
20. 26 October 1940 1 x Bf 109
21. 27 October 1940 1 x Bf 109 Claimed a Bf 109 at 09:30 over Croydon, Dungeness.[65] The Germans lost 13 Bf 109s to all causes on this date. Seven machines were lost that day to unidentified squadrons over Kent: I./Jagdgeschwader 3 (JG 3—Fighter Wing 3) lost Bf 109E-7 Werknummer 4124. The pilot, Leutnant Wilhelm Busch, was posted missing in action. 8 Staffel JG 27’s Bf 109 Werknummer 1329 damaged, force-landed in France after combat 20% destroyed. The same unit’s squadron leader Oberleutnant Anton Pointer went missing. 9 Staffel Werknummer 4818 force-landed near Calais 40% destroyed. Pilot Albert Busenkeil was wounded. 2 Staffel Jagdgeschwader 52 (JG 52—Fighter Wing 52) Werknummer 1268 Black 5 was lost over Kent. Karl Bott was posted missing in action. 3 Staffel JG 52 lost Werknummer 2798 Yellow 2. Oberleutnant Ulrich Steinhilper was captured (and later made numerous escape attempts from Canada). In the same unit, Yellow 4, Werknummer 3525, was shot down. Lothar Schieverhöfer missing in action.[66]
22. (Uncredited) 1 November 1940 1 x Bf 109 Logged as a claim over Faversham at 08:15.[46] An Bf 109 did crash near McKellar, and no other RAF pilot claimed it as destroyed. It could have been brought down by McKellar, but remains uncredited.[36]
TOTALS 21 kills

 ——————————————————————-

Urbanowicz, W (Flying Officer) – 15 kills

Witold Urbanowicz.jpg

Witold Urbanowicz (30 March 1908 – 17 August 1996) was a Polish fighter ace of the Second World War. According to the official record, Witold Urbanowicz was the second highest-scoring Polish fighter ace, with 17 confirmed wartime kills and 1 probable, not counting his pre-war victory. He was awarded with several decorations, among others the Virtuti Militari and British Distinguished Flying Cross. He also published several books of memoirs.

Biography

Urbanowicz was born in Olszanka, Augustów County. In 1930 he entered the Szkola Podchorazych Lotnictwa cadet flying school in Dęblin, graduating in 1932 as a 2/Lt. Observer. He was then posted to the night bomber squadron of the 1st Air Regiment in Warsaw. Later he completed an advanced pilotage course to become a fighter pilot. In the 1930s he flew with the 113th and No. 111th “Kosciuszko” Squadron.

In August 1936, flying an PZL P.11a, he shot down a Soviet reconnaissance plane which had crossed into Polish airspace. He was officially reprimanded and unofficially congratulated by his superior officer and as “punishment” in October 1936 was transferred to an air force training school in Deblin where he was nicknamed “Cobra“.

Second World War

During the Invasion of Poland in 1939, Urbanowicz was in an improvised Ulez Group, composed of flying instructors, flying obsolete PZL P.7a fighters and covering the Dęblin and Ułęż airfields. Despite a few encounters with enemy airplanes the Polish fighters (which could barely match the speed of German bombers) were not able to shoot down any enemy planes. On 8 September the school was evacuated from Ulez and Dęblin.[1]

He was ordered with the cadets to Romania, where they were told to await re-equipment: British and French aircraft were rumoured to have been sent, but no aircraft arrived. Urbanowicz returned to Poland to continue to fight, but after the Soviet invasion on Poland, he was captured by a Soviet irregular unit. The same day he managed to escape with two cadets and crossed the Romanian border and eventually found his way to France where, after the fall of Poland, a new Polish army was being formed.

While in France he and a group of other Polish pilots were invited to join the Royal Air Force in Great Britain. After initial training with 1 School of Army Co-operation at Old Sarum, he was sent to 6 OTU for re-training on fighters in July 1940. In August he was assigned to No. 145 Squadron RAF, and became operational on 4 August 1940. On 8 August he shot down a Messerschmitt Bf 110 Major Joachim Schlichting of V./LG 1 while flying with No. 601 Squadron (although he was never officially attached to the unit) and on 12 August a Junkers Ju 88 of KG 51.[1]

On 21 August he was transferred to the Polish-manned No. 303 Squadron, flying a Hawker Hurricane as “A” Flight commander. On 6 September he shot down a Bf 109 of JG 52. On 7 September he became Squadron Leader, after Zdzisław Krasnodębski was badly burned. On 15 September Urbanowicz claimed two Dornier Do. 17’s of KG 2.[1]

On 18 September 1940 Urbanowicz was awarded the Silver Cross of the Virtuti Militari by the Commander-in-Chief of the Polish Forces, General Sikorski. On 24 October, he was awarded the Distinguished Flying Cross.[2]

On 27 September he was officially credited with shooting down four aircraft: two Ju 88s of KG 77, a Bf 109 and a Bf 110 of 15.LG 1. On 30 September he claimed three Bf 109s (one from stab.JG 26, one of II./JG 53 and one of 4.JG 54) and one Dornier Do 17 of KG 3. Despite his success Urbanowicz was never popular at Polish headquarters and on 21 October he was forced to hand over command of the Squadron to Zdzisław Henneberg.

During the Battle of Britain, he claimed 15 confirmed kills and 1 probable, which made him one of the top Polish aces (second only to Stanisław Skalski) and in the top ten Allied aces of the battle.

Between 15 April 1941 and 1 June 1941 he commanded the 1st Polish Fighter Wing based at RAF Northolt, before being posted to staff work at No. 11 Group RAF HQ. In June 1941 he was assigned as the 2nd Air Attaché in the Polish Embassy in the United States.[1]

In September 1943 Urbanowicz joined the USAAF 14th Air Force on attachment in China. On 23 October he joined the 75th Fighter Squadron of the 23rd Fighter Group (Flying Tigers). Flying a P-40 Warhawk he took part in several combat missions. On 11 December he fought against six Japanese Mitsubishi Zeros and claimed two shot down (these were actually Nakajima Ki-44 “Tojo” fighters of the 85th Sentai ).[3]

According to his reports he also shot other airplanes over China, and destroyed some on the ground but those victories were not officially confirmed. According to Kenneth K. Koskodian, he downed 11 Japanese aircraft while being Claire Lee Chennault‘s guest.[4] He was later awarded the US Air Medal and a Chinese Flying Cross.

In December 1943 he returned to the United Kingdom and later became an Air Attaché in the USA again.[1]

During the war none of Witold Urbanowicz’s planes were hit by a single enemy bullet.

After the war

Hurricane gate guardian at RAF Uxbridge in the colours of Witold Urbanowicz’s 303 Squadron aircraft

In 1946 he returned to Poland, but was arrested by the communist Służba Bezpieczeństwa secret police as a suspected spy. After his release he fled to the USA. He lived in New York City working for American Airlines, Eastern Airlines and Republic Aviation, retiring in 1973. In 1991 he visited Poland after the fall of communism and again in 1995 when he was promoted to the rank of General. He died in New York on 17 August 1996.[5]

A fibreglass Hawker Hurricane gate guardian was unveiled at RAF Uxbridge in September 2010 in the colours of Urbanowicz’s aircraft from the Battle of Britain.[6]

Awards

Virtuti Militari Ribbon.png Virtuti Militari, Silver Cross (18 September 1940)
POL Krzyż Walecznych (1940) 4r BAR.PNG Cross of Valour, four times
DistinguishedFlyingCrossUKRibbon.jpg Distinguished Flying Cross (United Kingdom)
Air Medal ribbon.svg Air Medal (United States)
Flying Cross[clarification needed] (China)

References

Citations
  1. ^ Jump up to: a b c d e King 2010, p.339
  2. Jump up ^ King 2010, p.338
  3. Jump up ^ Aircraft of the Aces 100, Ki-44 “Tojo” Aces by Nicholas Millman, Osprey Publishing, p.26
  4. Jump up ^ Koskodian 2009, p. 98.
  5. Jump up ^ King 2010, p.340
  6. Jump up ^ “RAF commemorates Battle of Britan [sic] with services at RAF Uxbridge and Polish War Memorial”. This is Local London. 3 September 2010. Retrieved 14 June 2011. 
Bibliography
  • King, Richard. (2010) 303 (Polish) Squadron Battle of Britain Diary. Surrey: Red Kite ISBN 978-1-906592-03-5
  • Koskodian, Kenneth. K. (2009) No Greater Ally. New York City: Osprey Publishing
  • Fiedler, Arkady. Translation by Jarek Garlinski. (2010) 303 Squadron: The Legendary Battle of Britain Fighter Squadron. Los Angeles: Aquila Polonica Publishing ISBN 978-1-60772-004-1

————————————————————————————————————————————

Never, in the field of human conflict, was so much owed by so many to so few

Dowding with some of “The Few”

The Few were the Allied airmen of the Royal Air Force (RAF) who fought the Battle of Britain in the Second World War. The term comes from Winston Churchill‘s phrase “Never, in the field of human conflict, was so much owed by so many to so few.” It also alludes to Shakespeare‘s famous speech in his play, Henry V: “We few, we happy few, we band of brothers…”[

Aircrew

Nearly 3,000 men were awarded the “Battle of Britain” clasp. As of 2009[update], there were fewer than 90 alive.

By one tally, British RAF aircrew numbered 2,353 (80%) of the total of 2,927 flyers involved, with 407 Britons killed from a total of 510 losses. The remainder were not British, many coming from parts of the British Empire (particularly New Zealand, Canada, Australia, and South Africa), as well as exiles from many conquered European nations, particularly from Poland and Czechoslovakia. Other countries supplying smaller numbers included Belgium, France, Ireland, and the US.[2][3][4][5]

Statistics

The Battle of Britain was considered officially by the RAF[6] to have been fought between 10 July and 31 October 1940.

  • RAF pilots claimed to have shot down about 2,600 German aircraft, but figures compiled later suggest that Luftwaffe losses were more likely nearer 2,300.
  • Of 2,332 Allied pilots who flew fighters in the Battle, 38.90 percent could claim some success in terms of enemy aircraft shot down.
  • The number of pilots claiming more than one victory amounted to no more than 15 per cent of the total RAF pilots involved.
  • To be proclaimed an “ace” a pilot had to have five confirmed victories. During the Battle of Britain just 188 RAF pilots achieved that distinction – eight per cent of the total involved. A further 237 of those RAF pilots claiming successes during the Battle became “aces” later in the war.
  • There were four pilots who were “ace in a day” in the Battle of Britain: Archie McKellar, a British pilot, Antoni Glowacki, a Polish pilot, Ronald Fairfax Hamlyn and Brian Carbury, a New Zealand pilot.

Leading aces

The leading aces of the Battle of Britain (between 10 July and 31 October 1940) were: [7]

Rank Pilot Nationality Squadron Aircraft Kills Notes
1 Plt Off Eric Lock United Kingdom United Kingdom 41 Spitfire 21 Total 26 kills. KIA 3 August 1941.
2 Sq/Ldr Archie McKellar United Kingdom United Kingdom 605 Hurricane 19 Total 21 (possibly 22) three probable and three damaged. 5 Bf-109’s on 7 Oct, 1940. KIA 1 November 1940.
3 Sgt James Lacey United Kingdom United Kingdom 501 Hurricane 18
(23 by end of November)
Total 28 kills.
4 Sgt Josef František Czech Republic Czechoslovakia 303 Hurricane 17 Killed 8 October 1940.
5 Fg Off Brian Carbury New Zealand New Zealand 603 Spitfire 15 + ⅓
6 Fg Off Witold Urbanowicz Poland Poland 145 and 303 Hurricane 15 Total 18 (possibly 20) kills.
7 Plt Off Colin Gray New Zealand New Zealand 54 Spitfire 14 + ½ Total 27.7 kills.
8 Plt Off Bob Doe United Kingdom United Kingdom 234 and 238 Spitfire / Hurricane 14 (+ 2 shared)
9 Flt Lt Paterson Hughes Australia Australia 234 Spitfire 14 + ⅚ KIA 7 Sep 1940.
10 Sqn Ldr Michael Crossley United Kingdom United Kingdom 32 Hurricane 14 Wartime total 22 victories.

Memorial

The memorial to The Few at Capel-le-Ferne, on top of the white cliffs of Dover

…which faces towards the English Channel

The pilots are remembered on the Battle of Britain Memorial, Capel-le-Ferne, Kent, and their names are listed on the Battle of Britain Monument in London. The Battle of Britain Roll of Honour is held in Westminster Abbey in the RAF Chapel, and is paraded annually during the Service of Thanksgiving and Re-dedication on Battle of Britain Sunday.[8]

There is a preserved Hawker Hurricane fighter aircraft known as “The Last of The Many”—which may be a play on words with “The Few”—that flies as part of the Battle of Britain Memorial Flight, along with a Supermarine Spitfire that flew in the Battle (one of five Spitfires in the Memorial Flight). As the Hurricane was the last production model of that type, it did not itself fly in the Battle.

Popular culture

Pink Floyd loosely refers to “the Few” on the track, “One of the Few”, on their anti-war concept album The Final Cut. The heavy metal band Iron Maiden released a single named “Aces High“, telling the story of a pilot flying in the Battle of Britain. In 2010 the Swedish power metal band Sabaton recorded a song called “Aces in Exile” about the foreign contingent of the Few, on their album Coat of Arms.

The Few, a novel by Alex Kershaw, tells the stories of the men who flew in the Battle of Britain. As of 2003[update], a Hollywood film similarly named The Few was in preparation for release in 2008, based on the story of real-life US pilot Billy Fiske, who ignored his country’s neutrality rules and volunteered for the RAF. A Variety magazine outline of the film’s historical content[9] was said in The Independent to have been described by Bill Bond, who conceived the Battle of Britain Monument in London, as “Totally wrong. The whole bloody lot.”

Shell Shock – The Trauma of Battle

Shell Shock

The Trauma of Battle

Shell-shocked-soldier-1916-small

c

Shell Shock was a term coined to describe the reaction of some soldiers in World War I to the trauma of battle. It was a reaction to the intensity of the bombardment and fighting that produced a helplessness appearing variously as panic and being scared, or flight, an inability to reason, sleep, walk or talk.

During the War, the concept of shell shock was ill-defined. Cases of ‘shell shock’ could be interpreted as either a physical or psychological injury, or simply as a lack of moral fibre. While the term shell shock is no longer used in either medical or military discourse, it has entered into popular imagination and memory, and is often identified as the signature injury of the War.

In World War II and thereafter, diagnosis of ‘shell shock’ was replaced by that of combat stress reaction, a similar but not identical response to the trauma of warfare and bombardment.

Origin

During the early stages of World War I, soldiers from the British Expeditionary Force began to report medical symptoms after combat, including tinnitus, amnesia, headaches, dizziness, tremors, and hypersensitivity to noise. While these symptoms resembled those that would be expected after a physical wound to the brain, many of those reporting sick showed no signs of head wounds.[2] By December 1914 as many as 10% of British officers and 4% of enlisted men were suffering from “nervous and mental shock”.[3]

The term “shell shock” came into use to reflect an assumed link between the symptoms and the effects of explosions from artillery shells. The term was first published in 1915 in an article in The Lancet by Charles Myers. Some 60–80% of shell shock cases displayed acute neurasthenia, while 10% displayed what would now be termed symptoms of conversion disorder, including mutism and fugue.[3]

The number of shell shock cases grew during 1915 and 1916 but it remained poorly understood medically and psychologically. Some doctors held the view that it was a result of hidden physical damage to the brain, with the shock waves from bursting shells creating a cerebral lesion that caused the symptoms and could potentially prove fatal. Another explanation was that shell shock resulted from poisoning by the carbon monoxide formed by explosions.[4]

At the same time an alternative view developed describing shell shock as an emotional, rather than a physical, injury. Evidence for this point of view was provided by the fact that an increasing proportion of men suffering shell shock symptoms had not been exposed to artillery fire. Since the symptoms appeared in men who had no proximity to an exploding shell, the physical explanation was clearly unsatisfactory.[4]

In spite of this evidence, the British Army continued to try to differentiate those whose symptoms followed explosive exposure from others. In 1915 the British Army in France was instructed that:

Shell-shock and shell concussion cases should have the letter ‘W’ prefixed to the report of the casualty, if it was due to the enemy; in that case the patient would be entitled to rank as ‘wounded’ and to wear on his arm a ‘wound stripe‘. If, however, the man’s breakdown did not follow a shell explosion, it was not thought to be ‘due to the enemy’, and he was to [be] labelled ‘Shell-shock’ or ‘S’ (for sickness) and was not entitled to a wound stripe or a pension.[5]

However, it often proved difficult to identify which cases were which, as the information on whether a casualty had been close to a shell explosion or not was rarely provided.[4]

Management

Acute

At first, shell-shock casualties were rapidly evacuated from the front line – in part because of fear of their unpredictable behaviour.[6] As the size of the British Expeditionary Force increased, and manpower became in shorter supply, the number of shell shock cases became a growing problem for the military authorities. At the Battle of the Somme in 1916, as many as 40% of casualties were shell-shocked, resulting in concern about an epidemic of psychiatric casualties, which could not be afforded in either military or financial terms.

Among the consequences of this were an increasing official preference for the psychological interpretation of shell shock, and a deliberate attempt to avoid the medicalisation of shell shock. If men were ‘uninjured’ it was easier to return them to the front to continue fighting.[4] Another consequence was an increasing amount of time and effort devoted to understanding and treating shell shock symptoms.

By the Battle of Passchendaele in 1917, the British Army had developed methods to reduce shell-shock. A man who began to show shell-shock symptoms was best given a few days’ rest by his local medical officer.[3] Col. Rogers, RMO 4/Black Watch wrote:

You must send your commotional cases down the line. But when you get these emotional cases, unless they are very bad, if you have a hold of the men and they know you and you know them (and there is a good deal more in the man knowing you than in you knowing the man) … you are able to explain to him that there is really nothing wrong with him, give him a rest at the aid post if necessary and a day or two’s sleep, go up with him to the front line, and, when there, see him often, sit down beside him and talk to him about the war and look through his periscope and let the man see you are taking an interest in him.[5]

If symptoms persisted after a few weeks at a local Casualty Clearing Station, which would normally be close enough to the front line to hear artillery fire, a casualty might be evacuated to one of four dedicated psychiatric centres which had been set up further behind the lines, and were labelled as “NYDN – Not Yet Diagnosed Nervous” pending further investigation by medical specialists.

Even though the Battle of Passchendaele generally became a byword for horror, the number of cases of shell-shock were relatively few. 5,346 shell shock cases reached the Casualty Clearing Station, or roughly 1% of the British forces engaged. 3,963 (or just under 75%) of these men returned to active service without being referred to a hospital for specialist treatment. The number of shell shock cases reduced throughout the battle, and the epidemic of illness was ended.[7]

During 1917, “shell shock” was entirely banned as a diagnosis in the British Army,[8] and mentions of it were censored, even in medical journals.

Chronic

The treatment of chronic shell shock varied widely according to the details of the symptoms, the views of the doctors involved, and other factors including the rank and class of the patient.

There were so many officers and men suffering from shell shock that 19 British military hospitals were wholly devoted to the treatment of cases. Ten years after the war, 65,000 veterans of the war were still receiving treatment for it in Britain. In France it was possible to visit aged shell shock victims in hospital in 1960.[1]

Cowardice

Some men suffering from shell shock were put on trial, and even executed, for military crimes including desertion and cowardice. While it was recognised that the stresses of war could cause men to break down, a lasting episode was likely to be seen as symptomatic of an underlying lack of character.[10] For instance, in his testimony to the post-war Royal Commission examining shell-shock, Lord Gort said that shell-shock was a weakness and was not found in “good” units.[10] The continued pressure to avoid medical recognition of shell shock meant that it was not, in itself, considered an admissible defence.

Executions of soldiers in the British Army were not commonplace. While there were 240,000 Courts Martial and 3080 death sentences handed down, in only 346 cases was the sentence carried out.[11] 266 British soldiers were executed for “Desertion”, 18 for “Cowardice”, 7 for “Quitting a post without authority”, 5 for “Disobedience to a lawful command” and 2 for “Casting away arms”.[12] Controversially, on 7 November 2006 the government of the United Kingdom gave them all a posthumous conditional pardon.[13]

Commission of enquiry

The British government produced a Report of the War Office Committee of Enquiry into “Shell-Shock” which was published in 1922. Recommendations from this included:

In forward areas
No soldier should be allowed to think that loss of nervous or mental control provides an honourable avenue of escape from the battlefield, and every endeavour should be made to prevent slight cases leaving the battalion or divisional area, where treatment should be confined to provision of rest and comfort for those who need it and to heartening them for return to the front line.
In neurological centres
When cases are sufficiently severe to necessitate more scientific and elaborate treatment they should be sent to special Neurological Centres as near the front as possible, to be under the care of an expert in nervous disorders. No such case should, however, be so labelled on evacuation as to fix the idea of nervous breakdown in the patient’s mind.
In base hospitals
When evacuation to the base hospital is necessary, cases should be treated in a separate hospital or separate sections of a hospital, and not with the ordinary sick and wounded patients. Only in exceptional circumstances should cases be sent to the United Kingdom, as, for instance, men likely to be unfit for further service of any kind with the forces in the field. This policy should be widely known throughout the Force.
Forms of treatment
The establishment of an atmosphere of cure is the basis of all successful treatment, the personality of the physician is, therefore, of the greatest importance. While recognising that each individual case of war neurosis must be treated on its merits, the Committee are of opinion that good results will be obtained in the majority by the simplest forms of psycho-therapy, i.e., explanation, persuasion and suggestion, aided by such physical methods as baths, electricity and massage. Rest of mind and body is essential in all cases.
The committee are of opinion that the production of hypnoidal state and deep hypnotic sleep, while beneficial as a means of conveying suggestions or eliciting forgotten experiences are useful in selected cases, but in the majority they are unnecessary and may even aggravate the symptoms for a time.
They do not recommend psycho-analysis in the Freudian sense.
In the state of convalescence, re-education and suitable occupation of an interesting nature are of great importance. If the patient is unfit for further military service, it is considered that every endeavour should be made to obtain for him suitable employment on his return to active life.
Return to the fighting line
Soldiers should not be returned to the fighting line under the following conditions:-
(1) If the symptoms of neurosis are of such a character that the soldier cannot be treated overseas with a view to subsequent useful employment.
(2) If the breakdown is of such severity as to necessitate a long period of rest and treatment in the United Kingdom.
(3) If the disability is anxiety neurosis of a severe type.
(4) If the disability is a mental breakdown or psychosis requiring treatment in a mental hospital.
It is, however, considered that many of such cases could, after recovery, be usefully employed in some form of auxiliary military duty.

Part of the concern was that many British veterans were receiving pensions and had long-term disabilities.

By 1939, some 120,000 British ex-servicemen had received final awards for primary psychiatric disability or were still drawing pensions – about 15% of all pensioned disabilities – and another 44,000 or so … were getting pensions for ‘soldier’s heart’ or Effort Syndrome. There is, though, much that statistics do not show, because in terms of psychiatric effects, pensioners were just the tip of a huge iceberg.[5]

War correspondent Philip Gibbs wrote:

Something was wrong. They put on civilian clothes again and looked to their mothers and wives very much like the young men who had gone to business in the peaceful days before August 1914. But they had not come back the same men. Something had altered in them. They were subject to sudden moods, and queer tempers, fits of profound depression alternating with a restless desire for pleasure. Many were easily moved to passion where they lost control of themselves, many were bitter in their speech, violent in opinion, frightening.[5]

One British writer between the wars wrote:

There should be no excuse given for the establishment of a belief that a functional nervous disability constitutes a right to compensation. This is hard saying. It may seem cruel that those whose sufferings are real, whose illness has been brought on by enemy action and very likely in the course of patriotic service, should be treated with such apparent callousness. But there can be no doubt that in an overwhelming proportion of cases, these patients succumb to ‘shock’ because they get something out of it. To give them this reward is not ultimately a benefit to them because it encourages the weaker tendencies in their character. The nation cannot call on its citizens for courage and sacrifice and, at the same time, state by implication that an unconscious cowardice or an unconscious dishonesty will be rewarded.[5]

Development of psychiatry

At the beginning of World War II, the term “shell shock” was banned by the British Army, though the phrase “postconcussional syndrome” was used to describe similar traumatic responses.[9]

Society and culture

Shell shock has had a profound impact in British culture and the popular memory of World War I. At the time, war writers like the poet Siegfried Sassoon dealt with shell shock in their work. Sassoon spent time at Craiglockhart War Hospital, which treated shell shock casualties.[14] Author Pat Barker explored the causes and effects of shell shock in her Regeneration Trilogy, basing many of her characters on real historical figures and drawing on the writings of the first world war poets and the army doctor W. H. R. Rivers.

World War I – Chemical Weapons – History & Background

Chemical weapons in World War I

————————————————————————

Chemical Weapons in World War I

————————————————————————

Chemical weapons in World War I were primarily used to demoralize, injure, and kill entrenched defenders, against whom the indiscriminate and generally slow-moving or static nature of gas clouds would be most effective. The types of weapons employed ranged from disabling chemicals, such as tear gas and the severe mustard gas, to lethal agents like phosgene and chlorine. This chemical warfare was a major component of the first global war and first total war of the 20th century. The killing capacity of gas was limited, with four percent of combat deaths caused by gas. Gas was unlike most other weapons of the period because it was possible to develop effective countermeasures, such as gas masks. In the later stages of the war, as the use of gas increased, its overall effectiveness diminished. The widespread use of these agents of chemical warfare, and wartime advances in the composition of high explosives, gave rise to an occasionally expressed view of World War I as “the chemists’ war”.[1][2]

The use of poison gas performed by all major belligerents throughout World War I constituted war crimes as its use violated the 1899 Hague Declaration Concerning Asphyxiating Gases and the 1907 Hague Convention on Land Warfare, which prohibited the use of “poison or poisoned weapons” in warfare.

History of poison gas in World War

1914: Tear gas

The earliest military uses of chemicals were tear-inducing irritants rather than fatal or disabling poisons. During the first World War, the French army was the first to employ gas, using 26 mm grenades filled with tear gas (ethyl bromoacetate) in August 1914. The small quantities of gas delivered, roughly 19 cm³ per cartridge, were not even detected by the Germans. The stocks were rapidly consumed and by November a new order was placed by the French military. As bromine was scarce among the Entente allies, the active ingredient was changed to chloroacetone.[5]

In October 1914, German troops fired fragmentation shells filled with a chemical irritant against British positions at Neuve Chapelle, though the concentration achieved was so small that it was barely noticed.[6] None of the combatants considered the use of tear gas to be a conflict with the Hague Treaty of 1899, which prohibited the launching of projectiles containing asphyxiating or poisonous gas.[7]

1915: Large-scale use and lethal gases

The first instance of large-scale use of gas as a weapon was on 31 January 1915, when Germany fired 18,000 artillery shells containing liquid xylyl bromide tear gas on Russian positions on the Rawka River, west of Warsaw during the Battle of Bolimov. However, instead of vaporizing, the chemical froze and failed to have the desired effect.[6]

The first killing agent employed by the German military was chlorine. Chlorine is a powerful irritant that can inflict damage to the eyes, nose, throat and lungs. At high concentrations and prolonged exposure it can cause death by asphyxiation.[8] German chemical companies BASF, Hoechst and Bayer (which formed the IG Farben conglomerate in 1925) had been producing chlorine as a by-product of their dye manufacturing.[9] In cooperation with Fritz Haber of the Kaiser Wilhelm Institute for Chemistry in Berlin, they began developing methods of discharging chlorine gas against enemy trenches.[10][11]

According to the fieldpost letter of Major Karl von Zingler, the first chlorine gas attack by German forces took place before 2 January 1915: “In other war theaters it does not go better and it has been said that our Chlorine is very effective. 140 English officers have been killed. This is a horrible weapon …”.

————————————————————————————–

Gas warfare in the First World War

————————————————————————————–

By 22 April 1915, the German Army had 168 tons of chlorine deployed in 5,730 cylinders from Langemark–Poelkapelle, north of Ypres. At 17:30, in a slight easterly breeze, the gas was released, forming a gray-green cloud that drifted across positions held by French Colonial troops from Martinique who broke ranks, abandoning their trenches and creating an 8,000-yard (7 km) gap in the Allied line. However, the German infantry were also wary of the gas and, lacking reinforcements, failed to exploit the break before the 1st Canadian Division and assorted French troops reformed the line in scattered, hastily prepared positions 1,000–3,000 yards (910–2,740 m) apart.[6] The Entente governments quickly claimed the attack was a flagrant violation of international law but Germany argued that the Hague treaty had only banned chemical shells, rather than the use of gas projectors.

———————————————————————————–

WW1: Chemical Warfare

———————————————————————————–

In what became the Second Battle of Ypres, the Germans used gas on three more occasions; on 24 April against the 1st Canadian Division,[14] on 2 May near Mouse Trap Farm and on 5 May against the British at Hill 60.[15] The British Official History stated that at Hill 60, “90 men died from gas poisoning in the trenches or before they could be got to a dressing station; of the 207 brought to the nearest dressing stations, 46 died almost immediately and 12 after long suffering.”[16]

On August 6, German troops used chlorine gas against Russian troops defending the Fortress of Osowiec. Surviving defenders drove back the attack and successfully retained the fortress.

Germany used chemical weapons on the eastern front in an attack at Rawka, south of Warsaw. The Russian army took 9,000 casualties, with more than 1,000 fatalities. In response, the artillery branch of the Russian army organized a commission to study the delivery of poison gas in shells.[17]

Effectiveness and countermeasures

British emplacement after German gas attack (probably phosgene)

It quickly became evident that the men who stayed in their places suffered less than those who ran away, as any movement worsened the effects of the gas, and that those who stood up on the fire step suffered less—indeed they often escaped any serious effects—than those who lay down or sat at the bottom of a trench. Men who stood on the parapet suffered least, as the gas was denser near the ground. The worst sufferers were the wounded lying on the ground, or on stretchers, and the men who moved back with the cloud.[18] Chlorine was less effective as a weapon than the Germans had hoped, particularly as soon as simple countermeasures were introduced. The gas produced a visible greenish cloud and strong odour, making it easy to detect. It was water-soluble, so the simple expedient of covering the mouth and nose with a damp cloth was somewhat effective at reducing the effect of the gas. It was thought to be even more effective to use urine rather than water, as it was known at the time that chlorine reacted readily with urea (present in urine) to form dichloro urea.[19]

Chlorine required a concentration of 1,000 parts per million to be fatal, destroying tissue in the lungs, likely through the formation of hydrochloric acid when dissolved in the water in the lungs (2Cl2 + 2H2O → 4HCl + O2).[20] Despite its limitations, however, chlorine was an effective psychological weapon—the sight of an oncoming cloud of the gas was a continual source of dread for the infantry.[21]

Countermeasures were quickly introduced in response to the use of chlorine. The Germans issued their troops with small gauze pads filled with cotton waste, and bottles of a bicarbonate solution with which to dampen the pads. Immediately following the use of chlorine gas by the Germans, instructions were sent to British and French troops to hold wet handkerchiefs or cloths over their mouths. Simple pad respirators similar to those issued to German troops were soon proposed by Lieutenant-Colonel N. C. Ferguson, the A.D.M.S. of the 28th Division. These pads were intended to be used damp, preferably dipped into a solution of bicarbonate kept in buckets for that purpose, though other liquids were also used. Because such pads could not be expected to arrive at the front for several days, army divisions set about making them for themselves. Locally available muslin, flannel and gauze were used, officers were sent to Paris to buy more and local French women were employed making up rudimentary pads with string ties. Other units used lint bandages manufactured in the convent at Poperinge. Pad respirators were sent up with rations to British troops in the line as early as the evening of 24 April.[22]

In Britain the Daily Mail newspaper encouraged women to manufacture cotton pads, and within one month a variety of pad respirators were available to British and French troops, along with motoring goggles to protect the eyes. The response was enormous and a million gas masks were produced in a day. Unfortunately, the Mail’s design was useless when dry and caused suffocation when wet—the respirator was responsible for the deaths of scores of men. By 6 July 1915, the entire British army was equipped with the far more effective “smoke helmet” designed by Major Cluny MacPherson, Newfoundland Regiment, which was a flannel bag with a celluloid window, which entirely covered the head. The race was then on between the introduction of new and more effective poison gases and the production of effective countermeasures, which marked gas warfare until the armistice in November 1918.[22]

British gas attacks

British infantry advancing through gas at Loos, 25 September 1915

Football team of British soldiers with gas masks, Western front, 1916

A British gas bomb from 1915

The British expressed outrage at Germany’s use of poison gas at Ypres but responded by developing their own gas warfare capability. The commander of II Corps, Lieutenant General Sir Charles Ferguson, said of gas:

It is a cowardly form of warfare which does not commend itself to me or other English soldiers … We cannot win this war unless we kill or incapacitate more of our enemies than they do of us, and if this can only be done by our copying the enemy in his choice of weapons, we must not refuse to do so.[23]

The first use of gas by the British was at the Battle of Loos, 25 September 1915, but the attempt was a disaster. Chlorine, codenamed Red Star, was the agent to be used (140 tons arrayed in 5,100 cylinders), and the attack was dependent on a favorable wind. However, on this occasion the wind proved fickle, and the gas either lingered in no man’s land or, in places, blew back on the British trenches.[6] This debacle was compounded when the gas could not be released from all the British canisters because the wrong turning keys were sent with them. Subsequent retaliatory German shelling hit some of those unused full cylinders, releasing more gas among the British troops.[24] Exacerbating the situation was the primitive flannel gas masks distributed to the British. The masks were hot and the small eye-pieces misted over, reducing visibility. Some of the troops lifted the masks to get some fresh air, causing them to be gassed.[25]

1915: More deadly gases

Plate I, Microscopic section of human lung from phosgene shell poisoning, American Red Cross and Medical Research Committee, An Atlas of Gas Poisoning, 1918

The deficiencies of chlorine were overcome with the introduction of phosgene, which was prepared by a group of French chemists led by Victor Grignard and first used by France in 1915.[26] Colourless and having an odor likened to “mouldy hay,” phosgene was difficult to detect, making it a more effective weapon. Although phosgene was sometimes used on its own, it was more often used mixed with an equal volume of chlorine, with the chlorine helping to spread the denser phosgene.[27] The Allies called this combination White Star after the marking painted on shells containing the mixture.[28]

Phosgene was a potent killing agent, deadlier than chlorine. It had a potential drawback in that some of the symptoms of exposure took 24 hours or more to manifest. This meant that the victims were initially still capable of putting up a fight; although this could also mean that apparently fit troops would be incapacitated by the effects of the gas on the following day.[29]

In the first combined chlorine–phosgene attack by Germany, against British troops at Wieltje near Ypres, Belgium on 19 December 1915, 88 tons of the gas were released from cylinders causing 1069 casualties and 69 deaths.[27] The British P gas helmet, issued at the time, was impregnated with sodium phenolate and partially effective against phosgene. The modified PH Gas Helmet, which was impregnated with phenate hexamine and hexamethylene tetramine (urotropine) to improve the protection against phosgene, was issued in January 1916.[27][30][31]

Around 36,600 tons of phosgene were manufactured during the war, out of a total of 190,000 tons for all chemical weapons, making it second only to chlorine (93,800 tons) in the quantity manufactured:[32]

  • Germany 18,100 tons
  • France 15,700 tons
  • United Kingdom 1,400 tons (although they also used French stocks)
  • United States 1,400 tons (although they also used French stocks)

Although phosgene was never as notorious in public consciousness as mustard gas, it killed far more people, about 85% of the 100,000 deaths caused by chemical weapons during World War I.

1917: Mustard gas

Plate X, Microscopic section of human lung from mustard gas poisoning, American Red Cross and Medical Research Committee, An Atlas of Gas Poisoning, 1918

The most widely reported and, perhaps, the most effective gas of the First World War was mustard gas. It was a vesicant that was introduced by Germany in July 1917 prior to the Third Battle of Ypres.[6] The Germans marked their shells yellow for mustard gas and green for chlorine and phosgene; hence they called the new gas Yellow Cross. It was known to the British as HS (Hun Stuff), while the French called it Yperite (named after Ypres).[33]

A Canadian soldier with mustard gas burns, 1917/1918

Mustard gas is not a particularly effective killing agent (though in high enough doses it is fatal) but can be used to harass and disable the enemy and pollute the battlefield. Delivered in artillery shells, mustard gas was heavier than air, and it settled to the ground as an oily liquid resembling sherry. Once in the soil, mustard gas remained active for several days, weeks, or even months, depending on the weather conditions.[34]

The skin of victims of mustard gas blistered, their eyes became very sore and they began to vomit. Mustard gas caused internal and external bleeding and attacked the bronchial tubes, stripping off the mucous membrane. This was extremely painful. Fatally injured victims sometimes took four or five weeks to die of mustard gas exposure.[35]

One nurse, Vera Brittain, wrote: “I wish those people who talk about going on with this war whatever it costs could see the soldiers suffering from mustard gas poisoning. Great mustard-coloured blisters, blind eyes, all sticky and stuck together, always fighting for breath, with voices a mere whisper, saying that their throats are closing and they know they will choke.”[36]

The polluting nature of mustard gas meant that it was not always suitable for supporting an attack as the assaulting infantry would be exposed to the gas when they advanced. When Germany launched Operation Michael on 21 March 1918, they saturated the Flesquières salient with mustard gas instead of attacking it directly, believing that the harassing effect of the gas, coupled with threats to the salient’s flanks, would make the British position untenable.[citation needed]

Gas never reproduced the dramatic success of 22 April 1915; however, it became a standard weapon which, combined with conventional artillery, was used to support most attacks in the later stages of the war. Gas was employed primarily on the Western Front—the static, confined trench system was ideal for achieving an effective concentration. Germany also made use of gas against Russia on the Eastern Front, where the lack of effective countermeasures resulted in deaths of over 56,000 Russians,[37] while Britain experimented with gas in Palestine during the Second Battle of Gaza.[38] Russia began manufacturing chlorine gas in 1916, with phosgene being produced later in the year. However, most of the manufactured gas was never used.[17]

The British Army believed that the use of gas was needed, but did not use mustard gas until November 1917 at Cambrai, after their armies had captured a stockpile of German mustard-gas shells. It took the British more than a year to develop their own mustard gas weapon, with production of the chemicals centred on Avonmouth Docks.[39][40] (The only option available to the British was the Despretz–Niemann–Guthrie process). This was used first in September 1918 during the breaking of the Hindenburg Line with the Hundred Days’ Offensive.

The Allies mounted more gas attacks than the Germans in 1917 and 1918 because of a marked increase in production of gas from the Allied nations. Germany was unable to keep up with this pace despite creating various new gases for use in battle, mostly as a result of very costly methods of production. Entry into the war by the United States allowed the Allies to increase mustard gas production far more than Germany.[41] Also the prevailing wind on the Western Front was blowing from west to east,[42] which meant the British more frequently had favorable conditions for a gas release than did the Germans.

Though the United States never used chemical weapons of its own manufacture in World War I (the Artillery used Mustard gas with significant effect during the Meuse Argonne Offensive on at least three occasions [43]), it had begun large-scale production of an improved vesicant gas known as Lewisite, for use in an offensive planned for early 1919. By the time of the armistice on 11 November, a plant near Willoughby, Ohio was producing 10 tons per day of the substance, for a total of about 150 tons. It is uncertain what effect this new chemical would have had on the battlefield, however, as it degrades in moist conditions.[44][45]

Post-war

By the end of the war, chemical weapons had lost much of their effectiveness against well trained and equipped troops. At that time, chemical weapon agents inflicted an estimated 1.3 million casualties.[46]

Nevertheless, in the following years, chemical weapons were used in several, mainly colonial, wars where one side had an advantage in equipment over the other. The British used adamsite against Russian revolutionary troops in 1919 and allegedly used mustard gas against Iraqi insurgents in the 1920s; Bolshevik troops used poison gas to suppress the Tambov Rebellion in 1920, Spain used chemical weapons in Morocco against Rif tribesmen throughout the 1920s[47] and Italy used mustard gas in Libya in 1930 and again during its invasion of Ethiopia in 1936.[48] In 1925, a Chinese warlord, Zhang Zuolin, contracted a German company to build him a mustard gas plant in Shenyang,[47] which was completed in 1927.

Public opinion had by then turned against the use of such weapons which led to the Geneva Protocol, an updated and extensive prohibition of poison weapons. The Protocol, which was signed by most First World War combatants in 1925, bans the use (but not the stockpiling) of lethal gas and bacteriological weapons. Most countries that signed ratified it within around five years, although a few took much longer – Brazil, Japan, Uruguay, and the United States did not do so until the 1970s, and Nicaragua ratified it only in 1990.[49] The signatory nations agreed not to use poison gas in the future, stating “the use in war of asphyxiating, poisonous or other gases, and of all analogous liquids, materials or devices, has been justly condemned by the general opinion of the civilised world.”[50]

Although chemical weapons have been used in at least a dozen wars since the end of the First World War,[48] they were not used in combat on a large scale until mustard gas and the more deadly nerve agents were used by Iraq during the 8-year Iran-Iraq war. It killed around 20,000 Iranian troops (and injured another 80,000), which is around a quarter of the number of deaths caused by chemical weapons during the First World War.[51]

Effect on World War II

Although all major combatants stockpiled chemical weapons during the Second World War, the only reports of its use in the conflict were the Japanese use of relatively small amounts of mustard gas and lewisite in China,[52][53] and very rare occurrences in Europe (for example some sulfur mustard bombs were dropped on Warsaw on 3 September 1939, which Germany acknowledged in 1942 but indicated had been accidental).[47] Mustard gas was the agent of choice, with the British stockpiling 40,719 tons, the Russians 77,400 tons, the Americans over 87,000 tons and the Germans 27,597 tons.[47] The destruction of a cargo ship containing mustard gas led to many casualties in Bari, Italy.

In both Axis and Allied nations, children in school were taught to wear gas masks in case of gas attack. Germany developed the poison gases tabun, sarin, and soman during the war, and used Zyklon B in their extermination camps. Neither Germany nor the Allied nations used any of their war gases in combat, despite maintaining large stockpiles and occasional calls for their use.[nb 1] Poison gas played an important role in the Holocaust.

Britain made plans to use mustard gas on the landing beaches in the event of an invasion of the United Kingdom in 1940.[54][55] The United States considered using gas to support their planned invasion of Japan.[56]

Casualties

The contribution of gas weapons to the total casualty figures was relatively minor. British figures, which were accurately maintained from 1916, recorded that only 3% of gas casualties were fatal, 2% were permanently invalid and 70% were fit for duty again within six weeks.[citation needed]

It was remarked as a joke that if someone yelled ‘Gas’, everyone in France would put on a mask. … Gas shock was as frequent as shell shock.

— H. Allen, Towards the Flame, 1934

John Singer Sargent‘s 1918 painting Gassed

Gas! GAS! Quick, boys! — An ecstasy of fumbling,
Fitting the clumsy helmets just in time;
But someone still was yelling out and stumbling,
And flound’ring like a man in fire or lime …
Dim, through the misty panes and thick green light,
As under a green sea, I saw him drowning.
In all my dreams, before my helpless sight,
He plunges at me, guttering, choking, drowning.

Plate III, Pallid type of asphyxia from phosgene poisoning, with circulatory failure, American Red Cross and Medical Research Committee, An Atlas of Gas Poisoning, 1918

Death by gas was often slow and painful. According to Denis Winter (Death’s Men, 1978), a fatal dose of phosgene eventually led to “shallow breathing and retching, pulse up to 120, an ashen face and the discharge of four pints (2 litres) of yellow liquid from the lungs each hour for the 48 of the drowning spasms.”

A common fate of those exposed to gas was blindness, chlorine gas or mustard gas being the main causes. One of the most famous First World War paintings, Gassed by John Singer Sargent, captures such a scene of mustard gas casualties which he witnessed at a dressing station at Le Bac-du-Sud near Arras in July 1918. (The gases used during that battle (tear gas) caused temporary blindness and/or a painful stinging in the eyes. These bandages were normally water-soaked to provide a rudimentary form of pain relief to the eyes of casualties before they reached more organized medical help.)

The proportion of mustard gas fatalities to total casualties was low; only 2% of mustard gas casualties died and many of these succumbed to secondary infections rather than the gas itself. Once it was introduced at the third battle of Ypres, mustard gas produced 90% of all British gas casualties and 14% of battle casualties of any type.

Estimated gas casualties[37]
Nation Fatal Total
(Fatal & Non-fatal)
Russia 56,000 419,340
Germany 9,000 200,000
France 8,000 190,000
British Empire
(includes Canada)
8,109 188,706
Austria-Hungary 3,000 100,000
United States 1,462 72,807
Italy 4,627 60,000
Total 90,198 1,230,853

Mustard gas was a source of extreme dread. In The Anatomy of Courage (1945), Lord Moran, who had been a medical officer during the war, wrote:

After July 1917 gas partly usurped the role of high explosive in bringing to head a natural unfitness for war. The gassed men were an expression of trench fatigue, a menace when the manhood of the nation had been picked over.[57]

Mustard gas did not need to be inhaled to be effective — any contact with skin was sufficient. Exposure to 0.1 ppm was enough to cause massive blisters. Higher concentrations could burn flesh to the bone. It was particularly effective against the soft skin of the eyes, nose, armpits and groin, since it dissolved in the natural moisture of those areas. Typical exposure would result in swelling of the conjunctiva and eyelids, forcing them closed and rendering the victim temporarily blind. Where it contacted the skin, moist red patches would immediately appear which after 24 hours would have formed into blisters. Other symptoms included severe headache, elevated pulse and temperature (fever), and pneumonia (from blistering in the lungs).

Many of those who survived a gas attack were scarred for life. Respiratory disease and failing eyesight were common post-war afflictions. Of the Canadians who, without any effective protection, had withstood the first chlorine attacks during 2nd Ypres, 60% of the casualties had to be repatriated and half of these were still unfit by the end of the war, over three years later.

In reading the statistics of the time, one should bear the longer term in mind. Many of those who were fairly soon recorded as fit for service were left with scar tissue in their lungs. This tissue was susceptible to tuberculosis attack. It was from this that many of the 1918 casualties died, around the time of the Second World War, shortly before sulfa drugs became widely available for its treatment.

British casualties

British forces gas casualties on the Western Front[citation needed]
Date Agent Casualties (official)
Fatal Non-fatal
April –
May 1915
Chlorine 350 7,000
May 1915 –
June 1916
Lachrymants 0 0
December 1915 –
August 1916
Chlorine 1,013 4,207
July 1916 –
July 1917
Various 532 8,806
July 1917 –
November 1918
Mustard gas 4,086 160,526
April 1915 –
November 1918
Total 5,981 180,539

A British nurse treating mustard gas cases recorded:

They cannot be bandaged or touched. We cover them with a tent of propped-up sheets. Gas burns must be agonizing because usually the other cases do not complain even with the worst wounds but gas cases are invariably beyond endurance and they cannot help crying out.[58]

A postmortem account from the British official medical history records one of the British casualties:

Case four. Aged 39 years. Gassed 29 July 1917. Admitted to casualty clearing station the same day. Died about ten days later. Brownish pigmentation present over large surfaces of the body. A white ring of skin where the wrist watch was. Marked superficial burning of the face and scrotum. The larynx much congested. The whole of the trachea was covered by a yellow membrane. The bronchi contained abundant gas. The lungs fairly voluminous. The right lung showing extensive collapse at the base. Liver congested and fatty. Stomach showed numerous submucous haemorrhages. The brain substance was unduly wet and very congested.[59]

Civilian casualties

The distribution of gas cloud casualties was not only limited to the front. Nearby towns were at risk from winds blowing the poison gases through. Civilians rarely had a warning system put into place to alert their neighbours of the danger. In addition to poor warning systems, civilians often did not have access to effective gas masks. Also, when the gas came to the towns over the wind, it could easily get into houses through open windows and doors. An estimated 100,000-260,000 civilian casualties were caused by chemical weapons during the conflict and tens of thousands of more (along with military personnel) died from scarring of the lungs, skin damage, and cerebral damage in the years after the conflict ended. Many commanders on both sides knew that such weapon would cause major harm to civilians as wind would blow poison gases into nearby civilian towns but nonetheless continued to use them throughout the war. British Field Marshal Sir Douglas Haig wrote in his diary: “My officers and I were aware that such weapon would cause harm to women and children living in nearby towns, as strong winds were common on the battlefront. However, because the weapon was to be directed against the enemy, none of us were overly concerned at all.

Countermeasures

None of the First World War’s combatants were prepared for the introduction of poison gas as a weapon. Once gas had appeared, development of gas protection began and the process continued for much of the war producing a series of increasingly effective gas masks.

Even at Second Ypres, Germany, still unsure of the weapon’s effectiveness, only issued breathing masks to the engineers handling the gas. At Ypres a Canadian medical officer, who was also a chemist, quickly identified the gas as chlorine and recommended that the troops urinate on a cloth and hold it over their mouth and nose. The first official equipment issued was similarly crude; a pad of material, usually impregnated with a chemical, tied over the lower face. To protect the eyes from tear gas, soldiers were issued with gas goggles.

British Vickers machine gun crew wearing PH gas helmets with exhaust tubes

The next advance was the introduction of the gas helmet — basically a bag placed over the head. The fabric of the bag was impregnated with a chemical to neutralize the gas — however, the chemical would wash out into the soldier’s eyes whenever it rained. Eye-pieces, which were prone to fog up, were initially made from talc. When going into combat, gas helmets were typically worn rolled up on top of the head, to be pulled down and secured about the neck when the gas alarm was given. The first British version was the Hypo helmet, the fabric of which was soaked in sodium hyposulfite (commonly known as “hypo”). The British P gas helmet, partially effective against phosgene and with which all infantry were equipped with at Loos, was impregnated with sodium phenolate. A mouthpiece was added through which the wearer would breathe out to prevent carbon dioxide build-up. The adjutant of the 1/23rd Battalion, The London Regiment, recalled his experience of the P helmet at Loos:

The goggles rapidly dimmed over, and the air came through in such suffocatingly small quantities as to demand a continuous exercise of will-power on the part of the wearers.[64]

A modified version of the P Helmet, called the PH Helmet, was issued in January 1916, and was additionally impregnated with hexamethylenetetramine to improve the protection against phosgene.[27]

Australian infantry wearing Small Box Respirators, Ypres, September 1917

Self-contained box respirators represented the culmination of gas mask development during the First World War. Box respirators used a two-piece design; a mouthpiece connected via a hose to a box filter. The box filter contained granules of chemicals that neutralised the gas, delivering clean air to the wearer. Separating the filter from the mask enabled a bulky but efficient filter to be supplied. Nevertheless, the first version, known as the Large Box Respirator (LBR) or “Harrison’s Tower”, was deemed too bulky — the box canister needed to be carried on the back. The LBR had no mask, just a mouthpiece and nose clip; separate gas goggles had to be worn. It continued to be issued to the artillery gun crews but the infantry were supplied with the “Small Box Respirator” (SBR).

The Small Box Respirator featured a single-piece, close-fitting rubberized mask with eye-pieces. The box filter was compact and could be worn around the neck. The SBR could be readily upgraded as more effective filter technology was developed. The British-designed SBR was also adopted for use by the American Expeditionary Force. The SBR was the prized possession of the ordinary infantryman; when the British were forced to retreat during the German Spring Offensive of 1918, it was found that while some troops had discarded their rifles, hardly any had left behind their respirators.

Humans were not the only ones that needed protection from gas clouds. Horses and mules were important methods of transportation that could be endangered if they came into close contact with gas. This was not so much of a problem until it became common to launch gas great distances. This caused many researchers to develop masks that could be used on animals such as dogs, horses, mules, and even carrier pigeons.[65]

The following are some examples of improvised animal gas masks that were implemented:

For mustard gas, which could cause severe damage by simply making contact with skin, no effective countermeasure was found during the war. The kilt-wearing Scottish regiments were especially vulnerable to mustard gas injuries due to their bare legs. At Nieuwpoort in Flanders some Scottish battalions took to wearing women’s tights beneath the kilt as a form of protection.

Gas alert by Arthur Streeton, 1918

Gas alert procedure became a routine for the front-line soldier. To warn of a gas attack, a bell would be rung, often made from a spent artillery shell. At the noisy batteries of the siege guns, a compressed air strombus horn was used, which could be heard nine miles (14 km) away. Notices would be posted on all approaches to an affected area, warning people to take precautions.

Other British attempts at countermeasures were not so effective. An early plan was to use 100,000 fans to disperse the gas. Burning coal or carborundum dust was tried. A proposal was made to equip front-line sentries with diving helmets, air being pumped to them through a 100 ft (30 m) hose.

However, the effectiveness of all countermeasures is apparent. In 1915, when poison gas was relatively new, less than 3% of British gas casualties died. In 1916, the proportion of fatalities jumped to 17%. By 1918, the figure was back below 3%, though the total number of British gas casualties was now nine times the 1915 levels.

Various gas masks employed on the Western Front during the war

Delivery systems

A British cylinder release at Montauban on the Somme, June 1916 — part of the preparation for the Battle of the Somme.

The first system employed for the mass delivery of gas involved releasing the gas cylinders in a favourable wind such that it was carried over the enemy’s trenches. The Hague Convention of 1899 prohibited the use of poisons gasses delivered by projectiles. The main advantage of this method was that it was relatively simple and, in suitable atmospheric conditions, produced a concentrated cloud capable of overwhelming the gas mask defences. The disadvantages of cylinder releases were numerous. First and foremost, delivery was at the mercy of the wind. If the wind was fickle, as was the case at Loos, the gas could backfire, causing friendly casualties. Gas clouds gave plenty of warning, allowing the enemy time to protect themselves, though many soldiers found the sight of a creeping gas cloud unnerving. Also gas clouds had limited penetration, only capable of affecting the front-line trenches before dissipating.

Finally, the cylinders had to be emplaced at the very front of the trench system so that the gas was released directly over no man’s land. This meant that the cylinders had to be manhandled through communication trenches, often clogged and sodden, and stored at the front where there was always the risk that cylinders would be prematurely breached during a bombardment. A leaking cylinder could issue a telltale wisp of gas that, if spotted, would be sure to attract shellfire.

German gas attack on the eastern front.

A British chlorine cylinder, known as an “oojah”, weighed 190 lb (86 kg), of which only 60 lb (27 kg) was chlorine gas, and required two men to carry. Phosgene gas was introduced later in a cylinder, known as a “mouse”, that only weighed 50 lb (23 kg).

Delivering gas via artillery shell overcame many of the risks of dealing with gas in cylinders. The Germans, for example, used 5.9-inch (150 mm) artillery shells (“five-nines”). Gas shells were independent of the wind and increased the effective range of gas, making anywhere within reach of the guns vulnerable. Gas shells could be delivered without warning, especially the clear, nearly odorless phosgene — there are numerous accounts of gas shells, landing with a “plop” rather than exploding, being initially dismissed as dud HE or shrapnel shells, giving the gas time to work before the soldiers were alerted and took precautions.

Loading a battery of Livens gas projectors

The main flaw associated with delivering gas via artillery was the difficulty of achieving a killing concentration. Each shell had a small gas payload and an area would have to be subjected to a saturation bombardment to produce a cloud to match cylinder delivery. Mustard gas, however, did not need to form a concentrated cloud and hence artillery was the ideal vehicle for delivery of this battlefield pollutant.

The solution to achieving a lethal concentration without releasing from cylinders was the “gas projector”, essentially a large-bore mortar that fired the entire cylinder as a missile. The British Livens projector (invented by Captain W.H. Livens in 1917) was a simple device; an 8-inch (200 mm) diameter tube sunk into the ground at an angle, a propellant was ignited by an electrical signal, firing the cylinder containing 30 or 40 lb (14 or 18 kg) of gas up to 1,900 meters. By arranging a battery of these projectors and firing them simultaneously, a dense concentration of gas could be achieved. The Livens was first used at Arras on 4 April 1917. On 31 March 1918 the British conducted their largest ever “gas shoot”, firing 3,728 cylinders at Lens.

Unexploded weapons

Phosgene delivery system unearthed at the Somme, 2006

Over 16,000,000 acres (65,000 km2) of France had to be cordoned off at the end of the war because of unexploded ordnance. About 20% of the chemical shells were duds, and approximately 13 million of these munitions were left in place. This has been a serious problem in former battle areas from immediately after the end of the War until the present. Shells may be, for instance, uncovered when farmers plough their fields (termed the ‘iron harvest‘), and are also regularly discovered when public works or construction work is done.[66]

An additional difficulty is the current stringency of environmental legislation. In the past, a common method of getting rid of unexploded chemical ammunition was to detonate or dump it at sea; this is currently prohibited in most countries.[67][nb 2]

The problems are especially acute in some northern regions of France. The French government no longer disposes of chemical weapons at sea. For this reason, piles of untreated chemical weapons accumulated. In 2001, it became evident that the pile stored at a depot in Vimy was unsafe; the inhabitants of the neighboring town were evacuated, and the pile moved, using refrigerated trucks and under heavy guard, to a military camp in Suippes.[68] The capacity of the plant is meant to be 25 tons per year (extensible to 80 tons at the beginning), for a lifetime of 30 years.[69]

Germany has to deal with unexploded ammunition and polluted lands resulting from the explosion of an ammunition train in 1919.[69]

Aside from unexploded shells, there have been claims that poison residues have remained in the local environment for an extended period, though this is unconfirmed; well known but unverified anecdotes claim that as late as the 1960s trees in the area retained enough mustard gas residue to injure farmers or construction workers who were clearing them.[70]

Gases used

Name First use Type Used by
Xylyl bromide[71] 1914 Lachrymatory, toxic Both
Chlorine[72] 1915 Corrosive. Lung Irritant Both
Phosgene[72] 1915 Irritant – Skin and mucous membranes. Corrosive, toxic Both
Benzyl bromide[71] 1915 Lachrymatory Central Powers
Chloromethyl chloroformate[71] 1915 Irritant – Eyes, skin, lungs Both
Trichloromethyl chloroformate[71] 1916 Severe irritant, causes burns Both
Chloropicrin[72] 1916 Irritant, lachrymatory, toxic Both
Stannic chloride[71] 1916 Severe irritant, causes asphyxiating Allies
Ethyl iodoacetate[71] 1916 Lachrymatory, toxic Allies
Bromoacetone[71] 1916 Lachrymatory, irritant Both
Monobromomethyl ethyl ketone[71] 1916 Lachrymatory, irritant Central Powers
Acrolein[71] 1916 Lachrymatory, toxic Central Powers
Hydrogen cyanide[71] (Prussic acid) 1916 Toxic, Chemical Asphyxiant Allies
Hydrogen sulfide[71] (Sulphuretted hydrogen) 1916 Irritant, toxic Allies
Diphenylchloroarsine[72] (Diphenyl chlorasine) 1917 Irritant/Sternutatory (causes sneezing) Central Powers
α-chlorotoluene (Benzyl chloride) 1917 Irritant, lachrymatory Central Powers
Mustard gas[72] (Bis(2-chloroethyl) sulfide) 1917 Vesicant (blistering agent), lung irritant Both
Bis(chloromethyl) ether (Dichloromethyl ether) 1918 Irritant, can blur vision Central Powers
Ethyldichloroarsine[72] 1918 Vesicant Central Powers
N-Ethylcarbazole 1918 Irritant Central Powers

Long-term health effects

Soldiers who claimed to have been exposed to chemical warfare have often presented with unusual medical conditions which has led to much controversy. The lack of information has left doctors, patients, and their families in the dark in terms of prognosis and treatment. Nerve agents such as sarin, tabun, and soman are believed to have the most significant long-term health effects.[73] Chronic fatigue and memory loss have been reported to last up to three years after exposure. In the years following World War One, there were many conferences held in attempts to abolish the use of chemical weapons all together, such as The Washington Conference (1921–22), Geneva Conference (1923–25) and the World Disarmament Conference (1933). Although the United States was an original signatory of the Geneva Protocol in 1925, the US Senate did not formally ratify it until 1975.

Although the health effects are generally chronic in nature, the exposures were generally acute. A positive correlation has been proven between exposure to mustard agents and skin cancers, other respiratory and skin conditions, leukemia, several eye conditions, bone marrow depression and subsequent immunosuppression, psychological disorders and sexual dysfunction.[74] Chemicals used in the production of chemical weapons have also left residues in the soil where the weapons were used. The chemicals that have been detected can cause cancer and can have an impact on a person’s brain, blood, liver, kidneys and skin.[75]

Despite the evidence in support of long-term health effects, there are studies that show just the opposite. Some US veterans who were closely affected by chemical weapons showed no neurological evidence in the following years. These same studies showed that one single contact with chemical weapons would be enough to cause long-term health effects.[76]

The Gurkhas – Unsung Hero’s of the British Army. Background & History


The Gurkhas

– Unsung Hero’s of the British Army –

Featured image
Gurkha Soldiers (1896).

—————————————————————————-

The Gurkhas – Full Documentry

—————————————————————————-

Featured image

The Gurkhas

——————————————————————-

The Gurkhas March Down the Mall 2015 (1)

——————————————————————-

The Gurkhas (Nepali : गोर्खा) (/ˈɡɜrkə/ or /ˈɡʊərkə/), also spelled as Gorkhas, are soldiers from Nepal. Historically, the terms “Gurkha” and “Gorkhali” were synonymous with “Nepali,” and derived from the hill town and district of Gorkha from which the Kingdom of Nepal expanded.[1][2] Legend has it that the name may be traced to the medieval Hindu warrior-saint Guru Gorakhnath[3] who has a historic shrine in Gorkha.[4] Gurkhas are traditionally recruited from various Nepali hill ethnicities, but do not come from a single group or region in the multi-ethnic country.

Although the Gorkhas found in Himachal are mostly from Nepal, there have been reports of non-Nepalese Gorkhas (such as Thai Gorkhas, Naga Gorkhas and Chinese Gorkhas). There are Gurkha military units in the Nepalese, British and the Indian army (Gorkhas) enlisted in Nepal. Although they meet many of the requirements of Article 47 [5] of Protocol I of the Geneva Conventions regarding mercenaries, they are exempt under clauses 47(e)&(f) similar to the French Foreign Legion.[6]

Gurkhas are closely associated with the khukuri, a forward-curving Nepalese knife and have a well known reputation for their fearless military prowess. The former Indian Army Chief of Staff Field Marshal Sam Manekshaw, once stated that[7] “If a man says he is not afraid of dying, he is either lying or is a Gurkha.”

—————————————————————————-

Gurkhas in Falkland War

—————————————————————————-

Background

During the Gurkha War (1814–1816) between the Gorkha Kingdom in Nepal and the East India Company the British were impressed by the Gorkhali soldiers which they called Gurkhas.[8] Their war cry was and is to this very day: Jaya Mahakali, Ayo Gorkhali (Nepali: जय महाकाली, आयो गोर्खाली) (Glory to Great Kali, Gorkhas approach!) In the Peace Treaty it was agreed that Gorkhalis could be recruited to serve under contract in the East India Company’s army.

Traditionally, recruitment had been only from the Nepali hill groups such as the, Chhetri (Thakuri), Magar and Gurung. These three castes are the original Gurkhas who fought against British. Brahmin, Sherpa/Tamang were not allowed to be recruited in Gurkha army. Today Gurkhas are from all tribes of Nepal including Gurung, Magar, Chhetri (Thakuri), Rai, limbu, Sherpa, Tamang, Newars, etc.[9] Gurkhas were thought to be a martial race because they were considered to be naturally warlike and aggressive in battle; to possess qualities of courage, loyalty, self-sufficiency, physical strength, resilience, orderliness; to be able to work hard for long periods of time; and to fight with tenacity and military strength.[10]

Professor Sir Ralph Lilley Turner, MC, who served with the 3rd Queen Alexandra’s Own Gurkha Rifles in the First World War, wrote of Gurkhas:

“As I write these last words, my thoughts return to you who were my comrades, the stubborn and indomitable peasants of Nepal. Once more I hear the laughter with which you greeted every hardship. Once more I see you in your bivouacs or about your fires, on forced march or in the trenches, now shivering with wet and cold, now scorched by a pitiless and burning sun. Uncomplaining you endure hunger and thirst and wounds; and at the last your unwavering lines disappear into the smoke and wrath of battle. Bravest of the brave most generous of the generous, never had country more faithful friends than you.”

——————————————————————————

Who Will Be a Gurkha

——————————————————————————

British East India Company Army

Gurkha soldiers during the Anglo-Nepalese War, 1815 AD.

The Anglo–Nepalese War was fought between the Gurkha Kingdom of Nepal and the British East India Company as a result of border disputes and ambitious expansionism of both the belligerent parties. The war ended with the signing of the Treaty of Sugauli in 1816.

David Ochterlony and the British political agent William Fraser were among the first to recognize the potential of Gurkha soldiers in British service. During the war the British were keen to use defectors from the Nepalese army and employ them as irregular forces. His confidence in their loyalty was such that in April 1815 he proposed forming them into a battalion under Lieutenant Ross called the Nasiri regiment. This regiment, which later became the 1st King George’s Own Gurkha Rifles, saw action at the Malaun fort under the leadership of Lieutenant Lawtie, who reported to Ochterlony that he “had the greatest reason to be satisfied with their exertions”.

About 5,000 men entered British service in 1815, most of whom were not just Gorkhalis but Kumaonis, Garhwalis and other Himalayan hill men. These groups, eventually lumped together under the term Gurkha, became the backbone of British Indian forces.

As well as Ochterlony’s Gorkhali battalions, William Fraser and Lieutenant Frederick Young raised the Sirmoor battalion, later to become the 2nd King Edward VII’s Own Gurkha Rifles; an additional battalion, the Kumaon battalion was also raised eventually becoming the 3rd Queen Alexandra’s Own Gurkha Rifles. None of these men fought in the second campaign.

Gurkhas served as troops under contract to the East India Company in the Pindaree War of 1817, in Bharatpur in 1826 and the First and Second Anglo-Sikh Wars in 1846 and 1848.[11]

During the Indian Rebellion of 1857, Gurkhas fought on the British side, and became part of the British Indian Army on its formation. The 8th (Sirmoor) Local Battalion made a particularly notable contribution during the conflict, and indeed twenty-five Indian Order of Merit awards were made to men from that regiment during the Siege of Delhi.[12] Three days after the mutiny began, the Sirmoor Battalion were ordered to move to Meerut, where the British garrison was barely holding on, and in doing so they had to march up to 48 kilometres a day.[13] Later, during the four-month Siege of Delhi they defended Hindu Rao‘s house, losing 327 out of 490 men. During this action they fought side by side with the 60th Rifles and a strong bond developed.[14][15] Twelve regiments from the Nepalese Army also took part in the relief of Lucknow[16] under the command of Shri Teen (3) Maharaja Maharana Jung Bahadur of Nepal and his older brother C-in-C Ranaudip Singh (Ranodip or Ranodeep) Bahadur Rana (later to succeed Jung Bahadur and become Sri Teen Maharaja Ranodip Singh of Nepal).

After the rebellion the 60th Rifles pressed for the Sirmoor Battalion to become a rifle regiment. This honour was granted then next year (1858) when the Battalion was renamed the Sirmoor Rifle Regiment and awarded a third colour.[17] In 1863 Queen Victoria presented the regiment with the Queen’s Truncheon, as a replacement for the colours that rifle regiments do not usually have.[18]

————————————————

Gurkhas vs French Foreign Legion (HD)

————————————————

British Indian Army (c. 1857–1947)

The Nusseree Battalion later known as the 1st Gurkha Rifles circa 1857

Hindu Rao‘s house shortly after the siege

Gurkha Soldiers (1896). The centre figure wears the dark green dress uniform worn by all Gurkhas in British service, with certain regimental distinctions

From the end of the Indian Rebellion of 1857 until the start of World War I the Gurkha Regiments saw active service in Burma, Afghanistan, the North-East Frontier and the North-West Frontiers of India, Malta (the Russo-Turkish War, 1877–78), Cyprus, Malaya, China (the Boxer Rebellion of 1900) and Tibet (Younghusband’s Expedition of 1905).

Between 1901 and 1906, the Gurkha regiments were renumbered from the 1st to the 10th and re-designated as the Gurkha Rifles. In this time, the Brigade of Gurkhas, as the regiments came to be collectively known, was expanded to twenty battalions within the ten regiments.[19]

2nd/5th Royal Gurkha Rifles, North-West Frontier 1923

During World War I (1914–18), more than 200,000 Gurkhas served in the British Army, suffering approximately 20,000 casualties, and receiving almost 2,000 gallantry awards.[20] The number of Gurkha battalions was increased to thirty-three, and Gurkha units were placed at the disposal of the British high command by the Nepalese government for service on all fronts. Many Nepalese volunteers served in non-combatant roles, serving in units such as the Army Bearer Corps and the labour battalions, but there were also large numbers that served in combat in France, Turkey, Palestine, and Mesopotamia.[21] They served on the battlefields of France in the Loos, Givenchy, Neuve Chapelle and Ypres; in Mesopotamia, Persia, Suez Canal and Palestine against Turkish advance, Gallipoli and Salonika.[22] One detachment served with Lawrence of Arabia, while during the Battle of Loos (June–December 1915) a battalion of the 8th Gurkhas fought to the last man, hurling themselves time after time against the weight of the German defences, and in the words of the Indian Corps commander, Lieutenant-General Sir James Willcocks, “… found its Valhalla”.[23] During the ultimately unsuccessful Gallipoli campaign in 1915, the Gurkhas were among the first to arrive and the last to leave. The 1st/6th Gurkhas, having landed at Cape Helles, led the assault during the first major operation to take out a Turkish high point, and in doing so captured a feature that later became known as “Gurkha Bluff”.[24] At Sari Bair they were the only troops in the whole campaign to reach and hold the crest line and look down on the Straits, which was the ultimate objective.[25] The 2nd Battalion of the 3rd Gurkha Rifles (2nd/3rd Gurkha Rifles) was involved in the conquest of Baghdad.

Following the end of the war, the Gurkhas were returned to India and during the inter-war years, they were largely kept away from the internal strife and urban conflicts of the sub-continent, instead being employed largely on the frontiers and in the hills where fiercely independent tribesmen were a constant source of troubles.[26] As such, between the World Wars, the Gurkha regiments fought in the Third Afghan War in 1919 and then participated in numerous campaigns on the North-West Frontier, mainly in Waziristan, where they were employed as garrison troops defending the frontier, keeping the peace amongst the local populace and keeping the lawless and often openly hostile Pathan tribesmen in check. During this time the North-West Frontier was the scene of considerable political and civil unrest and the troops stationed at Razmak, Bannu and Wanna saw an extensive amount of action.[27]

During World War II (1939–45), there were ten Gurkha regiments, with two battalions each making a total of twenty pre-war battalions.[28] Following the Dunkirk evacuation of the British Expeditionary Force in 1940, the Nepalese government offered to increase recruitment to increase the total number of Gurkha battalions in British service to thirty-five.[29] This would eventually rise to forty-three battalions and in order to achieve this, third and fourth battalions were raised for all ten regiments, with fifth battalions also being raised for 1 GR, 2 GR and 9 GR.[28] This expansion required ten training centres to be established for basic training and regimental records across India. In addition five training battalions[30] were raised, while other units[31] were raised as garrison battalions for keeping the peace in India and defending rear areas.[32] Large numbers of Gurkha men were also recruited for non-Gurkha units, and other specialised functions such as paratroops, signals, engineers, and military police.

A total of 250,280[32] Gurkhas served in 40 battalions, plus eight Nepalese Army battalions, plus Parachute, training, garrison, and porter units during the war,[33] in almost all theatres. In addition to keeping peace in India, Gurkhas fought in Syria, North Africa, Italy, Greece and against the Japanese in the jungles of Burma, northeast India and also Singapore.[34] They did so with considerable distinction, earning 2,734 bravery awards in the process[32] and suffering around 32,000 casualties in all theatres.[35]

Gurkha military rank system in the British Indian Army

Gurkha ranks in the British Indian Army followed the same pattern as those used throughout the rest of the Indian Army at that time.[36] As in the British Army itself, there were three distinct levels: private soldiers, non-commissioned officers and commissioned officers. Commissioned officers within the Gurkha regiments held a Viceroy’s Commission, which was distinct from the King’s or Queen’s Commission that British officers serving with a Gurkha regiment held. Any Gurkha holding a commission was technically subordinate to any British officer, regardless of rank.[37]

The 2/5th Royal Gurkha Rifles marching through Kure soon after their arrival in Japan in May 1946 as part of the Allied forces of occupation

British Indian Army and current Indian Army ranks/current British Army equivalents

Viceroy Commissioned Officers (VCOs) up to 1947 and Junior Commissioned Officers (JCOs) from 1947:[38]

Warrant officers

Non-commissioned officers

Private soldiers

Notes

  • British Army officers received Queen’s or King’s Commissions, but Gurkha officers in this system received the Viceroy’s Commission. After Indian independence in 1947, Gurkha officers in regiments which became part of the British Army received the King’s (later Queen’s) Gurkha Commission, and were known as King’s/Queen’s Gurkha Officers (KGO/QGO). Gurkha officers had no authority to command troops of British regiments. The QGO Commission was abolished in 2007.
  • Jemadars and subedars normally served as platoon commanders and company 2ICs, but were junior to all British officers, while the subedar major was the Commanding Officer’s advisor on the men and their welfare. For a long time it was impossible for Gurkhas to progress further, except that an honorary lieutenancy or captaincy was very rarely bestowed upon a Gurkha on retirement.[37]
  • The equivalent ranks in the post-1947 Indian Army were (and are) known as Junior Commissioned Officers (JCOs). They retained the traditional rank titles used in the British Indian Army — Jemadar (later Naib Subedar), Subedar and Subedar Major.
  • While in principle any British subject may apply for a commission without having served in the ranks, Gurkhas cannot. It was customary for a Gurkha soldier to rise through the ranks and prove his ability before his regiment would consider offering him a commission.[37]
  • From the 1920s, Gurkhas could also receive King’s Indian Commissions, and later full King’s or Queen’s Commissions, which put them on a par with British officers. This was rare until after the Second World War.
  • Gurkha officers commissioned from the Royal Military Academy – Sandhurst – and Short Service Officers regularly fill appointments up to the rank of major. At least two Gurkhas have been promoted to lieutenant colonel and there is theoretically now no bar to further progression.[37]
  • After 1948, the Brigade of Gurkhas (part of the British Army) was formed and adopted standard British Army rank structure and nomenclature, except for the three Viceroy Commission ranks between Warrant Officer 1 and Second Lieutenant (jemadar, subedar and subedar major) which remained, albeit with different rank titles Lieutenant (Queens Gurkha Officer), Captain (QGO) and Major (QGO). The QGO commission was abolished in 2007, Gurkha soldiers are currently commissioned as Late Entry Officers (as above).[37]

Regiments of the Gurkha Rifles (c.1815–1947)

Princess Mary’s Own

Second World War training battalions[edit]

  • 14th Gurkha Rifles Training Battalion[39]
  • 29th Gurkha Rifles Training Battalion
  • 38th Gurkha Rifles Training Battalion[39]
  • 56th Gurkha Rifles Training Battalion[39]
  • 710th Gurkha Rifles Training Battalion[39]

Post-independence (1947–present)

THE GURKHA
SOLDIER
Bravest of the brave,
most generous of the generous,
never had country
more faithful friends
than you.
Professor Sir Ralph Turner MC[40]

After Indian independence—and the partition of India—in 1947 and under the Tripartite Agreement, the original ten Gurkha regiments consisting of the twenty pre-war battalions were split between the British Army and the newly independent Indian Army.[32] Six Gurkha regiments (twelve battalions) were transferred to the post-independence Indian Army, while four regiments (eight battalions) were transferred to the British Army.[41]

To the disappointment of their British officers the majority of Gurkhas given a choice between British or Indian Army service opted for the latter. The reason appears to have been the pragmatic one that the Gurkha regiments of the Indian Army would continue to serve in their existing roles in familiar territory and under terms and conditions that were well established.[42] The only substantial change was the substitution of Indian officers for British. By contrast the four regiments selected for British service faced an uncertain future in (initially) Malaya—a region where relatively few Gurkhas had previously served. The four regiments (or eight battalions) in British service have since been reduced to a single (two battalion) regiment while the Indian units have been expanded beyond their pre-Independence establishment of twelve battalions.[43]

The principal aim of the Tripartite Agreement was to ensure that Gurkhas serving under the Crown would be paid on the same scale as those serving in the new Indian Army.[44] This was significantly lower than the standard British rates of pay. While the difference is made up through cost of living and location allowances during a Gurkha’s actual period of service, the pension payable on his return to Nepal is much lower than would be the case for his British counterparts.[45]

With the abolition of the Nepalese monarchy, the future recruitment of Gurkhas for British and Indian service has been put into doubt. A spokesperson for the Communist Party of Nepal (Maoist), which is expected to play a major role in the new secular republic, has stated that recruitment as mercenaries is degrading to the Nepalese people and will be banned.[46]

British Army Gurkhas

Main article: Brigade of Gurkhas

Four Gurkha regiments were transferred to the British Army on 1 January 1948:

They formed the Brigade of Gurkhas and were initially stationed in Malaya. There were also a number of additional Gurkha regiments including the 69th and 70th Gurkha Field Squadrons, both included in the 36th Engineer Regiment. Since then, British Gurkhas have served in Borneo during the Confrontation with Indonesia, in the Falklands War, and on various peacekeeping missions in Sierra Leone, East Timor, Bosnia and Kosovo.[47]

The Band of Brigade of Gurkhas December 2007

Gurkhas in Hong Kong:

  • 26th Gurkha Brigade (1948–50)
  • 51st Infantry Brigade (disbanded 1976)
  • 48th Gurkha Infantry Brigade (1957–76; renamed Gurkha Field Force 1976–97; returned to old title 1987–ca. 1992)

As of November 2006, the Brigade of Gurkhas in the British Army has the following units:

The Brigade of Gurkhas also has its own clerks and chefs posted among the above-mentioned units. Gurkhas were among the troops who retook the Falklands in 1982 and have served a number of tours of duty in the current War in Afghanistan.[48][49][50]

Indian Army Gorkhas

The 1st Battalion of 1 Gorkha Rifles of the Indian Army take position outside a simulated combat town during a training exercise

Upon independence in 1947, six of the original ten Gurkha regiments remained with the Indian Army.[41] These regiments were:

Additionally, a further regiment, 11 Gorkha Rifles, was raised. In 1949 the spelling was changed from “Gurkha” to the original “Gorkha”.[51] All royal titles were dropped when India became a republic in 1950.[51]

Since partition, the Gurkha regiments that were transferred to the Indian Army have established themselves as a permanent and vital part of the newly independent Indian Army. Indeed, while Britain has reduced its Gurkha contingent, India has continued to recruit Nepalis into Gorkha regiments in large numbers.[43] In 2009 the Indian Army had a Gorkha contingent that numbered around 42,000 men in forty-six battalions, spread across seven regiments.

Although their deployment is still governed by the 1947 Tripartite Agreement, in the post-1947 conflicts India has fought in, Gorkhas have served in almost all of them, including the wars with Pakistan in 1947, 1965 and 1971 and also against China in 1962.[52] They have also been used in peacekeeping operations around the world.[51] They have also served in Sri Lanka conducting operations against the Tamil Tigers.[53]

Nepalese Army Gorkhas

A Nepalese Gorkha UN soldier.

Two light infantry battalions of the Nepalese Army retain the name of the Gorkhas: Nepalese Army, also known as the Gurkha Army.

  • Shree Purano Gorakh Battalion — established 1763
  • Shree Naya Gorakh Battalion — established 1783

Until the abolition (2008) of the monarchy (itself a Gurkha dynasty), the Gorkha units were utilized as palace guards by the King of Nepal, with one battalion always permanently deployed.[54] The Shree Purano Gorakh Battalion was the first major Nepalese contingent deployed on UN Peacekeeping operations, when it was deployed to the Sinai Peninsula in 1974.[55]

Singapore Gurkha Contingent

The Gurkha Contingent (GC) of the Singapore Police Force was formed on 9 April 1949 from selected ex-British Army Gurkhas. It is an integral part of the Police Force and was raised to replace a Sikh unit which had existed prior to the Japanese occupation during the Second World War.[56]

The GC is a well trained, dedicated and disciplined body whose principal role is as riot police. In times of crisis it can be deployed as a reaction force. During the turbulent years before and after independence, the GC acquitted itself well on several occasions during outbreaks of civil disorder. The Gurkhas displayed the courage, self-restraint and professionalism for which they are famous and earned the respect of the society at large.[56]

Recently the GC can be seen patrolling the streets and have replaced local policemen to guard key installations. The most recent deployment of the GC was to provide additional security for the Singapore Airshow, Asia’s largest airshow, and the hunt for the escaped terrorist, Mas Selamat.

Brunei Gurkha Reserve Unit

The Gurkha Reserve Unit is a special guard force in the Sultanate of Brunei. The Brunei Reserve Unit employs about 500 Gurkhas. The majority are veterans of the British Army and the Singaporean Police, who have joined the GRU as a second career.

Gurkha soldiers in non-specific foreign units

Hong Kong

A considerable number of ex-Gurkhas and their families live in Hong Kong, where they are particularly well represented in the private security profession (G4S Gurkha Services, Pacific Crown Security Service, Sunkoshi Gurkha Security) and among labourers. Ex-Gurkhas left their barracks and moved into the surrounding urban area. There are considerable Nepalese communities in Yuen Long and Kwun Chung.

Malaysia

After the Federation of Malaya became independent from the United Kingdom in August 1957, many Gurkhas became soldiers in the Malayan armed forces, especially in the Royal Ranger Regiment. Others became security guards, mainly in Kuala Lumpur.

United States Navy

The United States Navy employs civilian Gurkha contract guards. Some work alongside Army, Air Force and Navy personnel in day-to-day operations, notably as sentries at its base in Naval Support Activity Bahrain and on the US Navy side of the pier at Mina Salman. Others work as security forces at the United States Embassy in Kabul, Afghanistan.

Coalition Forces in Iraq

Gurkha contract guards were used to guard key facilities in Iraq during Operation Iraqi Freedom. The guarded facilities included Baghdad International Airport and the Al Rasheed Hotel.

Other

Ethnic identity

Ethnically, Chhetri (Thakuri), Gurung and Magar were the Gurkha tribes who united Nepal and fought against the British invasions. But today, Gurkhas mostly belong to the Chhetri (Thakuri), Tamang, Gurung, Magar, Rai, Limbu, Newars and Sunuwar, and members of any Nepali tribe can join the Army.[57]

All Gurkhas, regardless of ethnic origin, speak, in addition to their group language, Nepali, also known as Khas Kura or Khas Bhasa. Their large knife, called the kukri, became iconic and is featured in a curved configuration on their emblem.

Life after service

Gurkhas traditionally returned to their homeland of Nepal following their military service, to resume a life of subsistence farming or labour. The country’s poor infrastructure and lack of welfare system led to a high number of ex-Gurkhas facing destitution. When the extent of their hardship came to light in the late 1960s, officers in the British Army established a charity – The Gurkha Welfare Trust – to ensure that all former soldiers would live out their retirement in dignity.

Indian statehood aspirations Gorkhaland

In the mid-1980s, some Nepali speaking groups in West Bengal began to organize under the name of Gorkhaland National Liberation Front, calling for their own Gorkha state, Gorkhaland.

Victoria Cross recipients

There have been twenty-six Victoria Crosses awarded to members of the Gurkha regiments.[58] The first was awarded in 1858 and the last in 1965.[59] Thirteen of the recipients have been British officers serving with Gurkha regiments, although since 1915 the majority have been received by Gurkhas serving in the ranks as private soldiers or as NCOs.[20] In addition, since Indian independence in 1947, Gurkhas serving in the Indian Army have also been awarded three Param Vir Chakras, which are roughly equivalent.[60]

Of note also, there have been two George Cross medals awarded to Gurkha soldiers, for acts of bravery in situations that have not involved combat.[20]

Treatment of Gurkhas in the United Kingdom

Nick Clegg being presented a Gurkha Hat, by a Gurkha veteran during his Maidstone visit, to celebrate the success of their joint campaign for the right to live in Britain, 2009

The treatment of Gurkhas and their families was the subject of controversy in the United Kingdom once it became widely known that Gurkhas received smaller pensions than their British counterparts.[61] The nationality status of Gurkhas and their families was also an area of dispute, with claims that some ex-army Nepali families were being denied residency and forced to leave Britain. On 8 March 2007, the British Government announced that all Gurkhas who signed up after 1 July 1997 would receive a pension equivalent to that of their British counterparts. In addition, Gurkhas would, for the first time, be able to transfer to another army unit after five years’ service and women would also be allowed to join—although not in first-line units—conforming to the British Army’s policy. The act also guaranteed residency rights in Britain for retired Gurkhas and their families.

Despite the changes, many Gurkhas who had not served long enough to entitle them to a pension faced hardship on their return to Nepal, and some critics derided the Government’s decision to only award the new pension and citizenship entitlement to those joining after 1 July 1997, claiming that this left many ex-Gurkha servicemen still facing a financially uncertain retirement. A pressure group, Gurkha Justice Campaign,[62] joined the debate in support of the Gurkhas.

In a landmark ruling on 30 September 2008 the High Court in London decided that the Home Secretary’s policy allowing Gurkhas who left the Army before 1997 to apply for settlement in the United Kingdom was irrationally restrictive in its criteria, and quashed it. In line with the ruling of the High Court the Home Office pledged to review all cases affected by this decision.[63]

On 29 April 2009 a motion in the House of Commons by the Liberal Democrats that all Gurkhas be offered an equal right of residence was passed by 267 votes to 246. This was the only first day motion defeat for a government since 1978. Nick Clegg, the Liberal Democrat leader, stated that “This is an immense victory […] for the rights of Gurkhas who have been waiting so long for justice, a victory for Parliament, a victory for decency.” He added that it was “the kind of thing people want this country to do”.[64]

On 21 May 2009, the Home Secretary Jacqui Smith announced that all Gurkha veterans who retired before 1997 with at least four years service would be allowed to settle in the UK. The actress Joanna Lumley, daughter of Gurkha corps major James Lumley, who had highlighted the treatment of the Gurkhas and campaigned for their rights, commented: “This is the welcome we have always longed to give”.[65]

A charity, The Gurkha Welfare Trust, provides aid to alleviate hardship and distress among Gurkha ex-servicemen.[66]

On June 9th, 2015, a celebration called the Gurkha 200, held at The Royal Hospital Chelsea and attended by members of the royal family, will commemorate the bicentennial of the Gurkha Welfare Trust by paying tribute to Gurkha culture and military service.[67]

Settlement rights

A 2008 UK High Court decision on a test case in London, R. (On the Application of Limbu) v Secretary of State for the Home Department ([2008] EWHC 2261 (Admin)), acknowledged the ‘debt of honour’ to Gurkhas discharged before 1997. The Home Secretary of State’s policy allowing veterans to apply on a limited set of criteria (such as connection to the United Kingdom) was quashed as being unduly restrictive. The Court found that the Gurkhas had suffered a “historic injustice”, and that the policy was irrational in failing to take into account factors such as length of service or particularly meritorious conduct.[68]

Khaled al-Asaad. Slaughtered by Animals – Now with those he loved & Studied. R.I.P

Khaled al-Asaad

1934 – 18 August 2015

R.I.P

—————————————————————–

UPDATED

28th March 2016

Syrian government troops advance towards Palmyra

Thinking of Khaled al-Asaad who loved this place and died protecting it from the deluded followers of Islamic State and their twisted , obscene take on Islam. Although to late to save his life and the ancient sites he loved and studied – hopefully he will be looking down from  heaven and rejoicing at its recapture and the news that the damage was not as great as first thought.

Rest in peace Khaled – Now with those you loved and studied.

 The retaking of Palmyra by the Syrian army ends 10 months of occupation by the so-called Islamic State (IS). It is an important step in the containment and eventual defeat of the jihadist group that has seized swathes of Syria and Iraq.

It may not mean the end for IS, whose heartlands of Raqqa, Deir Ezzor, and Mosul remain safe havens, but it is a step in chipping away at the group’s power base, both geographically and strategically, as well as debasing the myth that the caliphate’s armies are all-conquering and unable to be defeated.

Quite apart from protecting its beauty and historic importance – which IS forces have shown no respect for – reversing the fall of Palmyra is psychologically important.

See BBC News for full story

—————————————————

Palmyra archaeologist beheaded by ISIS

—————————————————

Palmyra

—————————————————

Satellite image of IS destruction

The temple is reduced to a pile of rubble in this picture taken just a few days ago

Khaled Mohamad al-Asaad (Arabic pronunciation: [ɐlʔæsʕæd] Arabic: خالد الأسعد‎ (1934[1] – 18 August 2015), also Khaled Asaad, was a Syrian archaeologist and the head of antiquities for the ancient city of Palmyra, a UNESCO World Heritage Site. He held this position for over 40 years.[2] At age 81, al-Asaad was publicly beheaded by the Islamic State of Iraq and Syria (ISIS).

Khaled al-Asaad
Khaled al-Asaad 2012.jpg

Khaled al-Asaad in 2002
Born 1934
Tadmur, Syria
Died 18 August 2015 (aged 81)
Tadmur, Syria
Cause of death Beheaded by ISIS
Alma mater University of Damascus
Occupation Archaeologist
Known for Head of antiquities in Palmyra

Early life, education and family

Al-Asaad was born in Palmyra, Syria, and lived there most of his life.[3] He held a diploma in history and was educated at the University of Damascus.[4] Al-Asaad was the father of eleven children; six sons and five daughters, one of whom was named Zenobia after the well-known Palmyrene queen.[4]

Career

Archeologist

During his career, he engaged in the excavations and restoration of Palmyra. He had become the principal custodian of the Palmyra site for 40 years since 1963.[5] He worked with American, Polish, German, French and Swiss archaeological missions. His achievement is the elevation of Palmyra to a UNESCO World Heritage Site.[4] He was also fluent in Aramaic and regularly translated texts until 2011.[2]

In 2003, he was part of a Syrian-Polish team that uncovered a 3rd-century mosaic which portrayed a struggle between a human and a winged animal. He described it as “one of the most precious discoveries ever made in Palmyra”. In 2001, he announced the discovery of 700 7th-century silver coins bearing images of Kings Khosru I and Khosru II, part of the Sassanid dynasty that ruled Persia before the Muslim conquest.[3][4]

He was a sought-after speaker at conferences, presenting his vigorous and extensive research. Leading academics and researchers spoke warmly of his affection for Palmyra and his mastery of its history.[3] When he retired in 2003, his son Walid took on the mantle of his work at the site of Palmyra. They both were reportedly detained by ISIS in August 2015; the fate of his son is not yet known.[1]

Politics

In 1954 it is believed that he joined the Syrian Ba’ath Party.[4] However, it is not clear whether he was an active supporter of the Syrian government of Bashar al-Assad.[1] According to The Economist, some have said he was a “staunch supporter” of Assad.[6]

Death

In May 2015, Tadmur (the modern city of Palmyra) and the adjacent ancient city of Palmyra came under the control of the Islamic State of Iraq and Syria (ISIS). Al-Asaad helped evacuate the city museum prior to ISIS’s takeover.[4] Al-Asaad was among those captured during this time, and ISIS attempted to get al-Asaad to reveal the location of the ancient artifacts that he had helped to hide.[7] He was murdered in Tadmur on 18 August 2015. The New York Times reported:

After detaining him for weeks, the jihadists dragged him on Tuesday to a public square where a masked swordsman cut off his head in front of a crowd, Mr. Asaad’s relatives said. His blood-soaked body was then suspended with red twine by its wrists from a traffic light, his head resting on the ground between his feet, his glasses still on, according to a photo distributed on social media by Islamic State supporters.[8]

A placard hanging from the waist of his dead body listed al-Asaad’s alleged crimes: being an “apostate,” representing Syria at “infidel conferences,” serving as “the director of idolatry” in Palmyra, visiting “Heretic Iran” and communicating with a brother in the Syrian security services.[8] His body was reportedly displayed in Tadmur and then in the ancient city of Palmyra.[7][8][9][10][11]

In addition to al-Asaad, Qassem Abdullah Yehya, the Deputy Director of the DGAM Laboratories, also protected the Palmyra site. Qassem too was killed by ISIL while on duty on 12 August 2015. He was 37 years old.[12]

Reactions

  • The Chief of Syrian Antiquities, Maamoun Abdulkarim, condemned al-Asaad’s death, calling him “a scholar who gave such memorable services to the place Palmyra and to history”. He called al-Asaad’s ISIL killers a “bad omen on Palmyra”.[11]
  • Yasser Tabbaa, a specialist on Islamic art and architecture in Syria and Iraq, said of al-Asaad: “He was a very important authority on possibly the most important archaeological site in Syria.”[8]
  • Dario Franceschini, the Italian Minister of Cultural Heritage and Activities and Tourism announced that the flags of all Italian museums would be flown at half-mast in honor of al-Asaad.[13][14]
  • UNESCO and its general director Irina Bokova condemned al-Asaad’s murder, saying “They killed him because he would not betray his deep commitment to Palmyra. Here is where he dedicated his life.”[15]
  • The Aligarh Historians Society has issued a statement expressing hope that the killers would one day be brought to justice. The Society said that “Civilized people, irrespective of country or religion, must unite in their support for all political and military measures designed to achieve this end, especially those being made by the governments of Syria and Iraq.”[16]

Honours and medal


Palmyra

——————————————————————

ISIS blows ancient Baal Shamin temple in Palmyra

——————————————————————

Ruins of Palmyra

Palmyra (/ˌpælˈmrə/; Aramaic: ܬܕܡܘܪܬܐTedmurtā ; Arabic: تدمرTadmor) was an ancient Semitic city in present Homs Governorate, Syria. Archaeological finds date back to the Neolithic, and it was first documented in the early second millennium BC as a caravan stop for travellers crossing the Syrian Desert. The city was noted in the annals of the Assyrian kings, and may have been mentioned in the Hebrew Bible. Palmyra was a part of the Seleucid Empire and prospered after its incorporation into the Roman Empire in the first century.

The city’s wealth enabled the construction of monumental projects. By the third century AD the city was a prosperous metropolis and regional center. Before 273 it enjoyed autonomy for much of its existence. It was attached to the Roman province of Syria and its political organization was influenced by the Greek city-state model during the first two centuries AD. The city was governed by a senate, which was responsible for public works and the military. After becoming a colonia during the third century, Palmyra incorporated Roman governing institutions before adopting a monarchical system in 260. The city received its wealth from trade caravans; the Palmyrenes, renowned merchants, established colonies along the Silk Road and operated throughout the Roman Empire. The Palmyrenes were primarily a mix of Amorites, Arameans and Arabs,[2] with a Jewish minority. The city’s social structure was tribal, and its inhabitants spoke Palmyrene (a dialect of Aramaic); Greek was used for commercial and diplomatic purposes. The culture of Palmyra, influenced by those of the Greco-Roman world and Persia, produced distinctive art and architecture. The city’s inhabitants worshiped local deities and Mesopotamian and Arab gods.

In 260 the Palmyrene king Odaenathus defeated the Persian emperor Shapur I. He fought several battles against the Persians before his assassination in 267. Odaenathus was succeeded by his two young sons under the regency of Queen Zenobia, who rebelled against Rome and began invading its eastern provinces in 270. The Palmyrene rulers adopted imperial titles in 271; the Roman emperor Aurelian defeated the city in 272, destroying it in 273 after a failed second rebellion.

Palmyra was a minor center under the Byzantines, Rashiduns, Ummayads, Abbasids, Mamluks and their vassals. The Palmyrenes converted to Christianity during the fourth century and to Islam in the second half of the first millennium, and the Palmyrene and Greek languages were replaced by Arabic. The city—destroyed by the Timurids in 1400—remained a small village under the Ottomans until 1918, followed by the Syrian kingdom and the French Mandate. In 1929, the French began moving villagers into the new village of Tadmur. The transfer was completed in 1932, with the site abandoned and available for excavations. On 21 May 2015, Palmyra came under the control of the militant group Islamic State of Iraq and the Levant (ISIL).

Location and etymology

The northern Palmyrene mountain belt

Palmyra is 215 km (134 mi) northeast of the Syrian capital, Damascus,[3] in an oasis surrounded by palms (of which twenty varieties have been reported).[4][5] Two mountain ranges overlook the city; the northern Palmyrene mountain belt from the north and the southern Palmyrene mountains from the southwest.[6] In the south and the east Palmyra is exposed to the Syrian Desert.[6] A small wadi (al-Qubur) crosses the area,[7] flowing from the western hills past the city before disappearing in the eastern gardens of the oasis.[8] South of the wadi is a spring, Efqa.[9] Pliny the Elder described the town in the 70s AD as famous for its desert location, the richness of its soil,[10] and the springs surrounding it, which made agriculture and herding possible.[note 1][10]

“Tadmor” is the Semitic, earliest-attested native name of the city, appearing in the first half of the second millennium BC.[12] The word’s etymology is vague; according to Albert Schultens, it derived from the Semitic word for “dates” (tamar,[note 2][14] referring to the palm trees surrounding the city).[note 3][5]

The name “Palmyra” appeared during the early first century AD in the works of Pliny the Elder,[12][15] and was used throughout the Greco-Roman world.[14] It is generally believed that “Palmyra” derives from “Tadmor” as an alteration (supported by Schultens),[note 4][14] or a translation of “Tadmor” (assuming that it meant palm), and derived from the Greek word for palm “Palame” (supported by Jean Starcky).[5][12]

Michael Patrick O’Connor proposed a Hurrian origin of “Palmyra” and “Tadmor”,[12] citing the inexplicability of alterations to the theorized roots of both names (represented in the addition of -d- to tamar and -ra- to palame).[5] According to this theory, “Tadmor” derives from the Hurrian tad (“to love”) with the addition of the typical Hurrian mid vowel rising (mVr) formant mar.[17] “Palmyra” derives from pal (“to know”) using the same mVr formant (mar).[17] Thirteenth-century Syrian geographer Yaqut al-Hamawi wrote that Tadmor, the daughter of one of Noah’s distant descendants, was buried in the city.[18]

History

Former spring, with steps

Efqa spring, which dried up in 1994]

The site at Palmyra provided evidence for a Neolithic settlement near Efqa,[20] with stone tools dated to 7500 BC.[21] Archaeoacoustics in the tell beneath the Temple of Bel indicated traces of cultic activity dated to 2300 BC.[22][23][24]

Early period

Palmyra entered the historical record during the Bronze Age around 2000 BC, when Puzur-Ishtar the Tadmorean agreed to a contract at an Assyrian trading colony in Kultepe.[21][25] It was mentioned next in the Mari tablets as a stop for trade caravans and nomadic tribes, such as the Suteans.[26] King Shamshi-Adad I of Assyria passed the area on his way to the Mediterranean at the beginning of the 18th century BC;[27] by then, Palmyra was the easternmost point of the kingdom of Qatna.[28] The town was mentioned in a 13th-century BC tablet discovered at Emar, which recorded the names of two “Tadmorean” witnesses.[26] At the beginning of the 11th century BC, King Tiglath-Pileser I of Assyria recorded his defeat of the “Arameans” of “Tadmar”.[26]

The Hebrew Bible (Second Book of Chronicles 8:4) records a city by the name “Tadmor” as a desert city built (or fortified) by King Solomon of Israel;[29] Flavius Josephus mentions the Greek name “Palmyra”, attributing its founding to Solomon in Book VIII of his Antiquities of the Jews.[30] Later Islamic traditions attribute the city’s founding to Solomon’s Jinn.[31] The association of Palmyra with Solomon is a conflation of “Tadmor” and a city built by Solomon in Judea and known as “Tamar” in the Books of Kings (1 Kings 9:18).[32] The biblical description of “Tadmor” and its buildings does not fit archaeological findings in Palmyra, which was a settlement during Solomon’s reign in the 10th century BC.[32]

Hellenistic and Roman periods

interior of a temple

The temple of Baalshamin‘s interior

During the Hellenistic period under the Seleucids (between 312 and 64 BC), Palmyra became a prosperous settlement owing allegiance to the Seleucid king.[32][33] In 217 BC, a Palmyrene force led by a sheikh named Zabdibel joined the army of King Antiochus III in the Battle of Raphia which ended in a Seleucid defeat.[note 5][35] In the middle of the Hellenistic era, Palmyra, formerly south of the al-Qubur wadi, began to expand beyond its northern bank.[36] By the late second century BC, the tower tombs in the Palmyrene Valley of Tombs and the city temples (most notably, the temples of Baalshamin, Al-lāt and the Hellenistic temple) began to be built.[32][35][37]

In 64 BC the Roman Republic annexed the Seleucid kingdom, and the Roman general Pompey established the province of Syria.[35] Palmyra was left independent,[35] trading with Rome and Parthia but belonging to neither.[38] The earliest known Palmyrene inscription is dated to around 44 BC;[39] Palmyra was still a minor sheikhdom, offering water to caravans which occasionally took the desert route on which it was located.[40] However, according to Appian Palmyra was wealthy enough for Mark Antony to send a force to conquer it in 41 BC.[38] The Palmyrenes evacuated to Parthian lands beyond the eastern bank of the Euphrates,[38] which they prepared to defend.[39]

Autonomous Palmyrene region

Temple ruins, with eight columns remaining

Main shrine of the Temple of Bel

Well-preserved Roman ampitheater

Palmyra’s theatre

Ruins, with arches and columns

Monumental arch in the eastern section of Palmyra’s colonnade

Palmyra became part of the Roman Empire when it was annexed and paid tribute during Tiberius‘ early reign, around 14 AD.[note 6][35][41] The Romans included Palmyra in the province of Syria,[41] and defined the region’s boundaries; a boundary marker laid by Roman governor Silanus was found 75 kilometres (47 mi) northwest of the city at Khirbet el-Bilaas.[42] A marker at the city’s southwestern border was found at Qasr al-Hayr al-Gharbi,[43] and its eastern border extended to the Euphrates valley.[43] This region included numerous villages subordinate to the center such as Al-Qaryatayn (35 other settlements have been identified by 2012).[44][45][46] The Roman imperial period brought great prosperity to the city, which enjoyed a privileged status under the empire—retaining much of its internal autonomy,[35] being ruled by a council,[47] and incorporating many Greek city-state (polis) institutions into its government.[note 7][48]

The earliest Palmyrene text attesting a Roman presence in the city dates to 18 AD, when the Roman general Germanicus tried to develop a friendly relationship with Parthia; he sent the Palmyrene Alexandros to Mesene, a Parthian vassal kingdom.[note 8][50] This was followed by the arrival of the Roman legion Legio X Fretensis the following year.[note 9][52] Roman authority was minimal during the first century AD, although tax collectors were resident,[53] and a road connecting Palmyra and Sura was built in 75 AD.[note 10][54] The Romans used Palmyrene soldiers,[55] but (unlike typical Roman cities) no local magistrates or prefects are recorded in the city.[54] Palmyra saw intensive construction during the first century, including the city’s first walled fortifications and the Temple of Bel (completed and dedicated in 32 AD).[52][56] During the first century Palmyra developed from a minor desert caravan station into a leading trading center,[note 11][40] with Palmyrene merchants establishing colonies in surrounding trade centers.[50]

Palmyrene trade reached its apex during the second century,[58] aided by two factors; the first was a trade route built by Palmyrenes,[10] and protected by garrisons at major locations, including a garrison in Dura-Europos manned in 117 AD.[59] The second was the Roman annexation of the Nabataean capital Petra in 106,[35] shifting control over southern trade routes of the Arabian Peninsula from the Nabataeans to Palmyra.[note 12][35]

In 129 Palmyra was visited by Hadrian, who named it “Hadriane Palmyra” and made it a free city.[61][62] Hadrian promoted Hellenism throughout the empire,[63] and Palmyra’s urban expansion was modeled on that of Greece.[63] This led to new projects, including the theatre, the colonnade and the temple of Nabu.[63] Roman authority in Palmyra was reinforced in 167, when the cavalry Ala I Thracum Herculiana garrison was moved to the city.[note 13][66]

In the 190s, Palmyra was assigned to the province of Phoenice, newly created by the Severan dynasty.[67] Toward the end of the second century, Palmyra began a steady transition from a traditional Greek city-state to a monarchy;[68] urban development diminished after the city’s building projects peaked.[69] The Severan ascension to the imperial throne in Rome played a major role in Palmyra’s transition:[69]

  • The new dynasty favored the city,[70] stationing the Cohors I Flavia Chalcidenorum garrison there by 206.[71] Caracalla made Palmyra a colonia between 213 and 216, replacing many Greek institutions with Roman constitutional ones.[68] Severus Alexander, emperor from 222 to 235, visited Palmyra in 229.[70][72]
  • The Severan-led Roman–Parthian War, from 194 to 217, influenced regional security and affected the city’s trade.[70][73] Bandits began attacking caravans by 199, leading Palmyra to strengthen its military presence.[70] The city devoted more energy to protecting the Roman east than to commerce, and its importance increased.[74]

Palmyrene kingdom and Persian wars

Bust of a bearded man wearing a wreath

Bust, allegedly of Odenaethus

The rise of the Sasanian Empire in Persia considerably damaged Palmyrene trade.[75] The Sasanians disbanded Palmyrene colonies in their lands,[75] and began a war against the Roman empire.[76] In an inscription dated to 252 Odaenathus appears bearing the title of exarchos (lord) of Palmyra.[77][78] The weakness of the Roman empire and the constant Persian danger were probably the reasons behind the Palmyrene council’s decision to elect a lord for the city in order for him to lead a strengthened army.[79] Odaenathus approached Shapur I of Persia to request him to guarantee Palmyrene interests in Persia, but was rebuffed.[80] In 260 the Emperor Valerian fought Shapur at the Battle of Edessa, but was defeated and captured.[80]

Odaenathus formed an army of Palmyrenes, peasants and the remaining Roman soldiers in the region against Shapur.[80] According to the Augustan History, Odaenathus declared himself king prior to the battle.[81] The Palmyrene leader won a decisive victory near the banks of the Euphrates later in 260 forcing the Persians to retreat.[82] One of Valerian’s officers, Macrianus Major, his sons Quietus and Macrianus, and the prefect Balista then rebelled against Valerian’s son Gallienus, usurping imperial power in Syria.[82] In 261 Odaenathus marched against the remaining usurpers in Syria, defeating and killing Quietus and Balista.[82] As a reward, he received the title Imperator Totius Orientis (“Governor of the East”) from Gallienus,[83] and ruled Syria, Mesopotamia, Arabia and Anatolia‘s eastern regions as the imperial representative.[84][85] In 262 Odaenathus launched a new campaign against Shapur,[86] reclaiming the rest of Roman Mesopotamia (most importantly, the cities of Nisibis and Carrhae), sacking the Jewish city of Nehardea,[note 14][87][88] and besieging the Persian capital Ctesiphon.[89] Following his victory, the Palmyrene monarch assumed the title King of Kings.[note 15][92]

After defeating a Persian army in 263 (or 264), Odaenathus crowned his son Hairan as co-King of Kings near Antioch,[93] then marched and besieged Ctesiphon for the second time (in 264).[89][94] Although he did not take the Persian capital, Odaenathus drove the Persians out of all Roman lands conquered since the beginning of Shapur’s wars in 252.[94] A Persian attack on Palmyra was repelled,[95] and they were defeated by Odaenathus in 266 near Ctesiphon.[82] In 267 Odaenathus, accompanied by Hairan, moved north to repel Gothic attacks on Asia Minor.[82] The king and his son were assassinated during their return;[82] according to the Augustan History and John Zonaras, Odaenathus was killed by a cousin (Zonaras says nephew) named in the History as Maeonius.[96] The Augustan History also says that Maeonius was proclaimed emperor for a brief period before being tried and executed by Odaenathus’ widow, Zenobia.[96][97][98] However, no inscriptions or other evidence exist for Maeonius’ reign and he was probably killed immediately after assassinating Odaenathus.[99][100]

Odaenathus was succeeded by his sons: ten-year-old Vaballathus and the younger Herodianus, who died soon after his father.[101][102] Zenobia, their mother, was the de facto ruler and Vaballathus remained in her shadow while she consolidated her power.[101] Gallienus dispatched his prefect Praetorio Heraclian to command military operations against the Persians, but he was marginalized by Zenobia and returned to the West.[94] The queen was careful not to provoke Rome, claiming for herself and her son the titles held by her husband while guaranteeing the safety of the borders with Persia and pacifying the Tanukhids in Hauran.[101] To protect the borders with Persia, Zenobia fortified different settlements on the Euphrates including the citadels of Halabiye and Zalabiye.[103] Circumstantial evidence exist for confrontations with the Sasanians; probably in 269 Vaballathus took the title Persicus Maximus (“The great victor in Persia”) and the title might be linked with an unrecorded battle against a Persian army trying to regain control of Northern Mesopotamia.[104][105]

Palmyrene empire
Main article: Palmyrene Empire

Map of the Palmyrene empire

The Palmyrene empire in 271 AD

Zenobia began her military career in the spring of 270, during the reign of Claudius Gothicus.[106] Under the pretext of attacking the Tanukhids, she annexed Roman Arabia.[106] This was followed in October by an invasion of Egypt,[107][108] ending with a Palmyrene victory and Zenobia’s proclamation as queen of Egypt.[109] Palmyra invaded Anatolia the following year, reaching Ankara and the pinnacle of its expansion.[110]

The conquests were made behind a mask of subordination to Rome.[111] Zenobia issued coins in the name of Claudius’ successor Aurelian, with Vaballathus depicted as king;[note 16][111] since Aurelian was occupied with repelling insurgencies in Europe, he permitted the Palmyrene coinage and conferred the royal titles.[112] In late 271, Vaballathus and his mother assumed the titles of Augustus (emperor) and Augusta.[note 17][111]

The following year, Aurelian crossed the Bosphorus and advanced quickly through Anatolia.[116] According to one account, Roman general Marcus Aurelius Probus regained Egypt from Palmyra;[note 18][117] Aurelian entered Issus and headed to Antioch, where he defeated Zenobia in the Battle of Immae.[118] Zenobia was defeated again at the Battle of Emesa, taking refuge in Homs before quickly returning to her capital.[119] When the Romans besieged Palmyra, Zenobia refused their order to surrender in person to the emperor.[110] She escaped east to ask the Persians for help, but was captured by the Romans; the city capitulated soon afterwards.[120][121]

Later Roman and Byzantine periods

Ruins, with columns and arches

Diocletian’s camp

Aurelian spared the city and stationed a garrison of 600 archers, led by Sandarion, as a peacekeeping force.[122] In 273 Palmyra rebelled under the leadership of Septimius Apsaios,[115] declaring Antiochus (a relative of Zenobia) as Augustus.[123] Aurelian marched against Palmyra, razing it to the ground and seizing the most valuable monuments to decorate his Temple of Sol.[120][124] Palmyrene buildings were smashed, residents massacred and the temple of Bel pillaged.[120]

Palmyra was reduced to a village without territory.[125] Aurelian repaired the temple of Bel, and the Legio I Illyricorum was stationed in the city.[125] Shortly before 303 the Camp of Diocletian, a castra in the western part of the city, was built.[125] The 4-hectare (9.9-acre) camp was a base for the Legio I Illyricorum,[125] which guarded the trade routes around the city.[126]

Palmyra became a Christian city in the decades following its destruction by Aurelian.[127] In late 527, Justinian I ordered its fortification and the restoration of its churches and public buildings to protect the empire against raids by Lakhmid king Al-Mundhir III ibn al-Nu’man.[128]

Arab caliphate

Palmyra was annexed by the Rashidun Caliphate after its 634 capture by the Muslim general Khalid ibn al-Walid, who took the city after an 18-day march by his army through the Syrian Desert from Mesopotamia.[129] By then Palmyra was limited to the Diocletian camp,[130] and became part of Homs Province.[131]

Umayyad and early Abbasid periods

Palmyra experienced a degree of prosperity as part of the Umayyad Caliphate,[132] which used part of the Temple of Bel as a mosque.[133] Palmyra was a key stop on the East-West trade route, with a large souq (market) built by the Ummayads, and the city’s population increased.[132][133] During this period, Palmyra was a stronghold of the Banu Kalb tribe.[134] After being defeated by Marwan II during a civil war in the caliphate, Umayyad contender Sulayman ibn Hisham fled to the Banu Kalb in Palmyra, but eventually pledged allegiance to Marwan in 744; Palmyra continued to oppose Marwan until the surrender of Banu Kalb leader al-Abrash al-Kalbi in 745.[135] That year, Marwan ordered the city’s walls demolished.[130][136]

In 750 a revolt, led by Majza’a ibn al-Kawthar and Ummayad pretender Abu-Muhammad al-Sufyani, against the new Abbasid Caliphate swept across Syria;[137] the tribes in Palmyra supported the rebels.[138] After his defeat Abu-Muhammad took refuge in the city, which withstood the Abbasid attack long enough to allow him to escape.[138]

Decentralization

Stone wall, with an arch and pillars

Fortifications at the Temple of Bel

Abbasid power dwindled during the 10th century, when the empire disintegrated and was divided among a number of vassals.[139] Most of the new rulers acknowledged the caliph as their nominal sovereign, a situation which continued until the Mongol destruction of the Abbasid Caliphate in 1258.[140]

In 955 Sayf al-Dawla, the Hamdanid prince of Aleppo, defeated the nomads near the city,[141] and built a kasbah (fortress) in response to campaigns by the Byzantine emperors Nikephoros II Phokas and John I Tzimiskes.[142] After the early-11th-century Hamdanid collapse, Palmyra was controlled by the successor Mirdasid dynasty.[143] Earthquakes devastated the city in 1068 and 1089.[130][144] The Mirdasids were followed in the second half of the 11th century by Khalaf of the Mala’ib tribe, centered in Homs.[145] Starting in the 1070s Syria came under the Seljuk Empire,[146] whose sultan Malik-Shah I expelled the Mala’ib and imprisoned Khalaf in 1090.[147] Khalaf’s lands were given to Malik-Shah’s brother, Tutush I,[147] who gained his independence after his brother’s 1092 death and established a cadet branch of the Seljuk dynasty in Syria.[148]

Ruins of an old stone castle

Fakhr-al-Din al-Maani Castle

During the early 12th century Palmyra was ruled by Toghtekin, the Burid atabeg of Damascus, who appointed his nephew governor.[149] Toghtekin’s nephew was killed by rebels, and the atabeg retook the city in 1126.[149] Palmyra was given to Toghtekin’s grandson, Shihab-ud-din Mahmud,[149] who was replaced by governor Yusuf ibn Firuz when Shihab-ud-din Mahmud returned to Damascus after his father Taj al-Muluk Buri succeeded Toghtekin.[150] The Burids transformed the Temple of Bel into a citadel in 1132, fortifying the city,[151][152] and transferring it to the Bin Qaraja family three years later in exchange for Homs.[152]

During the mid-12th century, Palmyra was ruled by the Zengid dynasty king Nur ad-Din Mahmud.[153] It became part of the district of Homs,[154] which was given as a fiefdom to the Ayyubid general Shirkuh in 1167 and confiscated after his death in 1169.[155][156] Homs was annexed by the Ayyubid sultanate in 1174;[157] the following year, Saladin gave Homs (including Palmyra) to his cousin Nasir al-Din Muhammad as a fiefdom.[158] After Saladin’s death, the Ayyubid realm was divided and Palmyra was given to Nasir al-Din Muhammad’s son Al-Mujahid Shirkuh II (who built the castle of Palmyra known as Fakhr-al-Din al-Maani Castle around 1230).[159][160] Five years before, Syrian geographer Yaqut al-Hamawi described Palmyra’s residents as living in “a castle surrounded by a stone wall”.[18]

Mamluk period

Palmyra was used as a refuge by Sherkoh II’s grandson, Al-Ashraf Musa, who allied himself with Mongol king Hulagu Khan and fled after the Mongol defeat in the 1260 Battle of Ain Jalut against the Mamluks.[161] Al-Ashraf Musa asked the Mamluk sultan Qutuz for pardon and was accepted as a vassal.[161] Al-Ashraf Musa died in 1263 without a heir bringing the Homs district under direct Mamluk rule.[162]

Al-Fadl principality

Date trees, with Palmyra in the background

Palmyra’s gardens

The Al-Fadl clan (a branch of the Tayy tribe) declared its loyalty to the Mamluks,[163][164] and in 1284 prince Muhanna bin Issa of the Al-Fadl was appointed lord of Palmyra by sultan Qalawun.[163] He was imprisoned by sultan Al-Ashraf Khalil in 1293, and restored two years later by sultan Al-Adil Kitbugha.[163] Muhanna declared his loyalty to Öljaitü of the Ilkhanate in 1312 and was dismissed and replaced with his brother Fadl by sultan Al-Nasir Muhammad.[163] Although Muhanna was forgiven by Al-Nasir and restored in 1317, he and his tribe were expelled in 1320 for his continued relations with the Ilkhanate and he was replaced by tribal chief Muhammad ibn Abi Bakr.[163][165]

Muhanna was forgiven and restored by Al-Nasir in 1330; he remained loyal to the sultan until his death three years later, when he was succeeded by his son.[166] Contemporary historian Ibn Fadlallah al-Omari described the city as having “vast gardens, flourishing trades and bizarre monuments”.[167] The Fadl family protected the trade routes and villages from Bedouin raids,[168] raiding other cities and fighting among themselves.[166] The Mamluks intervened militarily several times, dismissing, imprisoning or expelling its leaders.[166] In 1400 Palmyra was attacked by Timur,[169] who took 200,000 sheep and destroyed the city.[170][171] The Fadl prince Nu’air escaped the battle against Timur and later fought Jakam, the sultan of Aleppo.[172] Nu’air was captured, taken to Aleppo and executed in 1406; this, according to Ibn Hajar Al-Asqalani, ended the Fadl family’s power.[172]

Ottoman and later periods

People in an alley, with ruins in the background

The village, within the temple of Bel, during the early 20th century

Syria became part of the Ottoman Empire in 1516,[173] and Palmyra was incorporated into Damascus Eyalet as the center of an administrative district (Sanjak).[note 19][174] During the Ottoman era, Palmyra was a small village in the courtyard of the temple of Bel.[175] After 1568 the Ottomans appointed the Lebanese prince Ali bin Musa Harfush as governor of Palmyra’s sanjak,[176] dismissing him in 1584 for treason.[177]

In 1630 Palmyra came under the authority of another Lebanese prince, Fakhr-al-Din II,[178] who renovated Sherkoh II’s castle (which became known as Fakhr-al-Din al-Maani Castle).[160][179] The prince fell from grace with the Ottomans in 1633 and lost control of the village,[178] which remained a separate sanjak until it was absorbed by Zor Sanjak in 1857.[180] The village became home to an Ottoman garrison to control the Bedouin in 1867.[181]

Palmyra regained some of its importance at the beginning of the 20th century as a station for caravans, and its revival was aided by the advent of motorized transport.[175] In 1918, as World War I was ending, the Royal Air Force built an airfield for two planes,[note 20][182][183] and in November the Ottomans retreated from Zor Sanjak without a fight.[note 21][184] The Syrian Emirate‘s army entered Deir ez-Zor on 4 December, and Zor Sanjak became part of Syria.[185] In 1919, as the British and French argued over the borders of the planned mandates,[182] British permanent military representative to the Supreme War Council Henry Wilson suggested adding Palmyra to the British mandate.[182] However, British general Edmund Allenby persuaded his government to abandon this plan.[182] Syria (including Palmyra) became part of the French Mandate after Syria’s defeat in the Battle of Maysalun in 24 July 1920.[186]

As Palmyra gained importance to French efforts to pacify the Syrian Desert, a base was constructed in the village near the temple of Bel in 1921.[187] In 1929 the general director of antiquities in Syria, Henri Arnold Seyrig, began excavating the ruins and convinced the villagers to move to a new, French-built village next to the site.[188] The relocation was completed in 1932;[189] ancient Palmyra was ready for excavation as its villagers settled into the new village of Tadmur.[45][188]

Syrian Civil War

Further information: Palmyra offensive (2015)

Stone lion, with a gazelle between its front legs

The Lion of Al-lāt (first century AD), which stood at the entrance of the temple of Al-lāt

As a result of the Syrian Civil War, Palmyra experienced widespread looting and damage by combatants.[190] During the summer of 2012, concerns about looting in the museum and the site increased when an amateur video of Syrian soldiers carrying funerary stones was posted.[191] However, according to France 24‘s report, “From the information gathered, it is impossible to determine whether pillaging was taking place.”[191] The following year the facade of the temple of Bel sustained a large hole from mortar fire, and colonnade columns have been damaged by shrapnel.[190] According to Maamoun Abdulkarim, director of antiquities and museums at the Syrian Ministry of Culture, the Syrian Army positioned its troops in some archaeological-site areas,[190] while Syrian opposition soldiers stationed themselves in gardens around the city.[190]

On 13 May 2015, ISIL launched an attack on the modern town of Tadmur, sparking fears that the iconoclastic group would destroy the adjacent ancient site Palmyra.[192] On 21 May 2015, some artifacts were removed from the Palmyra museum by the Syrian curators and transported in 2 trucks to Damascus. A number of Greco-Roman busts, jewelry, and other objects looted from the Palmyra museum have been found on the international market.[193] The same day, ISIL forces entered the World Heritage Site.[194] According to eyewitnesses, on 23 May the militants destroyed the lion of Al-lāt and other statues.[195] Local residents reported that the Syrian air force bombed the site on 13 June, damaging the northern wall close to the Temple of Baalshamin.[196]

Since at least 27 May 2015, Palmyra’s theatre was used as a place of public executions of ISIL opponents. A video released by ISIL shows the killing of 20 prisoners at the hands of teenaged male executioners, watched by hundreds of men and boys.[197] On 18 August 2015, Palmyra’s retired antiquities chief Khaled al-Asaad was beheaded by ISIL after being tortured for a month to get information about the city and its treasures; al-Asaad refused to give any information to his captors.[198] The militant group destroyed the temple of Baalshamin on 23 August 2015 according to Abdulkarim and activists while the Syrian Observatory for Human Rights claimed that the destruction took place one month earlier.[199][200]

People, language and society

Further information: Palmyrene dialect and Palmyrene alphabet

Bust of a deceased woman, Aqmat

Palmyrene funerary portrait

At its height during the reign of Zenobia, Palmyra had more than 200,000 residents.[201] Its earliest known inhabitants were the Amorites in the early second millennium BC,[202] and by the end of the millennium Arameans were mentioned as inhabitanting the area.[203][204] Arabs arrived in the city in the late first millennium BC; Zabdibel’s soldiers, who aided the Seleucids in the battle of Raphia (217 BC), were described as Arabs.[35] The newcomers were assimilated by the earlier inhabitants, spoke their language,[39] and formed a significant segment of the aristocracy.[205][206] The city also had a Jewish community; inscriptions in Palmyrene from the necropolis of Beit She’arim in Lower Galilee confirm the burial of Palmyrene Jews.[207]

During the Umayyad period Palmyra was mainly inhabited by the Kalb tribe.[175] Benjamin of Tudela recorded the existence of 2,000 Jews in the city during the twelfth century,[208] but after the invasion by Timur it was a small village until the relocation in 1932.[189][209][210]

Alphabetic inscription on stone

Alphabetic inscription in Palmyrene alphabet

Before 274 AD, Palmyrenes spoke a dialect of Aramaic and used the Palmyrene alphabet.[note 22][212][213] The use of Latin was minimal, but Greek was used by wealthier members of society for commercial and diplomatic purposes,[2] and it became the dominant language during the Byzantine era.[24] After the Arab conquest Greek was replaced by Arabic,[24] from which a Palmyrene dialect evolved.[214]

Palmyra’s society before 273 was a mixture of the different peoples inhabiting the city,[26][215] which is seen in Aramaic, Arabic and Amorite clan names.[note 23][216][217] Palmyra was a tribal community but due to the lack of sources, an understanding of the nature of Palmyrene tribes structure building or maintaining is not possible.[218] Thirty clans have been documented;[219] five of which were identified as tribes (Phyle (φυλή)) comprising several sub-clans.[note 24][220] By the time of Nero Palmyra had four tribes, each residing in an area of the city bearing its name.[221] Three of the tribes were the Komare, Mattabol and Ma’zin; the fourth tribe is uncertain, but was probably the Mita.[221][222] In time, the four tribes became highly civic and tribal lines blurred;[note 25][221] by the second century clan identity lost its importance, and it disappeared during the third century.[note 26][221] Palmyra declined, and was a village of 6,000 inhabitants at the beginning of the 20th century; although surrounded by Bedouin, the villagers preserved their dialect,[214] and maintained the life of a small settlement.[130]

Culture

Square burial chambers, with reliefs of the people buried

Loculi (burial chambers)

Palmyra had a distinctive culture,[224] based on a local Semitic tradition,[225] and influenced by Greece and Rome.[note 27][227] The extent of Greek influence on Palmyra’s culture is debated;[228] according to traditional scholarship, the Palmyrenes’ Greek practices were a superficial layer over a local essence.[229] Palmyra’s senate was an example; although Palmyrene texts written in Greek described it as a “boule” (a Greek institution), the senate was a gathering of non-elected tribal elders (a Near-Eastern assembly tradition).[230] Some scholars, such as Fergus Millar, view Palmyra’s culture as a fusion of local and Greco-Roman traditions.[231]

The culture of Persia influenced Palmyrene military tactics, dress and court ceremonies.[232] Palmyra had no large libraries or publishing facilities, and it lacked an intellectual movement characteristic of other Eastern cities such as Edessa or Antioch.[233] Although Zenobia opened her court to academics, the only notable scholar documented was Cassius Longinus.[233]

Elaborate stone tomb

Interior of Elahbel tomb

Palmyra had a large agora.[note 28] However, unlike the Greek Agoras (public gathering places shared with public buildings), Palmyra’s agora resembled an Eastern caravanserai more than a hub of public life.[235][236] The Palmyrenes buried their dead in elaborate family mausoleums,[237] most with interior walls forming rows of burial chambers (loculi) in which the dead, laying at full length, were placed.[238][239] A relief of the person interred formed part of the wall’s decoration, acting as a headstone.[239] Sarcophagi appeared in the late second century and were used in some of the tombs.[240] Many burial monuments contained fully dressed, bejeweled mummies,[241] embalmed in a method similar to that used in Ancient Egypt.[242]

Art and architecture

Although Palmyrene art was related to that of Greece, it had a distinctive style unique to the middle-Euphrates region.[243] Palmyrene art is well represented by the bust reliefs which seal the openings of its burial chambers.[243] The reliefs emphasized clothing, jewelry and a frontal representation of the person depicted,[243][244] characteristics which can be seen as a forerunner of Byzantine art.[243] According to Michael Rostovtzeff, Palmyra’s art was influenced by the Parthian art.[245] However, the origin of frontality that characterized Palmyrene and Parthian arts is a controversial issue; while Parthian origin has been suggested (by Daniel Schlumberger),[246] Michael Avi-Yonah contends that it was a local Syrian tradition that influenced Parthian art.[247] Little painting, and none of the bronze statues of prominent citizens (which stood on brackets on the main columns of the Great Colonnade), have survived.[248] A damaged frieze and other sculptures from the Temple of Bel, many removed to museums in Syria and abroad, suggest the city’s public monumental sculpture.[248]

Many surviving funerary busts reached Western museums during the 19th century.[249] Palmyra provided the most convenient Eastern examples bolstering an art-history controversy at the turn of the 20th century: to what extent Eastern influence on Roman art replaced idealized classicism with frontal, hieratic and simplified figures (as believed by Josef Strzygowski and others).[248][250] This transition is seen as a response to cultural changes in the Western Roman Empire, rather than artistic influence from the East.[248] Palmyrene bust reliefs, unlike Roman sculptures, are rudimentary portraits; although many have a “striking individual quality”, their details vary little across figures of similar age and gender.[248]

Like its art, Palmyra’s architecture was influenced by the Greco-Roman style,[251] while preserving local elements (best seen in the Temple of Bel).[252] Enclosed by a massive wall flanked with traditional Roman columns,[252][253] Bel’s sanctuary plan was primarily Semitic.[252] Similar to the Second Temple, the sanctuary consisted of a large courtyard with the deity’s main shrine off-center against its entrance (a plan preserving elements of the temples of Ebla and Ugarit).[252][254]

Government

Inscription on a stone pillar

Inscription in Greek and Aramaic honoring the strategos Julius Aurelius Zenobius

From the beginning of its history to the first century AD Palmyra was a petty sheikhdom,[255] and by the first century BC a Palmyrene identity began to develop.[256] During the first half of the first century AD, Palmyra incorporated some institutions of a Greek city (polis);[48] the concept of citizenship (demos) appears in an inscription, dated to 10 AD, describing the Palmyrenes as a community.[257] In 74 AD, an inscription mentions the city’s boule (senate).[48] The tribal role in Palmyra is debated; during the first century, four treasurers representing the four tribes seems to have partially controlled the administration but their role became ceremonial by the second century and power rested in the hands of the council.[258]

The Palmyrene council consisted of about six hundred members of the local elite (such as the elders or heads of wealthy families or clans),[note 29][47] representing the city’s four quarters.[222] The council, headed by a president,[259] managed civic responsibilities;[47] it supervised public works (including the construction of public buildings), approved expenditures, collected taxes,[47] and appointed two archons (lords) each year.[259][260] Palmyra’s military was led by strategoi (generals) appointed by the council.[261][262] Roman provincial authority set and approved Palmyra’s tariff structure,[263] but the provincial interference in local government was kept minimal as the empire sought to ensure the continuous success of Palmyrene trade most beneficial to Rome.[264] An imposition of direct provincial administration would have jeopardized Palmyra’s ability to conduct its trading activities in the East, specially in Parthia.[264]

With the elevation of Palmyra to a colonia around 213-216, the city ceased being subject to Roman provincial governors and taxes.[265] Palmyra incorporated Roman institutions into its system while keeping many of its former ones.[266] The council remained, and the strategos designated one of two annually-elected magistrates.[266] This duumviri implemented the new colonial constitution,[266] replacing the archons.[260] Palmyra’s political scene changed with the rise of Odaenathus family; an inscription dated to 251 describe Odaenathus’ son Hairan as “Ras” (lord) of Palmyra (exarch in the Greek section of the inscription) and another inscription dated to 252 describe Odaenathus with the same title.[note 30][77] Odaenathus was probably elected by the council as exarch,[79] which was an unusual title in the Roman empire and was not part of the traditional Palmyrene governance institutions.[77][267] Whether Odaenathus’ title indicated a military or a priestly position is unknown,[268] but the military role is more likely.[269] By 257 Odaenathus was known as a consularis, possibly the legatus of the province of Phoenice.[268] In 258 Odaenathus began extending his political influence, taking advantage of regional instability caused by Sasanian aggression;[268] this culminated in the Battle of Edessa,[80] Odaenathus’ royal elevation and mobilization of troops, which made Palmyra a kingdom.[80]

The monarchy maintained the council and most civic institutions,[268][270] permitting the election of magistrates until 264.[260] In the absence of the monarch, the city was administered by a viceroy.[271] Although governors of the eastern Roman provinces under Odaenathus’ control were still appointed by Rome, the king had overall authority.[272] During Zenobia’s rebellion, governors were appointed by the queen.[273]

Not all Palmyrenes accepted the dominion of the royal family; a senator, Septimius Haddudan, appears in a later Palmyrene inscription as aiding Aurelian’s armies during the 273 rebellion.[274][275] After the Roman destruction of the city, Palmyra was ruled directly by Rome,[276] and its following states (including the Burids and Ayyubids),[149][277] or by subordinate Bedouin chiefs—primarily the Fadl family, who governed for the Mamluks.[278]

Military

Stone relief depicting warriors

Relief in the Temple of Bel depicting Palmyrene war gods

Due to its military character and efficiency in battle, Irfan Shahîd described Palmyra as the “Sparta among the cities of the Orient”; even Palmyrene gods were depicted in full military uniforms.[279] Palmyra’s army protected the city and its economy, helping extend Palmyrene authority beyond the city walls and protecting the countryside’s desert trade routes.[280] The city had a substantial military;[43] Zabdibel commanded a force of 10,000 in the third century BC,[35] and Zenobia led an army of 70,000 in the Battle of Emesa.[281] Soldiers were recruited from the city and its territories, spanning several thousand square kilometers from the outskirts of Homs to the Euphrates valley.[43] Non-Palmyrene soldiers were also recruited; a Nabatean cavalryman is recorded in 132 as serving in a Palmyrene unit stationed at Anah.[281] Palmyra’s recruiting system is unknown; the city might have selected and equipped the troops and the strategoi led, trained and disciplined them.[282]

The strategoi were appointed by the council with the approval of Rome.[262] The royal army was under the leadership of the monarch aided by generals,[283][284] and was modeled on the Sasanians in arms and tactics.[232] The Palmyrenes were noted archers.[285] They used infantry while a heavily armored cavalry (clibanarii) constituted the main attacking force.[note 31][287][288] Palmyra’s infantry was armed with swords, lances and small round shields;[55] the clibanarii were fully armored (including their horses), and used heavy spears (kontos) 3.65 metres (12.0 ft) long without shields.[288][289]

Relations with Rome

Citing Palmyrenes’ combat skills in large, sparsely populated areas, the Romans formed a Palmyrene Auxilia to serve in the imperial Roman army.[55] Vespasian reportedly had 8,000 Palmyrene archers in Judea,[55] and Trajan established the first Palmyrene Auxilia in 116 (a camel cavalry unit, Ala I Ulpia dromedariorum Palmyrenorum).[55][290][291] Palmyrene units were deployed throughout the Roman Empire,[note 32] serving in Dacia late in Hadrian’s reign,[293] and at El Kantara in Numidia and Moesia under Antoninus Pius.[293][294] During the late second century Rome formed the Cohors XX Palmyrenorum, which was stationed in Dura-Europos.[293]

Rulers

Hairan as a Roman soldier

Hairan as depicted in the Promptuarii Iconum Insigniorum

Bearded relative of Odaenathus, wearing a metal hat

Maeonius as depicted in the Promptuarii Iconum Insigniorum

Zenobia on a Roman coin

Zenobia as Augusta, on the obverse of an Antoninianus

Man wearing a crown on a Roman coin

Vaballathus as Augustus, on the obverse of an Antoninianus

Religion

Reliefs of four human-looking gods
Right to left: Bel, Yarhibol, Aglibol and Baalshamin
Relief of three human-appearing Palmyrene gods
Baalshamin (center), Aglibol (right) and Malakbel (left)

Palmyra’s gods were primarily part of the northwestern Semitic pantheon, with the addition of gods from the Mesopotamian and Arab pantheons.[304] The city’s chief pre-Hellenistic deity was called Bol,[305] an abbreviation of Baal (a northwestern Semitic honorific).[306] The Babylonian cult of Bel-Marduk influenced the Palmyrene religion and by 217 BC the chief deity’s name was changed to Bel.[305] This did not indicate the replacing of the northwestern Semitic Bol with a Mesopotamian deity, but was a mere change in the name.[306]

Second in importance after the supreme deity,[307] were over sixty ancestral gods of the Palmyrene clans.[307][308] Palmyra had unique deities,[309] such as the god of justice and Efqa’s guardian Yarhibol,[310][311] the sun god Malakbel,[312] and the moon god Aglibol.[312] Palmyrenes worshiped regional deities, including the greater Levantine gods Astarte, Baal-hamon, Baalshamin and Atargatis;[309] the Babylonian gods Nabu and Nergal,[309] and the Arab Azizos, Arsu, Šams and Al-lāt.[309][310]

The deities worshiped in the countryside were depicted as camel or horse riders and bore Arab names.[45] The nature of those deities is left to theory as only names are known, most importantly Abgal.[313] The Palmyrene pantheon included ginnaye (some were given the designation “Gad”),[314] a group of lesser deities popular in the countryside,[315] who were similar to the Arab jinn and the Roman genius.[316] Ginnaye were believed to have the appearance and behavior of humans, similar to Arab jinn.[316] Unlike jinn, however, the ginnaye could not possess or injure humans.[316] Their role was similar to the Roman genius: tutelary deities who guarded individuals and their caravans, cattle and villages.[307][316]

Although the Palmyrenes worshiped their deities as individuals, some were associated with other gods.[317] Bel had Astarte-Belti as his consort, and formed a triple deity with Aglibol and Yarhibol (who became a sun god in his association with Bel).[310][318] Malakbel was part of many associations,[317] pairing with Gad Taimi and Aglibol,[319][319] and forming a triple deity with Baalshamin and Aglibol.[320] Palmyra hosted an Akitu (spring festival) each Nisan.[321] Each of the city’s four quarters had a sanctuary for a deity considered ancestral to the resident tribe; Malakbel and Aglibol’s sanctuary was in the Komare quarter.[322] The Baalshamin sanctuary was in the Ma’zin quarter, the Arsu sanctuary in the Mattabol quarter,[322] and the Atargatis sanctuary in the fourth tribe’s quarter.[note 33][320]

Palmyra’s paganism was replaced with Christianity as the religion spread across the Roman Empire, and a bishop was reported in the city by 325.[127] Although most temples became churches, the temple of Al-lāt was destroyed in 385 at the order of Maternus Cynegius (the eastern praetorian prefect).[127] After the Arab conquest in 634 Islam gradually replaced Christianity, and the last known bishop of Palmyra was consecrated in 818.[323]

Economy

Ruins of two stone walls, with doorways

Palmyra’s Agora; the two front entrances lead to the interior, the city’s marketplace

Palmyra’s economy before and at the beginning of the Roman period was based on agriculture, pastoralism, trade,[10] and serving as a rest station for the caravans which sporadically crossed the desert.[40] By the end of the first century BC, the city had a mixed economy based on agriculture, pastoralism,[324] taxation,[325] and, most importantly, the caravan trade.[326]

Taxation was an important source of revenue for Palmyra.[325] Caravaneers paid taxes in a building known as the Tariff Court,[219] where a tax law dating to 137 was discovered in 1881 by Armenian prince Abamelek Lazarew who was visiting the ruins.[327][328] The law regulated the tariffs paid by the merchants for goods sold at the internal market or exported from the city.[note 34][219][330] Most land was owned by the city, which collected grazing taxes.[324] The oasis had about 1,000 hectares (2,500 acres) of irrigable land,[331] surrounded by the countryside.[332] The Palmyrenes constructed an extensive irrigation system in the northern mountains that consisted of reservoirs and channels to capture and store the occasional rainfall.[46] The countryside was intensively planted with olive, fig, pistachio and barley.[46] However, agriculture could not support the population and food was imported.[332]

After Palmyra’s destruction in 273, it became a market for villagers and nomads from the surrounding area.[333] The city regained some of its prosperity during the Ummayad era, indicated by the discovery of a large Ummayad souq in the colonnade street.[334] Palmyra was a minor trading center until the Timurid destruction,[167][171] which reduced it to a settlement on the desert border whose inhabitants herded and cultivated small plots for vegetables and corn.[335]

Commerce

Map of the Silk Road, from China to Europe

The Silk Road

Palmyra’s main trade route ran east to the Euphrates, where it connected to the Silk Road.[336] The route then ran south along the river toward the port of Charax Spasinu on the Persian Gulf, where Palmyrene ships traveled back and forth to India.[337] Goods were imported from India, China and Transoxiana,[338] and exported west to Emesa (or Antioch) then the Mediterranean ports,[339] from which they were distributed throughout the Roman Empire.[337] In addition to the usual route some Palmyrene merchants used the Red Sea,[338] probably as a result of the Roman–Parthian Wars.[340] Goods were carried overland from the seaports to a Nile port, and then taken to the Egyptian Mediterranean ports for export.[340] Inscriptions attesting a Palmyrene presence in Egypt date to the reign of Hadrian.[341]

Since Palmyra was not on the Silk Road (which followed the Euphrates),[10] the Palmyrenes secured the desert route passing their city.[10] They connected it to the Euphrates valley, providing water and shelter.[10] The Palmyrene route was used almost exclusively by the city’s merchants,[10] who maintained a presence in many cities, including Dura-Europos in 33 BC,[57] Babylon by 19 AD, Seleucia by 24 AD,[50] Dendera, Coptos,[342] Bahrain, the Indus River Delta, Merv and Rome.[343]

The caravan trade depended on patrons and merchants.[344] Patrons owned the land on which the caravan animals were raised, providing animals and guards for the merchants.[344] The lands were located in the numerous villages of the Palmyrene countryside.[45] Although merchants used the patrons to conduct business, their roles often overlapped and a patron would sometimes lead a caravan.[344] Commerce made Palmyra and its merchants among the wealthiest in the region.[326] Some caravans were financed by a single merchant,[219] such as Male’ Agrippa (who financed Hadrian’s visit in 129 and the 139 rebuilding of the temple of Bel).[61] The primary income-generating trade good was silk, which was exported from the East to the West.[345] Other exported goods included jade, muslin, spices, ebony, ivory and precious stones.[343] For its domestic market Palmyra imported slaves, prostitutes, olive oil, dyed goods, myrrh and perfume.[329][343]

Site

City layout

Brick tombs on a hillside
Valley of Tombs
Tomb at the bottom of a staircase
Underground tomb

Palmyra began as a small settlement near the Efqa spring on the southern bank of Wadi al-Qubur.[346] The settlement, known as the Hellenistic settlement, had residences expanding to the wadi’s northern bank during the first century.[8] Although the city’s walls originally enclosed an extensive area on both banks of the wadi, the walls rebuilt during Diocletian’s reign surrounded only the northern-bank section.[8]

Most of the city’s monumental projects were built on the wadi’s northern bank.[347] Among them is the temple of Bel, on a tell which was the site of an earlier temple (known as the Hellenistic temple).[37] However, excavation supports the theory that the temple was originally located on the southern bank; the wadi’s bed was diverted to incorporate the temple into Palmyra’s new urban organization, which began with its prosperity during the late first and early second centuries.[36]

Palmyra from the air, outlined in red

Palmyra’s landmarks

Also north of the wadi was the Great Colonnade, Palmyra’s 1.1-kilometre-long (0.68 mi) main street,[348] which extended from the temple of Bel in the east,[349] to the Funerary Temple no.86 in the city’s western part.[350][351] It has a monumental arch in its eastern section,[352] and a tetrapylon stands in the center.[353]

The Baths of Diocletian, built on the ruins of an earlier building which might have been the royal palace,[216] were on the left side of the colonnade.[354] Nearby were the temple of Baalshamin,[355] residences,[356] and the Byzantine churches, which include a 1,500-year-old church (Palmyra’s fourth, and believed to be the largest ever discovered in Syria).[3] The church columns were estimated to be 6 metres (20 ft) tall, and its base measured 12 by 24 metres (39 by 79 ft).[3] A small amphitheatre was found in the church’s courtyard.[3]

The temple of Nabu and the Roman theater were built on the colonnade’s southern side.[357] Behind the theater were a small senate building and the large Agora, with the remains of a triclinium (banquet room) and the Tariff Court.[358] A cross street at the western end of the colonnade leads to the Camp of Diocletian,[348][359] built by Sosianus Hierocles (the Roman governor of Syria).[360] Nearby are the temple of Al-lāt and the Damascus Gate.[361]

West of the ancient walls the Palmyrenes built a number of large-scale funerary monuments which now form the Valley of Tombs,[362] a 1-kilometre-long (0.62 mi) necropolis.[363] The more than 50 monuments were primarily tower-shaped and up to four stories high.[364] Towers were replaced by funerary temples as above ground tombs after 128, which is the date of the most recent tower.[350] The city had other cemeteries in the north, southwest and southeast, where the tombs are primarily hypogea (underground).[365][366]

Notable structures

Public buildings

Four columns at the entrance of a building

Baths of Diocletian

  • The senate building is largely ruined.[358] It is a small building that consists of a peristyle courtyard and a chamber that has an apse at one end and rows of seats around it.[219]
  • Much of the Baths of Diocletian are ruined and do not survive above the level of the foundations.[367] The complex’s entrance is marked by four massive Egyptian granite columns each 1.3 metres (4 ft 3 in) in diameter, 12.5 metres (41 ft) high and weigh 20 tonnes.[358] Inside, the outline of a bathing pool surrounded by a colonnade of Corinthian columns is still visible in addition to an octagonal room that served as a dressing room containing a drain in its center.[358]
  • The Agora of Palmyra was built c. 193.[368] It is a massive 71 by 84 metres (233 by 276 ft) structure with 11 entrances.[358] Inside the agora, 200 columnar bases that used to hold statues of prominent citizens were found.[358] The inscriptions on the bases allowed an understanding of the order by which the statues were grouped; the eastern side was reserved for senators, the northern side for Palmyrene officials, the western side for soldiers and the southern side for caravan chiefs.[358]
  • The Tariff Court is a large rectangular enclosure south of the agora and sharing its northern wall with it.[369] Originally, the entrance of the court was a massive vestibule in its southwestern wall.[369] However, the entrance was blocked by the construction of a defensive wall and the court was entered through three doors from the Agora.[369] The court gained its name by containing a 5 meters long stone slab that had the Palmyrene tax law inscribed on it.[370]
  • The Triclinium of the Agora is located to the northwestern corner of the Agora and can host up to 40 person.[371][372] It is a small 12 by 15 metres (39 by 49 ft) hall decorated with Greek key motifs that run in a continuous line halfway up the wall.[373] The building was probably used by the rulers of the city;[371] Seyrig proposed that it was a small temple before being turned into a banqueting hall.[372]

Temples

Further information: Temple of Bel and Temple of Baalshamin
  • The temple of Nabu is largely ruined.[374] The temple was Eastern in its plan; the outer enclosure’s propylaea led to a 20 by 9 metres (66 by 30 ft) podium through a portico of which the bases of the columns survives.[375] The peristyle cella opened onto an outdoor altar.[375]
  • The temple of Al-lāt is largely ruined with only a podium, few columns and the door frame remaining.[376] Inside the compound, a giant lion relief (Lion of Al-lāt) was excavated and in its original form, was a relief protruding from the temple compound’s wall.[377][378]
  • The ruined temple of Baal-hamon is located on the top of Jabal al-Muntar hill which oversees the spring of Efqa.[379] Constructed in 89 AD, it consists of a cella and a vestibule with two columns.[379] The temple had a defensive tower attached to it;[380] a tessera depicting the sanctuary was excavated and it reveled that both the cella and the vestibule were decorated with merlons.[380]

Other buildings

Further information: Great Colonnade at Palmyra

Ruined building

The Funerary Temple no.86

  • The Funerary Temple no.86 (also known as the House Tomb) is located at the western end of the Great Colonnade.[350][381] It was built in the third century and has a portico of six columns and vine patterns carvings.[382][383] Inside the chamber, steps leads down to a vault crypt.[383] The shrine might have been connected to the royal family being the only tomb inside the city’s walls.[382]
  • The Tetrapylon was erected during the renovations of Diocletian at the end of the third century.[130] It is a square platform and each corner contains a grouping of four columns.[357] Each column group supports a 150 tons cornice and contains a pedestal in its center that originally carried a statue.[357] Out of sixteen columns, only one is original while the rest are concrete reconstruction carried out in 1963 by the Syrian Directorate-General of Antiquities.[383] The original columns were brought from Egypt and carved out of pink granite.[357]
  • The city’s current walls were erected during the reign of Diocletian whose fortification of the city enclosed a much smaller area than the original pre-273 city.[384] The Diocletianic walls had protective towers and fortified gateways.[384]
The pre-273 walls were narrow and while encircling the whole city, they do not seem to have provided real protection against an invasion.[384] No signs of towers or fortified gates exist and it can not be proven that the walls enclosed the city as many gaps appears to have never been defended.[384] Those walls seems to have been a tool to protect the city against Bedouins and to provide a costume barrier.[384]

Excavations

The Colonnade

Four groups of four columns each

The Tetrapylon

During the Middle Ages Palmyra was largely forgotten by the West,[175] although it was visited by travelers such as Pietro Della Valle (between 1616 and 1625), Jean-Baptiste Tavernier (in 1638) and many Swedish and German explorers.[385] In 1678 a group of English merchants visited the city, and its first scholarly description appeared in a 1705 book by Abednego Seller.[385] In 1751, an expedition led by Robert Wood and James Dawkins studied Palmyra’s architecture;[385] visits by travelers and antiquarians continued, including one made by Lady Hester Stanhope in 1813.[385] In 1901 the stone slab containing the Palmyrene tax law was removed to the Hermitage Museum in Saint Petersburg.[358]

Palmyra’s first excavations were conducted in 1902 by Otto Puchstein and in 1917 by Theodor Wiegand.[189] In 1929, French general director of antiquities of Syria and Lebanon Henri Arnold Seyrig began large-scale excavation of the site;[189] interrupted by World War II, it resumed soon after the war’s end.[189] Seyrig started with the Temple of Bel in 1929 and between 1939 and 1940 he excavated the Agora.[45] Daniel Schlumberger conducted excavations in the Palmyrene northwest countryside in 1934 and 1935 where he studied different local sanctuaries in the Palmyrene villages.[45] From 1954 to 1956, a Swiss expedition organized by UNESCO excavated the temple of Baalshamin.[189] Since 1958, the site has been excavated by the Syrian Directorate-General of Antiquities,[188] and Polish expeditions led by many archaeologists including Kazimierz Michałowski (until 1980) and Michael Gawlikowski (until 2011).[189][386]

The Polish expedition concentrated its work in the Camp of Diocletian while the Syrian Directorate-General of Antiquities excavated the temple of Nabu.[45] Most of the hypogea were excavated jointly by the Polish expedition and the Syrian Directorate,[387] while the area of Efqa was excavated by Jean Starcky and Jafar al-Hassani.[356] The temple of Baal-hamon was discovered by Robert du Mesnil du Buisson in the 1970s.[379] The Palmyrene irrigation system was discovered in 2008 by Jørgen Christian Meyer who researched the Palmyrene countryside through ground inspections and satellite images.[46] Most of Palmyra still remains unexplored especially the residential quarters in the north and south while the necropolis has been thoroughly excavated by the Directorate and the Polish expedition.[356] Excavation expeditions departed Palmyra in 2011 due to the Syrian Civil War.[46]

In 1980, the historic site including the necropolis outside the walls was declared a World Heritage Site by the UNESCO.[388] In November 2010 Austrian media manager Helmut Thoma admitted looting a Palmyrene grave in 1980, stealing architectural pieces for his home;[389] German and Austrian archaeologists protested the theft.[390]

See also