Category Archives: History

The Falklands War – The Untold Story

The Falklands War – The Untold Story

Falklands Crisis was a 1982 war between Argentina and the United Kingdom. The conflict resulted from the long-standing dispute over the sovereignty of the Falkland Islands and South Georgia and the South Sandwich Islands, which lie in the South Atlantic, east of Argentina.

The Falklands War (Spanish: Guerra de las Malvinas), also known as the Falklands Conflict, Falklands Crisis, and the Guerra del Atlántico Sur (Spanish for “South Atlantic War“), was a ten-week war between Argentina and the United Kingdom over two British overseas territories in the South Atlantic: the Falkland Islands and South Georgia and the South Sandwich Islands. It began on Friday, 2 April 1982, when Argentina invaded and occupied the Falkland Islands (and, the following day, South Georgia and the South Sandwich Islands) in an attempt to establish the sovereignty it had long claimed over them. On 5 April, the British government dispatched a naval task force to engage the Argentine Navy and Air Force before making an amphibious assault on the islands. The conflict lasted 74 days and ended with the Argentine surrender on 14 June 1982, returning the islands to British control. In total, 649 Argentine military personnel, 255 British military personnel, and three Falkland Islanders died during the hostilities.

The conflict was a major episode in the protracted confrontation over the territories’ sovereignty. Argentina asserted (and maintains to this day) that the islands are Argentinian territory,[6] and the Argentine government thus characterised its military action as the reclamation of its own territory. The British government regarded the action as an invasion of a territory that had been a Crown colony since 1841. Falkland Islanders, who have inhabited the islands since the early 19th century, are predominantly descendants of British settlers, and favour British sovereignty. Neither state, however, officially declared war (both sides did declare the Islands areas a war zone and officially recognised that a state of war existed between them) and hostilities were almost exclusively limited to the territories under dispute and the area of the South Atlantic where they lie.

The conflict has had a strong impact in both countries and has been the subject of various books, articles, films, and songs. Patriotic sentiment ran high in Argentina, but the outcome prompted large protests against the ruling military government, hastening its downfall. In the United Kingdom, the Conservative Party government, bolstered by the successful outcome, was re-elected the following year. The cultural and political weight of the conflict has had less effect in Britain than in Argentina, where it remains a continued topic for discussion.[7]

Relations between the United Kingdom and Argentina were restored in 1989 following a meeting in Madrid, Spain, at which the two countries’ governments issued a joint statement.[8] No change in either country’s position regarding the sovereignty of the Falkland Islands was made explicit. In 1994, Argentina’s claim to the territories was added to its constitution.[9]

Lead-up to the conflict

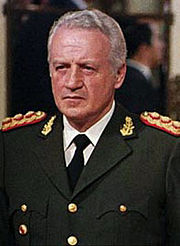
Lieutenant General Leopoldo Galtieri, leader of the Argentinian Junta
Admiral Jorge Anaya was the driving force in the Junta’s decision to invade.[10][11][12]

In the period leading up to the war – and, in particular, following the transfer of power between the military dictators General Jorge Rafael Videla and General Roberto Eduardo Viola late in March 1981 – Argentina had been in the midst of a devastating economic stagnation and large-scale civil unrest against the military junta that had been governing the country since 1976.[13] In December 1981 there was a further change in the Argentine military regime bringing to office a new junta headed by General Leopoldo Galtieri (acting president), Brigadier Basilio Lami Dozo and Admiral Jorge Anaya. Anaya was the main architect and supporter of a military solution for the long-standing claim over the islands,[14] calculating that the United Kingdom would never respond militarily.[15]

By opting for military action, the Galtieri government hoped to mobilise the long-standing patriotic feelings of Argentines towards the islands, and thus divert public attention from the country’s chronic economic problems and the regime’s ongoing human rights violations.[16] Such action would also bolster its dwindling legitimacy. The newspaper La Prensa speculated in a step-by-step plan beginning with cutting off supplies to the Islands, ending in direct actions late in 1982, if the UN talks were fruitless.[17]

The ongoing tension between the two countries over the islands increased on 19 March when a group of Argentine scrap metal merchants (actually infiltrated by Argentine marines) raised the Argentine flag at South Georgia, an act that would later be seen as the first offensive action in the war. The Royal Navy ice patrol vessel HMS Endurance was dispatched from Stanley to South Georgia in response, subsequently leading to the invasion of South Georgia by Argentine forces on 3 April. The Argentine military junta, suspecting that the UK would reinforce its South Atlantic Forces,[18] ordered the invasion of the Falkland Islands to be brought forward to 2 April.

Britain was initially taken by surprise by the Argentine attack on the South Atlantic islands, despite repeated warnings by Royal Navy captain Nicholas Barker and others. Barker believed that Defence Secretary John Nott‘s 1981 review (in which Nott described plans to withdraw the Endurance, Britain’s only naval presence in the South Atlantic) sent a signal to the Argentines that Britain was unwilling, and would soon be unable, to defend its territories and subjects in the Falklands.[19][20]

Argentine invasion

The Argentine destroyer ARA Santísima Trinidad landed Special Forces south of Stanley

On 2 April 1982, The Argentine forces mounted amphibious landings off the Falkland Islands, following the civilian occupation of South Georgia on 19 March, before the Falklands War began. The invasion was met with a nominal defence organised by the Falkland Islands’ Governor Sir Rex Hunt, giving command to Major Mike Norman of the Royal Marines. The events of the invasion included the landing of Lieutenant Commander Guillermo Sanchez-Sabarots’ Amphibious Commandos Group, the attack on Moody Brook barracks, the engagement between the troops of Hugo Santillan and Bill Trollope at Stanley, and the final engagement and surrender at Government House.

Initial British response

The cover of Newsweek magazine, 19 April 1982, depicts HMS Hermes, flagship of the British Task Force.

Word of the invasion first reached Britain from Argentine sources.[21] A Ministry of Defence operative in London had a short telex conversation with Governor Hunt’s telex operator, who confirmed that Argentines were on the island and in control.[21][22] Later that day, BBC journalist Laurie Margolis was able to speak with an islander at Goose Green via amateur radio, who confirmed the presence of a large Argentine fleet and that Argentine forces had taken control of the island.[21] Operation Corporate was the codename given to the British military operations in the Falklands War. The commander of task force operations was Admiral Sir John Fieldhouse. Operations lasted from 1 April 1982 to 20 June 1982.[23] The British undertook a series of military operations as a means of recapturing the Falklands from Argentine occupation. The British government had taken action prior to the 2 April invasion. In response to events on South Georgia, the submarines HMS Splendid and HMS Spartan were ordered to sail south on 29 March, whilst the stores ship Royal Fleet Auxiliary (RFA) Fort Austin was dispatched from the Western Mediterranean to support HMS Endurance.[24] Lord Carrington had wished to send a third submarine, but the decision was deferred due to concerns about the impact on operational commitments.[24] Coincidentally, on 26 March, the submarine HMS Superb left Gibraltar and it was assumed in the press it was heading south. There has since been speculation that the effect of those reports was to panic the Argentine junta into invading the Falklands before nuclear submarines could be deployed.[24]

The following day, during a crisis meeting headed by the Prime Minister Margaret Thatcher, the Chief of the Naval Staff, Admiral Sir Henry Leach, advised them that “Britain could and should send a task force if the islands are invaded”. On 1 April, Leach sent orders to a Royal Navy force carrying out exercises in the Mediterranean to prepare to sail south. Following the invasion on 2 April, after an emergency meeting of the cabinet, approval was given to form a task force to retake the islands. This was backed in an emergency session of the House of Commons the next day.[25]

On 6 April, the British Government set up a War Cabinet to provide day-to-day political oversight of the campaign.[3] This was the critical instrument of crisis management for the British with its remit being to “keep under review political and military developments relating to the South Atlantic, and to report as necessary to the Defence and Overseas Policy Committee”. Until it was dissolved on 12 August, the War Cabinet met at least daily. Although Margaret Thatcher is described as dominating the War Cabinet, Lawrence Freedman notes in the Official History of the Falklands Campaign that she did not ignore opposition or fail to consult others. However, once a decision was reached she “did not look back”.[3]

Position of third party countries

On the evening of 3 April, the United Kingdom’s United Nations ambassador Sir Anthony Parsons put a draft resolution to the United Nations Security Council. The resolution, which condemned the hostilities and demanded the immediate Argentine withdrawal from the Islands, was adopted by the council the following day as United Nations Security Council Resolution 502, which passed with ten votes in support, one against (Panama) and four abstentions (China, the Soviet Union, Poland and Spain).[25][26][27] The UK received further political support from the Commonwealth of Nations and the European Economic Community. The EEC also provided economic support by imposing economic sanctions on Argentina. Argentina itself was politically backed by a majority of countries in Latin America and some members of the Non-Aligned Movement.[citation needed] On 20 May 1982, the Prime Minister of New Zealand, Rob Muldoon, announced that he would make HMNZS Canterbury, a Leander class frigate, available for use where the British thought fit to release a Royal Navy vessel for the Falklands.[28]

The war was an unexpected event in a world strained by the Cold War and the North–South divide. The response of some countries was the effort to mediate the crisis and later as the war began, the support (or criticism) based in terms of anti-colonialism, political solidarity, historical relationships or realpolitik.

The United States was concerned by the prospect of Argentina turning to the Soviet Union for support,[29] and initially tried to mediate an end to the conflict. However, when Argentina refused the US peace overtures, US Secretary of State Alexander Haig announced that the United States would prohibit arms sales to Argentina and provide material support for British operations. Both Houses of the US Congress passed resolutions supporting the US action siding with the United Kingdom.[30]

The US provided the United Kingdom with military equipment ranging from submarine detectors to the latest missiles.[31][32][33][34] President Ronald Reagan approved the Royal Navy’s request to borrow the Sea Harrier-capable amphibious assault ship USS Iwo Jima (LPH-2) if the British lost an aircraft carrier. The United States Navy developed a plan to help the British man the ship with American military contractors, likely retired sailors with knowledge of the Iwo Jima‍ ’​s systems.[35] France provided dissimilar aircraft training so Harrier pilots could train against the French aircraft used by Argentina.[36] French and British intelligence also worked to prevent Argentina from obtaining more Exocet missiles on the international market,[37] while at the same time Peru attempted to purchase 12 missiles for Argentina, in a failed secret operation.[38][39] Chile gave support to Britain in the form of intelligence about Argentine military and early warning radar.[40][41] Throughout the war, Argentina was afraid of a Chilean military intervention in Patagonia and kept some of her best mountain regiments away from the Falklands near the Chilean border as a precaution.[42]

In recent years, it has become known that a listening post located in Fauske, Norway was vital in giving the British intelligence information regarding Argentinian fleet locations. The listening post was designated Fauske II by Norway. The information was “stolen” from Soviet spy satellites, which were the only space assets that covered the South Atlantic.[43] Western powers such as the United States and the UK did not have their own satellite presence in this area at the time. A high ranking British military source claimed that the intelligence the British got from the Fauske II post as “Incredibly vital”:

When the war broke out, we had almost no intelligence information from this area. It was here we got help from the Norwegians, who gave us a stream of information about the Argentinian warships positions. The information came to us all the time and straight to our war headquarters at Northwood. The information was continuously updated and told us exactly where the Argentinian ships were.[43][44]

While France overtly backed the United Kingdom, a French technical team remained in Argentina throughout the war. French government sources have said that the French team was engaged in intelligence-gathering; however, it simultaneously provided direct material support to the Argentines, identifying and fixing faults in Exocet missile launchers.[45] According to the book Operation Israel, advisers from Israel Aerospace Industries were already in Argentina and continued their work during the conflict. The book also claims that Israel sold weapons and drop tanks in a secret operation in Peru.[46][47] Peru also openly sent “Mirages, pilots and missiles” to Argentina during the war.[48] Peru had earlier transferred ten Hercules transport planes to Argentina soon after the British Task Force had set sail in April 1982.[49] Nick van der Bijl records that, after the Argentine defeat at Goose Green, Venezuela and Guatemala offered to send paratroops to the Falklands.[50] Through Libya, under Muammar Gaddafi, Argentina received 20 launchers and 60 SA-7 missiles, as well as machine guns, mortars and mines; all in all, the load of four trips of two Boeing 707s of the AAF, refuelled in Recife with the knowledge and consent of the Brazilian government.[51] Some of these clandestine logistics operations were mounted by the Soviet Union.[52]

British Task Force

HMS Invincible, part of the task force. Pictured in 1990

Royal Navy Fleet Air Arm Sea Harrier FRS1. The gloss paint scheme was altered to a duller one en route south.

The British government had no contingency plan for an invasion of the islands, and the task force was rapidly put together from whatever vessels were available.[53] The nuclear submarine Conqueror set sail from France on 4 April, whilst the two aircraft carriers Invincible and Hermes, in the company of escort vessels, left Portsmouth only a day later.[25] On its return to Southampton from a world cruise on 7 April, the ocean liner SS Canberra was requisitioned and set sail two days later with 3 Commando Brigade aboard.[25] The ocean liner Queen Elizabeth 2 was also requisitioned and left Southampton on 12 May with 5th Infantry Brigade on board.[25] The whole task force eventually comprised 127 ships: 43 Royal Navy vessels, 22 Royal Fleet Auxiliary ships and 62 merchant ships.[53]

The retaking of the Falkland Islands was considered extremely difficult. The US Navy considered a successful counter-invasion by the British “…a military impossibility.”[54] Firstly, the British were significantly constrained by the disparity in deployable air cover.[55] The British had 42 aircraft (28 Sea Harriers and 14 Harrier GR.3s) available for air combat operations,[56] against approximately 122 serviceable jet fighters, of which about 50 were used as air superiority fighters and the remainder as strike aircraft, in Argentina’s air forces during the war.[57] Crucially, the British lacked AEW aircraft.

Many of the British were also concerned by the Argentine surface fleet because it possessed many of the same weapons systems and capabilities as the British fleet, specifically Exocet-equipped vessels, in addition to two Type 209 submarines.[58] For this reason, the British planned to screen their fleet with submarines. They also envisaged a naval retreat on the appearance of Argentine ships to avoid surface combat.

By mid-April, the Royal Air Force had set up the airbase of RAF Ascension Island, co-located with Wideawake Airfield (USA) on the mid-Atlantic British overseas territory of Ascension Island, including a sizeable force of Avro Vulcan B Mk 2 bombers, Handley Page Victor K Mk 2 refuelling aircraft, and McDonnell Douglas Phantom FGR Mk 2 fighters to protect them. Meanwhile, the main British naval task force arrived at Ascension to prepare for active service. A small force had already been sent south to recapture South Georgia.

Encounters began in April; the British Task Force was shadowed by Boeing 707 aircraft of the Argentine Air Force during their travel to the south.[59] Several of these flights were intercepted by Sea Harriers outside the British-imposed exclusion zone; the unarmed 707s were not attacked because diplomatic moves were still in progress and the UK had not yet decided to commit itself to armed force. On 23 April, a Brazilian commercial Douglas DC-10 from VARIG Airlines en route to South Africa was intercepted by British Harriers who visually identified the civilian plane.[60]

Recapture of South Georgia and the attack on Santa Fe

The South Georgia force, Operation Paraquet, under the command of Major Guy Sheridan RM, consisted of Marines from 42 Commando, a troop of the Special Air Service (SAS) and Special Boat Service (SBS) troops who were intended to land as reconnaissance forces for an invasion by the Royal Marines. All were embarked on RFA Tidespring. First to arrive was the Churchill-class submarine HMS Conqueror on 19 April, and the island was over-flown by a radar-mapping Handley Page Victor on 20 April.

The first landings of SAS troops took place on 21 April, but—with the southern hemisphere autumn setting in—the weather was so bad that their landings and others made the next day were all withdrawn after two helicopters crashed in fog on Fortuna Glacier. On 23 April, a submarine alert was sounded and operations were halted, with Tidespring being withdrawn to deeper water to avoid interception. On 24 April, the British forces regrouped and headed in to attack.

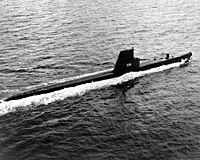
The ARA Santa Fe sailing on the surface.

On 25 April, after resupplying the Argentine garrison in South Georgia, the submarine ARA Santa Fe was spotted on the surface[61] by a Westland Wessex HAS Mk 3 helicopter from HMS Antrim, which attacked the Argentine submarine with depth charges. HMS Plymouth launched a Westland Wasp HAS.Mk.1 helicopter, and HMS Brilliant launched a Westland Lynx HAS Mk 2. The Lynx launched a torpedo, and strafed the submarine with its pintle-mounted general purpose machine gun; the Wessex also fired on Santa Fe with its GPMG. The Wasp from HMS Plymouth as well as two other Wasps launched from HMS Endurance fired AS-12 ASM antiship missiles at the submarine, scoring hits. Santa Fe was damaged badly enough to prevent her from diving. The crew abandoned the submarine at the jetty at King Edward Point on South Georgia.

With Tidespring now far out to sea, and the Argentine forces augmented by the submarine’s crew, Major Sheridan decided to gather the 76 men he had and make a direct assault that day. After a short forced march by the British troops and a naval bombardment demonstration by two Royal Navy vessels (Antrim and Plymouth), the Argentine forces surrendered without resistance. The message sent from the naval force at South Georgia to London was, “Be pleased to inform Her Majesty that the White Ensign flies alongside the Union Jack in South Georgia. God Save the Queen.” The Prime Minister, Margaret Thatcher, broke the news to the media, telling them to “Just rejoice at that news, and congratulate our forces and the Marines!”[62]

Black Buck raids

Main article: Operation Black Buck

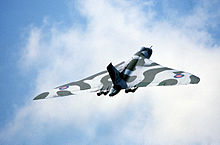
On 1 May, British operations on the Falklands opened with the “Black Buck 1” attack (of a series of five) on the airfield at Stanley. A Vulcan bomber from Ascension flew on an 8,000-nautical-mile (15,000 km; 9,200 mi) round trip dropping conventional bombs across the runway at Stanley and back to Ascension. The mission required repeated refuelling, and required several Victor tanker aircraft operating in concert, including tanker to tanker refuelling. The overall effect of the raids on the war is difficult to determine, and the raids consumed precious tanker resources from Ascension,[63] but also prevented Argentina from stationing fast jets on the islands.

The raids did minimal damage to the runway, and damage to radars was quickly repaired. As of 2014[update] the Royal Air Force Web site still states that all the three bombing missions had been successful,[64] but historian Lawrence Freedman, who had access to classified documents, said in a 2005 book that the subsequent bombing missions were failures.[65] Argentine sources said that the Vulcan raids influenced Argentina to withdraw some of its Mirage IIIs from Southern Argentina to the Buenos Aires Defence Zone.[66][67][68] This was later described as propaganda by Falklands veteran Commander Nigel Ward.[69] In any case, the effect of the Vulcan raids on Argentina’s deployment of defensive fighters was watered down when British officials made clear that there would be no strikes on air bases in Argentina.[70]

Of the five Black Buck raids, three were against Stanley Airfield, with the other two anti-radar missions using Shrike anti-radiation missiles.

Escalation of the air war

The Falklands had only three airfields. The longest and only paved runway was at the capital, Stanley, and even that was too short to support fast jets (although an arrestor gear was fitted in April to support Skyhawks). Therefore, the Argentines were forced to launch their major strikes from the mainland, severely hampering their efforts at forward staging, combat air patrols and close air support over the islands. The effective loiter time of incoming Argentine aircraft was low, and they were later compelled to overfly British forces in any attempt to attack the islands.

The first major Argentine strike force comprised 36 aircraft (A-4 Skyhawks, IAI Daggers, English Electric Canberras, and Mirage III escorts), and was sent on 1 May, in the belief that the British invasion was imminent or landings had already taken place. Only a section of Grupo 6 (flying IAI Dagger aircraft) found ships, which were firing at Argentine defences near the islands. The Daggers managed to attack the ships and return safely. This greatly boosted morale of the Argentine pilots, who now knew they could survive an attack against modern warships, protected by radar ground clutter from the Islands and by using a late pop up profile. Meanwhile, other Argentine aircraft were intercepted by BAE Sea Harriers operating from HMS Invincible. A Dagger[71] and a Canberra were shot down.

Combat broke out between Sea Harrier FRS Mk 1 fighters of No. 801 Naval Air Squadron and Mirage III fighters of Grupo 8. Both sides refused to fight at the other’s best altitude, until two Mirages finally descended to engage. One was shot down by an AIM-9L Sidewinder air-to-air missile (AAM), while the other escaped but was damaged and without enough fuel to return to its mainland air base. The plane made for Stanley, where it fell victim to friendly fire from the Argentine defenders.[72]

As a result of this experience, Argentine Air Force staff decided to employ A-4 Skyhawks and Daggers only as strike units, the Canberras only during the night, and Mirage IIIs (without air refuelling capability or any capable AAM) as decoys to lure away the British Sea Harriers. The decoying would be later extended with the formation of the Escuadrón Fénix, a squadron of civilian jets flying 24 hours-a-day simulating strike aircraft preparing to attack the fleet. On one of these flights, an Air Force Learjet was shot down, killing the squadron commander, Vice Commodore Rodolfo De La Colina, the highest-ranking Argentine officer to die in the war.[73][74] Stanley was used as an Argentine strongpoint throughout the conflict. Despite the Black Buck and Harrier raids on Stanley airfield (no fast jets were stationed there for air defence) and overnight shelling by detached ships, it was never out of action entirely. Stanley was defended by a mixture of surface-to-air missile (SAM) systems (Franco-German Roland and British Tigercat) and Swiss-built Oerlikon 35 mm twin anti-aircraft cannons. Lockheed Hercules transport night flights brought supplies, weapons, vehicles, and fuel, and airlifted out the wounded up until the end of the conflict.

The only Argentine Hercules shot down by the British was lost on 1 June when TC-63 was intercepted by a Sea Harrier in daylight[75][76] when it was searching for the British fleet north-east of the islands after the Argentine Navy retired its last SP-2H Neptune due to airframe attrition.

Various options to attack the home base of the five Argentine Etendards at Río Grande were examined and discounted (Operation Mikado), subsequently five Royal Navy submarines lined up, submerged, on the edge of Argentina’s 12-nautical-mile (22 km; 14 mi) territorial limit to provide early warning of bombing raids on the British task force.[77]

Sinking of ARA General Belgrano

The ARA Belgrano.

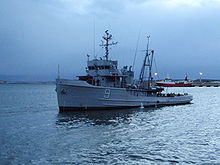
Alferez Sobral

Two British naval task forces (one of surface vessels and one of submarines) and the Argentine fleet were operating in the neighbourhood of the Falklands and soon came into conflict. The first naval loss was the World War II-vintage Argentine light cruiser ARA General Belgrano. The nuclear-powered submarine HMS Conqueror sank General Belgrano on 2 May. Three hundred and twenty-three members of General Belgrano‍ ’​s crew died in the incident. Over 700 men were rescued from the open ocean despite cold seas and stormy weather. The losses from General Belgrano totalled nearly half of the Argentine deaths in the Falklands conflict and the loss of the ship hardened the stance of the Argentine government.

Regardless of controversies over the sinking, due to disagreement on the exact nature of the Maritime Exclusion Zone and whether General Belgrano had been returning to port at the time of the sinking, it had a crucial strategic effect: the elimination of the Argentine naval threat. After her loss, the entire Argentine fleet, with the exception of the conventional submarine ARA San Luis,[61] returned to port and did not leave again during the fighting. The two escorting destroyers and the battle group centred on the aircraft carrier ARA Veinticinco de Mayo both withdrew from the area, ending the direct threat to the British fleet that their pincer movement had represented.

In a separate incident later that night, British forces engaged an Argentine patrol gunboat, the ARA Alferez Sobral, that was searching for the crew of the Argentine Air Force Canberra light bomber shot down on 1 May. Two Royal Navy Lynx helicopters fired four Sea Skua missiles at her. Badly damaged and with eight crew dead, Alferez Sobral managed to return to Puerto Deseado two days later. The Canberra’s crew were never found.

Sinking of HMS Sheffield

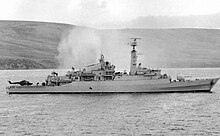
HMS Sheffield

On 4 May, two days after the sinking of Belgrano, the British lost the Type 42 destroyer HMS Sheffield to fire following an Exocet missile strike from the Argentine 2nd Naval Air Fighter/Attack Squadron. Sheffield had been ordered forward with two other Type 42s to provide a long-range radar and medium-high altitude missile picket far from the British carriers. She was struck amidships, with devastating effect, ultimately killing 20 crew members and severely injuring 24 others. The ship was abandoned several hours later, gutted and deformed by the fires that continued to burn for six more days. She finally sank outside the Maritime Exclusion Zone on 10 May.

The incident is described in detail by Admiral Sandy Woodward in his book One Hundred Days, Chapter One. Woodward was a former commanding officer of Sheffield.[78]

The tempo of operations increased throughout the second half of May as the United Nations’ attempts to mediate a peace were rejected by the British, who felt that any delay would make a campaign impractical in the South Atlantic storms. The destruction of Sheffield (the first Royal Navy ship sunk in action since World War II) had a profound impact on the British public, bringing home the fact that the “Falklands Crisis”, as the BBC News put it, was now an actual “shooting war”.

British special forces operations

Given the threat to the British fleet posed by the Etendard-Exocet combination, plans were made to use C-130s to fly in some SAS troops to attack the home base of the five Etendards at Río Grande, Tierra del Fuego. The operation was codenamed “Mikado“. The operation was later scrapped, after acknowledging that its chances of success were limited, and replaced with a plan to use HMS Onyx to drop SAS operatives several miles offshore at night for them to make their way to the coast aboard rubber inflatables and proceed to destroy Argentina’s remaining Exocet stockpile.[79]

An SAS reconnaissance team was dispatched to carry out preparations for a seaborne infiltration. A Westland Sea King helicopter carrying the assigned team took off from HMS Invincible on the night of 17 May, but bad weather forced it to land 50 miles (80 km) from its target and the mission was aborted.[80] The pilot flew to Chile, landed south of Punta Arenas, and dropped off the SAS team. The helicopter’s crew of three then destroyed the aircraft, surrendered to Chilean police on 25 May, and were repatriated to the UK after interrogation. The discovery of the burnt-out helicopter attracted considerable international attention. Meanwhile, the SAS team crossed and penetrated deep into Argentina, but cancelled their mission after the Argentines suspected an SAS operation and deployed some 2,000 troops to search for them. The SAS men were able to return to Chile, and took a civilian flight back to the UK.[81]

On 14 May the SAS carried out a raid on Pebble Island on the Falklands, where the Argentine Navy had taken over a grass airstrip map for FMA IA 58 Pucará light ground-attack aircraft and Beechcraft T-34 Mentors, which resulted with the destruction of several aircraft.[nb 4]

Land battles

Landing at San Carlos—Bomb Alley

British sailors in anti-flash gear at action stations on HMS Cardiff near San Carlos, June 1982.

During the night of 21 May, the British Amphibious Task Group under the command of Commodore Michael Clapp (Commodore, Amphibious Warfare – COMAW) mounted Operation Sutton, the amphibious landing on beaches around San Carlos Water,[nb 5] on the northwestern coast of East Falkland facing onto Falkland Sound. The bay, known as Bomb Alley by British forces, was the scene of repeated air attacks by low-flying Argentine jets.[82][83]

The 4,000 men of 3 Commando Brigade were put ashore as follows: 2nd Battalion, Parachute Regiment (2 Para) from the RORO ferry Norland and 40 Commando Royal Marines from the amphibious ship HMS Fearless were landed at San Carlos (Blue Beach), 3rd Battalion, Parachute Regiment (3 Para) from the amphibious ship HMS Intrepid was landed at Port San Carlos (Green Beach) and 45 Commando from RFA Stromness was landed at Ajax Bay (Red Beach). Notably, the waves of eight LCUs and eight LCVPs were led by Major Ewen Southby-Tailyour, who had commanded the Falklands detachment NP8901 from March 1978 to 1979. 42 Commando on the ocean liner SS Canberra was a tactical reserve. Units from the Royal Artillery, Royal Engineers, etc. and armoured reconnaissance vehicles were also put ashore with the landing craft, the Round table class LSL and mexeflote barges. Rapier missile launchers were carried as underslung loads of Sea Kings for rapid deployment.

By dawn the next day, they had established a secure beachhead from which to conduct offensive operations. From there, Brigadier Julian Thompson‘s plan was to capture Darwin and Goose Green before turning towards Port Stanley. Now, with the British troops on the ground, the Argentine Air Force began the night bombing campaign against them using Canberra bomber planes until the last day of the war (14 June).

HMS Antelope smoking after being hit, 23 May

At sea, the paucity of the British ships’ anti-aircraft defences was demonstrated in the sinking of HMS Ardent on 21 May, HMS Antelope on 24 May, and MV Atlantic Conveyor (struck by two AM39 Exocets) on 25 May along with a vital cargo of helicopters, runway-building equipment and tents. The loss of all but one of the Chinook helicopters being carried by the Atlantic Conveyor was a severe blow from a logistical perspective.

Also lost on this day was HMS Coventry, a sister to Sheffield, whilst in company with HMS Broadsword after being ordered to act as a decoy to draw away Argentine aircraft from other ships at San Carlos Bay.[84] HMS Argonaut and HMS Brilliant were badly damaged. However, many British ships escaped being sunk because of weaknesses of the Argentine pilots’ bombing tactics described below.

To avoid the highest concentration of British air defences, Argentine pilots released ordnance from very low altitude, and hence their bomb fuzes did not have sufficient time to arm before impact. The low release of the retarded bombs (some of which the British had sold to the Argentines years earlier) meant that many never exploded, as there was insufficient time in the air for them to arm themselves. A simple free-fall bomb in a low altitude release, impacts almost directly below the aircraft, which is then within the lethal fragmentation zone of the explosion.

A retarded bomb has a small parachute or air brake that opens to reduce the speed of the bomb to produce a safe horizontal separation between the two. The fuze for a retarded bomb requires that the retarder be open a minimum time to ensure safe separation. The pilots would have been aware of this—but due to the high concentration required to avoid SAMs, Anti-Aircraft Artillery (AAA), and British Sea Harriers, many failed to climb to the necessary release point. The Argentinian forces solved the problem by fitting improvised retarding devices, allowing the pilots to effectively employ low-level bombing attacks on 8 June.

In his autobiographical account of the Falklands War, Admiral Woodward blamed the BBC World Service for disclosing information that led the Argentines to change the retarding devices on the bombs. The World Service reported the lack of detonations after receiving a briefing on the matter from a Ministry of Defence official. He describes the BBC as being more concerned with being “fearless seekers after truth” than with the lives of British servicemen.[85] Colonel ‘H’. Jones levelled similar accusations against the BBC after they disclosed the impending British attack on Goose Green by 2 Para.

Thirteen bombs hit British ships without detonating.[86] Lord Craig, the retired Marshal of the Royal Air Force, is said to have remarked: “Six better fuses and we would have lost”[87] although Ardent and Antelope were both lost despite the failure of bombs to explode. The fuzes were functioning correctly, and the bombs were simply released from too low an altitude.[85] [88] The Argentines lost 22 aircraft in the attacks.[nb 6]

Battle of Goose Green

Infantry deployment in East Falklands after landing in San Carlos

Main article: Battle of Goose Green

From early on 27 May until 28 May, 2 Para, (approximately 500 men) with artillery support from 8 (Alma) Commando Battery, Royal Artillery, approached and attacked Darwin and Goose Green, which was held by the Argentine 12th Infantry Regiment. After a tough struggle that lasted all night and into the next day, the British won the battle; in all, 17 British and 47 Argentine soldiers were killed. In total 961 Argentine troops (including 202 Argentine Air Force personnel of the Condor airfield) were taken prisoner.

The BBC announced the taking of Goose Green on the BBC World Service before it had actually happened. It was during this attack that Lieutenant Colonel H. Jones, the commanding officer of 2 Para, was killed at the head of his battalion while charging into the well-prepared Argentine positions. He was posthumously awarded the Victoria Cross.

With the sizeable Argentine force at Goose Green out of the way, British forces were now able to break out of the San Carlos beachhead. On 27 May, men of 45 Cdo and 3 Para started a loaded march across East Falkland towards the coastal settlement of Teal Inlet.

Special forces on Mount Kent

Meanwhile, 42 Commando prepared to move by helicopter to Mount Kent.[nb 7] Unknown to senior British officers, the Argentine generals were determined to tie down the British troops in the Mount Kent area, and on 27 and 28 May they sent transport aircraft loaded with Blowpipe surface-to-air missiles and commandos (602nd Commando Company and 601st National Gendarmerie Special Forces Squadron) to Stanley. This operation was known as Operation AUTOIMPUESTA (Self-Determination-Initiative).

For the next week, the SAS and the Mountain and Arctic Warfare Cadre (M&AWC) of 3 Commando Brigade waged intense patrol battles with patrols of the volunteers’ 602nd Commando Company under Major Aldo Rico, normally 2nd in Command of the 22nd Mountain Infantry Regiment. Throughout 30 May, Royal Air Force Harriers were active over Mount Kent. One of them, Harrier XZ963, flown by Squadron Leader Jerry Pook—in responding to a call for help from D Squadron, attacked Mount Kent’s eastern lower slopes, and that led to its loss through small-arms fire. Pook was subsequently awarded the Distinguished Flying Cross.[89]

The Argentine Navy used their last AM39 Exocet missile attempting to attack HMS Invincible on 30 May. There are Argentine claims that the missile struck;[90][91] however, the British have denied this, some citing that HMS Avenger shot it down.[92][93] When Invincible returned to the UK after the war, she showed no signs of missile damage.

On 31 May, the M&AWC defeated Argentine Special Forces at the Battle of Top Malo House. A 13-strong Argentine Army Commando detachment (Captain José Vercesi’s 1st Assault Section, 602nd Commando Company) found itself trapped in a small shepherd’s house at Top Malo. The Argentine commandos fired from windows and doorways and then took refuge in a stream bed 200 metres (700 ft) from the burning house. Completely surrounded, they fought 19 M&AWC marines under Captain Rod Boswell for 45 minutes until, with their ammunition almost exhausted, they elected to surrender.

Three Cadre members were badly wounded. On the Argentine side, there were two dead, including Lieutenant Ernesto Espinoza and Sergeant Mateo Sbert (who were decorated for their bravery). Only five Argentines were left unscathed. As the British mopped up Top Malo House, Lieutenant Fraser Haddow’s M&AWC patrol came down from Malo Hill, brandishing a large Union Flag. One wounded Argentine soldier, Lieutenant Horacio Losito, commented that their escape route would have taken them through Haddow’s position.

601st Commando tried to move forward to rescue 602nd Commando Company on Estancia Mountain. Spotted by 42 Commando, they were engaged with 81mm mortars and forced to withdraw to Two Sisters mountain. The leader of 602nd Commando Company on Estancia Mountain realised his position had become untenable and after conferring with fellow officers ordered a withdrawal.[94]

The Argentine operation also saw the extensive use of helicopter support to position and extract patrols; the 601st Combat Aviation Battalion also suffered casualties. At about 11.00 am on 30 May, an Aerospatiale SA-330 Puma helicopter was brought down by a shoulder-launched Stinger surface-to-air missile (SAM) fired by the SAS in the vicinity of Mount Kent. Six National Gendarmerie Special Forces were killed and eight more wounded in the crash.[95]

As Brigadier Thompson commented, “It was fortunate that I had ignored the views expressed by Northwood HQ that reconnaissance of Mount Kent before insertion of 42 Commando was superfluous. Had D Squadron not been there, the Argentine Special Forces would have caught the Commando before de-planing and, in the darkness and confusion on a strange landing zone, inflicted heavy casualties on men and helicopters.”[96]

Bluff Cove and Fitzroy

By 1 June, with the arrival of a further 5,000 British troops of the 5th Infantry Brigade, the new British divisional commander, Major General Jeremy Moore RM, had sufficient force to start planning an offensive against Stanley. During this build-up, the Argentine air assaults on the British naval forces continued, killing 56. Of the dead, 32 were from the Welsh Guards on RFA Sir Galahad and RFA Sir Tristram on 8 June. According to Surgeon-Commander Rick Jolly of the Falklands Field Hospital, more than 150 men suffered burns and injuries of some kind in the attack, including, famously, Simon Weston.[97]

The Guards were sent to support an advance along the southern approach to Stanley. On 2 June, a small advance party of 2 Para moved to Swan Inlet house in a number of Army Westland Scout helicopters. Telephoning ahead to Fitzroy, they discovered that the area was clear of Argentines and (exceeding their authority) commandeered the one remaining RAF Chinook helicopter to frantically ferry another contingent of 2 Para ahead to Fitzroy (a settlement on Port Pleasant) and Bluff Cove (a settlement on Port Fitzroy).

This uncoordinated advance caused great difficulties in planning for the commanders of the combined operation, as they now found themselves with a 30 miles (48 km) string of indefensible positions on their southern flank. Support could not be sent by air as the single remaining Chinook was already heavily oversubscribed. The soldiers could march, but their equipment and heavy supplies would need to be ferried by sea.

Plans were drawn up for half the Welsh Guards to march light on the night of 2 June, whilst the Scots Guards and the second half of the Welsh Guards were to be ferried from San Carlos Water in the Landing Ship Logistics (LSL) Sir Tristram and the landing platform dock (LPD) Intrepid on the night of 5 June. Intrepid was planned to stay one day and unload itself and as much of Sir Tristram as possible, leaving the next evening for the relative safety of San Carlos. Escorts would be provided for this day, after which Sir Tristram would be left to unload using a Mexeflote (a powered raft) for as long as it took to finish.

Political pressure from above to not risk the LPD forced Commodore Clapp to alter this plan. Two lower-value LSLs would be sent, but with no suitable beaches to land on, Intrepid’s landing craft would need to accompany them to unload. A complicated operation across several nights with Intrepid and her sister ship Fearless sailing half-way to dispatch their craft was devised.

The attempted overland march by half the Welsh Guards failed, possibly as they refused to march light and attempted to carry their equipment. They returned to San Carlos and landed directly at Bluff Cove when Fearless dispatched her landing craft. Sir Tristram sailed on the night of 6 June and was joined by Sir Galahad at dawn on 7 June. Anchored 1,200 feet (370 m) apart in Port Pleasant, the landing ships were near Fitzroy, the designated landing point.

The landing craft should have been able to unload the ships to that point relatively quickly, but confusion over the ordered disembarcation point (the first half of the Guards going direct to Bluff Cove) resulted in the senior Welsh Guards infantry officer aboard insisting that his troops should be ferried the far longer distance directly to Port Fitzroy/Bluff Cove. The alternative was for the infantrymen to march via the recently repaired Bluff Cove bridge (destroyed by retreating Argentine combat engineers) to their destination, a journey of around seven miles (11 km).

On Sir Galahad‍ ’​s stern ramp there was an argument about what to do. The officers on board were told that they could not sail to Bluff Cove that day. They were told that they had to get their men off ship and onto the beach as soon as possible as the ships were vulnerable to enemy aircraft. It would take 20 minutes to transport the men to shore using the LCU and Mexeflote. They would then have the choice of walking the seven miles to Bluff Cove or wait until dark to sail there. The officers on board said that they would remain on board until dark and then sail. They refused to take their men off the ship. They possibly doubted that the bridge had been repaired due to the presence on board Sir Galahad of the Royal Engineer Troop whose job it was to repair the bridge. The Welsh Guards were keen to rejoin the rest of their Battalion, who were potentially facing the enemy without their support. They had also not seen any enemy aircraft since landing at San Carlos and may have been overconfident in the air defences. Ewen Southby-Tailyour gave a direct order for the men to leave the ship and go to the beach. The order was ignored.

The longer journey time of the landing craft taking the troops directly to Bluff Cove and the squabbling over how the landing was to be performed caused an enormous delay in unloading. This had disastrous consequences. Without escorts, having not yet established their air defence, and still almost fully laden, the two LSLs in Port Pleasant were sitting targets for two waves of Argentine A-4 Skyhawks.

The disaster at Port Pleasant (although often known as Bluff Cove) would provide the world with some of the most sobering images of the war as TV news video footage showed Navy helicopters hovering in thick smoke to winch survivors from the burning landing ships.

British casualties were 48 killed and 115 wounded.[98] Three Argentine pilots were also killed. The air strike delayed the scheduled British ground attack on Stanley by two days.[99] However, Argentine General Mario Menendez, commander of Argentine forces in the Falklands, was told that 900 British soldiers had died. He expected that the losses would cause enemy morale to drop and the British assault to stall.

Fall of Stanley

The road to Stanley

Argentine prisoners of war – Port Stanley.

On the night of 11 June, after several days of painstaking reconnaissance and logistic build-up, British forces launched a brigade-sized night attack against the heavily defended ring of high ground surrounding Stanley. Units of 3 Commando Brigade, supported by naval gunfire from several Royal Navy ships, simultaneously attacked in the Battle of Mount Harriet, Battle of Two Sisters, and Battle of Mount Longdon. Mount Harriet was taken at a cost of 2 British and 18 Argentine soldiers. At Two Sisters, the British faced both enemy resistance and friendly fire, but managed to capture their objectives. The toughest battle was at Mount Longdon. British forces were bogged down by assault rifle, mortar, machine gun, artillery fire, sniper fire, and ambushes. Despite this, the British continued their advance.

During this battle, 13 were killed when HMS Glamorgan, straying too close to shore while returning from the gun line, was struck by an improvised trailer-based Exocet MM38 launcher taken from the destroyer ARA Seguí by Argentine Navy technicians.[100] On the same day, Sergeant Ian McKay of 4 Platoon, B Company, 3 Para died in a grenade attack on an Argentine bunker, which earned him a posthumous Victoria Cross. After a night of fierce fighting, all objectives were secured. Both sides suffered heavy losses.

The night of 13 June saw the start of the second phase of attacks, in which the momentum of the initial assault was maintained. 2 Para, with CVRT support from The Blues and Royals, captured Wireless Ridge at the Battle of Wireless Ridge, with the loss of 3 British and 25 Argentine lives, and the 2nd battalion, Scots Guards captured Mount Tumbledown at the Battle of Mount Tumbledown, which cost 10 British and 30 Argentine lives.

A pile of discarded Argentine weapons in Port Stanley

With the last natural defence line at Mount Tumbledown breached, the Argentine town defences of Stanley began to falter. In the morning gloom, one company commander got lost and his junior officers became despondent. Private Santiago Carrizo of the 3rd Regiment described how a platoon commander ordered them to take up positions in the houses and “if a Kelper resists, shoot him”, but the entire company did nothing of the kind.[101]

A ceasefire was declared on 14 June and the commander of the Argentine garrison in Stanley, Brigade General Mario Menéndez, surrendered to Major General Jeremy Moore the same day.

Recapture of South Sandwich Islands

The Argentine Thule Garrison at the Corbeta Uruguay base

On 20 June, the British retook the South Sandwich Islands (which involved accepting the surrender of the Southern Thule Garrison at the Corbeta Uruguay base), and declared hostilities over. Argentina had established Corbeta Uruguay in 1976, but prior to 1982 the United Kingdom had contested the existence of the Argentine base only through diplomatic channels.

Casualties

In total 907 were killed during the 74 days of the conflict:

Of the 86 Royal Navy personnel, 22 were lost in HMS Ardent, 19 + 1 lost in HMS Sheffield, 19 + 1 lost in HMS Coventry and 13 lost in HMS Glamorgan. Fourteen naval cooks were among the dead, the largest number from any one branch in the Royal Navy.

Thirty-three of the British Army’s dead came from the Welsh Guards, 21 from the 3rd Battalion, the Parachute Regiment, 18 from the 2nd Battalion, the Parachute Regiment, 19 from the Special Air Service, 3 from Royal Signals and 8 from each of the Scots Guards and Royal Engineers. The 1st battalion/7th Duke of Edinburgh’s Own Gurkha Rifles lost one man killed.

Two more British deaths may be attributed to Operation Corporate, bringing the total to 260:

  • Captain Brian Biddick from SS Uganda underwent an emergency operation on the voyage to the Falklands. Later he was repatriated by an RAF medical flight to the hospital at Wroughton where he died on 12 May.[114]
  • Paul Mills from HMS Coventry suffered from complications from a skull fracture sustained in the sinking of his ship and died on 29 March 1983; he is buried in his home town of Swavesey.[115]

There were 1,188 Argentine and 777 British non-fatal casualties.

Further information about the field hospitals and hospital ships is at Ajax Bay and List of hospitals and hospital ships of the Royal Navy. On the Argentine side beside the Military Hospital at Port Stanley, the Argentine Air Force Mobile Field Hospital was deployed at Comodoro Rivadavia.

Red Cross Box[edit]

Before British offensive operations began, the British and Argentine governments agreed to establish an area on the high seas where both sides could station hospital ships without fear of attack by the other side. This area, a circle 20 nautical miles in diameter, was referred to as the Red Cross Box (

 WikiMiniAtlas

48°30′S 53°45′W / 48.500°S 53.750°W / -48.500; -53.750), about 45 miles (72 km) north of Falkland Sound). Ultimately, the British stationed four ships (HMS Hydra, HMS Hecla and HMS Herald and the primary hospital ship Uganda) within the box, while the Argentinians stationed three (Almirante Irizar, Bahia Paraiso and Puerto Deseado).

Hecla at HM Naval Base Gibraltar, during conversion to a hospital ship for service during the Falklands War

The hospital ships were non-warships converted to serve as hospital ships. The three British naval vessels were survey vessels and Uganda was a passenger liner. Almirante Irizar was an icebreaker, Bahia Paraiso was an Antarctic supply transport and Puerto Deseado was a survey ship. The British and Argentine vessels operating within the Box were in radio contact and there was some transfer of patients between the hospital ships. For example, the British hospital ship SS Uganda on four occasions transferred patients to an Argentinian hospital ship. The British naval hospital ships operated as casualty ferries, carrying casualties from both sides from the Falklands to Uganda and operating a shuttle service between the Red Cross Box and Montevideo.

Throughout the conflict officials of the International Committee of the Red Cross (ICRC) conducted inspections to verify that all concerned were abiding by the rules of the Geneva Convention. On 12 June, some personnel transferred from the Argentine hospital ship to the British ships by helicopter. Argentine naval officers also inspected the British casualty ferries in the estuary of the River Plate.

British casualty evacuation

Hydra worked with Hecla and Herald, to take casualties from Uganda to Montevideo, Uruguay, where a fleet of Uruguayan ambulances would meet them. RAF VC10 aircraft then flew the casualties to the UK for transfer to the Princess Alexandra Royal Air Force Hospital at RAF Wroughton, near Swindon.[citation needed]

Aftermath

This brief war brought many consequences for all the parties involved, besides the considerable casualty rate and large materiel loss, especially of shipping and aircraft, relative to the deployed military strengths of the opposing sides.

In the United Kingdom, Margaret Thatcher’s popularity increased. The success of the Falklands campaign was widely regarded as the factor in the turnaround in fortunes for the Conservative government, who had been trailing behind the SDP-Liberal Alliance in the opinion polls for months before the conflict began, but after the success in the Falklands the Conservatives returned to the top of the opinion polls by a wide margin and went on to win the following year’s general election by a landslide.[116] Subsequently, Defence Secretary Nott’s proposed cuts to the Royal Navy were abandoned.

The islanders subsequently had full British citizenship restored in 1983, their lifestyle improved by investments Britain made after the war and by the liberalisation of economic measures that had been stalled through fear of angering Argentina. In 1985, a new constitution was enacted promoting self-government, which has continued to devolve power to the islanders.

In Argentina, the Falklands War meant that a possible war with Chile was avoided. Further, Argentina returned to a democratic government in the 1983 general election, the first free general election since 1973. It also had a major social impact, destroying the military’s image as the “moral reserve of the nation” that they had maintained through most of the 20th century.

Various figures have been produced for the number of veterans who have committed suicide since the war. Some studies have estimated that 264 British veterans and 350–500 Argentine veterans have committed suicide since 1982.[117][118][119] However, a detailed study[120] of 21,432 British veterans of the war commissioned by the UK Ministry of Defence found that only 95 had died from “intentional self-harm and events of undetermined intent (suicides and open verdict deaths)”, a ratio no higher than that of the general population.[121]

Military analysis

Militarily, the Falklands conflict remains the largest air-naval combat operation between modern forces since the end of the Second World War. As such, it has been the subject of intense study by military analysts and historians. The most significant “lessons learned” include: the vulnerability of surface ships to anti-ship missiles and submarines, the challenges of co-ordinating logistical support for a long-distance projection of power, and reconfirmation of the role of tactical air power, including the use of helicopters.

In 1986, the BBC broadcast the Horizon programme, In the Wake of HMS Sheffield, which discussed lessons learned from the conflict—and measures since taken to implement them, such as stealth ships and close-in weapon systems.

Memorials

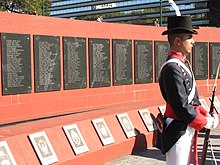
The Monumento a los Caídos en Malvinas (“Monument for the Fallen in the Falklands”) in Plaza San Martín, Buenos Aires; a member of the historic Patricios regiment stands guard.[nb 8]

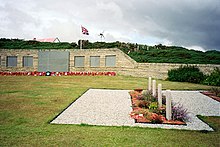
In addition to memorials on the islands, there is a memorial in the crypt of St Paul’s Cathedral, London to the British war dead.[122] In Argentina, there is a memorial at Plaza San Martín in Buenos Aires,[123] another one in Rosario, and a third one in Ushuaia.

During the war, British dead were put into plastic body bags and buried in mass graves. After the war, the bodies were recovered; 14 were reburied at Blue Beach Military Cemetery and 64 were returned to Britain.

Many of the Argentine dead are buried in the Argentine Military Cemetery west of the Darwin Settlement. The government of Argentina declined an offer by Britain to have the bodies repatriated to the mainland.[124]

Minefields

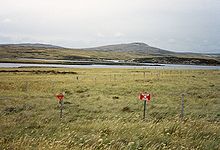
Although some minefields have been cleared, a substantial number of them still exist in the islands, such as this one at Port William on East Falkland.

As of 2011, there were 113 uncleared minefields on the Falkland Islands and unexploded ordnance (UXOs) covering an area of 13 km2 (5.0 sq mi). Of this area, 5.5 km2 (2.1 sq mi) on the Murrell Peninsula were classified as being “suspected minefields” – the area had been heavily pastured for the previous 25 years without incident. It was estimated that these minefields had 20,000 anti-personnel mines and 5,000 anti-tank mines. No human casualties from mines or UXO have been reported in the Falkland Islands since 1984, and no civilian mine casualties have ever occurred on the islands. The UK reported six military personnel were injured in 1982 and a further two injured in 1983. Most military accidents took place while clearing the minefields in the immediate aftermath of the 1982 conflict or in the process of trying to establish the extent of the minefield perimeters, particularly where no detailed records existed.

On 9 May 2008, the Falkland Islands Government asserted that the minefields, which represent 0.1% of the available farmland on the islands “present no long term social or economic difficulties for the Falklands,” and that the impact of clearing the mines would cause more problems than containing them. However, the British Government, in accordance with its commitments under the Mine Ban Treaty has a commitment to clear the mines by the end of 2019. [125][126] In May 2012, it was announced that 3.7 km2 (1.4 sq mi) of Stanley Common (which lies between the Stanley – Mount Pleasant road and the shoreline) was made safe and had been opened to the public, opening up a 3-kilometre (1.9 mi) stretch of coastline and a further two kilometres of shoreline along Mullet’s Creek.[127]

Press and publicity

Argentina

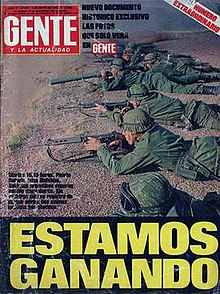
Gente‍ ’​s “Estamos ganando” headline (“We’re winning”)

Selected war correspondents were regularly flown to Port Stanley in military aircraft to report on the war. Back in Buenos Aires, newspapers and magazines faithfully reported on “the heroic actions of the largely conscript army and its successes”.[17]

Officers from the intelligence services were attached to the newspapers and ‘leaked’ information confirming the official communiqués from the government. The glossy magazines Gente and Siete Días swelled to 60 pages with colour photographs of British warships in flames – many of them faked – and bogus eyewitness reports of the Argentine commandos’ guerrilla war on South Georgia (6 May) and an already dead Pucará pilot’s attack on HMS Hermes[17] (Lt. Daniel Antonio Jukic had been killed at Goose Green during a British air strike on 1 May). Most of the faked photos actually came from the tabloid press. One of the best remembered headlines was “Estamos ganando” (“We’re winning”) from the magazine Gente, that would later use variations of it.[128]

The Argentine troops on the Falkland Islands could read Gaceta Argentina—a newspaper intended to boost morale among the servicemen. Some of its untruths could easily be unveiled by the soldiers who recovered corpses.[129]

The Malvinas course united the Argentines in a patriotic atmosphere that protected the junta from critics, and even opponents of the military government supported Galtieri; Ernesto Sabato said: “Don’t be mistaken, Europe; it is not a dictatorship who is fighting for the Malvinas, it is the whole Nation. Opponents of the military dictatorship, like me, are fighting to extirpate the last trace of colonialism.”[130] The Madres de Plaza de Mayo were even exposed to death threats from ordinary people.[17]

HMS Invincible was repeatedly sunk in the Argentine press,[131] and on 30 April 1982 the Argentine magazine Tal Cual showed Prime Minister Thatcher with an eyepatch and the text: Pirate, witch and assassin. Guilty![132] Three British reporters sent to Argentina to cover the war from the Argentine perspective were jailed until the end of the war.[133]

United Kingdom

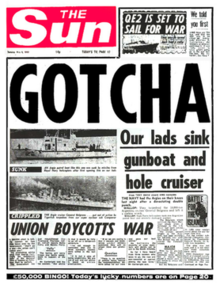
The Sun‍ ’​s “Gotcha” headline

Seventeen newspaper reporters, two photographers, two radio reporters and three television reporters with five technicians sailed with the Task Force to the war. The Newspaper Publishers’ Association selected them from among 160 applicants, excluding foreign media. The hasty selection resulted in the inclusion of two journalists among the war reporters who were interested only in Queen Elizabeth II’s son Prince Andrew, who was serving in the conflict.[134] The Prince flew a helicopter on multiple missions, including anti-surface warfare, Exocet missile decoy and casualty evacuation.

Merchant vessels had the civilian Inmarsat uplink, which enabled written telex and voice report transmissions via satellite. SS Canberra had a facsimile machine that was used to upload 202 pictures from the South Atlantic over the course of the war. The Royal Navy leased bandwidth on the US Defense Satellite Communications System for worldwide communications. Television demands a thousand times the data rate of telephone, but the Ministry of Defence was unsuccessful in convincing the US to allocate more bandwidth.[135]

TV producers suspected that the enquiry was half-hearted; since the Vietnam War television pictures of casualties and traumatised soldiers were recognised as having negative propaganda value. However, the technology only allowed uploading a single frame per 20 minutes – and only if the military satellites were allocated 100% to television transmissions. Videotapes were shipped to Ascension Island, where a broadband satellite uplink was available, resulting in TV coverage being delayed by three weeks.[135]

The press was very dependent on the Royal Navy, and was censored on site. Many reporters in the UK knew more about the war than those with the Task Force.[135]

The Royal Navy expected Fleet Street to conduct a Second World War-style positive news campaign[136] but the majority of the British media, especially the BBC, reported the war in a neutral fashion.[137] These reporters referred to “the British troops” and “the Argentinian troops” instead of “our lads” and the “Argies”.[138] The two main tabloid papers presented opposing viewpoints: The Daily Mirror was decidedly anti-war, whilst The Sun became well known for headlines such as “Stick It Up Your Junta!,” which, along with the reporting in other tabloids,[139] led to accusations of xenophobia[131] [139][140] and jingoism.[131] [140][141][142] The Sun was condemned for its “Gotcha” headline following the sinking of the ARA General Belgrano.[143][144][145]

Cultural impact

There were wide-ranging influences on popular culture in both the UK and Argentina, from the immediate postwar period to the present. The then elderly Argentinian writer Jorge Luis Borges described the war as “a fight between two bald men over a comb”.[146] The words yomp and Exocet entered the British vernacular as a result of the war. The Falklands War also provided material for theatre, film and TV drama and influenced the output of musicians. In Argentina, the military government banned the broadcasting of music in the English language, giving way to the rise of local rock musicians.[147]

The Great Famine – Part 1 & 2

 “Great Irish Famine” redirects here. For the 1740–41 famine, see Irish Famine (1740–41).
Great Famine

The Great Famine – Part 1

The Great Famine – Part 2


an Gorta Mór
Skibbereen by James Mahony, 1847.JPG

Scene at Skibbereen during the Great Famine, by Cork artist James Mahony (1810–1879), commissioned by The Illustrated London News, 1847.
Country United Kingdom of Great Britain and Ireland
Location Ireland
Period 1845–1852
Total deaths 1 million
Observations Policy failure, potato blight, Corn Laws, British Anti-Catholicism
Relief see below
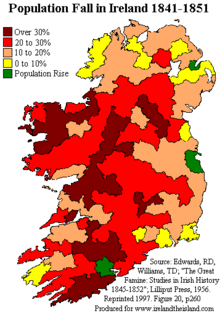
Impact on demographics Population fell by 20–25% due to mortality and emigration
Consequences Permanent change in the country’s demographic, political and cultural landscape
Website List of memorials to the Great Famine
Preceded by Irish Famine (1740–1741)
Succeeded by Irish Famine, 1879 (An Gorta Beag)

The Great Famine (Irish: an Gorta Mór) or the Great Hunger was a period of mass starvation, disease and emigration in Ireland between 1845 and 1852.[1] It is sometimes referred to, mostly outside Ireland, as the Irish Potato Famine because about two-fifths of the population was solely reliant on this cheap crop for a number of historical reasons.[2][3] During the famine approximately 1 million people died and a million more emigrated from Ireland,[4] causing the island’s population to fall by between 20% and 25%.[5]

The proximate cause of famine was a potato disease commonly known as potato blight,[6] which ravaged potato crops throughout Europe during the 1840s. However the impact in Ireland was disproportionate as one third of the population was dependent on the potato for a range of ethnic, religious, political, social and economic reasons, such as land acquisition, absentee landlords and the Corn Laws, which all contributed to the disaster to varying degrees and remain the subject of intense historical debate.

The famine was a watershed in the history of Ireland.[1] Its effects permanently changed the island’s demographic, political and cultural landscape. For both the native Irish and those in the resulting diaspora, the famine entered folk memory[fn 1] and became a rallying point for various Home rule and United Ireland movements, as the whole island was then part of the United Kingdom of Great Britain and Ireland.

The massive famine soured the already strained relations between many of the Irish people and the British Crown, heightening Irish republicanism, which eventually led to Irish independence in the next century. Modern historians regard it as a dividing line in the Irish historical narrative, referring to the preceding period of Irish history as “pre-Famine”.

Causes and contributing factors

Starting in 1801, Ireland had been directly governed, under the Act of Union, as part of the United Kingdom. Executive power lay in the hands of the Lord Lieutenant of Ireland and Chief Secretary for Ireland, both of whom were appointed by the British government. Ireland sent 105 members of parliament to the House of Commons of the United Kingdom, and Irish representative peers elected 28 of their own number to sit for life in the House of Lords. Between 1832 and 1859, 70% of Irish representatives were landowners or the sons of landowners.[8]

In the 40 years that followed the union, successive British governments grappled with the problems of governing a country which had, as Benjamin Disraeli put it in 1844, “a starving population, an absentee aristocracy, and an alien Church, and in addition the weakest executive in the world.”[9] One historian calculated that between 1801 and 1845, there had been 114 commissions and 61 special committees enquiring into the state of Ireland and that “without exception their findings prophesied disaster; Ireland was on the verge of starvation, her population rapidly increasing, three-quarters of her labourers unemployed, housing conditions appalling and the standard of living unbelievably low.”[10]

Laws that restricted the rights of Irish Catholics

In the 17th and 18th centuries, Irish Catholics had been prohibited by the penal laws from purchasing or leasing land, from voting, from holding political office, from living in or within 5 miles (8 km) of a corporate town, from obtaining education, from entering a profession, and from doing many other things necessary for a person to succeed and prosper in society. The laws had largely been reformed by 1793, and in 1829, Irish Catholics could again sit in parliament following the Act of Emancipation.[11]

Landlords and tenants

During the 18th century, the “middleman system” for managing landed property was introduced. Rent collection was left in the hands of the landlords’ agents, or middlemen. This assured the landlord of a regular income, and relieved them of any responsibility; the tenants however were subject to exploitation by the middlemen.[12]

Catholics made up 80% of the population, the bulk of whom lived in conditions of poverty and insecurity despite Catholic emancipation in 1829. At the top of the “social pyramid” was the “ascendancy class“, the English and Anglo-Irish families who owned most of the land, and who had more or less limitless power over their tenants. Some of their estates were vast: the Earl of Lucan owned over 60,000 acres (240 km2). Many of these landlords lived in England and were called “absentee landlords“. The rent revenue was sent to England,[13] collected from “impoverished tenants” who were paid minimal wages to raise crops and livestock for export.[14]

In 1843, the British Government considered that the land question in Ireland was the root cause of disaffection in the country. They set up a Royal Commission, chaired by the Earl of Devon, to enquire into the laws regarding the occupation of land. Daniel O’Connell described this commission as “perfectly one-sided”, being made up of landlords and no tenants.[15] Devon reported in February 1845 that “It would be impossible adequately to describe the privations which they [the Irish labourer and his family] habitually and silently endure … in many districts their only food is the potato, their only beverage water … their cabins are seldom a protection against the weather … a bed or a blanket is a rare luxury … and nearly in all their pig and a manure heap constitute their only property.”[16] The Commissioners concluded that they could not “forbear expressing our strong sense of the patient endurance which the labouring classes have exhibited under sufferings greater, we believe, than the people of any other country in Europe have to sustain.”[16]

The Commission stated that bad relations between landlord and tenant were principally responsible. There was no hereditary loyalty, feudal tie or paternalism as existed in England. Ireland was a conquered country. The Earl of Clare said of the landlords, “confiscation is their common title.”[17] According to the historian Cecil Woodham-Smith, the landlords regarded the land as a source of income from which to extract as much money as possible. With the Irish “brooding over their discontent in sullen indignation” according to the Earl of Clare, Ireland was seen as a hostile place in which to live, and as a consequence absentee landlords were common, with some visiting their property once or twice in a lifetime, if ever.[17] The rents from Ireland were then spent elsewhere; an estimated £6,000,000 was remitted out of Ireland in 1842.[17]

According to Woodham-Smith, the ability of the middlemen was measured by the amount of money they could contrive to extract.[12] They were described in evidence before the Commission as “land sharks”, “bloodsuckers” and “the most oppressive species of tyrant that ever lent assistance to the destruction of a country”.[12]

The middlemen leased large tracts of land from the landlords on long leases with fixed rents, which they then sublet as they saw fit. They split the holding into smaller and smaller parcels to increase the amount of rent they could obtain. Tenants could be evicted for reasons such as non-payment of rents (which were high), or if the landlord decided to raise sheep instead of grain crops. The cottier paid his rent by working for the landlord.[18] Any improvements made on the holdings by the tenants became the property of the landlords when the lease expired or was terminated, which acted as a disincentive to improvements. The tenants had no security of tenure on the land; being tenants “at will” they could be turned out whenever the landlord chose. This class of tenant made up the majority of tenant farmers in Ireland, the exception being in Ulster where, under a practice known as “tenant right”, tenants were compensated for any improvements made to their holdings. The commission according to Woodham-Smith stated that “the superior prosperity and tranquility of Ulster, compared with the rest of Ireland, were due to tenant right.”[12]

Landlords in Ireland often used their powers without remorse, and the people lived in dread of them. In these circumstances, Woodham-Smith writes “industry and enterprise were extinguished and a peasantry created which was one of the most destitute in Europe.”[16]

Tenants, subdivisions, and bankruptcy

In 1845, 24% of all Irish tenant farms were of 0.4–2 hectares (1–5 acres) in size, while 40% were of 2–6 hectares (5–15 acres). Holdings were so small that no crop other than potatoes would suffice to feed a family, nor could ranching be a possibility due to the limited land. The British government reported, shortly before the famine, that poverty was so widespread that one-third of all Irish small holdings could not support their families, after paying their rent, except by earnings of seasonal migrant labour in England and Scotland.[19] Following the famine, reforms were implemented making it illegal to further divide land holdings.[20]

The 1841 census showed a population of just over eight million. Two-thirds of those depended on agriculture for their survival, but they rarely received a working wage. They had to work for their landlords in return for the patch of land they needed to grow enough food for their own families. This was the system which forced Ireland and its peasantry into monoculture since only the potato could be grown in sufficient quantity. The rights to a plot of land in Ireland could mean the difference between life and death in the early 19th century.[14]

Potato dependency

The potato was introduced to Ireland as a garden crop of the gentry. By the late 17th century, it had become widespread as a supplementary rather than a principal food because the main diet still revolved around butter, milk, and grain products. In the first two decades of the 18th century, however, it became a base food of the poor, especially in winter.[21] Furthermore, a disproportionate share of the potatoes grown in Ireland were of a single variety, the Irish Lumper.[22] The expansion of the economy between 1760 and 1815 saw the potato make inroads into the diet of the people and become a staple food year round for farmers.[23] The large dependency on this single crop, and the lack of genetic variability among the potato plants in Ireland, were two of the reasons why the emergence of Phytophthora infestans had such devastating effects in Ireland and less severe effects elsewhere in Europe.[24]

The potato’s spread was essential to the development of the cottier system, supporting an extremely cheap workforce, but at the cost of lower living standards. For the labourer, it was essentially a potato wage that shaped the expanding agrarian economy.[23]

The expansion of tillage led to an inevitable expansion of the potato acreage and an expansion of peasant farmers. By 1841, there were over half a million peasant farmers, with 1.75 million dependants. The principal beneficiary of this system was the English consumer.[23]

The Celtic grazing lands of… Ireland had been used to pasture cows for centuries. The British colonised… the Irish, transforming much of their countryside into an extended grazing land to raise cattle for a hungry consumer market at home… The British taste for beef had a devastating impact on the impoverished and disenfranchised people of… Ireland… pushed off the best pasture land and forced to farm smaller plots of marginal land, the Irish turned to the potato, a crop that could be grown abundantly in less favorable soil. Eventually, cows took over much of Ireland, leaving the native population virtually dependent on the potato for survival.[25]

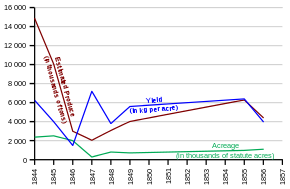
Potato production during the Great Famine.[26] Note: years 1844, 1845, 1846, and 1848 are extrapolated.

The potato was also used extensively as a fodder crop for livestock immediately prior to the famine. Approximately 33% of production, amounting to 5,000,000 short tons (4,500,000 t), was normally used in this way.[27]

Blight in Ireland

Prior to the arrival in Ireland of the disease Phytophthora infestans, commonly known as blight, there were only two main potato plant diseases.[28] One was called “dry rot” or “taint” and the other was a virus, known popularly as “curl”.[28][29] Phytophthora infestans is an oomycete (a variety of parasitic, non-photosynthetic algae, and not a fungus).[30]

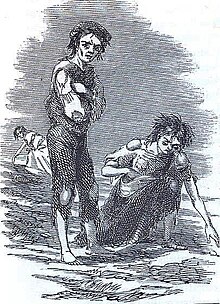
An 1849 depiction of Bridget O’Donnell and her two children during the famine.

In 1851, the Census of Ireland Commissioners recorded 24 failures of the potato crop going back to 1728, of varying severity. General crop failures, through disease or frost, were recorded in 1739, 1740, 1770, 1800, and 1807. In 1821 and 1822, the potato crop failed in Munster and Connaught. In 1830 and 1831, Mayo, Donegal, and Galway suffered likewise. In 1832, 1833, 1834 and 1836, dry rot and curl caused serious losses, and in 1835, the potato failed in Ulster. Widespread failures throughout Ireland occurred in 1836, 1837, 1839, 1841 and 1844. According to Woodham-Smith, “the unreliability of the potato was an accepted fact in Ireland.”[31]

How and when the blight Phytophthora infestans arrived in Europe is still uncertain; however, it almost certainly was not present prior to 1842, and probably arrived in 1844.[32] The origin of the pathogen has been traced to Toluca Valley of Mexico,[33] whence it spread first within North America and then to Europe.[32] The 1845–46 blight was caused by the HERB-1 strain of the blight.[34]

In 1844, Irish newspapers carried reports concerning a disease which for two years had attacked the potato crops in America.[35] A likely source was the eastern United States, where in 1843 and 1844 blight largely destroyed the potato crops. Ships from Baltimore, Philadelphia, or New York City could have brought diseased potatoes to European ports.[36] W. C. Paddock suggests that it was transported on potatoes being carried to feed passengers on clipper ships sailing from America to Ireland.[30]

Once introduced, it spread rapidly. By mid-August 1845, it had reached much of northern and central Europe; Belgium, The Netherlands, northern France and southern England had all been stricken.[37]

On 16 August 1845, the Gardeners’ Chronicle and Horticultural Gazette reported “a blight of unusual character” in the Isle of Wight. A week later, on 23 August, it reported that “A fearful malady has broken out among the potato crop … In Belgium the fields are said to be completely desolated. There is hardly a sound sample in Covent Garden market … As for cure for this distemper, there is none.”[38] These reports were extensively covered in Irish newspapers.[39] On 11 September the Freeman’s Journal reported on “the appearance of what is called “cholera” in potatoes in Ireland, especially in the north.”[40] On 13 September[fn 2] the Gardeners’ Chronicle announced: “We stop the Press with very great regret to announce that the potato Murrain has unequivocally declared itself in Ireland.”[38] Nevertheless, the British government remained optimistic over the next few weeks, as it received conflicting reports. Only when the crop was lifted in October did the scale of destruction become apparent.[41] Prime Minister Sir Robert Peel wrote to Sir James Graham in mid-October that he found the reports “very alarming”, but reminded him that there was, according to Woodham-Smith, “always a tendency to exaggeration in Irish news”.[42]

Crop loss in 1845 has been estimated at anywhere from one third[6] to as high as one half of cultivated acreage.[39] The Mansion House Committee in Dublin, to which hundreds of letters were directed from all over Ireland, claimed on 19 November 1845 to have ascertained beyond the shadow of doubt that “considerably more than one-third of the entire of the potato crop… has been already destroyed”.[37]

In 1846, three-quarters of the harvest was lost to blight.[43] By December, a third of a million destitute people were employed in public works.[44] According to Cormac Ó Gráda the first attack of potato blight caused considerable hardship in rural Ireland, from the autumn of 1846, when the first deaths from starvation were recorded.[45] Seed potatoes were scarce in 1847. Little had been sown, so despite average yields, hunger continued. 1848 yields would be only two-thirds of normal. Since over three million Irish people were totally dependent on potatoes for food, hunger and famine were inevitable.[43]

Reaction in Ireland

The Corporation of Dublin sent a memorial to the Queen, “praying her” to call Parliament together early (Parliament was at this time prorogued), and to recommend the requisition of some public money for public works, especially railways in Ireland. The Town Council of Belfast met and made similar suggestions, but neither body asked for charity, according to Mitchel. “They demanded that, if Ireland was indeed an Integral part of the realm, the common exchequer of both islands should be used—not to give alms, but to provide employment on public works of general utility.” It was Mitchel’s opinion that “if Yorkshire and Lancashire had sustained a like calamity in England, there is no doubt such measures as these would have been taken, promptly and liberally.”[46]

In early November 1845, a deputation from the citizens of Dublin, including the Duke of Leinster, Lord Cloncurry, Daniel O’Connell, and the Lord Mayor, went to the Lord Lieutenant of Ireland, Lord Heytesbury, to offer suggestions, such as opening the ports to foreign corn, stopping distillation from grain, prohibiting the export of foodstuffs, and providing employment through public works.[47] Lord Heytesbury told them not to be alarmed, that they “were premature”, that scientists were enquiring into all those matters,[fn 3] and that the Inspectors of Constabulary and Stipendiary Magistrates were charged with making constant reports from their districts; and there was no “immediate pressure on the market”.[46]

On 8 December 1845, Daniel O’Connell, in the Repeal Association, proposed the following remedies to the pending disaster. One of the first things he suggested was the introduction of “Tenant-Right” as practised in Ulster, giving the landlord a fair rent for his land, but giving the tenant compensation for any money he might have laid out on the land in permanent improvements.[49]

O’Connell then pointed out the means used by the Belgian legislature during the same season: shutting their ports against the export of provisions, but opening them to imports. He suggested that if Ireland had a domestic Parliament the ports would be thrown open and the abundant crops raised in Ireland would be kept for the people of Ireland. O’Connell maintained that only an Irish parliament would provide for the people both food and employment, saying that a repeal of the Act of Union was a necessity and Ireland’s only hope.[49]

John Mitchel, one of the leading Repealers, raised the issue of the “Potato Disease” in Ireland as early as 1844 in The Nation, noting how powerful an agent hunger had been in certain revolutions.[50][non-primary source needed] On 14 February 1846, he put forward his views on “the wretched way in which the famine was being trifled with”, and asked, had not the Government even yet any conception that there might be soon “millions of human beings in Ireland having nothing to eat.”[51]

On 28 February, writing on the Coercion Bill, which was then going through the House of Lords, he noted that this was the only kind of legislation that was sure to meet with no obstruction in the British House of Commons. His view was that however the government may differ about feeding the Irish people, “they agree most cordially in the policy of taxing, prosecuting and ruining them”[52][non-primary source needed] (as it happened, the bill was subsequently defeated, and Peel’s government fell).

In an article on “English Rule” on 7 March, Mitchel wrote that the Irish People were “expecting famine day by day” and they attributed it collectively, not to “the rule of heaven as to the greedy and cruel policy of England.” He continued in the same article to write that the people “believe that the season as they roll are but ministers of England’s rapacity; that their starving children cannot sit down to their scanty meal but they see the harpy claw of England in their dish.” The people, Mitchel wrote, watched as their “food melting in rottenness off the face of the earth,” all the while watching “heavy-laden ships, freighted with the yellow corn their own hands have sown and reaped, spreading all sail for England.” [53][non-primary source needed]

Mitchel later wrote one of the first widely circulated tracts on the famine, The Last Conquest of Ireland (Perhaps) in 1861. It established the widespread view that the treatment of the famine by the British was a deliberate murder of the Irish and contained the famous phrase:

The Almighty, indeed, sent the potato blight, but the English created the Famine.[54]

Mitchel was charged with sedition because of his writings, but this charge was dropped and he was convicted by a packed jury under the newly enacted Treason Felony Act and sentenced to 14 years transportation to Bermuda.[55]

The Nation according to Charles Gavan Duffy, insisted that the one remedy was that which the rest of Europe had adopted, which even the parliaments of the Pale had adopted in periods of distress, which was to retain in the country the food raised by her people till the people were fed.[56]

Ireland at this time was, according to the Act of Union of 1801, an integral part of the British imperial homeland, “the richest empire on the globe,” and was “the most fertile portion of that empire,” in addition; Ireland was sheltered by both “… Habeas corpus and trial by jury …”.[57] And yet Ireland’s elected representatives seemed powerless to act on the country’s behalf as Members of the British Parliament. Commenting on this at the time John Mitchel wrote: “That an island which is said to be an integral part of the richest empire on the globe … should in five years lose two and a half millions of its people (more than one fourth) by hunger, and fever the consequence of hunger, and flight beyond sea to escape from hunger …”[57] The period of the potato blight in Ireland from 1845 to 1851 was full of political confrontation.[8] A more radical Young Ireland group seceded from the Repeal movement in July 1846 and attempted an armed rebellion in the Young Irelander Rebellion of 1848. It was unsuccessful.[58]

In 1847, William Smith O’Brien, the leader of the Young Ireland party, became one of the founding members of the Irish Confederation[59] to campaign for a Repeal of the Act of Union, and called for the export of grain to be stopped and the ports closed.[60] The following year he organised the resistance of landless farmers in County Tipperary against the landowners and their agents.

Government response

F. S. L. Lyons characterised the initial response of the British government to the early less severe phase of the famine as “prompt and relatively successful”.[61] Confronted by widespread crop failure in November 1845, Prime Minister Sir Robert Peel purchased £100,000 worth of maize and cornmeal secretly from America.[62] Baring Brothers initially acted as agents for the Prime Minister. The government hoped that they would not “stifle private enterprise” and that their actions would not act as a disincentive to local relief efforts. Due to weather conditions, the first shipment did not arrive in Ireland until the beginning of February 1846.[63] The initial shipments were of unground dried kernels and the few Irish mills in operation were not equipped for milling maize. A long and complicated milling process had to be adopted before the meal could be distributed.[64] In addition, before the cornmeal could be consumed, it had to be ‘very much’ cooked again, or eating it could result in severe bowel complaints.[63] Because of its yellow colour, and initial unpopularity, it became known as ‘Peel’s brimstone’.[65]

In October 1845, Peel moved to repeal the Corn Laws, tariffs on grain which kept the price of bread artificially high, but the issue split his party and he had insufficient support from his own colleagues to push the measure through. He resigned the premiership in December, but the opposition was unable to form a government and he was re-appointed.[66] In March, Peel set up a programme of public works in Ireland[67] but the famine situation worsened during 1846 and the repeal of the Corn Laws in that year did little to help the starving Irish; the measure split the Conservative Party, leading to the fall of Peel’s ministry.[68] On 25 June, the second reading of the government’s Irish Coercion Bill was defeated by 73 votes in the House of Commons by a combination of Whigs, Radicals, Irish Repealers and protectionist Conservatives. Peel was forced to resign as prime minister on 29 June, and the Whig leader, Lord John Russell, assumed the seals of office.[69]

The measures undertaken by Peel’s successor, Russell, proved comparatively inadequate as the crisis deepened. The new Whig administration, influenced by the doctrine of laissez-faire,[70] believed that the market would provide the food needed and refused to intervene against food exports to England, then halted the previous government’s food and relief works, leaving many hundreds of thousands of people without any work, money or food.[71] Russell’s ministry introduced a new programme of public works, which by the end of December 1846 employed some half million Irish and proved impossible to administer.[72] Charles Trevelyan, who was in charge of the administration of government relief, limited the Government’s food aid programme because of a firm belief in laissez-faire.[73] He thought “the judgement of God sent the calamity to teach the Irish a lesson”. For his policy, he was commemorated in the song “The Fields of Athenry“. The Public Works were “strictly ordered” to be unproductive—that is, they would create no fund to repay their own expenses. Many hundreds of thousands of “feeble and starving men” according to John Mitchel, were kept digging holes, and breaking up roads, which was doing no service.[74]

A memorial to the victims of the Doolough Tragedy (30 March 1849). To continue receiving relief, hundreds were instructed to travel many miles in bad weather. A large number died on the journey.

In January 1847, the government abandoned this policy, realizing it had failed, and turned to a mixture of “indoor” and “outdoor” direct relief; the former administered in workhouses through the Irish Poor Laws, the latter through soup kitchens. The costs of the Poor Law fell primarily on the local landlords, who in turn attempted to reduce their liability by evicting their tenants.[72] This was then facilitated through the “Cheap Ejectment Acts”.[74] The poor law amendment act was passed in June 1847. It embodied the principle popular in Britain, that Irish property must support Irish poverty. The landed proprietors in Ireland were held in Britain to have created the conditions that led to the famine. [75][76] It was asserted however, that the British parliament since the Act of Union of 1800 was partly to blame.[75] This point was raised in The Illustrated London News on 13 February 1847, “There was no law it would not pass at their request, and no abuse it would not defend for them.” On 24 March The Times reported that Britain had permitted in Ireland “a mass of poverty, disaffection, and degradation without a parallel in the world. It allowed proprietors to suck the very life-blood of that wretched race.”[75]

The “Gregory clause” of the Poor Law prohibited anyone who held at least 14 of an acre from receiving relief.[72] This in practice meant that if a farmer, having sold all his produce to pay rent and taxes, should be reduced, as many thousands of them were, to applying for public outdoor relief, he would not get it until he had first delivered up all his land to the landlord. Of this Law Mitchel wrote “it is the able-bodied idler only who is to be fed—if he attempted to till but one rood of ground, he dies.” This simple method of ejectment was called “passing paupers through the workhouse”—a man went in, a pauper came out.[74] These factors combined to drive thousands of people off the land: 90,000 in 1849, and 104,000 in 1850.[72]

Irish food exports during Famine

Records show Irish lands exported food even during the worst years of the Famine. When Ireland had experienced a famine in 1782–83, ports were closed to keep Irish-grown food in Ireland to feed the Irish. Local food prices promptly dropped. Merchants lobbied against the export ban, but government in the 1780s overrode their protests.[77] No such export ban happened in the 1840s.[78]

Throughout the entire period of the Famine, Ireland was exporting enormous quantities of food. In Ireland before and after the famine, Cormac O’Grada points out, “Although the potato crop failed, the country was still producing and exporting more than enough grain crops to feed the population. But that was a ‘money crop’ and not a ‘food crop’ and could not be interfered with.”[79]

In History Ireland magazine (1997, issue 5, pp. 32–36), Christine Kinealy, a Great Hunger scholar, lecturer, and Drew University professor, relates her findings: Almost 4,000 vessels carried food from Ireland to the ports of Bristol, Glasgow, Liverpool and London during 1847, when 400,000 Irish men, women and children died of starvation and related diseases. She also writes that Irish exports of calves, livestock (except pigs), bacon and ham actually increased during the Famine. This food was shipped under British military guard from the most famine-stricken parts of Ireland; Ballina, Ballyshannon, Bantry, Dingle, Killala, Kilrush, Limerick, Sligo, Tralee and Westport. A wide variety of commodities left Ireland during 1847, including peas, beans, onions, rabbits, salmon, oysters, herring, lard, honey, tongues, animal skins, rags, shoes, soap, glue and seed. The most shocking export figures concern butter. Butter was shipped in firkins, each one holding 9 imperial gallons; 41 litres. In the first nine months of 1847, 56,557 firkins (509,010 imperial gallons; 2,314,000 litres) were exported from Ireland to Bristol, and 34,852 firkins (313,670 imperial gallons; 1,426,000 litres) were shipped to Liverpool, which correlates with 822,681 imperial gallons (3,739,980 litres) of butter exported to England from Ireland during nine months of the worst year of the Famine.[80] The problem in Ireland was not lack of food, which was plentiful, but the price of it, which was beyond the reach of the poor.[81]

Cecil Woodham-Smith, an authority on the Irish Famine, wrote in The Great Hunger: Ireland 1845-1849 that no issue has provoked so much anger and embittered relations between England and Ireland “as the indisputable fact that huge quantities of food were exported from Ireland to England throughout the period when the people of Ireland were dying of starvation.”[82] John Ranelagh claims Ireland remained a net exporter of food throughout most of the five-year famine.[83] However, Woodham-Smith claims that in addition to the maize imports, four times as much wheat was imported into Ireland at the height of the famine as exported.[84]

Charity

Further information: Souperism

William Smith O’Brien, speaking on the subject of charity in a speech to the Repeal Association, February 1845, applauded the fact that the universal sentiment on the subject of charity was that they would accept no English charity. He expressed the view that the resources of this country were still abundantly adequate to maintain the population and that until those resources had been utterly exhausted, he hoped that there was no one in “Ireland who will so degrade himself as to ask the aid of a subscription from England”.[46]

Mitchel wrote in his The Last Conquest of Ireland (Perhaps), on the same subject, that no one from Ireland ever asked for charity during this period, and that it was England who sought charity on Ireland’s behalf, and, having received it, was also responsible for administering it. He suggested that it has been carefully inculcated by the British Press, “that the moment Ireland fell into distress, she became an abject beggar at England’s gate, and that she even craved alms from all mankind.” He affirmed that in Ireland no one ever asked alms or favours of any kind from England or any other nation, but that it was England herself that begged for Ireland. He suggested that it was England that “sent ’round the hat over all the globe, asking a penny for the love of God to relieve the poor Irish,” and constituting herself the agent of all that charity, took all the profit of it.[49]

Large sums of money were donated by charities; Calcutta is credited with making the first donation of £14,000. The money was raised by Irish soldiers serving there and Irish people employed by the East India Company.[85] Pope Pius IX sent funds and Queen Victoria donated £2,000.

In addition to the religious, non-religious organisations came to the assistance of famine victims. The British Relief Association was one such group. Founded on 1 January 1847 by Lionel de Rothschild, Abel Smith, and other prominent bankers and aristocrats, the Association raised money throughout England, America and Australia; their funding drive benefited by a “Queen’s Letter”, a letter from Queen Victoria appealing for money to relieve the distress in Ireland.[86] With this initial letter the Association raised £171,533. A second, somewhat less successful “Queen’s Letter” was issued in late 1847.[86] In total, the Association raised approximately £390,000 for Irish relief.[87]

Private initiatives such as the Central Relief Committee of the Society of Friends (Quakers) attempted to fill the gap caused by the end of government relief and eventually the government reinstated the relief works, although bureaucracy slowed the release of food supplies.[88] Thousands of dollars were raised in the United States, including $170 collected from a group of Native American Choctaws in 1847.[89] “It had been just 16 years since the Choctaw people had experienced the Trail of Tears, and they had faced starvation … It was an amazing gesture”, according to Judy Allen, editor of the Choctaw Nation of Oklahoma‘s newspaper, Biskinik. To mark the 150th anniversary, eight Irish people retraced the Trail of Tears,[90] and the donation was publicly commemorated by President Mary Robinson.

Eviction

Landlords were responsible for paying the rates of every tenant whose yearly rent was £4 or less. Landlords whose land was crowded with poorer tenants were now faced with large bills. They began clearing the poor tenants from their small plots, and letting the land in larger plots for over £4 which then reduced their debts. In 1846, there had been some clearances, but the great mass of evictions came in 1847.[91] According to James S. Donnelly Jr, it is impossible to be sure how many people were evicted during the years of the famine and its immediate aftermath. It was only in 1849 that the police began to keep a count, and they recorded a total of almost 250,000 persons as officially evicted between 1849 and 1854.[92]

Donnelly considered this to be an underestimate, and if the figures were to include the number pressured into “voluntary” surrenders during the whole period (1846–1854) the figure would almost certainly exceed half a million persons.[93] While Helen Litton says there were also thousands of “voluntary” surrenders, she notes also that there was “precious little voluntary about them.” In some cases, tenants were persuaded to accept a small sum of money to leave their homes, “cheated into believing the workhouse would take them in.”[91]

West Clare was one of the worst areas for evictions, where landlords turned thousands of families out and demolished their derisory cabins. Captain Kennedy in April 1848 estimated that 1,000 houses, with an average of six people to each, had been levelled since November.[94] The Mahon family of Strokestown House evicted 3,000 people in 1847, and were still able to dine on lobster soup.[95]

After Clare, the worst area for evictions was County Mayo, accounting for 10% of all evictions between 1849 and 1854. The Earl of Lucan, who owned over 60,000 acres (240 km2) was among the worst evicting landlords. He was quoted as saying ‘he would not breed paupers to pay priests’. Having turned out in the parish of Ballinrobe over 2,000 tenants alone, the cleared land he then used as grazing farms.[96] In 1848, the Marquis of Sligo owed £1,650 to Westport Union; he was also an evicting landlord, though he claimed to be selective, saying he was only getting rid of the idle and dishonest. Altogether, he cleared about 25% of his tenants.[97]

According to Litton, evictions might have taken place earlier but for fear of the secret societies. However they were now greatly weakened by the Famine. Revenge still occasionally took place, with seven landlords being shot, six fatally, during the autumn and winter of 1847. Ten other occupiers of land, though without tenants, were also murdered, she says.[98]

Lord Clarendon, alarmed that this might mean rebellion, asked for special powers. Lord John Russell was not sympathetic to this appeal. Lord Clarendon believed that the landlords themselves were mostly responsible for the tragedy in the first place, saying “It is quite true that landlords in England would not like to be shot like hares and partridges…but neither does any landlord in England turn out fifty persons at once and burn their houses over their heads, giving them no provision for the future.” The Crime and Outrage Act was passed in December 1847 as a compromise and additional troops were sent to Ireland.[99]

Under the notorious Gregory clause, described by Donnelly as a “vicious amendment to the Irish poor law, named after William H. Gregory, M.P.[fn 4] and commonly known as the quarter-acre clause, provided that no tenant holding more than a quarter-acre of land would be eligible for public assistance either in or outside the workhouse. This clause had been a successful Tory amendment to the Whig poor-relief bill which became law in early June 1847, where its potential as an estate-clearing device was widely recognised in parliament, though not in advance.[100] At first the poor law commissioners and inspectors viewed the clause as a valuable instrument for a more cost-effective administration of public relief, but the drawbacks soon became apparent, even from an administrative perspective. They would soon view them as little more than murderous from a humanitarian perspective. According to Donnelly it became obvious that the quarter-acre clause was “indirectly a death-dealing instrument.”[101]

Emigration

Emigrants Leave Ireland, engraving by Henry Doyle (1827–1893), from Mary Frances Cusack’s Illustrated History of Ireland, 1868.

While the famine was responsible for a significant increase in emigration from Ireland, of anywhere from 45% to nearly 85% depending on the year and the county, it was not the sole cause. Nor was it even the era when mass emigration from Ireland commenced. That can be traced to the middle of the 18th century, when some 250,000 people left Ireland over a period of 50 years to settle in the New World. From the defeat of Napoleon to the beginning of the famine, a period of 30 years, “at least 1,000,000 and possibly 1,500,000 emigrated”.[102] However, during the worst of the famine, emigration reached somewhere around 250,000 in one year alone, with far more emigrants leaving from western Ireland than any other part.[103]

Families did not migrate en masse but younger members of families did – so much so that emigration almost became a rite of passage, as evidenced by the data that show that, unlike similar emigration throughout world history, women emigrated just as often, just as early, and in the same numbers as men. The emigrant started a new life in a new land, sent remittances “[reaching] £1,404,000 by 1851”[104] back to his/her family in Ireland which, in turn, allowed another member of the family to emigrate.

Emigration during the famine years of 1845–1850 was to England, Scotland, South Wales, North America, and Australia.[105] By 1851, about a quarter of Liverpool‘s population was Irish-born. Many of those fleeing to the Americas used the well-established McCorkell Line.[106]

Of the more than 100,000 Irish that sailed to Canada in 1847, an estimated one out of five died from disease and malnutrition, including over 5,000 at Grosse Isle, Quebec, an island in the Saint Lawrence River used to quarantine ships near Quebec City.[107] Overcrowded, poorly maintained and badly provisioned vessels, known as coffin ships, sailed from small, unregulated harbours in the West of Ireland in contravention of British safety requirements and mortality rates were high.[108] The 1851 census reported that more than half the inhabitants of Toronto, Ontario were Irish, and in 1847 alone, 38,000 famine Irish flooded a city with fewer than 20,000 citizens. Other Canadian cities such as Saint John, New Brunswick; Quebec City and Montreal, Quebec; Ottawa, Kingston and Hamilton, Ontario also received large numbers since Canada, as part of the British Empire, could not close its ports to Irish ships (unlike the US), and they could get passage cheaply (or free in the case of tenant evictions) in returning empty lumber holds. However fearing nationalist insurgencies the British government placed harsh restrictions on Irish immigration to Canada after 1847 resulting in larger influxes to the US.

In America, most Irish became city-dwellers: with little money, many had to settle in the cities that the ships they came on landed in.[109] By 1850, the Irish made up a quarter of the population in Boston, New York City, Philadelphia and Baltimore. In addition, Irish populations became prevalent in some American mining communities.

A graph of the populations of Ireland [left axis] and Europe [right axis] indexed against date.

The famine marked the beginning of the depopulation of Ireland in the 19th century. Population had increased by 13–14% in the first three decades of the 19th century. Between 1831 and 1841, population grew by 5%. Application of Thomas Malthus‘s idea of population expanding geometrically, while resources increase arithmetically was popular during the famines of 1817 and 1822. By the 1830s they were seen as overly simplistic and Ireland’s problems were seen “less as an excess of population than as a lack of capital investment.”[110] The population of Ireland was increasing no faster than that of England, which suffered no equivalent catastrophe. By 1854, between 1.5 and 2 million Irish left their country due to evictions, starvation, and harsh living conditions.

Death toll

Population change in Ireland 1841–1851

It is not known exactly how many people died during the period of the famine, although it is believed more died from diseases than from starvation.[111] State registration of births, marriages or deaths had not yet begun, and records kept by the Roman Catholic Church are incomplete.[fn 5] One possible estimate has been reached by comparing the expected population with the eventual numbers in the 1850s. A census taken in 1841 recorded a population of 8,175,124. A census immediately after the famine in 1851 counted 6,552,385, a drop of over 1.5 million in 10 years. The census commissioners estimated that at the normal rate of increase the population in 1851 should have been just over 9 million.[113]

In 1851, the census commissioners collected information on the number who died in each family since 1841, the cause, season and year of death. They recorded 21,770 total deaths from starvation in the previous decade, and 400,720 deaths from disease. Listed diseases were fever, dysentery, cholera, smallpox and influenza; the first two being the main killers (222,021 and 93,232). The commissioners acknowledged that their figures were incomplete and that the true number of deaths was probably higher: “The greater the amount of destitution of mortality … the less will be the amount of recorded deaths derived through any household form; – for not only were whole families swept away by disease … but whole villages were effaced from off the land.” Later historians agree that the 1851 death tables “were flawed and probably under-estimated the level of mortality”.[114][115] The combination of institutional and figures provided by individuals gives “an incomplete and biased count” of fatalities during the famine.[116] Cormac Ó Gráda referencing the work of W. A. MacArthur,[117] writes that specialists have long known the Irish death tables were inaccurate.[118] As a result, Ó Gráda says that the tables undercount the number of deaths,[119] because information was gathered from surviving householders having to look back over the previous 10 years, and death and emigration had cleared away entire families, leaving few or no survivors to answer the census questions.

S. H. Cousens’ estimate of 800,000 deaths relied heavily on retrospective information contained in the 1851 census and elsewhere,[120] and is now regarded as too low.[121][122] Modern historian Joseph Lee says “at least 800,000”,[123] and R. F. Foster estimates that “at least 775,000 died, mostly through disease, including cholera in the latter stages of the holocaust”. He further notes that “a recent sophisticated computation estimates excess deaths from 1846 to 1851 as between 1,000,000 and 1,500,000 … after a careful critique of this, other statisticians arrive at a figure of 1,000,000.”[fn 6]

Joel Mokyr‘s estimates at an aggregated county level range from 1.1 million to 1.5 million deaths between 1846 and 1851. Mokyr produced two sets of data which contained an upper-bound and lower-bound estimate, which showed not much difference in regional patterns.[125][121] The true figure is likely to lie between the two extremes of half and one and a half million, and the most widely accepted estimate is one million.[126][127]

At least a million people are thought to have emigrated as a result of the famine.[4] There were about 1 million long-distance emigrants between 1846 and 1851, mainly to North America. The total given in the 1851 census is 967,908.[128] Short-distance emigrants, mainly to Britain, may have numbered 200,000 or more.[129]

Decline in population 1841–51 (%)
Leinster Munster Ulster Connaught Ireland
15.3 22.5 15.7 28.8 20
Table from Lee 1973, p. 2

Detailed statistics of the population of Ireland since 1841 are available at Irish population analysis.

Political cartoon from the 1880s: “In forty years I have lost, through the operation of no natural law, more than Three Million of my Sons and Daughters, and they, the Young and the Strong, leaving behind the Old and Infirm to weep and to die. Where is this to end?

Another area of uncertainty lies in the descriptions of disease given by tenants as to the cause of their relatives’ deaths.[121] Though the 1851 census has been rightly criticised as underestimating the true extent of mortality, it does provide a framework for the medical history of the Great Famine.[130] The diseases that badly affected the population fell into two categories,[130] famine-induced diseases and diseases of nutritional deficiency. Of the nutritional deficiency diseases the most commonly experienced were starvation and marasmus, as well as a condition at the time called dropsy. Dropsy (oedema) was a popular name given for the symptoms of several diseases, one of which, kwashiorkor, is associated with starvation.[130] The greatest mortality, however, was not from nutritional deficiency diseases, but from famine-induced ailments.[130][131] The malnourished are very vulnerable to infections; therefore, these were more severe when they occurred. Measles, diarrhoea, tuberculosis, most respiratory infections, whooping cough, many intestinal parasites and cholera were all strongly conditioned by nutritional status. Potentially lethal diseases, such as smallpox and influenza, were so virulent that their spread was independent of nutrition.[131]

The best example of this phenomenon was fever, which exacted the greatest death toll. In the popular mind, as well as medical opinion, fever and famine were closely related.[132] Social dislocation—the congregation of the hungry at soup kitchens, food depots, and overcrowded work houses—created conditions that were ideal for spreading infectious diseases such as typhus, typhoid and relapsing fever.[131][130] Diarrhoeal diseases were the result of poor hygiene, bad sanitation and dietary changes. The concluding attack on a population incapacitated by famine was delivered by Asiatic cholera, which had visited Ireland briefly in the 1830s. In the following decade it spread uncontrollably across Asia, through Europe, and into Britain and finally reached Ireland in 1849.[130]

Some scholars estimate that the population of Ireland was reduced by 20–25%.[5] All of this occurred while taxes, rents, and food exports were being collected and sent to British landlords, in an amount surpassing £6 million.[133]

Aftermath

The potato remained Ireland’s staple crop after the famine; at the end of the 19th century, the Irish per capita consumption of four pounds a day was the highest in the world.[134] Later famines made only minimal effect and are generally forgotten, except by historians. By the 1911 census, the island of Ireland’s population had fallen to 4.4 million, about the same as the population in 1800 and 2000 and only a half of its peak population.[135]

On the other hand, the population of England and Wales doubled from 16 million in 1841 to 32.5 million in 1901.[136]

The Famine gave considerable impetus to the shift from Irish to English as the language of the majority. Those most gravely affected by the Famine were mostly in Irish-speaking districts, and those districts also supplied most of the emigrants. Awareness of the cultural loss provided a spur to the work of Irish language activists in Ireland, Britain, America and Australia, resulting in the foundation of such organisations as the Gaelic League.

Ireland‘s mean age of marriage in 1830 was 23.8 for women and 27.47 for men where they had once been 21 for women and 25 for men, respectively, and those who never married numbered about 10% of the population;[137] in 1840, they had respectively risen to 24.4 and 27.7;[138][139] in the decades after the Famine, the age of marriage had risen to 28–29 for women and 33 for men and as many as a third of Irishmen and a fourth of Irishwomen never married due to low wages and chronic economic problems that discouraged early and universal marriage.[140]

Analysis of the government’s role

Contemporary

Contemporary opinion was sharply critical of the Russell government’s response to and management of the crisis. From the start, there were accusations that the government failed to grasp the magnitude of the disaster. Sir James Graham, who had served as Home Secretary in Sir Robert Peel‘s late government, wrote to Peel that, in his opinion, “the real extent and magnitude of the Irish difficulty are underestimated by the Government, and cannot be met by measures within the strict rule of economical science.”[141]

This criticism was not confined to outside critics. The Lord Lieutenant of Ireland, Lord Clarendon, wrote a letter to Russell on 26 April 1849, urging that the government propose additional relief measures: “I don’t think there is another legislature in Europe that would disregard such suffering as now exists in the west of Ireland, or coldly persist in a policy of extermination.”[142] Also in 1849 the Chief Poor Law Commissioner, Edward Twisleton, resigned in protest over the Rate-in-Aid Act, which provided additional funds for the Poor Law through a 6p in the pound levy on all rateable properties in Ireland.[143] Twisleton testified that “comparatively trifling sums were required for Britain to spare itself the deep disgrace of permitting its miserable fellow subjects to die of starvation.” According to Peter Gray, in his book The Irish Famine, the government spent £7,000,000 for relief in Ireland between 1845 and 1850, “representing less than half of one percent of the British gross national product over five years. Contemporaries noted the sharp contrast with the 20 million pounds compensation given to West Indian slave-owners in the 1830s.”[110]

Other critics maintained that even after the government recognised the scope of the crisis, it failed to take sufficient steps to address it. John Mitchel, one of the leaders of the Young Ireland Movement, wrote the following in 1860: “I have called it an artificial famine: that is to say, it was a famine which desolated a rich and fertile island that produced every year abundance and superabundance to sustain all her people and many more. The English, indeed, call the famine a ‘dispensation of Providence;’ and ascribe it entirely to the blight on potatoes. But potatoes failed in like manner all over Europe; yet there was no famine save in Ireland. The British account of the matter, then, is first, a fraud; second, a blasphemy. The Almighty, indeed, sent the potato blight, but the English created the famine.”[144]

Still other critics saw reflected in the government’s response its attitude to the so-called “Irish Question”. Nassau Senior, an economics professor at Oxford University, wrote that the Famine “would not kill more than one million people, and that would scarcely be enough to do any good.”[144] In 1848, Denis Shine Lawlor suggested that Russell was a student of the Elizabethan poet Edmund Spenser, who had calculated “how far English colonisation and English policy might be most effectively carried out by Irish starvation.”[145] Charles Trevelyan, the civil servant with most direct responsibility for the government’s handling of the famine, described it in 1848 as “a direct stroke of an all-wise and all-merciful Providence”, which laid bare “the deep and inveterate root of social evil”; the Famine, he affirmed, was “the sharp but effectual remedy by which the cure is likely to be effected. God grant that the generation to which this opportunity has been offered may rightly perform its part…”[146]

Historical

Christine Kinealy expresses the consensus of historians when she states that “the major tragedy of the Irish Famine of 1845–52 marked a watershed in modern Irish history. Its occurrence, however, was neither inevitable nor unavoidable.”[1] The underlying factors which combined to cause the famine were aggravated by an inadequate government response. As Kinealy notes,

…[T]he government had to do something to help alleviate the suffering, the particular nature of the actual response, especially following 1846, suggests a more covert agenda and motivation. As the Famine progressed, it became apparent that the government was using its information not merely to help it formulate its relief policies, but also as an opportunity to facilitate various long-desired changes within Ireland. These included population control and the consolidation of property through various means, including emigration… Despite the overwhelming evidence of prolonged distress caused by successive years of potato blight, the underlying philosophy of the relief efforts was that they should be kept to a minimalist level; in fact they actually decreased as the Famine progressed.[147]

Several writers single out the decision of the government to permit the continued export of food from Ireland as suggestive of the policy-makers’ attitudes. Leon Uris suggested that “there was ample food within Ireland”, while all the Irish-bred cattle were being shipped off to England.[148] The following exchange appeared in Act IV of George Bernard Shaw‘s play Man and Superman:

MALONE. He will get over it all right enough. Men thrive better on disappointments in love than on disappointments in money. I daresay you think that sordid; but I know what I’m talking about. My father died of starvation in Ireland in the black 47, Maybe you’ve heard of it.
VIOLET. The Famine?
MALONE. [with smouldering passion] No, the starvation. When a country is full of food, and exporting it, there can be no famine. My father was starved dead; and I was starved out to America in my mother’s arms. English rule drove me and mine out of Ireland. Well, you can keep Ireland. I and my like are coming back to buy England; and we’ll buy the best of it. I want no middle class properties and no middle class women for Hector. That’s straightforward isn’t it, like yourself?[149]

Some also pointed to the structure of the British Empire as a contributing factor. James Anthony Froude wrote that “England governed Ireland for what she deemed her own interest, making her calculations on the gross balance of her trade ledgers, and leaving moral obligations aside, as if right and wrong had been blotted out of the statute book of the Universe.”[11] Dennis Clark, an Irish-American historian and critic of empire, claimed that the famine was “the culmination of generations of neglect, misrule and repression. It was an epic of English colonial cruelty and inadequacy. For the landless cabin dwellers it meant emigration or extinction…”[150]

Genocide question

Ireland’s Holocaust mural on the Ballymurphy Road, Belfast. “An Gorta Mór, Britain’s genocide by starvation, Ireland’s holocaust 1845–1849.”

The famine remains a controversial event in Irish history. Debate and discussion on the British government’s response to the failure of the potato crop in Ireland, the exportation of food crops and livestock, the subsequent large-scale starvation, and whether or not this constituted genocide, remains a historically and politically charged issue.

In 1996, Francis A. Boyle, a law professor at the University of Illinois at Urbana-Champaign, wrote a report commissioned by the New York-based Irish Famine/Genocide Committee, which concluded that the British government deliberately pursued a race and ethnicity-based policy aimed at destroying the group commonly known as the Irish people and that the policy of mass starvation amounted to genocide per the Hague convention of 1948.[fn 7] On the strength of Boyle’s report, the US state of New Jersey included the famine in the “Holocaust and Genocide Curriculum” at the secondary tier.[fn 8]

Journalist Peter Duffy writes that “The government’s crime, which deserves to blacken its name forever …” was rooted “in the effort to regenerate Ireland” through “landlord-engineered replacement of tillage plots with grazing lands” that “took precedence over the obligation to provide food … for its starving citizens. It is little wonder that the policy looked to many people like genocide.”[153]

Several commentators have argued that the searing effect of the famine has on Irish cultural memory creates effects similar to that of genocide, while maintaining that one did not occur. Robert Kee suggests that the Famine is seen as “comparable” in its force on “popular national consciousness to that of the ‘final solution‘ on the Jews,” and that it is not “infrequently” thought that the Famine was something very like “a form of genocide engineered by the English against the Irish people.” This point was echoed by James Donnelly, a historian at the University of Wisconsin–Madison, who wrote in his work Landlord and Tenant in Nineteenth-century Ireland, “I would draw the following broad conclusion: at a fairly early stage of the Great Famine the government’s abject failure to stop or even slow down the clearances (evictions) contributed in a major way to enshrining the idea of English state-sponsored genocide in Irish popular mind. Or perhaps one should say in the Irish mind, for this was a notion that appealed to many educated and discriminating men and women, and not only to the revolutionary minority…And it is also my contention that while genocide was not in fact committed, what happened during and as a result of the clearances had the look of genocide to a great many Irish…”[154]

Historian Cormac Ó Gráda disagreed that the famine was genocide: first, that “genocide includes murderous intent, and it must be said that not even the most bigoted and racist commentators of the day sought the extermination of the Irish”; second, that most people in Whitehall “hoped for better times for Ireland” and third, that the claim of genocide overlooks “the enormous challenge facing relief agencies, both central and local, public and private”.[155] Ó Gráda thinks that a case of neglect is easier to sustain than that of genocide.[155]

Famine Memorial in Dublin

Edward Lengel claims that views of the Irish as racially inferior, and for this reason significantly responsible for their circumstances, gained purchase in Great Britain during and immediately after the famine, especially through influential publications such as The Medical Times and The Times.[156]

The Great Famine in Ireland has been compared to the Holodomor (“hunger plague”) which took place in the Ukraine under Stalin in 1932.[157][158][159] Like Ireland, the Ukraine is a fertile region, and the 1932 famine has been the subject of similar controversy and debate. The term Holodomor was coined by Raphael Lemkin, who regarded the famine as a genocide engineered by Stalin to promote the political ideology of collectivism.

Memorials

The Great Famine is memorialised in many locations throughout Ireland, especially in those regions that suffered the greatest losses, and also in cities overseas with large populations descended from Irish immigrants. These include, at Custom House Quays, Dublin, the thin sculptural figures, by artist Rowan Gillespie, who are portrayed as if walking towards the emigration ships on the Dublin Quayside. There is also a large memorial at the Murrisk Millennium Peace Park at the foot of Croagh Patrick in County Mayo.[160] Among the memorials in the US is the Irish Hunger Memorial near a section of the Manhattan waterfront in New York City, where many fleeing Irish arrived. An annual Great Famine walk, the brainchild of the Irish author/humanitarian, Don Mullan, from Doolough to Louisburgh, Co. Mayo, was inaugurated in 1988 and has been led by such notable personalities as Archbishop Desmond Tutu of South Africa and the Choctaw Nation of Oklahoma. The walk, organised by AFrI (Action From Ireland), takes place on the first or second Saturday of May and links the memory of the Great Hunger with a contemporary Human Rights issue. Commemorating the Doolough Tragedy, the walk was covered by the three major US television networks: ABC, NBC and CBS, during its first three years.

British SAS Special Forces (Full Documentary)

British SAS Special Forces

File:S.A.S emblem.svg

————————————————————————————————–

World’s Most Dangerous | SAS Special Forces – New Documentary(2015)

————————————————————————————————–

The Special Air Service (SAS) is a unit of the British Army founded in 1941 as a regiment, and later reconstituted as a corps in 1950.[5] This special forces unit undertakes a number of roles including covert reconnaissance, counter-terrorism, direct action, and human intelligence gathering.[8][10]

————————————————————————————————

Royal British Special Forces – British SAS Documentary – HD Documentary

————————————————————————————————

The corps presently comprises 22 Special Air Service Regiment, the regular component, under the operational command of United Kingdom Special Forces, and 21 (Artists) Special Air Service Regiment and 23 Special Air Service Regiment, which are reserve units under the operational command of 1st Intelligence, Surveillance and Reconnaissance Brigade.[11]

The Special Air Service traces its origins to 1941 and the Second World War, and was reformed as part of the Territorial Army in 1947, named the 21st Special Air Service Regiment (Artists Rifles). 22 Special Air Service Regiment, part of the regular army, later gained fame and recognition worldwide after successfully assaulting the Iranian Embassy in London and rescuing hostages during the 1980 Iranian Embassy siege, lifting the regiment from obscurity outside the military

The Special Air Service (SAS) is a unit of the British Army founded in 1941 as a regiment, and later reconstituted as a corps in 1950.[5] This special forces unit undertakes a number of roles including covert reconnaissance, counter-terrorism, direct action, and human intelligence gathering.[8][10]

The corps presently comprises 22 Special Air Service Regiment, the regular component, under the operational command of United Kingdom Special Forces, and 21 (Artists) Special Air Service Regiment and 23 Special Air Service Regiment, which are reserve units under the operational command of 1st Intelligence, Surveillance and Reconnaissance Brigade.[11]

The Special Air Service traces its origins to 1941 and the Second World War, and was reformed as part of the Territorial Army in 1947, named the 21st Special Air Service Regiment (Artists Rifles). 22 Special Air Service Regiment, part of the regular army, later gained fame and recognition worldwide after successfully assaulting the Iranian Embassy in London and rescuing hostages during the 1980 Iranian Embassy siege, lifting the regiment from obscurity outside the military

History

The Special Air Service was a unit of the British Army during the Second World War, formed in July 1941 by David Stirling and originally called “L” Detachment, Special Air Service Brigade—the “L” designation and Air Service name being a tie-in to a British disinformation campaign, trying to deceive the Axis into thinking there was a paratrooper regiment with numerous units operating in the area (the real SAS would ‘prove’ to the Axis that the fake one existed).[1][13] It was conceived as a commando force to operate behind enemy lines in the North African Campaign[14] and initially consisted of five officers and 60 other ranks.[15] Its first mission, in November 1941, was a parachute drop in support of the Operation Crusader offensive.[13] Due to German resistance and adverse weather conditions, the mission was a disaster: 22 men, a third of the unit, were killed or captured.[16] Its second mission was a success: transported by the Long Range Desert Group, it attacked three airfields in Libya, destroying 60 aircraft without loss.[16] In September 1942 it was renamed 1st SAS, consisting at that time of four British squadrons, one Free French, one Greek, and the Folboat Section.[17]

In January 1943, Stirling was captured in Tunisia and Paddy Mayne replaced him as commander.[18] In April 1943, the 1st SAS was reorganised into the Special Raiding Squadron under Mayne’s command and the Special Boat Squadron was placed under the command of George Jellicoe.[19] The Special Raiding Squadron fought in Sicily and Italy along with the 2nd SAS, which had been formed in North Africa in 1943 in part by the renaming of the Small Scale Raiding Force.[20][21] The Special Boat Squadron fought in the Aegean Islands and Dodecanese until the end of the war.[22] In 1944 the SAS Brigade was formed from the British 1st and 2nd SAS, the French 3rd and 4th SAS and the Belgian 5th SAS.[23] It was tasked with parachute operations behind the German lines in France[2] and carried out operations supporting the Allied advance through Belgium, the Netherlands (Operation Pegasus), and eventually into Germany (Operation Archway).[23][24] As a result of Hitler’s issuing of the Commando Order 18 October 1942, the members of the unit faced the additional danger that they would be summarily executed if ever captured by the Germans. In July 1944, following Operation Bulbasket, 34 captured SAS commandos were summarily executed by the Germans. In October 1944, in the aftermath of Operation Loyton 31 captured SAS commandos were summarily executed by the Germans.[25]

Post war

At the end of the war the British Government saw no further need for the force and disbanded it on 8 October 1945.[2] The following year it was decided there was a need for a long-term deep-penetration commando unit, and a new SAS regiment was to be raised as part of the Territorial Army.[26] Ultimately, the Artists Rifles, raised in 1860 and headquartered at Dukes Road, Euston, took on the SAS mantle as 21st SAS Regiment (V) on 1 January 1947.[3][26]

man in British Army uniform, carrying a parachute helmet and wearing a beret, other men can just be seen in the dark background

21 SAS soldier after a night parachute drop exercise in Denmark, 1955

In 1950, a 21 SAS squadron was raised to fight in the Korean War. After three months of training in England, it was informed that the squadron would no longer be required in Korea and so it instead volunteered to fight in the Malayan Emergency.[27] Upon arrival in Malaya, it came under the command of Mike Calvert who was forming a new unit called the Malayan Scouts (SAS).[27] Calvert had already formed one squadron from 100 volunteers in the Far East, which became A Squadron—the 21 SAS squadron then became B Squadron; and after a recruitment visit to Rhodesia by Calvert, C Squadron was formed from 1,000 Rhodesian volunteers.[28] The Rhodesians returned home after three years service and were replaced by a New Zealand squadron.[29] By this time, the need for a regular army SAS regiment had been recognised; 22 SAS Regiment was formally added to the army list in 1952 and has been based at Hereford since 1960.[8] In 1959 the third regiment, 23 SAS Regiment, was formed by renaming the Reserve Reconnaissance Unit, which had succeeded MI9 and whose members were experts in escape and evasion.[30]

22 SAS Regiment

Since serving in Malaya, men from the regular army 22 SAS Regiment have taken part in covert reconnaissance and surveillance by patrols and some larger scale raiding missions in Borneo.[31] An operation against communist guerillas included the Battle of Mirbat in the Oman.[32] They have also taken part in operations in the Aden Emergency,[33] Northern Ireland,[34] and Gambia.[31] Their Special projects team assisted the West German counter-terrorism group GSG 9 at Mogadishu.[31] The SAS counter terrorist wing famously took part in a hostage rescue operation during the Iranian Embassy Siege in London.[35] During the Falklands War B squadron were prepared for Operation Mikado before it was subsequently cancelled whilst D and G squadrons were deployed and participated in the raid on Pebble Island.[36] Operation Flavius was a controversial operation in Gibraltar against the Provisional Irish Republican Army (PIRA).[31] 22 SAS also directed NATO aircraft onto Serb positions and hunted war criminals in Bosnia.[37][38] They were also involved in the Kosovo War helping KLA guerillas behind Serbian lines. According to Albanian sources one SAS sergeant was killed by Serbian special forces.[39]
The Gulf War, in which A, B and D squadrons deployed, was the largest SAS mobilisation since the Second World War, also notable for the failure of the Bravo Two Zero mission.[40] In Sierra Leone it took part in Operation Barras, a hostage rescue operation, to extract members of the Royal Irish Regiment.[31] In the Iraq War, it formed part of Task Force Black and Task Force Knight, with A Squadron 22 SAS being singled out for exceptional service by General Stanley McChrystal, the American commander of NATO forces: during a six-month tour it carried out 175 combat missions.[41] In 2006, members of the SAS were involved in the operation to free peace activists Norman Kember, James Loney and Harmeet Singh Sooden. The three men had been held hostage in Iraq for 118 days during the Christian Peacemaker hostage crisis.[42] Operations against the Taliban in Afghanistan[43] involved soldiers from 21 and 23 SAS Regiments.[4]

Various British newspapers have speculated on the SAS involvement in Operation Ellamy and the 2011 Libyan civil war, the Daily Telegraph reports that “defence sources have confirmed that the SAS has been in Libya for several weeks, and played a key role in coordinating the fall of Tripoli.”[44] While The Guardian reports “They have been acting as forward air controllers – directing pilots to targets – and communicating with NATO operational commanders. They have also been advising rebels on tactics.”[45]

A significant force of the Special Air Service was deployed to Northern Iraq in late August 2014, and according to former MI6 chief Richard Barrett will be sent to Syria, tasked with trying to track down the Islamic State terrorist group that the press labeled the Beatles using a range of high-tech equipment and with potentially freeing their hostages.[46][47][48][49] In October 2014, the SAS began executing raids against ISIS supply lines in western Iraq, using helicopters to drop light vehicles manned by sniper squads. It has been claimed that the SAS have killed up to eight ISIS fighters per day since the raids began.[50]

In recent years SAS officers have risen to the highest ranks in the British Army. General Peter de la Billière was the Commander-in-Chief of the British forces in the 1990 Gulf War.[51] General Michael Rose became commander of the United Nations Protection Force in Bosnia in 1994.[52] In 1997 General Charles Guthrie became Chief of the Defence Staff the head of the British Armed Forces.[53] Lieutenant-General Cedric Delves was appointed Commander of the Field Army and Deputy Commander in Chief NATO Regional Headquarters Allied Forces North in 2002–2003.[54]

Influence on other special forces

Following the post-war reconstitution of the Special Air Service, other countries in the Commonwealth recognised their need for similar units. The Canadian Special Air Service Company was formed in 1947, being disbanded in 1949.[55][56] The New Zealand Special Air Service squadron was formed in 1954 to serve with the British SAS in Malaya.[29] Australia formed the 1st SAS Company in July 1957, which became a full regiment of the Australian Special Air Service Regiment (SASR) in August 1964.[57] On its return from Malaya, the C (Rhodesian) Squadron formed the basis for creation of the Rhodesian Special Air Service in 1961.[30] It retained the name “C Squadron (Rhodesian) Special Air Service” within the Rhodesian Security Forces until 1978, when it became 1 (Rhodesian) Special Air Service Regiment.[58]

Non-Commonwealth countries have also formed units based on the SAS. The Belgian Army’s Special Forces Group, which wears the same capbadge as the British SAS, traces its ancestry partly from the 5th Special Air Service of the Second World War.[59][60][61][62][63][64][65] The French 1st Marine Infantry Parachute Regiment (1er RPIMa) can trace its origins to the Second World War 3rd and 4th SAS, adopting its “who dares wins” motto.[66] The American unit, Delta Force, was formed by Colonel Charles Alvin Beckwith, who served with 22 SAS as an exchange officer, and recognised the need for a similar type of unit in the United States Army.[67] The Israeli Sayeret Matkal has also been modelled after the SAS, sharing its motto. Ireland‘s Army Ranger Wing (ARW) has also modelled its training on that of the SAS, as well as Delta Force (who in turn have been influenced by the SAS). The Irish ARW train with the SAS.[68] The Philippine National Police‘s Special Action Force, heavily engaged in counter-insurgency in the Mindinao region, was formed along the lines of the SAS.[69]


Please consider making a small or large donation as I am very poor and every donation is most welcome and goes towards the cost of running this blog.

Make a small donation

paypal donation button

Thank you!

Battle of Britain 1940 – WWII BATTLEFIELD. The Hardest Day

Battle of Britain 1940

——————————–

The Battle Of Britain

1 – 5 Short Films

——————————–

The Battle of Britain (German: Luftschlacht um England, literally “Air battle for England”) is the name given to the Second World War air campaign waged by the German Air Force (Luftwaffe) against the United Kingdom during the summer and autumn of 1940. The Battle of Britain was the first major campaign to be fought entirely by air forces,[18] and was also the largest and most sustained aerial bombing campaign to that date.

The objective of the Nazi German forces was to achieve air superiority over the Royal Air Force (RAF), especially its Fighter Command. Beginning in July 1940, coastal shipping convoys and shipping centres, such as Portsmouth, were the main targets; one month later, the Luftwaffe shifted its attacks to RAF airfields and infrastructure. As the battle progressed, the Luftwaffe also targeted factories involved in World War II aircraft production and ground infrastructure. Eventually the Luftwaffe resorted to attacking areas of political significance and using terror bombing strategy.[nb 10]

By preventing Germany from gaining air superiority, the British forced Adolf Hitler to postpone and eventually cancel Operation Sea Lion, a planned amphibious and airborne invasion of Britain. However, Germany continued bombing operations on Britain, known as The Blitz. The failure of Nazi Germany to achieve its objective of destroying Britain’s air defences in order to force Britain to negotiate an armistice (or even surrender outright) is considered by historians to be its first major defeat in World War II and a crucial turning point in the conflict.[20]

The Battle of Britain has an unusual distinction in that it gained its name prior to being fought. The name is derived from a famous speech delivered by Prime Minister Winston Churchill in the House of Commons on June 18, more than three weeks prior to the generally accepted date for the start of the battle

… What General Weygand has called The Battle of France is over. The battle of Britain is about to begin. Upon this battle depends the survival of Christian civilisation. Upon it depends our own British life and the long continuity of our institutions and our Empire. The whole fury and might of the enemy must very soon be turned on us. Hitler knows that he will have to break us in this island or lose the war. If we can stand up to him, all Europe may be free and the life of the world may move forward into broad, sunlit uplands. But if we fail, then the whole world, including the United States, including all that we have known and cared for, will sink into the abyss of a new Dark Age made more sinister, and perhaps more protracted, by the lights of a perverted science. Let us therefore brace ourselves to our duties, and so bear ourselves that, if the British Empire and its Commonwealth last for a thousand years, men will still say, “This was their finest hour”.[21]

— Winston Churchill

Background

British Prime Minister Winston Churchill

The early stages of World War II saw successful German invasions on the continent aided decisively by the air power of the Luftwaffe, which was able to establish tactical air superiority with great efficiency. The distressing speed with which German forces defeated most of the defending armies in Norway during the spring of 1940 created a significant political crisis in Britain. In early May 1940, the Norway Debate questioned the fitness for office of the British Prime Minister Neville Chamberlain. On 10 May, the same day Winston Churchill became British Prime Minister, the Germans initiated the Battle of France with an aggressive invasion of French territory. RAF Fighter Command was desperately short of trained pilots and aircraft, but despite the objections of its commander Hugh Dowding that the diversion of his forces would leave home defences under-strength, Churchill sent fighter squadrons to support operations in France,[22] where the RAF suffered heavy losses.[23]

After the evacuation of British and French soldiers from Dunkirk and the French surrender on 22 June 1940, Hitler mainly focused his energies on the possibility of invading the Soviet Union[24] in the belief that the British, defeated on the continent and without European allies, would quickly come to terms.[25] The Germans were so convinced of an imminent armistice that they began constructing street decorations for the homecoming parades of victorious troops.[26] Although the British Foreign Secretary, Lord Halifax, and certain elements of the British public favoured a negotiated peace with an ascendant Germany, Churchill and a majority of his Cabinet refused to consider an armistice.[27] Instead, Churchill used his skilful rhetoric to harden public opinion against capitulation and to prepare the British for a long war. In his “This was their finest hour” speech of 18 June 1940, he declared that “the Battle of France is over. I expect that the Battle of Britain is about to begin.”[28]

After a series of military victories, Germany took control of huge territories in central, northern, and western Europe that mainly corresponded to the boundaries of the defeated countries of Poland, France, Denmark, Norway, Belgium, and the Netherlands. In addition to these conquests, the boundaries of Germany itself had already been swelled considerably by the annexation of Austria and Czechoslovakia in 1938 and 1939. Germany’s position thus seemed invincible to many Europeans. Hitler hoped for a negotiated peace with Britain, thus made no preparations for amphibious assault on a hostile shore. In any case, at the time, the only forces with experience in this type of warfare and modern equipment to support it were the Japanese, who became adept with it at the Battle of Wuhan in 1938.[29] On 11 July 1940, Grand Admiral Erich Raeder, Commander-in-Chief of the Kriegsmarine (German Navy), told Hitler that an invasion of Britain could only be contemplated as a last resort, and only after full air superiority had been achieved. The Kriegsmarine had been nearly crippled by the Norwegian Campaign, with many of its ships sunk or damaged, while the Royal Navy still had over 50 destroyers, 21 cruisers and eight battleships in the British Home Fleet.[30][31][nb 11] There was little that the weakened Kriegsmarine could do to stop the Royal Navy from intervening. The only alternative was to use the Luftwaffe’s dive bombers and torpedo bombers, which required air superiority to operate effectively. Grand Admiral Raeder said, “A powerful and effective air force might create conditions favourable for an invasion, whether it could was not in the Navy War Staff’s province.”[33]

Although he agreed with Raeder, Hitler ordered the preparation of a plan to invade the United Kingdom on July 16.[34] He hoped that news of the preparations would frighten the UK into peace negotiations. “Directive No. 16; On the Preparation of a Landing Operation against England” read, in part, as follows:

Since England, despite its militarily hopeless situation, still has not shown any signs of being prepared to negotiate, I have decided to prepare a landing operation against England and, if necessary, carry it out.

The objective of this operation is to eliminate the English home country as a base for the continuation of the war against Germany …
2) Included in these preparations is the bringing about of those preconditions which make a landing in England possible;
a) The English air force must have been beaten down to such an extent morally and in fact that it can no longer muster any power of attack worth mentioning against the German crossing. (italics added)[35][nb 12][36]

All preparations were to be made by mid-August. For secrecy, this directive was only issued to Commanders-in-Chief, but Hermann Göring passed it on to his Luftwaffe Air Fleet commanders by coded radio messages that were intercepted by Britain’s Y-Service and successfully decrypted by Hut 6 at Bletchley Park.[37]

The Kriegsmarine produced a draft plan for achieving a narrow beachhead near Dover. On 28 July the army responded that they wanted landings all along the south coast of England. Hitler held a meeting of his army and navy chiefs on 31 July in his residence of Berghof, and on 1 August the OKW (Oberkommando der Wehrmacht or “High Command of the Armed Forces”) issued its plan.[38] The plan, code named Operation Sea Lion, was scheduled to take place in mid-September 1940. Operation Sea Lion called for landings on the south coast of Great Britain backed by an airborne assault. Neither Hitler nor OKW believed it would be possible to carry out a successful amphibious assault on Britain until the RAF had been neutralised. Raeder believed that air superiority might make a successful landing possible although it would be a risky operation and require “absolute mastery over the Channel by our air forces”.[39]

For his part, Grand Admiral Karl Dönitz believed that air superiority was “not enough”. Dönitz later stated, “we possessed neither control of the air or the sea; nor were we in any position to gain it.”[40] Some writers, such as Derek Robinson, have agreed with Dönitz. Robinson argues that the massive superiority of the Royal Navy over the Kriegsmarine would have made Sea Lion a disaster and the Luftwaffe could not have prevented decisive intervention by British cruisers and destroyers, even with air superiority.[41][42] Williamson Murray argued that the task facing the Germans in summer 1940 was beyond their capabilities; the three German armed services were not capable of solving the problem of invading the British Isles. Murray contends that the Kriegsmarine had been effectively eliminated owing to heavy losses during the Norwegian Campaign.[43] and states that it is doubtful that the Kriegsmarine and Luftwaffe could have prevented the Royal Navy from engaging the invasion fleet.[44]

The Luftwaffe had not been represented at the Berghof, but Göring was confident that air victory was possible. Like many commanders in other air forces, including the RAF, he was convinced by the ideas of Giulio Douhet that “The bomber will always get through” and if attacks on military targets failed, the bombing of civilians could force the British government to surrender.[45]

Opposing forces

The Luftwaffe faced a more capable opponent than any it had previously met: a sizeable, highly coordinated, well-supplied, modern air force.

Fighters

The Luftwaffe’s Messerschmitt Bf 109E and Bf 110C fought against the RAF’s workhorse Hurricane Mk I and the less numerous Spitfire Mk I; Hurricanes outnumbered Spitfires in RAF Fighter Command by about two to one when war broke out.[46] The Bf 109E had a better climb rate and was up to 40 mph faster in level flight [47] than the Rotol (constant speed propellor) equipped Hurricane Mk I, depending on altitude. The speed and climb disparity with the original non-Rotol Hurricane was even greater. In spring and summer 1940, all RAF Spitfire and Hurricane fighter squadrons converted to 100 octane aviation fuel,[48] which allowed their Merlin engines to generate significantly more power and an approximately 30 mph increase in speed at low altitudes[49][50] through the use of an Emergency Boost Override.[51][52][53] In September 1940, the more powerful Mk IIa series 1 Hurricanes started entering service in small numbers.[54] This version was capable of a maximum speed of 342 mph (550 km/h), some 20 mph more than the original (non-Rotol) Mk I, though it was still 15 to 20 mph slower than a Bf 109 (depending on altitude).[55]

Hawker Hurricane R4118 fought in the Battle of Britain. Here it arrives at the 2014 Royal International Air Tattoo, England.

X4382, a late production Spitfire Mk I of 602 Squadron flown by P/O Osgood Hanbury, Westhampnett, September 1940

The performance of the Spitfire over Dunkirk came as a surprise to the Jagdwaffe, although the German pilots retained a strong belief that the 109 was the superior fighter.[56] The British fighters were equipped with eight Browning .303 (7.7mm) machine guns, while most Bf 109Es had two 7.92mm machine guns supplemented by two 20mm cannons.[nb 13] The latter was much more effective than the .303; many German planes landed despite large numbers of .303 hits. At some altitudes, the Bf 109 could outclimb the British fighter. It could also engage in vertical-plane negative-g manoeuvres without the engine cutting out because its DB 601 engine used fuel injection; this allowed the 109 to dive away from attackers more readily than the carburettor-equipped Merlin. On the other hand, the Bf 109E had a much larger turning circle than its two foes.[57] In general, though, as Alfred Price noted in The Spitfire Story:

… the differences between the Spitfire and the Me 109 in performance and handling were only marginal, and in a combat they were almost always surmounted by tactical considerations of which side had seen the other first, which had the advantage of sun, altitude, numbers, pilot ability, tactical situation, tactical co-ordination, amount of fuel remaining, etc.[58]

The Bf 109E was also used as a Jabo (jagdbomber, fighter-bomber)—the E-4/B and E-7 models could carry a 250 kg bomb underneath the fuselage, the later model arriving during the battle. The Bf 109, unlike the Stuka, could fight on equal terms with RAF fighters after releasing its ordnance.[59][60]

At the start of the battle, the twin-engined Messerschmitt Bf 110C long range Zerstörer (“Destroyer”) was also expected to engage in air-to-air combat while escorting the Luftwaffe bomber fleet. Although the 110 was faster than the Hurricane and almost as fast as the Spitfire, its lack of manoeuvrability and acceleration meant that it was a failure as a long-range escort fighter. On 13 and 15 August, 13 and 30 aircraft were lost, the equivalent of an entire Gruppe, and the type’s worst losses during the campaign.[61] This trend continued with a further eight and fifteen lost on 16 and 17 August.[62] Göring ordered the Bf 110 units to operate “where the range of the single-engined machines were not sufficient”.[citation needed]

The most successful role of the Bf 110 during the battle was as a Schnellbomber (fast bomber). The Bf 110 usually used a shallow dive to bomb the target and escape at high speed.[63][64] One unit, Erprobungsgruppe 210 – initially formed as the service test unit (Erprobungskommando) for the emerging successor to the 110, the Me 210 – proved that the Bf 110 could still be used to good effect in attacking small or “pinpoint” targets.[63]

Four 264 Squadron Defiants (PS-V was shot down on 28 August 1940 over Kent by Bf 109s.)

The RAF’s Boulton Paul Defiant had some initial success over Dunkirk because of its resemblance to the Hurricane; Luftwaffe fighters attacking from the rear were surprised by its unusual gun turret.[65] However, during the Battle of Britain, this single-engined two-seater proved hopelessly outclassed. For various reasons, the Defiant lacked any form of forward-firing armament, and the heavy turret and second crewman meant it could not outrun or outmanoeuvre either the Bf 109 or Bf 110. By the end of August, after disastrous losses, the aircraft was withdrawn from daylight service.[66][67]

Bombers

Heinkel He 111 bombers during the Battle of Britain

The Luftwaffe’s primary bombers were the Heinkel He 111, Dornier Do 17, and Junkers Ju 88 for level bombing at medium to high altitudes, and the Junkers Ju 87 Stuka for dive bombing tactics. The He 111 was used in greater numbers than the others during the conflict. Forming the main brunt of the heavy formations, it is better known, partly due to its distinctive wing shape. Each level bomber also had a few reconnaissance versions accompanying them that were used during the battle.[68]

Although it was successful in previous Luftwaffe engagements, the Stuka suffered heavy losses in the Battle of Britain, particularly on 18 August, due to its slow speed and vulnerability to fighter interception after dive bombing a target. As the losses went up along with their limited payload and range, Stuka units were largely removed from operations over England and diverted to concentrate on shipping instead until they were eventually re-deployed to the Eastern Front in 1941. However, for some raids, they were called back, such as on 13 September to attack Tangmere airfield.[69][70][71]

The remaining three bomber types differed in their capabilities; the Heinkel 111 was the slowest; the Ju 88 was the fastest once its mainly external bomb load was dropped; and the Do 17 had the smallest bomb load.[68] All three bomber types suffered heavy losses from the home-based British fighters, but the Ju 88 disproportionately so. The German bombers required constant protection by the Luftwaffe’s fighter force. German escorts, however, were not enough. Bf 109Es were ordered to support more than 300–400 bombers on any given day.[72] Later in the conflict, when night bombing became more frequent, all three were used. However, due to its reduced bomb load, the lighter Do 17 was used less than the He 111 and Ju 88 for this purpose.

German propaganda photo purporting to show a Spitfire I flying very close to a Dornier 17Z.[nb 14]

On the British side, three bomber types were mostly used on night operations against targets such as factories, invasion ports and railway centres; the Armstrong Whitworth Whitley, the Handley-Page Hampden and the Vickers Wellington were classified as heavy bombers by the RAF, although the Hampden was a medium bomber comparable to the He 111. The twin-engined Bristol Blenheim and the obsolescent single-engined Fairey Battle were both light bombers; the Blenheim was the most numerous of the aircraft equipping RAF Bomber Command and was used in attacks against shipping, ports, airfields and factories on the continent by day and by night. The Fairey Battle squadrons, which had suffered heavy losses in daylight attacks during the Battle of France, were brought up to strength with reserve aircraft and continued to operate at night in attacks against the invasion ports, until the Battle was withdrawn from UK front line service in October 1940.[73][75]

Pilots

Before the war, the RAF’s processes for selecting potential candidates were opened to men of all social classes through the creation in 1936 of the RAF Volunteer Reserve, which “… was designed to appeal, to … young men … without any class distinctions …”[76] The older squadrons of the Royal Auxiliary Air Force did retain some of their upper-class exclusiveness,[77] but their numbers were soon swamped by the newcomers of the RAFVR; by 1 September 1939, 6,646 pilots had been trained through the RAFVR.[78]

A Spitfire pilot recounts how he shot down a Messerschmitt, Biggin Hill, September 1940

By summer 1940, there were about 9,000 pilots in the RAF to man about 5,000 aircraft, most of which were bombers.[citation needed] Fighter Command was never short of pilots, but the problem of finding sufficient numbers of fully trained-fighter pilots became acute by mid-August 1940.[79] With aircraft production running at 300 planes each week, only 200 pilots were trained in the same period. In addition, more pilots were allocated to squadrons than there were aircraft, as this allowed squadrons to maintain operational strength despite casualties and still provide for pilot leave.[80] Another factor was that only about 30% of the 9,000 pilots were assigned to operational squadrons; 20% of the pilots were involved in conducting pilot training, and a further 20% were undergoing further instruction, like those offered in Canada and in Southern Rhodesia to the Commonwealth trainees, although already qualified. The rest were assigned to staff positions, since RAF policy dictated that only pilots could make many staff and operational command decisions, even in engineering matters. At the height of fighting, and despite Churchill’s insistence, only 30 pilots were released to the front line from administrative duties.[81][nb 15]

For these reasons, and the permanent loss of 435 pilots during the Battle of France alone[23] along with many more wounded, and others lost in Norway, the RAF had fewer experienced pilots at the start of the initial defence of their home. It was the lack of trained pilots in the fighting squadrons, rather than the lack of aircraft, that became the greatest concern for Air Chief Marshal Hugh Dowding, Commander of Fighter Command. Drawing from regular RAF forces, the Auxiliary Air Force and the Volunteer Reserve, the British were able to muster some 1,103 fighter pilots on 1 July. Replacement pilots, with little flight training and often no gunnery training, suffered high casualty rates thus exacerbating the problem.[82]

The Luftwaffe on the other hand, were able to muster a larger number (1,450) of more experienced fighter pilots.[81] Drawing from a cadre of Spanish Civil War veterans, these pilots already had comprehensive courses in aerial gunnery and instructions in tactics suited for fighter-versus-fighter combat.[83] Training manuals discouraged heroism, stressing the importance of attacking only when the odds were in the pilot’s favour. Despite the high levels of experience, German fighter formations did not provide a sufficient reserve of pilots to allow for losses and leave,[80] and the Luftwaffe was unable to produce enough pilots to prevent a decline in operational strength as the battle progressed. Eventually, without the personnel available to continue the assault, the Luftwaffe failed during this segment of the war.

International participation

Allies

126 German aircraft or “Adolfs” were claimed by Polish pilots of 303 Squadron during the Battle

The Royal Air Force roll of honour for the Battle of Britain recognises 595 non-British pilots (out of 2,936) as flying at least one authorised operational sortie with an eligible unit of the RAF or Fleet Air Arm between 10 July and 31 October 1940.[13][84] These included 145 Poles, 127 New Zealanders, 112 Canadians, 88 Czechoslovaks, 10 Irish, 32 Australians, 28 Belgians, 25 South Africans, 13 French, 7 Americans, 3 Southern Rhodesians and one each from Jamaica and Mandatory Palestine.[85] “Altogether in the fighter battles, the bombing raids, and the various patrols flown between 10 July and 31 October 1940 by the Royal Air Force, 1495 aircrew were killed, of whom 449 were fighter pilots, 718 aircrew from Bomber Command, and 280 from Coastal Command. Among those killed were 47 airmen from Canada, 24 from Australia, 17 from South Africa, 35 from Poland, 20 from Czechoslovakia and six from Belgium. Forty-seven New Zealanders lost their lives, including 15 fighter pilots, 24 bomber and eight coastal aircrew. The names of these Allied and Commonwealth airmen are inscribed in a memorial book which rests in the Battle of Britain Chapel in Westminster Abbey. In the chapel is a stained glass window which contains the badges of the fighter squadrons which operated during the battle and the flags of the nations to which the pilots and aircrew belonged.”[86]

Axis

Main article: Corpo Aereo Italiano

An element of the Italian Royal Air Force (Regia Aeronautica) called the Italian Air Corps (Corpo Aereo Italiano or CAI) first saw action in late October 1940. It took part in the latter stages of the battle, but achieved limited success. The unit was redeployed in early 1941.

Luftwaffe strategy

Hermann Göring, the commander of the Luftwaffe

Hugo Sperrle, the commander of Luftflotte 3

The Luftwaffe strategy was devised to provide tactical support for the army on the battlefield. During the blitzkrieg offensives against Poland, Denmark and Norway, France and the Low Countries, the Luftwaffe had co-operated fully with the Wehrmacht. For the Battle of Britain however, the Luftwaffe had to operate in a strategic role, something for which it was unsuited. Its main task was to ensure air supremacy over southeast England, to pave the way for an invasion fleet.

The Luftwaffe regrouped after the Battle of France into three Luftflotten (Air Fleets) on Britain’s southern and northern flanks. Luftflotte 2, commanded by Generalfeldmarschall Albert Kesselring, was responsible for the bombing of southeast England and the London area. Luftflotte 3, under Generalfeldmarschall Hugo Sperrle, targeted the West Country, Wales, the Midlands, and northwest England. Luftflotte 5, led by Generaloberst Hans-Jürgen Stumpff from his headquarters in Norway, targeted the north of England and Scotland. As the battle progressed, command responsibility shifted, with Luftflotte 3 taking more responsibility for the night-time Blitz attacks while the main daylight operations fell upon Luftflotte 2’s shoulders.

Initial Luftwaffe estimates were that it would take four days to defeat the RAF Fighter Command in southern England. This would be followed by a four-week offensive during which the bombers and long-range fighters would destroy all military installations throughout the country and wreck the British aircraft industry. The campaign was planned to begin with attacks on airfields near the coast, gradually moving inland to attack the ring of sector airfields defending London. Later reassessments gave the Luftwaffe five weeks, from 8 August to 15 September, to establish temporary air superiority over England.[87] To achieve this goal, Fighter Command had to be destroyed, either on the ground or in the air, yet the Luftwaffe had to be able to preserve its own strength to be able to support the invasion; this meant that the Luftwaffe had to maintain a high “kill ratio” over the RAF fighters. The only alternative to the goal of air superiority was a terror bombing campaign aimed at the civilian population, but this was considered a last resort and it was (at this stage of the battle) expressly forbidden by Hitler.[87]

The Luftwaffe kept broadly to this scheme, but its commanders had differences of opinion on strategy. Sperrle wanted to eradicate the air defence infrastructure by bombing it. His counterpart, Kesselring, championed attacking London directly— either to bombard the British government into submission, or to draw RAF fighters into a decisive battle. Göring did nothing to resolve this disagreement between his commanders, and only vague directives were set down during the initial stages of the battle, with Göring seemingly unable to decide upon which strategy to pursue.[88] He seemed at times obsessed with maintaining his own power base in the Luftwaffe and indulging his outdated beliefs on air fighting, which would later lead to tactical and strategic errors.

Tactics

Fighter formations

Luftwaffe formations employed a loose section of two (nicknamed the Rotte), based on a leader (Rottenführer) followed at a distance of about 183 metres (200 yards)[nb 16] by his wingman (nicknamed the Rottenhund or Katschmareks), who also flew slightly higher and was trained always to stay with his leader. With more room between them, both pilots could spend less time maintaining formation and more time looking around and covering each other’s blind spots. Attacking aircraft could be sandwiched between the two 109s.[89] [nb 17] The rotte allowed the Rottenführer to concentrate on getting kills, but few wingmen had the chance,[91] leading to some resentment in the lower ranks where it was felt that the high scores came at their expense. Two sections were usually teamed up into a Schwarm, where all the pilots could watch what was happening around them. Each Schwarm in a Staffel flew at staggered heights and with 183 metres (200 yards) of room between them, making the formation difficult to spot at longer ranges and allowing for a great deal of flexibility.[83] By utilising a tight “cross-over” turn, a Schwarm could quickly change direction.[89]

The Bf 110s adopted the same Schwarm formation as the 109s, but were seldom able to use this to the same advantage. The Bf 110’s most successful method of attack was the “bounce” from above. When attacked, Zerstörergruppen increasingly resorted to forming large “defensive circles“, where each Bf 110 guarded the tail of the aircraft ahead of it. Göring ordered that they be renamed “offensive circles” in a vain bid to improve rapidly declining morale.[92] These conspicuous formations were often successful in attracting RAF fighters that were sometimes “bounced” by high-flying Bf 109s. This led to the often repeated myth that the Bf 110s were escorted by Bf 109s.

Higher-level dispositions

Luftwaffe tactics were influenced by their fighters. The Bf 110 proved too vulnerable to the nimble single-engined RAF fighters. This meant the bulk of fighter escort duties fell on the Bf 109. Fighter tactics were then complicated by bomber crews who demanded closer protection. After the hard-fought battles of 15 and 18 August, Göring met with his unit leaders. During this conference, the need for the fighters to meet up on time with the bombers was stressed. It was also decided that one bomber Gruppe could only be properly protected by several Gruppen of 109s. In addition, Göring stipulated that as many fighters as possible were to be left free for Freie Jagd (“Free Hunts”: a free-roving fighter sweep preceded a raid to try to sweep defenders out of the raid’s path). The Ju 87 units, which had suffered heavy casualties, were only to be used under favourable circumstances.[93] In early September, due to increasing complaints from the bomber crews about RAF fighters seemingly able to get through the escort screen, Göring ordered an increase in close escort duties. This decision shackled many of the Bf 109s to the bombers and, although they were more successful at protecting the bomber forces, casualties amongst the fighters mounted primarily because they were forced to fly and manoeuvre at reduced speeds.[94]

The Luftwaffe consistently varied its tactics in its attempts to break through the RAF defences. It launched many Freie Jagd to draw up RAF fighters. RAF fighter controllers, however, were often able to detect these and position squadrons to avoid them, keeping to Dowding’s plan to preserve fighter strength for the bomber formations. The Luftwaffe also tried using small formations of bombers as bait, covering them with large numbers of escorts. This was more successful, but escort duty tied the fighters to the bombers’ slow speed and made them more vulnerable.

Pattern of condensation trails left by British and German aircraft after a dogfight.

By September, standard tactics for raids had become an amalgam of techniques. A Freie Jagd would precede the main attack formations. The bombers would fly in at altitudes between 16,000 feet (4,900 m) and 20,000 feet (6,100 m), closely escorted by fighters. Escorts were divided into two parts (usually Gruppen), some operating in close contact with the bombers, and others a few hundred yards away and a little above. If the formation was attacked from the starboard, the starboard section engaged the attackers, the top section moving to starboard and the port section to the top position. If the attack came from the port side the system was reversed. British fighters coming from the rear were engaged by the rear section and the two outside sections similarly moving to the rear. If the threat came from above, the top section went into action while the side sections gained height to be able to follow RAF fighters down as they broke away. If attacked, all sections flew in defensive circles. These tactics were skilfully evolved and carried out, and were extremely difficult to counter.[95]

Adolf Galland, the successful leader of III./JG 26, became Geschwaderkommodore of JG 26 on 22 August

Adolf Galland noted:

We had the impression that, whatever we did, we were bound to be wrong. Fighter protection for bombers created many problems which had to be solved in action. Bomber pilots preferred close screening in which their formation was surrounded by pairs of fighters pursuing a zigzag course. Obviously, the visible presence of the protective fighters gave the bomber pilots a greater sense of security. However, this was a faulty conclusion, because a fighter can only carry out this purely defensive task by taking the initiative in the offensive. He must never wait until attacked because he then loses the chance of acting.

We fighter pilots certainly preferred the free chase during the approach and over the target area. This gives the greatest relief and the best protection for the bomber force.[96]

The biggest disadvantage faced by Bf 109 pilots was that without the benefit of long-range drop tanks (which were introduced in limited numbers in the late stages of the battle), usually of 300 litres (66 imp gal; 79 US gal) capacity, the 109s had an endurance of just over an hour and, for the 109E, a 600 km (370 mi) range. Once over Britain, a 109 pilot had to keep an eye on a red “low fuel” light on the instrument panel: once this was illuminated, he was forced to turn back and head for France. With the prospect of two long flights over water, and knowing their range was substantially reduced when escorting bombers or during combat, the Jagdflieger coined the term Kanalkrankheit or “Channel sickness”.[97]

Intelligence

The Luftwaffe was ill-served by its lack of military intelligence about the British defences.[98] The German intelligence services were fractured and plagued by rivalries; their performance was “amateurish”.[99] By 1940, there were few German agents operating in Great Britain and a handful of bungled attempts to insert spies into the country were foiled.[100]

As a result of intercepted radio transmissions, the Germans began to realise that the RAF fighters were being controlled from ground facilities; in July and August 1939, for example, the airship Graf Zeppelin, which was packed with equipment for listening in on RAF radio and RDF transmissions, flew around the coasts of Britain. Although the Luftwaffe correctly interpreted these new ground control procedures, they were incorrectly assessed as being rigid and ineffectual. A British radar system was well known to the Luftwaffe from intelligence gathered before the war, but the highly developed “Dowding system” linked with fighter control had been a well-kept secret.[101][102] Even when good information existed, such as a November 1939 Abwehr assessment of Fighter Command strengths and capabilities by Abteilung V, it was ignored if it did not match conventional preconceptions.

On 16 July 1940, Abteilung V, commanded by Oberstleutnant “Beppo” Schmid, produced a report on the RAF and on Britain’s defensive capabilities which was adopted by the frontline commanders as a basis for their operational plans. One of the most conspicuous failures of the report was the lack of information on the RAF’s RDF network and control systems capabilities; it was assumed that the system was rigid and inflexible, with the RAF fighters being “tied” to their home bases.[103][104] An optimistic and, as it turned out, erroneous conclusion reached was:

D. Supply Situation… At present the British aircraft industry produces about 180 to 300 first line fighters and 140 first line bombers a month. In view of the present conditions relating to production (the appearance of raw material difficulties, the disruption or breakdown of production at factories owing to air attacks, the increased vulnerability to air attack owing to the fundamental reorganisation of the aircraft industry now in progress), it is believed that for the time being output will decrease rather than increase.

In the event of an intensification of air warfare it is expected that the present strength of the RAF will fall, and this decline will be aggravated by the continued decrease in production.[104]

Because of this statement, reinforced by another more detailed report, issued on 10 August, there was a mindset in the ranks of the Luftwaffe that the RAF would run out of frontline fighters.[103] The Luftwaffe believed it was weakening Fighter Command at three times the actual attrition rate.[105] Many times, the leadership believed Fighter Command’s strength had collapsed, only to discover that the RAF were able to send up defensive formations at will.

Throughout the battle, the Luftwaffe had to use numerous reconnaissance sorties to make up for the poor intelligence. Reconnaissance aircraft (initially mostly Dornier Do 17s, but increasingly Bf 110s) proved easy prey for British fighters, as it was seldom possible for them to be escorted by Bf 109s. Thus, the Luftwaffe operated “blind” for much of the battle, unsure of its enemy’s true strengths, capabilities, and deployments. Many of the Fighter Command airfields were never attacked, while raids against supposed fighter airfields fell instead on bomber or coastal defence stations. The results of bombing and air fighting were consistently exaggerated, due to inaccurate claims, over-enthusiastic reports and the difficulty of confirmation over enemy territory. In the euphoric atmosphere of perceived victory, the Luftwaffe leadership became increasingly disconnected from reality. This lack of leadership and solid intelligence meant the Germans did not adopt consistent strategy, even when the RAF had its back to the wall. Moreover, there was never a systematic focus on one type of target (such as airbases, radar stations, or aircraft factories); consequently, the already haphazard effort was further diluted.[106]

Navigational aids

While the British were using radar for air defence more effectively than the Germans realised, the Luftwaffe attempted to press its own offensive with advanced radio navigation systems of which the British were initially not aware. One of these was Knickebein (“bent leg”); this system was used at night and for raids where precision was required. It was rarely used during the Battle of Britain (see Reginald Victor Jones and Battle of the Beams).[107]

Air-sea rescue

The Luftwaffe was much better prepared for the task of air-sea rescue than the RAF, specifically tasking the Seenotdienst unit, equipped with about 30 Heinkel He 59 floatplanes, with picking up downed aircrew from the North Sea, English Channel and the Dover Straits. In addition, Luftwaffe aircraft were equipped with life rafts and the aircrew were provided with sachets of a chemical called fluorescein which, on reacting with water, created a large, easy-to-see, bright green patch.[108][109] In accordance with the Geneva Convention, the He 59s were unarmed and painted white with civilian registration markings and red crosses. Nevertheless, RAF aircraft attacked these aircraft, as some were escorted by Bf 109s.[110]

After single He 59s were forced to land on the sea by RAF fighters, on 1 and 9 July respectively,[110][111] a controversial order was issued to the RAF on 13 July; this stated that from 20 July, Seenotdienst aircraft were to be shot down. One of the reasons given by Churchill was:

We did not recognise this means of rescuing enemy pilots so they could come and bomb our civil population again … all German air ambulances were forced down or shot down by our fighters on definite orders approved by the War Cabinet.[112]

The British also believed that their crews would report on convoys,[109] the Air Ministry issuing a communiqué to the German government on 14 July that Britain was

unable, however, to grant immunity to such aircraft flying over areas in which operations are in progress on land or at sea, or approaching British or Allied territory, or territory in British occupation, or British or Allied ships. Ambulance aircraft which do not comply with the above will do so at their own risk and peril[113]

The white He 59s were soon repainted in camouflage colours and armed with defensive machine guns. Although another four He 59s were shot down by RAF aircraft,[114] the Seenotdienst continued to pick up downed Luftwaffe and Allied aircrew throughout the battle, earning praise from Adolf Galland for their bravery.[115]

RAF strategy

Commander-in-Chief, Air Chief Marshal Sir Hugh Dowding
10 Group Commander, Sir Quintin Brand
11 Group Commander, Keith Park
12 Group Commander, Trafford Leigh-Mallory
13 Group Commander, Richard Saul

Dowding system

Chain Home radar cover, bases and group boundaries

Main article: Dowding system

During early tests of the Chain Home system, the slow flow of information from the CH radars and observers to the aircraft often caused them to miss their “bandits”. The solution, today known as the “Dowding system“, was to create a set of reporting chains to move information from the various observation points to the pilots in their fighters. It was named after its chief architect, “Stuffy” Dowding.[116]

Reports from CH radars and the Observer Corps were sent directly to Fighter Command Headquarters (FCHQ) at Bentley Priory where they were “filtered” to combine multiple reports of the same formations into single tracks. Telephone operators would then forward only the information of interest to the Group headquarters, where the map would be re-created. This process was repeated to produce another version of the map at the Sector level, covering a much smaller area. Looking over their maps, Group level commanders could select squadrons to attack particular targets. From that point the Sector operators would give commands to the fighters to arrange an interception, as well as return them to base. Sector stations also controlled the anti-aircraft batteries in their area; an army officer sat beside each fighter controller and directed the gun crews when to open and cease fire.[117]

The Dowding system dramatically improved the speed and accuracy of the information that flowed to the pilots. During the early war period it was expected that an average interception mission might have a 30% chance of ever seeing their target. During the battle, the Dowding system maintained an average rate over 75%, with several examples of 100% rates – every fighter dispatched found and intercepted its target. In contrast, Luftwaffe fighters attempting to intercept raids had to randomly seek their targets and often returned home having never seen enemy aircraft. The result is what is now known as an example of “force multiplication“; RAF fighters were as effective as two or more Luftwaffe fighters, greatly offsetting, or overturning, the disparity in actual numbers.

Effect of signals intelligence

It is unclear how much the British intercepts of the Enigma cipher, used for high-security German radio communications, affected the battle. Ultra, the information obtained from Enigma intercepts, gave the highest echelons of the British command a view of German intentions. According to F. W. Winterbotham, who was the senior Air Staff representative in the Secret Intelligence Service,[118] Ultra helped establish the strength and composition of the Luftwaffe’s formations, the aims of the commanders[119] and provided early warning of some raids.[120] In early August it was decided that a small unit would be set up at FCHQ, which would process the flow of information from Bletchley and provide Dowding only with the most essential Ultra material; thus the Air Ministry did not have to send a continual flow of information to FCHQ, preserving secrecy, and Dowding was not inundated with non-essential information. Keith Park and his controllers were also told about Ultra.[121] In a further attempt to camouflage the existence of Ultra, Dowding created a unit named No. 421 (Reconnaissance) Flight RAF. This unit (which later became No. 91 Squadron RAF), was equipped with Hurricanes and Spitfires and sent out aircraft to search for and report Luftwaffe formations approaching England.[122] In addition the radio listening service (known as Y Service), monitoring the patterns of Luftwaffe radio traffic, contributed considerably to the early warning of raids.

Air-sea rescue

One of the biggest oversights of the entire system was the lack of adequate air-sea rescue organisation. The RAF had started organising a system in 1940 with High Speed Launches (HSLs) based on flying boat bases and at a number of overseas locations, but it was still believed that the amount of cross-Channel traffic meant that there was no need for a rescue service to cover these areas. Downed pilots and aircrew, it was hoped, would be picked up by any boats or ships which happened to be passing by. Otherwise the local life boat would be alerted, assuming someone had seen the pilot going into the water.[123]

RAF aircrew were issued with a life jacket, nicknamed the “Mae West,” but in 1940 it still required manual inflation, which was almost impossible for someone who was injured or in shock. The waters of the English Channel and Dover Straits are cold, even in the middle of summer, and clothing issued to RAF aircrew did little to insulate them against these freezing conditions.[98] The RAF also imitated the German practice of issuing fluorescein.[109] A conference in 1939 had placed air-sea rescue under Coastal Command. Because a number of pilots had been lost at sea during the “Channel Battle”, on 22 August, control of RAF rescue launches was passed to the local naval authorities and 12 Lysanders were given to Fighter Command to help look for pilots at sea. In all some 200 pilots and aircrew were lost at sea during the battle. No proper air-sea rescue service was formed until 1941.[98]

Tactics

X4474, a late production Mk I Spitfire of 19 Squadron, September 1940. During the battle 19 Squadron was part of the Duxford Wing

Fighter formations

In the late 1930s, Fighter Command expected to face only bombers over Britain, not single-engined fighters. A series of “Fighting Area Tactics” were formulated and rigidly adhered to, involving a series of manoeuvres designed to concentrate a squadron’s firepower to bring down bombers. RAF fighters flew in tight, v-shaped sections (“vics”) of three, with four such “sections” in tight formation. Only the squadron leader at the front was free to watch for the enemy; the other pilots had to concentrate on keeping station.[124] Training also emphasised by-the-book attacks by sections breaking away in sequence. Fighter Command recognised the weaknesses of this structure early in the battle, but it was felt too risky to change tactics during the battle, because replacement pilots—often with only minimal flying time—could not be readily retrained,[125] and inexperienced pilots needed firm leadership in the air only rigid formations could provide.[126] German pilots dubbed the RAF formations Idiotenreihen (“rows of idiots”) because they left squadrons vulnerable to attack.[82][127]

Front line RAF pilots were acutely aware of the inherent deficiencies of their own tactics. A compromise was adopted whereby squadron formations used much looser formations with one or two “weavers” flying independently above and behind to provide increased observation and rear protection; these tended to be the least experienced men and were often the first to be shot down without the other pilots even noticing that they were under attack.[82][128] During the battle, 74 Squadron under Squadron Leader Adolph “Sailor” Malan adopted a variation of the German formation called the “fours in line astern”, which was a vast improvement on the old three aircraft “vic”. Malan’s formation was later generally used by Fighter Command.[129]

Squadron- and higher-level deployment

The weight of the battle fell upon 11 Group. Keith Park’s tactics were to dispatch individual squadrons to intercept raids. The intention was to subject incoming bombers to continual attacks by relatively small numbers of fighters and try to break up the tight German formations. Once formations had fallen apart, stragglers could be picked off one by one. Where multiple squadrons reached a raid the procedure was for the slower Hurricanes to tackle the bombers while the more agile Spitfires held up the fighter escort. This ideal was not always achieved, resulting in occasions when Spitfires and Hurricanes reversed roles.[130] Park also issued instructions to his units to engage in frontal attacks against the bombers, which were more vulnerable to such attacks. Again, in the environment of fast moving, three-dimensional air battles, few RAF fighter units were able to attack the bombers from head-on.[130]

During the battle, some commanders, notably Leigh-Mallory, proposed squadrons be formed into “Big Wings,” consisting of at least three squadrons, to attack the enemy en masse, a method pioneered by Douglas Bader.

Douglas Bader commanded 242 Squadron during the battle. He also led the Duxford Wing.

Proponents of this tactic claimed interceptions in large numbers caused greater enemy losses while reducing their own casualties. Opponents pointed out the big wings would take too long to form up, and the strategy ran a greater risk of fighters being caught on the ground refuelling. The big wing idea also caused pilots to overclaim their kills, due to the confusion of a more intense battle zone. This led to the belief big wings were far more effective than they were.[131]

The issue caused intense friction between Park and Leigh-Mallory, as 12 Group was tasked with protecting 11 Group’s airfields whilst Park’s squadrons intercepted incoming raids. However, the delay in forming up Big Wings meant the formations often did not arrive at all or until after German bombers had hit 11 Group’s airfields.[132] Dowding, to highlight the problem of the Big Wing’s performance, submitted a report compiled by Park to the Air Ministry on 15 November. In the report, he highlighted that during the period of 11 September – 31 October, the extensive use of the Big Wing had resulted in just 10 interceptions and one German aircraft destroyed, but his report was ignored.[133] Post-war analysis agrees Dowding and Park’s approach was best for 11 Group.

Dowding’s removal from his post in November 1940 has been blamed on this struggle between Park and Leigh-Mallory’s daylight strategy. However, the intensive raids and destruction wrought during the Blitz damaged both Dowding and Park in particular, for the failure to produce an effective night-fighter defence system, something for which the influential Leigh-Mallory had long criticised them.[134]

Bomber and Coastal Command contributions

A Bristol Blenheim Mk IV of 21 Squadron. The Blenheim bomber units of Bomber and Coastal Commands bore heavy casualties while undertaking a number of tasks during the battle

Bomber Command and Coastal Command aircraft flew offensive sorties against targets in Germany and France during the battle. After the initial disasters of the war, with Vickers Wellington bombers shot down in large numbers attacking Wilhelmshaven and the slaughter of the Fairey Battle squadrons sent to France, it became clear that Bomber Command would have to operate mainly at night to achieve any results without incurring very high losses.[135] From 15 May 1940, a night time bomber campaign was launched against the German oil industry, communications, and forests/crops, mainly in the Ruhr area.

As the threat mounted, Bomber Command changed targeting priority on 3 June 1940 to attack the German aircraft industry. On 4 July, the Air Ministry gave Bomber Command orders to attack ports and shipping. By September, the build-up of invasion barges in the Channel ports had become a top priority target.[136] On 7 September, the government issued a warning that the invasion could be expected within the next few days and, that night, Bomber Command attacked the Channel ports and supply dumps. On 13 September, they carried out another large raid on the Channel ports, sinking 80 large barges in the port of Ostend.[137] 84 barges were sunk in Dunkirk after another raid on 17 September and by 19 September, almost 200 barges had been sunk.[136] The loss of these barges may have contributed to Hitler’s decision to postpone Operation Sea Lion indefinitely.[136] The success of these raids was in part because the Germans had few Freya radar stations set up in France, so that air defences of the French harbours were not nearly as good as the air defences over Germany; Bomber Command had directed some 60% of its strength against the Channel ports.

Wellington crews studying maps at a briefing with the station commander, September 1940

The Bristol Blenheim units also raided German-occupied airfields throughout July to December 1940, both during daylight hours and at night. Although most of these raids were unproductive, there were some successes; on 1 August, five out of 12 Blenheims sent to attack Haamstede and Evere (Brussels) were able to bomb, destroying or heavily damaging three Bf 109s of II./JG 27 and apparently killing a Staffelkapitän identified as a Hauptmann Albrecht von Ankum-Frank. Two other 109s were claimed by Blenheim gunners.[138][nb 18] Another successful raid on Haamstede was made by a single Blenheim on 7 August which destroyed one 109 of 4./JG 54, heavily damaged another and caused lighter damage to four more.[139]

German invasion barges waiting at Boulogne Harbour, France during the Battle of Britain

There were some missions which produced an almost 100% casualty rate amongst the Blenheims; one such operation was mounted on 13 August 1940 against a Luftwaffe airfield near Aalborg in north-eastern Denmark by 12 aircraft of 82 Squadron. One Blenheim returned early (the pilot was later charged and due to appear before a court martial, but was killed on another operation), the other 11, which reached Denmark, were shot down, five by flak and six by Bf 109s. Of the 33 crewmen who took part in the attack, 20 were killed and 13 captured.[140]

As well as the bombing operations, Blenheim-equipped units had been formed to carry out long-range strategic reconnaissance missions over Germany and German-occupied territories. In this role, the Blenheims again proved to be too slow and vulnerable against Luftwaffe fighters, and they took constant casualties.[141]

Coastal Command directed its attention towards the protection of British shipping, and the destruction of enemy shipping. As invasion became more likely, it participated in the strikes on French harbours and airfields, laying mines, and mounting numerous reconnaissance missions over the enemy-held coast. In all, some 9,180 sorties were flown by bombers from July to October 1940. Although this was much less than the 80,000 sorties flown by fighters, bomber crews suffered about half the total number of casualties borne by their fighter colleagues. The bomber contribution was, therefore, much more dangerous on a loss-per-sortie comparison.[142]

Bomber, reconnaissance, and antisubmarine patrol operations continued throughout these months with little respite and none of the publicity accorded to Fighter Command. In his famous 20 August speech about “The Few“, praising Fighter Command, Churchill also made a point of mentioning Bomber Command’s contribution, adding that bombers were even then striking back at Germany; this part of the speech is often overlooked, even today.[143][144] The Battle of Britain Chapel in Westminster Abbey lists in a roll of honour, 718 Bomber Command crew members, and 280 from Coastal Command who were killed between 10 July and 31 October.[145]

Phases of the battle

German Heinkel He 111 bombers over the English Channel 1940

The battle can be roughly divided into four phases:

  • 10 July – 11 August: Kanalkampf (“the Channel battles”)
  • 12–23 August: Adlerangriff (“Eagle Attack”), the early assault against the coastal airfields
  • 24 August – 6 September: the Luftwaffe targets the airfields. The critical phase of the battle.
  • 7 September onwards: the day attacks switch to British towns and cities.

Channel battles

The Kanalkampf comprised a series of running fights over convoys in the English Channel. It was launched partly because Kesselring and Sperrle were not sure about what else to do, and partly because it gave German aircrews some training and a chance to probe the British defences.[88] Dowding could only provide minimal shipping protection, and these battles off the coast tended to favour the Germans, whose bomber escorts had the advantage of altitude and outnumbered the RAF fighters. From 9 July reconnaissance probing by Dornier Do 17 bombers put a severe strain on RAF pilots and machines, with high RAF losses to Bf 109s. When nine 141 Squadron Defiants went into action on 19 July six were lost to Bf 109s before a squadron of Hurricanes intervened. On 25 July a coal convoy and escorting destroyers suffered such heavy losses to attacks by Stuka dive bombers that the Admiralty decided convoys should travel at night: the RAF shot down 16 raiders but lost 7 aircraft. By 8 August 18 coal ships and 4 destroyers had been sunk, but the Navy was determined to send a convoy of 20 ships through rather than move the coal by railway. After repeated Stuka attacks that day, six ships were badly damaged, four were sunk and only four reached their destination. The RAF lost 19 fighters and shot down 31 German aircraft. The Navy now cancelled all further convoys through the Channel and sent the cargo by rail. Even so, these early combat encounters provided both sides with experience.[146]

Main assault

The main attack upon the RAF’s defences was code-named Adlerangriff (“Eagle Attack”).

Poor weather delayed Adlertag (“Eagle Day”) until 13 August 1940. On 12 August, the first attempt was made to blind the Dowding system, when aircraft from the specialist fighter-bomber unit Erprobungsgruppe 210 attacked four radar stations. Three were briefly taken off the air but were back working within six hours.[147] The raids appeared to show that British radars were difficult to knock out. The failure to mount follow-up attacks allowed the RAF to get the stations back on the air, and the Luftwaffe neglected strikes on the supporting infrastructure, such as phone lines and power stations, which could have rendered the radars useless, even if the towers themselves (which were very difficult to destroy) remained intact.[106]

Adlertag opened with a series of attacks, led again by Epro 210,[147] on coastal airfields used as forward landing grounds for the RAF fighters, as well as ‘satellite airfields’[nb 19] (including Manston and Hawkinge).[147] As the week drew on, the airfield attacks moved further inland, and repeated raids were made on the radar chain. 15 August was “The Greatest Day” when the Luftwaffe mounted the largest number of sorties of the campaign. Luftflotte 5 attacked the north of England. Believing Fighter Command strength to be concentrated in the south, raiding forces from Denmark and Norway ran into unexpectedly strong resistance. Inadequately escorted by Bf 110s, bombers were shot down in large numbers. North East England was attacked by 65 Heinkel 111s escorted by 34 Messerschmitt 110s, and RAF Great Driffield was attacked by 50 unescorted Junkers 88s. Out of 115 bombers and 35 fighters sent, 16 bombers and 7 fighters were destroyed.[148] As a result of these casualties, Luftflotte 5 did not appear in strength again in the campaign.

18 August, which had the greatest number of casualties to both sides, has been dubbed “The Hardest Day“. Following this grinding battle, exhaustion and the weather reduced operations for most of a week, allowing the Luftwaffe to review their performance. “The Hardest Day” had sounded the end for the Ju 87 in the campaign.[149] This veteran of Blitzkrieg was too vulnerable to fighters to operate over Britain. So as to preserve the Stuka force, Göring withdrew them from the fighting. This removed the main Luftwaffe precision-bombing weapon and shifted the burden of pinpoint attacks on the already-stretched Erpro 210. The Bf 110 proved too clumsy for dogfighting with single-engined fighters, and its participation was scaled back. It would only be used when range required it or when sufficient single-engined escort could not be provided for the bombers.

Göring made yet another fateful decision: to order more bomber escorts at the expense of free-hunting sweeps. To achieve this, the weight of the attack now fell on Luftflotte 2, and the bulk of the Bf 109s in Luftflotte 3 were transferred to Kesselring’s command, reinforcing the fighter bases in the Pas-de-Calais. Stripped of its fighters, Luftflotte 3 would concentrate on the night bombing campaign. Göring, expressing disappointment with the fighter performance thus far in the campaign, also made sweeping changes in the command structure of the fighter units, replacing many Geschwaderkommodore with younger, more aggressive pilots like Adolf Galland and Werner Mölders.[150]

Finally, Göring stopped the attacks on the radar chain. These were seen as unsuccessful, and neither the Reichsmarschall nor his subordinates realised how vital the Chain Home stations were to the defence systems. It was known that radar provided some early warning of raids, but the belief among German fighter pilots was that anything bringing up the “Tommies” to fight was to be encouraged.

Luftwaffe targets RAF airfields

Battle

Polish 303 squadron pilots, 1940. Left to right: P/O Ferić, Flt Lt Kent, F/O Grzeszczak, P/O Radomski, P/O Zumbach, P/O Łokuciewski, F/O Henneberg, Sgt. Rogowski, Sgt. Szaposznikow.

Göring ordered attacks on aircraft factories on 19 August 1940; on 23 August 1940 he ordered that RAF airfields be attacked. That evening an attack was mounted on a tyre factory in Birmingham. Raids on airfields continued through 24 August, and Portsmouth was hit by a major attack. That night, several areas of London were bombed; the East End was set ablaze and bombs landed on central London. Some historians believe that these bombs were dropped accidentally by a group of Heinkel He 111s which had failed to find their target; this account has been contested.[151] In retaliation, the RAF bombed Berlin on the night of 25–26 August, and continued bombing raids on Berlin. Göring’s pride was hurt, as he had previously claimed the British would never be able to bomb the city. The attacks enraged Hitler, who ordered retaliatory attacks on London.[152]

From 24 August onwards, the battle was a fight between Kesselring’s Luftflotte 2 and Park’s 11 Group. The Luftwaffe concentrated all their strength on knocking out Fighter Command and made repeated attacks on the airfields. Of the 33 heavy attacks in the following two weeks, 24 were against airfields. The key sector stations were hit repeatedly: Biggin Hill and Hornchurch four times each; Debden and North Weald twice each. Croydon, Gravesend, Rochford, Hawkinge and Manston were also attacked in strength. Coastal Command‘s Eastchurch was bombed at least seven times because it was believed to be a Fighter Command aerodrome. At times these raids caused some damage to the sector stations, threatening the integrity of the Dowding system.

To offset some losses, some 58 Fleet Air Arm fighter pilot volunteers were seconded to RAF squadrons, and a similar number of former Fairey Battle pilots were used. Most replacements from Operational Training Units (OTUs) had as little as nine hours flying time and no gunnery or air-to-air combat training. At this point, the multinational nature of Fighter Command came to the fore. Many squadrons and personnel from the air forces of the Dominions were already attached to the RAF, including top level commanders – Australians, Canadians, New Zealanders, Rhodesians and South Africans. In addition, there were other nationalities represented, including Free French, Belgian and a Jewish pilot from the British mandate of Palestine.

They were bolstered by the arrival of fresh Czechoslovak and Polish squadrons. These had been held back by Dowding, who mistakenly thought non-English speaking aircrew would have trouble working within his control system: Polish and Czech fliers proved to be especially effective. The pre-war Polish Air Force had lengthy and extensive training, and high standards; with Poland conquered and under brutal German occupation, the pilots of No. 303 (Polish) Squadron, the highest-scoring Allied unit,[153] were strongly motivated. Josef František, a Czech regular airman who had flown from the occupation of his own country to join the Polish and then French air forces before arriving in Britain, flew as a guest of 303 Squadron and was ultimately credited with the highest “RAF score” in the Battle of Britain.[154]

The RAF had the advantage of fighting over home territory. Pilots who bailed out of their downed aircraft could be back at their airfields within hours, while if low on fuel and/or ammunition they could be immediately rearmed.[155] One RAF pilot interviewed in late 1940 had been shot down five times during the Battle of Britain, but was able to crash land in Britain or bail out each time.[156] For Luftwaffe aircrews, a bailout over England meant capture – in the critical August period, almost exactly as many Luftwaffe pilots were taken prisoner as were killed[157] – while parachuting into the English Channel often meant drowning or death from exposure. Morale began to suffer, and [Kanalkrankheit] (“Channel sickness”) – a form of combat fatigue – began to appear among the German pilots. Their replacement problem was even worse than the British.

Impact of offensive

The effect of the German attacks on airfields is unclear. According to Stephen Bungay, Dowding, in a letter to Hugh Trenchard[158] accompanying Park’s report on the period 8 August – 10 September 1940, states that the Luftwaffe “achieved very little” in the last week of August and the first week of September.[159] The only Sector Station to be shut down operationally was Biggin Hill, and it was non-operational for just two hours. Dowding admitted 11 Group’s efficiency was impaired but, despite serious damage to some airfields, only two out of 13 heavily attacked airfields were down for more than a few hours. The German refocus on London was not critical.[159]

Retired air marshal Peter Dye, head of the RAF Museum, discussed the logistics of the battle in 2000[160] and 2010,[161] dealing specifically with the single-seat fighters. Dye contends that not only was British aircraft production replacing aircraft, but replacement pilots were keeping pace with losses. The number of pilots in RAF Fighter Command increased during July, August and September. The figures indicate the number of pilots available never decreased. From July, 1,200 were available. In 1 August, 1,400 were available. Just over that number were in the field by September. In October the figure was nearly 1,600. By 1 November 1,800 were available. Throughout the battle, the RAF had more fighter pilots available than the Luftwaffe.[160][161] Although the RAF’s reserves of single seat fighters fell during July, the wastage was made up for by an efficient Civilian Repair Organisation (CRO), which by December had repaired and put back into service some 4,955 aircraft,[162] and by aircraft held at Air Servicing Unit (ASU) airfields.[163]

Richard Overy agrees with Dye and Bungay. Overy asserts only one airfield was temporarily put out of action and “only” 103 pilots were lost. British fighter production produced 496 new aircraft in July and 467 in August, and another 467 in September (not counting repaired aircraft), covering the losses of August and September. Overy indicates the number of serviceable and total strength returns reveal an increase in fighters from 3 August to 7 September, 1,061 on strength and 708 serviceable to 1,161 on strength and 746 serviceable.[164] Moreover, Overy points out that the number of RAF fighter pilots grew by one-third between June and August 1940. Personnel records show a constant supply of around 1,400 pilots in the crucial weeks of the battle. In the second half of September it reached 1,500. The shortfall of pilots was never above 10%. The Germans never had more than between 1,100 and 1,200 pilots, a deficiency of up to one-third. “If Fighter Command were ‘the few’, the German fighter pilots were fewer”.[165]

Other scholars assert that this period was the most dangerous of all. In The Narrow Margin, published in 1961, historians Derek Wood and Derek Dempster believed that the two weeks from 24 August to 6 September represented a real danger. According to them, from 24 August to 6 September 295 fighters had been totally destroyed and 171 badly damaged, against a total output of 269 new and repaired Spitfires and Hurricanes. They assert that 103 pilots were killed or missing and 128 were wounded, which represented a total wastage of 120 pilots per week out of a fighting strength of just fewer than 1,000. They conclude that during August no more than 260 fighter pilots were turned out by OTUs and casualties in the same month were just over 300. A full squadron establishment was 26 pilots whereas the average in August was 16. In their assessment, the RAF was losing the battle.[166] Denis Richards, in his 1953 contribution to the official British account History of the Second World War, agreed that lack of pilots, especially experienced ones, was the RAF’s greatest problem. He states that between 8 and 18 August 154 RAF pilots were killed, severely wounded, or missing, while only 63 new pilots were trained. Availability of aircraft was also a serious issue. While its reserves during the Battle of Britain never declined to a half dozen planes as some later claimed, Richards describes 24 August to 6 September as the critical period because during these two weeks Germany destroyed far more aircraft through its attacks on 11 Group’s southeast bases than Britain was producing. Three more weeks of such a pace would indeed have exhausted aircraft reserves. Germany had seen heavy losses of pilots and aircraft as well however, thus its shift to night-time attacks in September. On 7 September RAF aircraft losses fell below British production and remained so until the end of the war.[167]

Raids on British cities

Main articles: The Blitz and Battle of Britain Day

Calais, September 1940. Göring giving a speech to pilots about the change in tactics: to bomb the towns instead of the airfields

Hitler’s No. 17 Directive on the conduct of war against the United Kingdom, issued on 1 August 1940, specifically prohibited the Luftwaffe from conducting terror raids on its own initiative, and reserved the right of ordering terror attacks as means of reprisal for the Führer himself:[168]

The war against England is to be restricted to destructive attacks against industry and air force targets which have weak defensive forces … The most thorough study of the target concerned, that is vital points of the target, is a pre-requisite for success. It is also stressed that every effort should be made to avoid unnecessary loss of life amongst the civilian population.[169]

The Luftwaffe offensive against Britain had included numerous raids on major ports since August, but Hitler had issued a directive that London was not to be bombed save on his sole instruction.[170] However, on the afternoon of 15 August, Hauptmann Walter Rubensdörffer leading Erprobungsgruppe 210 mistakenly bombed the Croydon airfield (on the outskirts of London) instead of the intended target, RAF Kenley;[171] this was followed on the night of 23/24 August[137] by the accidental bombing of Harrow, also on the outskirts of London, as well as raids on Aberdeen, Bristol, and South Wales. The focus on attacking airfields had also been accompanied by a sustained bombing campaign which began on 24 August with the largest raid so far, killing 100 in Portsmouth, and that evening the first night raid on London as described above.[151] On 25 August 1940, 81 bombers of Bomber Command were sent out to raid industrial and commercial targets in Berlin. Clouds prevented accurate identification and the bombs fell across the city, causing some casualties among the civilian population as well as damage to residential areas.[172] Continuing RAF raids on Berlin in retaliation led to Hitler withdrawing his directive,[173] and on 3 September Göring planned to bomb London daily, with General Albert Kesselring‘s enthusiastic support, having received reports the average strength of RAF squadrons was down to five or seven fighters out of twelve and their airfields in the area were out of action. Hitler issued a directive on 5 September to attack cities including London.[174][175] In his speech delivered on 4 September 1940, Hitler threatened to obliterate (ausradieren) British cities if British bombing runs against Germany did not stop.

Bombing of London

On 7 September, a massive series of raids involving nearly four hundred bombers and more than six hundred fighters targeted docks in the East End of London, day and night. The raids were code named Operation Loge. The RAF anticipated attacks on airfields and 11 Group rose to meet them, in greater numbers than the Luftwaffe expected. The first official deployment of 12 Group’s Lee-Mallory’s Big Wing took twenty minutes to form up, missing its intended target, but encountering another formation of bombers while still climbing. They returned, apologetic about their limited success, and blamed the delay on being scrambled too late.[152][176] Fighter Command had been at its lowest ebb, short of men and machines, and the break from airfield attacks allowed them to recover. 11 Group had considerable success in breaking up daytime raids. 12 Group repeatedly disobeyed orders and failed to meet requests to protect 11 Group airfields, but their experiments with increasingly large Big Wings had some success. The Luftwaffe began to abandon their morning raids, with attacks on London starting late in the afternoon for fifty-seven consecutive nights.[177]

Members of the London Auxiliary Firefighting Service

The most damaging aspect to the Luftwaffe of targeting London was the increase in range. The Bf 109E escorts had a limited fuel capacity resulting in only a 660 km (410 mile) maximum range solely on internal fuel,[178] and when they arrived had only 10 minutes of flying time before turning for home, leaving the bombers undefended by fighter escorts. Its eventual stablemate, the Focke-Wulf Fw 190A, was only flying in prototype form in the summer of 1940; the first 28 Fw 190s were not delivered until November 1940. The Fw 190A-1 had a maximum range of 940 km (584 miles) on internal fuel, 40% greater than the Bf 109E.[179] The Messerschmitt Bf 109E-7 corrected this deficiency by adding a ventral center-line ordnance rack to take either an SC 250 bomb or a standard 300 litre Luftwaffe drop tank to double the range to 1,325 km (820 mi). The ordnance rack was not retrofitted to earlier Bf 109Es until October 1940.

On 14 September, Hitler chaired a meeting with the OKW staff. Göring was in France directing the decisive battle, so Erhard Milch deputized for him.[180] Hitler asked “Should we call it off altogether?”. General Hans Jeschonnek, Luftwaffe Chief of Staff, begged for a last chance to defeat the RAF and for permission to launch attacks on civilian residential areas to cause mass panic. Hitler refused the latter, perhaps unaware of how much damage had already been done to civilian targets. He reserved for himself the power to unleash the terror weapon. Instead political will was to be broken by destroying the material infrastructure, the weapons industry, and stocks of fuel and food.

On 15 September, two massive waves of German attacks were decisively repulsed by the RAF by deploying every aircraft in 11 Group. Sixty German and 26 RAF aircraft were shot down. Two days after the German defeat Hitler postponed preparations for the invasion of Britain. Henceforth, in the face of mounting losses in men, aircraft and the lack of adequate replacements, the Luftwaffe switched from daylight to nighttime bombing. 15 September is commemorated as Battle of Britain Day.

On 16 September, Göring ordered the air fleets to begin the new phase of the battle.[181] Hitler hoped this might result in “eight million going mad” (referring to the population of London in 1940), which would “cause a catastrophe” for the British. In those circumstances, Hitler said, “even a small invasion might go a long way”. Hitler was against cancelling the invasion as “the cancellation would reach the ears of the enemy and strengthen his resolve”.[nb 20][nb 21]

Gun camera film shows tracer ammunition from a Supermarine Spitfire Mark I of 609 Squadron, flown by Flight Lieutenant J H G McArthur, hitting a Heinkel He 111 on its starboard quarter. These aircraft were part of a large formation from KG 53 and 55 which attacked the Bristol Aeroplane Company’s works at Filton, Bristol, just before midday on 25 September 1940.

A Junkers Ju 88 returning from a raid on London was shot down in Kent on 27 September resulting in the Battle of Graveney Marsh, the last action between British and foreign military forces on British mainland soil.[183]

Hitler postponed the invasion on 13 October “until the spring of 1941”, and October is regarded as the month regular bombing of Britain ended. It was not until Hitler’s Directive 21 was issued, on 18 December 1940, that the threat of invasion finally ended.[137]

During the battle, and for the rest of the war, an important factor in keeping public morale high was the continued presence in London of King George VI and his wife Queen Elizabeth. When war broke out in 1939, the King and Queen decided to stay in London and not flee to Canada, as had been suggested.[nb 22] George VI and Elizabeth officially stayed in Buckingham Palace throughout the war, although they often spent weekends at Windsor Castle to visit their daughters, Elizabeth (the future queen) and Margaret.[184] Buckingham Palace was damaged by bombs which landed in the grounds on 10 September and, on 13 September, more serious damage was caused by two bombs which destroyed the Royal Chapel. The royal couple were in a small sitting room about 80 yards from where the bombs exploded.[185][186] On 24 September, in recognition of the bravery of civilians, King George VI inaugurated the award of the George Cross.

Attrition statistics

Overall, by 2 November, the RAF fielded 1,796 pilots, an increase of over 40% from July 1940’s count of 1,259 pilots.[187] Based on German sources (from a Luftwaffe intelligence officer Otto Bechtle attached to KG 2 in February 1944) translated by the Air Historical Branch, Stephen Bungay asserts German fighter and bomber “strength” declined without recovery, and that from August – December 1940, the German fighter and bomber strength declined by 30 and 25 percent.[11] In contrast, Williamson Murray, argues (using translations by the Air Historical Branch) that 1,380 German bombers were on strength on 29 June 1940,[9][188] 1,420 bombers on 28 September,[189] 1,423 level bombers on 2 November[190] and 1,393 bombers on 30 November 1940.[190] In July – September the number of Luftwaffe pilots available fell by 136, but the number of operational pilots had shrunk by 171 by September. The training organisation of the Luftwaffe was failing to replace losses. German fighter pilots, in contrast to popular perception, were not afforded training or rest rotations unlike their British counterparts.[80] The first week of September accounted for 25% of the Fighter Command, and 24% of the Luftwaffe’s overall losses.[191] Between the dates 26 August – 6 September, on only one day (1 September) did the Germans destroy more aircraft than they lost. Losses were 325 German and 248 British.[192]

Luftwaffe losses for August numbered 774 aircraft to all causes, representing 18.5% of all combat aircraft at the beginning of the month.[193] Fighter Command’s losses in August were 426 fighters destroyed,[194] amounting to 40 per cent of 1,061 fighters available on 3 August.[195] In addition, 99 German bombers and 27 other types were destroyed between 1 and 29 August.[196]

From July to September, the Luftwaffe’s loss records indicate the loss of 1,636 aircraft, 1,184 to enemy action.[188] This represented 47% of the initial strength of single-engined fighters, 66% of twin-engined fighters, and 45% of bombers. This indicates the Germans were running out of aircrews as well as aircraft.[197]

Throughout the battle, the Germans greatly underestimated the size of the RAF and the scale of British aircraft production. Across the Channel, the Air Intelligence division of the Air Ministry consistently overestimated the size of the German air enemy and the productive capacity of the German aviation industry. As the battle was fought, both sides exaggerated the losses inflicted on the other by an equally large margin. However, the intelligence picture formed before the battle encouraged the Luftwaffe to believe that such losses pushed Fighter Command to the very edge of defeat, while the exaggerated picture of German air strength persuaded the RAF that the threat it faced was larger and more dangerous than was the case.[198] This led the British to the conclusion that another fortnight of attacks on airfields might force Fighter Command to withdraw their squadrons from the south of England. The German misconception, on the other hand, encouraged first complacency, then strategic misjudgement. The shift of targets from air bases to industry and communications was taken because it was assumed that Fighter Command was virtually eliminated.[199]

Between the 24 August and 4 September, German serviceability rates, which were acceptable at Stuka units, were running at 75% with Bf 109s, 70% with bombers and 65% with Bf 110s, indicating a shortage of spare parts. All units were well below established strength. The attrition was beginning to affect the fighters in particular.”[200] By 14 September, the Luftwaffe’s Bf 109 Geschwader possessed only 67% of their operational crews against authorised aircraft. For Bf 110 units it was 46 per cent; and for bombers it was 59 per cent. A week later the figures had dropped to 64 per cent, 52% and 52 per cent.[197] Serviceability rates in Fighter Command’s fighter squadrons, between the 24 August and 7 September, were listed as: 64.8% on 24 August; 64.7% on 31 August and 64.25% on 7 September 1940.[195]

Due to the failure of the Luftwaffe to establish air supremacy, a conference assembled on 14 September at Hitler’s headquarters. Hitler concluded that air superiority had not yet been established and “promised to review the situation on 17 September for possible landings on 27 September or 8 October. Three days later, when the evidence was clear that the German Air Force had greatly exaggerated the extent of their successes against the RAF, Hitler postponed Sea Lion indefinitely.”[201]

Aftermath

The Battle of Britain marked the first defeat of Hitler’s military forces, with air superiority seen as the key to victory.[202] Pre-war theories had led to exaggerated fears of strategic bombing, and UK public opinion was buoyed by coming through the ordeal.[203] For the RAF, Fighter Command had achieved a great victory in successfully carrying out Sir Thomas Inskip’s 1937 air policy of preventing the Germans from knocking Britain out of the war. Churchill concluded his famous 18 June ‘Battle of Britain’ speech in the House of Commons by referring to pilots and aircrew who fought the Battle: “… if the British Empire and its Commonwealth lasts for a thousand years, men will still say, ‘This was their finest hour.'”[204][nb 23]

The battle also significantly shifted American opinion. During the battle, many Americans accepted the view promoted by Joseph Kennedy, the American ambassador in London, who believed that the United Kingdom could not survive. Roosevelt wanted a second opinion, and sent “Wild Bill” Donovan on a brief visit to the UK; he became convinced the UK would survive and should be supported in every possible way.[205][206] Before the end of the year, American journalist Ralph Ingersoll, who had been in Britain, published an influential book concluding that “Adolf Hitler met his first defeat in eight years” in what might “go down in history as a battle as important as Waterloo or Gettysburg“. The turning point was when the Germans reduced the intensity of the Blitz after 15 September. According to Ingersoll, “[a] majority of responsible British officers who fought through this battle believe that if Hitler and Göring had had the courage and the resources to lose 200 planes a day for the next five days, nothing could have saved London”; instead, “[the Luftwaffe’s] morale in combat is definitely broken, and the RAF has been gaining in strength each week.”[207]

Both sides in the battle made exaggerated claims of numbers of enemy aircraft shot down. In general, claims were two to three times the actual numbers, because of the confusion of fighting in dynamic three-dimensional air battles. Postwar analysis of records has shown that between July and September, the RAF claimed 2,698 kills, while the Luftwaffe fighters claimed 3,198 RAF aircraft downed. Total losses, and start and end dates for recorded losses, vary for both sides. Luftwaffe losses from 10 July to 30 October 1940 total 1,652 aircraft, including 229 twin- and 533 single-engined fighters.[208] In the same period, RAF Fighter Command aircraft losses number 1,087, including 53 twin-engined fighters.[208] To the RAF figure should be added 376 Bomber Command and 148 Coastal Command aircraft conducting bombing, mining, and reconnaissance operations in defence of the country.[11]

Dr. Andrew Gordon, who lectures at the Joint Services Command and Staff College, and a former lecturer Professor Gary Sheffield, have suggested the existence of the Royal Navy was enough to prevent the Germans from invading;[209] even had the Luftwaffe won the air battle, the Germans had limited means with which to combat the Royal Navy, which would have intervened to prevent a landing. Some veterans of the battle point out the Royal Navy would have been vulnerable to air attack by the Luftwaffe if Germany had achieved air superiority,[210] citing the sinking of Prince of Wales and Repulse in December 1941 by an attack by Japanese aircraft.[210] In late May 1941 during the successful German airborne assault which seized Crete, the Royal Navy was able to prevent attempted German seaborne landings on the coast of Crete, despite losing six ships in three days due to undisputed Luftwaffe air supremacy. Churchill later wrote that the Royal Navy’s defeat of “these practically defenceless convoys of troops across waters of which they did not possess naval command as well as that of the air is a sample of what might have happened on a gigantic scale in the North Sea and English Channel in September 1940.”[211][212] Crete was lost to German airborne troops which neither the RN nor the absent RAF could stop.

A considered view of the battle also has to take into account the vital role of the Royal Navy. It was widely acknowledged by both sides that the only way of achieving a successful invasion of the British Isles was through the establishment of naval supremacy. Given the inability of the Luftwaffe to effect real damage on the RN throughout the battle and during the Dunkirk and Norwegian campaigns, as well as the lack of surface assets in the Kriegsmarine‘s inventory, sea control of the Channel by Germany was impossible. As one of ‘the Few’, Wg Cdr H R Allen said, “It was sea power that ruled the day in 1940, and fortunately Britain had a sufficiency. The air situation was, of course, important, but by no means fundamental. Without doubt the five hundred or so section, flight and squadron commanders in Fighter Command earned their laurels. But the real victor was the Royal Navy, the Silent Service.”[213] The Luftwaffe had 1,380 bombers on 29 June 1940. By 2 November 1940, this had increased to 1,423,[214] and to 1,511 by 21 June 1941, prior to Operation Barbarossa, but showing a drop of 200 from 1,711 reported on 11 May 1940.[215][216][nb 24] 1,107 single- and 357 twin-engined daylight fighters were reported on strength prior to the battle on 29 June 1940, compared to 1,440 single- and 188 twin-engined fighters, plus 263 night fighters, on 21 June 1941.[188][215]

There is a consensus among historians that the Luftwaffe simply could not crush the RAF. Stephen Bungay described Dowding and Park’s strategy of choosing when to engage the enemy whilst maintaining a coherent force as vindicated; their leadership, and the subsequent debates about strategy and tactics, however, had created enmity among RAF senior commanders and both were sacked from their posts in the immediate aftermath of the battle.[217] All things considered, the RAF proved to be a robust and capable organisation which was to use all the modern resources available to it to the maximum advantage.[218] Richard Evans wrote:

Irrespective of whether Hitler was really set on this course, he simply lacked the resources to establish the air superiority that was the sine qua non-of a successful crossing of the English Channel. A third of the initial strength of the German air force, the Luftwaffe, had been lost in the western campaign in the spring. The Germans lacked the trained pilots, the effective fighter aircraft, and the heavy bombers that would have been needed.[219][nb 25]

The Germans launched some spectacular attacks against important British industries, but they could not destroy the British industrial potential, and made little systematic effort to do so. Hindsight does not disguise the fact the threat to Fighter Command was very real, and for the participants it seemed as if there was a narrow margin between victory and defeat. Nevertheless, even if the German attacks on the 11 Group airfields which guarded southeast England and the approaches to London had continued, the RAF could have withdrawn to the Midlands out of German fighter range and continued the battle from there.[221] The victory was as much psychological as physical. Writes Alfred Price:

The truth of the matter, borne out by the events of 18 August is more prosaic: neither by attacking the airfields, nor by attacking London, was the Luftwaffe likely to destroy Fighter Command. Given the size of the British fighter force and the general high quality of its equipment, training and morale, the Luftwaffe could have achieved no more than a Pyrrhic victory. During the action on 18 August it had cost the Luftwaffe five trained aircrew killed, wounded or taken prisoner, for each British fighter pilot killed or wounded; the ratio was similar on other days in the battle. And this ratio of 5:1 was very close to that between the number of German aircrew involved in the battle and those in Fighter Command. In other words the two sides were suffering almost the same losses in trained aircrew, in proportion to their overall strengths. In the Battle of Britain, for the first time during the Second World War, the German war machine had set itself a major task which it patently failed to achieve, and so demonstrated that it was not invincible. In stiffening the resolve of those determined to resist Hitler the battle was an important turning point in the conflict.[222]

The British victory in the Battle of Britain was achieved at a heavy cost. Total British civilian losses from July to December 1940 were 23,002 dead and 32,138 wounded, with one of the largest single raids on 19 December 1940, in which almost 3,000 civilians died. With the culmination of the concentrated daylight raids, Britain was able to rebuild its military forces and establish itself as an Allied stronghold, later serving as a base from which the Liberation of Western Europe was launched.[20]

Battle of Britain Day

Winston Churchill summed up the effect of the battle and the contribution of Fighter Command with the words, “Never in the field of human conflict was so much owed by so many to so few“.[144][223] Pilots who fought in the battle have been known as The Few ever since; at times being specially commemorated on “Battle of Britain Day”, the 15th of September. On this day in 1940, the Luftwaffe embarked on their largest bombing attack yet, forcing the engagement of the entirety of the RAF in defence of London and the South East, which resulted in a decisive British victory that proved to mark a turning point in Britain’s favour.[224][225]

Within the Commonwealth, Battle of Britain Day has been observed more usually on the third Sunday in September, and even on the 2nd Thursday in September in some areas in the British Channel Islands.

The day has been observed by many artists over the years, often with works that show the battle itself. Many Mixed Media artists have also created pieces in honor of the Battle of Britain.[226]

British SAS Special Forces. Its about time the Terrorists were Terrorised.

 Send in the SAS See how brave they are faced with real Warriors

——————————————————————————————————

British Forces In Firefight with Taliban ( Afghanistan )

The footage follows a squad of British soldiers on foot patrol through irrigated farmland who quickly, soon after leaving their combat outpost, run into a firefight with
Taliban insurgents

——————————————————————————————————

UK vs ISIS: Elite SAS soldiers deployed on secret sniper missions to kill Islamic State militants

Squads of elite British Special Air Service soldiers have been deployed on secret missions to kill Islamic State militants, eliminating up to eight jihadists a day, according to a report in the Mail on Sunday.

Such attacks, which are often launched at night, may reflect a heightened effort from the United Kingdom to fight the Islamic State, as the SAS had previously said it was only engaged in non-combat missions in the area.

Before a mission begins, drones are sent to collect footage of potential target sites, while intelligence officials tap the phones of Islamic State leaders to gather more information.

SAS soldiers are carried to the drop site in Chinook helicopters. Since the helicopter’s engines are loud, the drop site can be as far as 80 kilometres from the target. The troops then prepare their heavy machine guns and sniper rifles before heading to the target site on quad bikes.

Their guerilla-style attacks take enemies by surprise and make it difficult for them to mount a defense. “Our tactics are putting the fear of God into IS as they don’t know where we’re going to strike next and there’s frankly nothing they can do to stop us,” an unnamed SAS source told the Mail on Sunday.

The United States and the United Kingdom will be coordinating an offensive by 20,000 Iraqi and Kurdish troops in spring.

———————————————————————————————————-

paypal donation button

Second Battle of Ypres – Remembering their sacrifice . Never forget

Second Battle of Ypres

A brief summary of the events that took place in April 1915 outside the town of Ypres.

The first battle of Ypres 1914 – Remembering Their Sacrifices. We Salute you all!

The first battle of Ypres 1914 – Remembering Their Sacrifices. We Salute you all!.

The first battle of Ypres 1914 – Remembering Their Sacrifices. We Salute you all!

Slide show remembering those lost  at the first battle of Ypres 1914

First Battle of Ypres

The First Battle of Ypres (19 October – 22 November) was a First World War battle fought around Ypres, in western Belgium during October and November 1914. The battle took place as part of the First Battle of Flanders (French: Première Bataille des Flandres German: Erste Flandernschlacht), in which German, French, Belgian and British armies fought from Arras in France to Nieuport on the Belgian coast, from 10 October to mid-November. The battles at Ypres began at the end of the Race to the Sea which involved attempts by the German and Franco-British armies to advance past the northern flank of their opponents. North of Ypres the fighting continued in the Battle of the Yser (16–31 October), fought between the German 4th Army and a largely Belgian force.

The fighting has been divided into five stages, an encounter battle from 19–21 October, the Battle of Langemarck from 21–24 October, the battles at La Bassée and Armentières to 2 November, coincident with more Allied attacks at Ypres and the Battle of Gheluvelt (29–31 October), a fourth phase with the last big German offensive which culminated at the Battle of Nonne Bosschen on 11 November then local operations, which faded out in late November. J. E. Edmonds, the British Official Historian, wrote that the II Corps battle at La Bassée could be taken as separate but that the battles from Armentières to Messines and Ypres, were better understood as a battle in two parts, an offensive by III Corps and the Cavalry Corps from 12–18 October), against which the Germans retired and an offensive by the German 6th and 4th armies from (19 October – 2 November), which from 30 October took place mainly north of the Lys, when the battles of Armentières and Messines merged with the Battles of Ypres.[a]

Attacks by the BEF, Belgians and a new French Eighth Army in Belgium made little progress beyond Ypres and then the German 4th and 6th armies took small amounts of ground at great cost to both sides, during the Battle of the Yser (16–31 October) and further south at Ypres. Falkenhayn then tried a limited offensive to capture Ypres and Mount Kemmel, from (19 October – 22 November). Neither side had moved forces to Flanders fast enough to obtain a decisive victory and by November, both were exhausted, short of ammunition and suffering from collapses in morale; some infantry units refused orders. The autumn battles in Flanders had quickly become static, attritional operations, unlike the battles of manoeuvre in the summer. French, British and Belgian troops in improvised field defences, repulsed German attacks for four weeks. From 21–23 October, German reservists had made mass attacks at Langemarck, with losses of up to 70 percent to little effect.

Warfare between mass armies, equipped with the weapons of the Industrial Revolution and its later developments, proved to be indecisive, because field fortifications neutralised many classes of offensive weapon. The defensive use of artillery and machine-guns had dominated the battlefield and the ability of the armies to supply themselves and replace casualties, prolonged battles for weeks. The German armies engaged 34 divisions in the Flanders battles, the French twelve, the British nine and the Belgians six, along with marines and dismounted cavalry. Falkenhayn reconsidered German strategy over the winter, because Vernichtungsstrategie and a dictated peace against France and Russia had been shown to be beyond German resources. Falkenhayn intended to detach Russia or France from the Allied coalition, by diplomatic as well as military action. A strategy of attrition (Ermattungsstrategie), would make the cost of the war too great, until one enemy negotiated an end to the war. The remaining belligerents would have to negotiate or face the German army concentrated on the remaining front, which would be sufficient to obtain a decisive victory.

For other Battles of Ypres, see Battle of Ypres.

Battle of the Somme Footage (1916). We Salute you all.

Battle of the Somme Footage (1916)

“One death is a tragedy; one million is a statistic”

In my opinion every death is a tragedy

Irish Soldiers in the Battle of the Somme

The Battle of the Somme, whose 90th anniversary we commemorate this year, began on 1 July 1916 in the high expectation of a major victory that would bring the carnage of the First World War to an end. By the time it petered out in the rain and snow of the following November, more than one million soldiers from both sides had died without making any appreciable alteration in the opening position.  Among the dead were over 3,500 Irish soldiers, with many more wounded. This large loss of life was made even more horrendous by its occurrence within the short space of the first day of the Battle and two days in the following September. In particular, the 5,500 casualties of the 36th Ulster Division on 1 July were men drawn almost entirely from one community in the province of Ulster. Nearly 2,000 soldiers from cities, towns, villages and town lands of the North were killed in the first few hours of fighting, an event which seared itself into the folk memory of their community. In a continuation of the same battle, the 16th Irish Division had 4,330 casualties in September, of whom 1,200 were killed. These came mainly from the other three provinces. Added to these were the Irish soldiers who fought in other divisions as part of the regular army or in the newly raised battalions. The total number of Irish casualties cannot be calculated with certainty but they affected every part of the island and continue to have an influence on the evolution of Irish politics.

We salute you all

Battle of the Somme Footage (1916). A Day that Shook the World. The Battle of the Somme began on July 1st, 1916 during World War One. A bloody battle that claimed more than 1 million casualties over a 5 month period. John Humphrys narrates. Includes footage of the battle.

A Day That Shook The World is the classic series that recalls the days of the 20th century that proved to be era-defining and pivotal in the course of modern history.

Roman Invasion of Britain (1- 3): Onslaught (with Bettany Hughes)

Roman Invasion of Britain ( Part 1 )

The Romans came to Britain and conquered it, ruling the island for centuries.  But why did they come and how did they succeed in the face of the inhabitants’ ferocious resistance? Using state-of-the-art graphic imagery and expert reconstructions of the Roman army in action, Bettany Hughes goes back in time to see how they inspired shock and awe. Hughes analyses the motives and actions of Roman emperors and generals, and of their opponents like Caratacus, a warrior from South-East England who became a hero to the Britons.

Roman Invasion of Britain ( Part 2 )

Roman Invasion of Britain (Part 3)