Category Archives: Great British Battles

Great British Battles – The Battle of Rorke’s Drift– 22nd – 23rd January 1879

Battle of Rorke’s Drift

22–23 January 1879

Location
Rorke’s Drift, Natal Province, South Africa

Greatest Scenes in Movies, EVER

———————————————————————–

The Battle of Rorke’s Drift

The Battle of Rorke’s Drift, also known as the Defence of Rorke’s Drift, was a battle in the Anglo-Zulu War. The defence of the mission station of Rorke’s Drift, under the command of Lieutenant John Chard of the Royal Engineers, and Lieutenant Gonville Bromhead immediately followed the British Army‘s defeat at the Battle of Isandlwana on 22 January 1879, and continued into the following day, 23 January.

Just over 150 British and colonial troops successfully defended the garrison against an intense assault by 3,000 to 4,000 Zulu warriors. The massive, but piecemealZulu attacks on Rorke’s Drift came very close to defeating the tiny garrison but were ultimately repelled. Eleven Victoria Crosses were awarded to the defenders, along with a number of other decorations and honours.


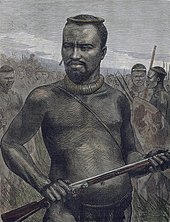
Dabulamanzi kaMpande who commanded the Zulu forces at Rorke’s Drift

Prelude


Rorke’s Drift, known as kwaJimu (“Jim’s Land”) in the Zulu language, was a mission station and the former trading post of James Rorke, an Irish merchant. It was located near a drift, or ford, on the Buffalo (Mzinyathi) River, which at the time formed the border between the British colony of Natal and the Zulu Kingdom. On 9 January 1879, the British No. 3 (Centre) Column, under Lord Chelmsford, arrived and encamped at the drift.

On 11 January, the day after the British ultimatum to the Zulus expired, the column crossed the river and encamped on the Zulu bank. A small force consisting of B Company, 2nd Battalion, 24th (2nd Warwickshire) Regiment of Foot (2nd/24th) under Lieutenant Gonville Bromhead was detailed to garrison the post, which had been turned into a supply depot and hospital under the overall command of Brevet Major Henry Spalding, 104th Foot, a member of Chelmsford’s staff.

On 20 January, after reconnaissance patrolling and building of a track for its wagons, Chelmsford’s column marched to Isandlwana, approximately 6 miles (9.7 km) to the east, leaving behind the small garrison. A large company of the 2nd/3rd Natal Native Contingent (NNC) under Captain William Stevenson was ordered to remain at the post to strengthen the garrison.

This company numbered between 100 and 350 men.

Captain Thomas Rainforth’s G Company of the 1st/24th Foot was ordered to move up from its station at Helpmekaar, 10 miles (16 km) to the southeast, after its own relief arrived, to further fortify the drift. Later that evening a portion of the No. 2 Column under Brevet Colonel Anthony Durnford, late of the Royal Engineers, arrived at the drift and camped on the Zulu bank, where it remained through the next day.

Late on the evening of 21 January, Durnford was ordered to Isandlwana, as was a small detachment of No. 5 Field Company, Royal Engineers, commanded by Lieutenant John Chard, which had arrived on the 19th to repair the pontoons which bridged the Buffalo. Chard rode ahead of his detachment to Isandlwana on the morning of 22 January to clarify his orders, but was sent back to Rorke’s Drift with only his wagon and its driver to construct defensive positions for the expected reinforcement company, passing Durnford’s column en route in the opposite direction.

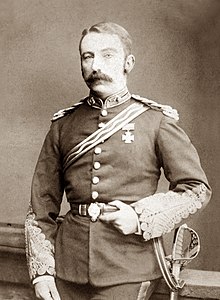
Lt. John Chard, VC


Sometime around noon on the 22nd, Major Spalding left the station for Helpmekaar to ascertain the whereabouts of Rainforth’s G Company, which was now overdue. He left Chard in temporary command. Chard rode down to the drift itself where the engineers’ camp was located. Soon thereafter, two survivors from Isandlwana – Lieutenant Gert Adendorff of the 1st/3rd NNC and a trooper from the Natal Carbineers – arrived bearing the news of the defeat and that a part of the Zulu impi was approaching the station.

Upon hearing this news, Chard, Bromhead, and another of the station’s officers, Acting Assistant Commissary James Dalton (of the Commissariat and Transport Department), held a quick meeting to decide the best course of action – whether to attempt a retreat to Helpmekaar or to defend their current position. Dalton pointed out that a small column, travelling in open country and burdened with carts full of hospital patients, would be easily overtaken and defeated by a numerically superior Zulu force, and so it was soon agreed that the only acceptable course was to remain and fight.

Defensive preparations

Once the British officers decided to stay, Chard and Bromhead directed their men to make preparations to defend the station. With the garrison’s some 400 men[15] working quickly, a defensive perimeter was constructed out of mealie bags. This perimeter incorporated the storehouse, the hospital, and a stout stone kraal. The buildings were fortified, with loopholes (firing holes) knocked through the external walls and the external doors barricaded with furniture.

At about 3:30 pm, a mixed troop of about 100 Natal Native Horse (NNH) under Lieutenant Alfred Henderson arrived at the station after having retreated in good order from Isandlwana. They volunteered to picket the far side of the Oscarberg (Shiyane), the large hill that overlooked the station and from behind which the Zulus were expected to approach.


With the defences nearing completion and battle approaching, Chard had several hundred men available to him: Bromhead’s B Company, Stevenson’s large NNC company, Henderson’s NNH troop, and various others (most of them hospital patients, but ‘walking wounded’) drawn from various British and colonial units. Adendorff also stayed, while the trooper who had ridden in with him galloped on to warn the garrison at Helpmekaar.

The force was sufficient, in Chard’s estimation, to fend off the Zulus. Chard posted the British soldiers around the perimeter, adding some of the more able patients, the ‘casuals’ and civilians, and those of the NNC who possessed firearms along the barricade. The rest of the NNC, armed only with spears, were posted outside the mealie bag and biscuit box barricade within the stone-walled cattle kraal.

The approaching Zulu force was vastly larger; the uDloko, uThulwana, inDlondo amabutho (regiments) of married men in their 30s and 40s and the inDlu-yengwe ibutho of young unmarried men mustered 3,000 to 4,000 warriors, none of them engaged during the battle at Isandlwana.

This Zulu force was the ‘loins’ or reserve of the army at Isandlwana and is often referred to as the Undi Corps. It was directed to swing wide of the British left flank and pass west and south of Isandlwana hill itself, in order to position itself across the line of communication and retreat of the British and their colonial allies in order to prevent their escape back into Natal by way of the Buffalo River ford leading to Rorke’s Drift.

By the time the Undi Corps reached Rorke’s Drift at 4:30 pm, they had fast-marched some 20 miles (32 km) from the morning encampment they had left at around 8 am, and they would spend almost the next eleven and a half hours continuously storming the British fortifications at Rorke’s Drift.

Most Zulu warriors were armed with an assegai (short spear) and a shield made of cowhide. The Zulu army drilled in the personal and tactical use and coordination of this weapons system. Some Zulus also had old muskets and antiquated rifles, though their marksmanship training was poor, and the quality and supply of powder and shot was dreadful.


Historical picture of Zulu warriors from about the same time as the events at Rorke’s Drift


The Zulu attitude towards firearms was that:

“The generality of Zulu warriors, however, would not have firearms – the arms of a coward, as they said, for they enable the poltroon to kill the brave without awaiting his attack.”


Even though their fire was not accurate, it was responsible for five of the seventeen British deaths at Rorke’s Drift.

While the Undi Corps had been led by inkhosi kaMapitha at the Isandlwana battle, the command of the Undi Corps passed to Prince Dabulamanzi kaMpande (half-brother of Cetshwayo kaMpande, the Zulu king) when kaMapitha was wounded during the pursuit of British fugitives from Isandlwana. Prince Dabulamanzi was considered rash and aggressive, and this characterisation was borne out by his violation of King Cetshwayo’s order to act only in defence of Zululand against the invading British soldiers and not carry the war over the border into enemy territory.

The Rorke’s Drift attack was an unplanned raid rather than any organised counter-invasion, with many of the Undi Corps Zulus breaking off to raid other African kraals and homesteads while the main body advanced on Rorke’s Drift.

At about 4:00 pm, Surgeon James Reynolds, Otto Witt – the Swedish missionary who ran the mission at Rorke’s Drift – and army chaplain Reverend George Smith came down from the Oscarberg hillside with the news that a body of Zulus was fording the river to the southeast and was “no more than five minutes away”. At this point, Witt decided to depart the station, as his family lived in an isolated farmhouse about 30 kilometres (19 mi) away, and he wanted to be with them. Witt’s native servant, Umkwelnantaba, left with him; so too did one of the hospital patients, Lieutenant Thomas Purvis of the 1st/3rd NNC.

——————————————————

Interview with Frank Bourne – Hero of Rorkes Drift

——————————————————

Battle

At about 4:20 pm, the battle began with Lieutenant Henderson’s NNH troopers, stationed behind the Oscarberg, briefly engaging the vanguard of the main Zulu force. However, tired from the battle and retreat from Isandlwana and short of carbine ammunition, Henderson’s men departed for Helpmekaar. Henderson himself reported to Lieutenant Chard that the enemy were close and that

“his men would not obey his orders but were going off to Helpmekaar”.

Henderson then followed his departing men. Upon witnessing the withdrawal of Henderson’s NNH troop, Captain Stevenson’s NNC company abandoned the cattle kraal and fled, greatly reducing the strength of the defending garrison. Outraged that Stevenson and some of his colonial NCOs also fled from the barricades, a few British soldiers fired after them, killing Corporal William Anderson.

With the Zulus nearly at the station, the garrison now numbered between 154 and 156 men.[30] Of these, only Bromhead’s company could be considered a cohesive unit. Additionally, up to 39 of his company were at the station as hospital patients, although only a handful of these were unable to take up arms.

With fewer men, Chard realised the need to modify the defences, and he gave orders for the construction of a biscuit-box wall through the middle of the post in order to make possible the abandonment of the hospital side of the station if the need arose.

At 4:30 pm, the Zulus rounded the Oscarberg and approached the south wall. Private Frederick Hitch, posted as lookout atop the storehouse, reported a large column of Zulus approaching. The Zulu vanguard, 600 men of the iNdluyengwe, attacked the south wall, which joined the hospital and the storehouse. The British opened fire at 500 yards (460 m).

The majority of the attacking Zulu force swept around to attack the north wall, while a few took cover and were either pinned by continuing British fire or retreated to the terraces of Oscarberg. There they began a harassing fire of their own. As this occurred, another Zulu force swept onto the hospital and north west wall.

Those British on the barricades — including Dalton and Bromhead — were soon engaged in fierce hand-to-hand fighting. The British wall was too high for the Zulus to scale, so they resorted to crouching under the wall, trying to get hold of the defenders’ Martini-Henry rifles, slashing at British soldiers with assegais or firing their weapons through the wall. At places, they clambered over each other’s bodies to drive the British off the walls but were driven back.

Zulu fire, both from those under the wall and around the Oscarberg, inflicted a few casualties, and five of the 17 defenders who were killed or mortally wounded in the action were struck while at the north wall.

—————————————-

Secrets Of The Dead – The Mystery Of Zulu Dawn

—————————————-

Defence of the hospital

Chard realised that the north wall, under almost constant Zulu attack, could not be held and, at 6:00 pm, he pulled his men back into the yard, abandoning the front two rooms of the hospital in the process. The hospital was becoming untenable; the loopholes had become a liability, as rifles poking out were grabbed at by the Zulus but, if the holes were left empty, the Zulu warriors stuck their own weapons through to fire into the rooms. Among the soldiers assigned to the hospital were Corporal William Wilson Allen and Privates Cole, Dunbar, Hitch, Horrigan, John Williams, Joseph Williams, Alfred Henry Hook, Robert Jones, and William Jones.

Privates Horrigan, John Williams, Joseph Williams and patients tried to hold the hospital entrance with rifles and fixed bayonets. Joseph Williams defended a small window, and 14 dead Zulus were found later beneath the window. As it became clear that the front of the building was being taken by the Zulus, John Williams began to hack a way of escape through the wall dividing the central room and a corner room in the back of the hospital. As he made a passable hole, the door into the central room came under furious attack from the Zulus, and he only had time to drag two bedridden patients out before the door gave way.

The corner room that John Williams had pulled the two patients into was occupied by Private Hook and another nine patients. John Williams hacked at the wall to the next room with his pick-axe, as Hook held off the Zulus. A firefight erupted as the Zulus fired through the door and Hook returned fire – but not without an assegai striking his helmet and stunning him.

Williams made the hole big enough to get into the next room, which was occupied only by patient Private Waters, and dragged the patients through. The last man out was Hook, who killed some Zulus who had knocked down the door before he dived through the hole. John Williams once again went to work, spurred by the fact that the roof was now on fire, as Hook defended the hole and Waters continued to fire through a loophole.

After fifty minutes, the hole was large enough to drag the patients through, and the men – save Privates Waters and Beckett, who hid in the wardrobe (Waters was wounded and Beckett died of assegai wounds) – were now in the last room, being defended by Privates Robert Jones and William Jones. From here, the patients clambered out through a window and then ran across the yard to the barricade.

Of the eleven patients, nine survived the trip, as did all the able-bodied men. According to James Henry Reynolds, only four defenders were killed in the hospital: one was a member of the Natal Native Contingent with a broken leg; Sgt Maxfield and Private Jenkins, who were ill with fever and refused to be moved. Reportedly, Jenkins was killed after being seized and stabbed, together with Private Adams who also refused to move. Private Cole, assigned to the hospital, was killed when he ran outside. Another hospital patient killed was Trooper Hunter of the Natal Mounted Police.

Among the hospital patients who escaped were a Corporal Mayer of the NNC; Bombardier Lewis of the Royal Artillery, and Trooper Green of the Natal Mounted Police, who was wounded in the thigh by a spent bullet. Private Conley with a broken leg was pulled to safety by Hook, although Conley’s leg was broken again in the process.

The cattle kraal and the bastion

The evacuation of the burning hospital completed the shortening of the perimeter. As night fell, the Zulu attacks grew stronger. The cattle kraal came under renewed assault and was evacuated by 10:00 pm, leaving the remaining men in a small bastion around the storehouse. Throughout the night, the Zulus kept up a constant assault against the British positions; Zulu attacks only began to slacken after midnight, and they finally ended by 2:00 am, being replaced by a constant harassing fire from Zulu firearms until 4:00 am.

By that time, the garrison had lost 14 dead. Two others were mortally wounded and 8 more – including Dalton – were seriously wounded. Virtually every man had some kind of wound. They were all exhausted, having fought for the better part of ten hours and were running low on ammunition. Of 20,000 rounds in reserve at the mission, only 900 remained.

——————————————————

Those that died in the Zulu war 1879

——————————————————

Aftermath

As dawn broke, the British could see that the Zulus were gone; all that remained were the dead and severely wounded. Patrols were dispatched to scout the battlefield, recover rifles, and look for survivors, many of whom were executed when found. At roughly 7:00 am, an Impi of Zulus suddenly appeared, and the British manned their positions again.

No attack materialised however, as the Zulus had been on the move for six days prior to the battle and had not eaten properly for two. In their ranks were hundreds of wounded, and they were several days’ march from any supplies. Soon after their appearance, the Zulus left the way they had come.

Around 8:00 am, another force appeared, and the redcoats left their breakfast to man their positions again. However, the force turned out to be the vanguard of Lord Chelmsford‘s relief column.

Breakdown of British and colonial casualties:

  • 1st/24th Foot: 4 killed or mortally wounded in action; 2 wounded
  • 2nd/24th Foot: 9 killed or mortally wounded in action; 9 wounded
  • Commissariat and Transport Department: 1 killed in action; 1 wounded
  • Natal Mounted Police: 1 killed in action; 1 wounded
  • 1st/3rd NNC: 1 killed in action
  • 2nd/3rd NNC: 2 wounded

Also, as mentioned, one member of Stevenson’s 2nd/3rd NNC, Corporal William Anderson, was killed by British fire while fleeing the station just prior to the arrival of the Zulus.

351 Zulu bodies were counted after the battle, but it has been estimated that at least 500 wounded and captured Zulus might have been massacred as well.

Having witnessed the carnage at Isandlwana, the members of Chelmsford’s relief force had no mercy for the captured, wounded Zulus they came across. Nor did the station’s defenders. Trooper William James Clarke of the Natal Mounted Police described in his diary that:

“altogether we buried 375 Zulus and some wounded were thrown into the grave. Seeing the manner in which our wounded had been mutilated after being dragged from the hospital … we were very bitter and did not spare wounded Zulus”


Laband, in his book The Zulu Response to the British Invasion of 1879, accepts the estimate of 600 that Shepstone had from the Zulus.

Samuel Pitt, who served as a private in B Company during the battle, told The Western Mail in 1914 that the official enemy death toll was too low:

“We reckon we had accounted for 875, but the books will tell you 400 or 500”.


Lieutenant Horace Smith-Dorrien, a member of Chelmsford’s staff, wrote that the day after the battle an improvised gallows was used “for hanging Zulus who were supposed to have behaved treacherously”.[43]

Victoria Crosses and Distinguished Conduct Medals


John Chard VC, as a lieutenant-colonel


Eleven Victoria Crosses were awarded to the defenders of Rorke’s Drift, seven of them to soldiers of the 2nd/24th Foot – the most ever received in a single action by one regiment (although not, as commonly thought, the most awarded in a single action or the most in a day: 16 were awarded at the Battle of Inkerman, on 5 November 1854; 28 were awarded during the Second Relief of Lucknow, 14–22 November 1857).

Four Distinguished Conduct Medals were also awarded. This high number of awards for bravery has been interpreted as a reaction to the earlier defeat at the Battle of Isandlwana – the extolling of the victory at Rorke’s Drift drawing the public’s attention away from the great defeat at Isandlwana and the fact that Lord Chelmsford and Bartle Frere had instigated the war without the approval of Her Majesty’s Government.

Certainly, Sir Garnet Wolseley, taking over as commander-in-chief from Lord Chelmsford later that year, was unimpressed with the awards made to the defenders of Rorke’s Drift, saying “it is monstrous making heroes of those who, shut up in buildings at Rorke’s Drift, could not bolt and fought like rats for their lives, which they could not otherwise save”.

Several historians have challenged this assertion and pointed out that the victory stands on its own merits, regardless of other concerns. Victor Davis Hanson responded to it directly in “Why the West has Won” saying

, “Modern critics suggest such lavishness in commendation was designed to assuage the disaster at Isandhlwana and to reassure a skeptical Victorian public that the fighting ability of the British soldier remained unquestioned. Maybe, maybe not, but in the long annals of military history, it is difficult to find anything quite like Rorke’s Drift, where a beleaguered force, outnumbered forty to one, survived and killed twenty men for every defender lost”.


Awarded the Victoria Cross:

In 1879 there was no provision for the posthumous granting of the Victoria Cross, and so it could not be awarded to anyone who had died in performing an act of bravery. In light of this, an unofficial ‘twelfth VC’ may be added to those listed: Private Joseph Williams, B Coy, 2nd/24th Foot, who was killed during the fight in the hospital and for whom it was mentioned in despatches that “had he lived he would have been recommended for the Victoria Cross”.

Awarded the Distinguished Conduct Medal:

On 15 January 1880, a submission for a DCM was also made for Private Michael McMahon (Army Hospital Corps). The submission was cancelled on 29 January 1880 for absence without leave and theft.

Depictions and dramatisations

The events surrounding the assault on Rorke’s Drift were first dramatised by military painters, notably Elizabeth Butler and Alphonse de Neuville. Their work was vastly popular in their day among the citizens of the British empire.

In 1914, a touring English Northern Union rugby league team defeated Australia 14-6 to win the Ashes in the final Test match. Depleted by injuries and fielding only ten men for much of the second half, the English outclassed and outfought the Australians in what quickly became known as the ‘Rorke’s Drift Test‘.

The 1964 film Zulu is a depiction of the Battle of Rorke’s Drift. The film received generally positive reviews from the critics. Some details of the film’s account have, however, been criticised[by whom?] as historically inaccurate (for example, in the movie the regiment is called the South Wales Borderers but the unit was not in fact called that until two years after the battle, although the regiment had been based at Brecon in South Wales since 1873).[54] While most of the men of the 1st Battalion, 24th Regiment of Foot (1/24) were recruited from the industrial towns and agricultural classes of England, principally from Birmingham and adjacent southwest counties, only 10 soldiers of the 1/24 that fought in the battle were Welsh. Many of the soldiers of the junior battalion, the 2/24, were Welshmen.

Of the 122 soldiers of the 24th Regiment present at the Battle of Rorke’s Drift, 49 are known to have been of English nationality, 32 were Welsh, 16 were Irish, 1 was a Scot, and 3 were born overseas. The nationalities of the remaining 21 are unknown.

In 1990 the game developer Impressions Games released a video game based on the historical battle. The battle was also featured by Mad Doc Software in its 2006 strategy game Empire Earth II: The Art of Supremacy as one of its “turning point” battle modes.

The battle of Rorke’s Drift was given a chapter in military historian Victor Davis Hanson‘s book Carnage and Culture (2002) as one of several landmark battles demonstrating the superior effectiveness of Western military practices

——————————————

Forgotten soldiers who fought 4,000 Zulus during battle of Rorke’s Drift

They were the Brummies and Black Country fighting men who thwarted 4,000 Zulus in a battle that will forever be remembered among one of the most heroic stands in British military history.


Zulu warriors attack British troops in the Battle of Rorke's Drift
Zulu warriors attack British troops in the Battle of Rorke’s Drift

They were the Brummies and Black Country fighting men who thwarted 4,000 Zulus in a battle that will forever be remembered among one of the most heroic stands in British military history.

Rorke’s Drift – the subject of a blockbuster movie – will never be forgotten. Eleven Victoria Crosses were handed out following the bloody encounter – the most spawned by one battle.

But, with the exception of the 11 who received this country’s highest forces’ honour, the local lads who braved knobkerries clubs, rifles and assegai spears have faded from the history books.

Now, on Remembrance Sunday – a day when we pay tribute to those prepared to make the ultimate sacrifice for this country – we salute the few from the 24th (Warwickshire) Regiment, although the unit, spawned in Warley, had based itself in Brecon by the time of the Zulu conflict.

Of the 122 of the regiment’s representatives at Rorke’s Drift, 49 were English, 32 Welsh, 16 Irish and there was a lone Scot.

Only four are believed to have been born and bred in Warwickshire. Their average age was 23, their average weight 10stone and their average height 5ft 3ins.

They were among the 139 defenders – a mix of British infantry and Natal irregulars – who defied the massive odds against them at the tiny garrison of Rorke’s Drift. Seeking sanctuary behind barricades of biscuit boxes and mealie bags, they held firm against a ceaseless onslaught that began at 4.20pm on January 22, 1879, and raged until dawn.

It has become the ultimate underdog victory. That red ribbon of men killed 351 Zulus and wounded 500 more: the African warriors decision to set alight the garrison hospital making them easy targets during night attacks. We lost 17.

Among them was Sergeant Joseph Lenford Windridge, played by Joe Powell in the 1964 film. He lived in Aston and after leaving the army found employment as a lamp-maker’s clerk, but his was a Civvy Street existence dogged by tragedy. Six of his 11 children died from TB.

 Some of the defenders of Rorke’s Drift towards the end of the Anglo-Zulu War of 1879
Some of the defenders of Rorke’s Drift towards the end of the Anglo-Zulu War of 1879

Windridge died from a stroke in 1902, aged 60, and was laid to rest in an unmarked, communal grave at Witton Cemetery. This year a campaign was launched to place a memorial on the plot.

Two other Birmingham survivors of the battle, Privates Robert Cole and Samuel Parry, are also buried at Witton and, again, their graves are unmarked.

Birmingham-born William Tasker was probably more deserving of a VC than many who received them.

The 33-year-old fought on despite blooding pouring from his head, the thin flesh split open by splinters from a musket ball. He died in his home city aged 42.

An unmarked grave was also the undignified final resting place for Joseph Bromwich, who fought at the battle alongside elder brother Charles. Joseph, buried at Bilston Cemetery, was 22 when he faced the Zulus. He was a broken man when he left the services and he died on February 25, 1916, with tongue cancer.

What’s clear from reading the documents that exist – many of them contradictory – is that troops emerged from Rorke’s Drift mentally scarred and never recovered from the harrowing experience.

William Jones, a down-and-out, was found wandering the streets of Manchester after selling his VC for £6. His family took him in, but terrified Jones remained convinced Zulus were coming through the windows of the modest home. He was declared insane and died in a mental institution.

Robert Jones VC took his own life with a shotgun.

——————————————————————————-

Last remnant of Rorke’s Drift:

Tiny scrap of paper gives rare first-hand account of the day British redcoats fought off Zulus, Captain, thousands of them

A rare first-hand account of the Battle of Rorke’s Drift – where 150 soldiers successfully fought off 4,000 Zulu warriors, has gone on display for the first time.

Written by one of the British heroes on a tiny scrap of paper, it is thought to be the earliest account of the battle which was immortalised in the 1964 film Zulu, starring Michael Caine and Stanley Baker.

Assistant Commissary Officer (ACO) Walter Dunne’s letter to his friend Captain W.J. Warneford at Cape Colony, describes how he and a vastly outnumbered group of soldiers successfully defended their missionary outpost at Rorke’s Drift in South Africa.

zullu letter 1

ASSISTANT COMISSARY OFFICER WALTER DUNNE’S LETTER IN FULL

 Rorke’s Drift/ 24 Jan.r ’79/

My dear Warneford,

Sad news about the 1/24th. (1st Battalion, 24th Foot) 5Cd commanded by Col. Pulleine were cut to pieces and the camp sacked. 20 Officers are missing.

About 1000 of the Kafirs came in here and attacked us on the same day (22nd). We had got about 2 hours notice and fortified the place with trap of grain biscuit boxes &c. They came on most determinedly on all sides. They drove our fellows out of the Hospital, killed the patients and burned the place.

They made several attempts to storm us but the soldiers (B Co of 24th under Bromhead) kept up such a steady killing fire that they were driven back each time. We had only 80 men, the contingent having bolted before a shot was fired. The fight was kept up all night & in the morning the Kafirs retreated leaving 351 dead bodies.

Dalton was wounded in the shoulder and temp clerk Byrne killed & 12 of the men… W A Dunne (over)

Some of the missing are Pulleine, Col. Dunford, Capt. Russell, Hodson (killed), Anstey, Daly, Mostyn, Dyer, Griffith, Pope, Austin, Pulleine (2 Mr.) Shepherd (S… major) Wardell (killed), Younghusband, Degacher, Porteous, Carage Dyson, Atkinson – Coghill is believed to have escaped & also Melvill.

—————————

Zulu Dawn (1979) – Final Battle

—————————

Buy Me A Coffee

Great British Battles – Battle of Agincourt – 25th October 1415

 Great British Battles

Battle of Agincourt

600 Anniversary 25th October 2015

Battlefield today

—————————————————–

History Documentary – The Battle of Agincourt, a Hundred Years of War

—————————————————–

The Battle of Agincourt was a major English victory in the Hundred Years’ War.[a] The battle took place on Friday, 25 October 1415 (Saint Crispin’s Day), near modern-day Azincourt, in northern France.[5][b] Henry V‘s victory at Agincourt, against a numerically superior French army, crippled France and started a new period in the war during which Henry V married the French king’s daughter, and their son, later Henry VI of England and Henry II of France, was made heir to the throne of France as well as of England.

Henry V led his troops into battle and participated in hand-to-hand fighting. The French king of the time, Charles VI, did not command the French army himself as he suffered from severe, repeating illnesses and moderate mental incapacitation. Instead, the French were commanded by Constable Charles d’Albret and various prominent French noblemen of the Armagnac party.

This battle is notable for the use of the English longbow in very large numbers, with English and Welsh archers forming most of Henry’s army. The battle is the centrepiece of the play Henry V by William Shakespeare.

—————————————————–

MIDIEVAL WEAPONS AND COMBAT – The Longbow

—————————————————–

Bbattle of Agincourt
Part of the Hundred Years’ War
Schlacht von Azincourt.jpg
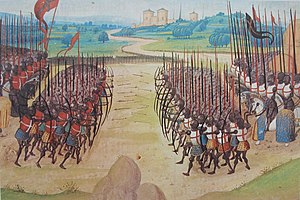
The Battle of Agincourt, 15th-century miniature
Date 25 October 1415 (Saint Crispin’s Day)
Location Agincourt, Pas-de-Calais, France
50°27′49″N 2°8′30″E / 50.46361°N 2.14167°E / 50.46361; 2.14167Coordinates: 50°27′49″N 2°8′30″E / 50.46361°N 2.14167°E / 50.46361; 2.14167
Result Decisive English victory
Belligerents
Royal Arms of England (1399-1603).svg England France moderne.svg France
Commanders and leaders
Strength
Modern estimates range from 6,000[1] to 9,000[2]
(see Numbers at Agincourt.) About 56 longbow archers, 16 dismounted knights and men-at-arms in heavy armour.
Modern estimates range from 12,000 (outnumbering the English 4–3).[2] to 36,000 (outnumbering the English 6–1;[3] see Numbers at Agincourt.)
About 10,000 knights and men-at-arms (of which about 1,200 were mounted), unknown thousands of other infantry, crossbowmen and archers.
Casualties and losses
At least 112 dead, unknown wounded[3] 7,000–10,000 (mostly killed) and about 1,500 noble prisoners[

Contemporary accounts

The battle of Agincourt is well documented by at least seven contemporary accounts, three of them by eyewitnesses. The approximate location of the battle has never been in dispute and the place remains relatively unaltered even after 600 years. Immediately after the battle, Henry summoned the heralds of the two armies who had watched the battle together, and with the principal French herald, Montjoie, settled on the name of the battle as Agincourt, after the nearest fortified place.[6] Two of the most frequently cited accounts come from Burgundian sources: one from Jean Le Fevre de Saint-Remy, who was present at the battle, and the other from Enguerrand de Monstrelet. The English eyewitness account comes from the anonymous Gesta Henrici Quinti, believed to have been written by a chaplain in the King’s household, who would have been in the baggage train at the battle.[7] A recent reappraisal of Henry’s strategy of the Agincourt campaign incorporates these three accounts, and argues that war was seen as a legal due process for solving the disagreement over claims to the French throne.[8]

—————————————————–

Agincourt’s Dark Secrets Battlefield Detectives

—————————————————–

Campaign

Main article: Hundred Years War

Henry V invaded France following the failure of negotiations with the French. He claimed the title of King of France through his great-grandfather Edward III, although in practice the English kings were generally prepared to renounce this claim if the French would acknowledge the English claim on Aquitaine and other French lands (the terms of the Treaty of Brétigny).[9] He initially called a Great Council in the spring of 1414 to discuss going to war with France, but the lords insisted that he should negotiate further and moderate his claims. In the following negotiations Henry said that he would give up his claim to the French throne if the French would pay the 1.6 million crowns outstanding from the ransom of John II (who had been captured at the Battle of Poitiers in 1356), and concede English ownership of the lands of Normandy, Touraine, Anjou, Brittany and Flanders, as well as Aquitaine. Henry would marry Treaty of Brétigny the young daughter of Charles VI, and receive a dowry of 2 million crowns. The French responded with what they considered the generous terms of marriage with Princess Catherine, a dowry of 600,000 crowns, and an enlarged Aquitaine. By 1415, negotiations had ground to a halt, with the English claiming that the French had mocked their claims and ridiculed Henry himself.[10] In December 1414, the English parliament was persuaded to grant Henry a “double subsidy”, a tax at twice the traditional rate, to recover his inheritance from the French. On 19 April 1415, Henry again asked the Great Council to sanction war with France, and this time they agreed.[11]

Henry’s army landed in northern France on 13 August 1415, carried by a fleet described by Shakespeare as “a city on the inconstant billows dancing / For so appears this fleet majestical”, often reported to comprise 1,500 ships, but probably far smaller, and besieged the port of Harfleur with an army of about 12,000, and up to 20,000 horses.[12] The siege took longer than expected. The town surrendered on 22 September, and the English army did not leave until 8 October. The campaign season was coming to an end, and the English army had suffered many casualties through disease. Rather than retire directly to England for the winter, with his costly expedition resulting in the capture of only one town, Henry decided to march most of his army (roughly 9,000) through Normandy to the port of Calais, the English stronghold in northern France, to demonstrate by his presence in the territory at the head of an army that his right to rule in the duchy was more than a mere abstract legal and historical claim.[13] He also intended the manoeuvre as a deliberate provocation to battle aimed at the dauphin, who had failed to respond to Henry’s personal challenge to combat at Harfleur.[14]

The French had raised an army during the siege which assembled around Rouen. This was not strictly a feudal army, but an army paid through a system similar to the English. The French hoped to raise 9,000 troops, but the army was not ready in time to relieve Harfleur. After Henry V marched to the north the French moved to blockade them along the River Somme. They were successful for a time, forcing Henry to move south, away from Calais, to find a ford. The English finally crossed the Somme south of Péronne, at Béthencourt and Voyennes [15][16] and resumed marching north. Without the river protection, the French were hesitant to force a battle. They shadowed Henry’s army while calling a semonce des nobles,[17] calling on local nobles to join the army. By 24 October both armies faced each other for battle, but the French declined, hoping for the arrival of more troops. The two armies spent the night of 24 October on open ground. The next day the French initiated negotiations as a delaying tactic, but Henry ordered his army to advance and to start a battle that, given the state of his army, he would have preferred to avoid, or to fight defensively: that was how Crécy and the other famous longbow victories had been won. The English had very little food, had marched 260 miles (420 km) in two and a half weeks, were suffering from sickness such as dysentery, and faced much larger numbers of well equipped French men at arms. The French army blocked Henry’s way to the safety of Calais, however, and delaying battle would only further weaken his tired army and allow more French troops to arrive.[18]

Battle

Preparations

The battle was fought in the narrow strip of open land formed between the woods of Tramecourt and Agincourt (close to the modern village of Azincourt).

The battle of Agincourt

English deployment

Early on the 25th, Henry deployed his army (approximately 1,500 men-at-arms and 7,000 longbowmen; see Numbers at Agincourt) across a 750-yard (690 m) part of the defile. The army was organised into three “battles” or divisions: the vanguard, led by the Duke of York; the main battle led by Henry himself; and the rearguard, led by Lord Camoys. In addition, Sir Thomas Erpingham, one of Henry’s most experienced household knights, had a role in marshalling the archers.[19] It is likely that the English adopted their usual battle line of longbowmen on either flank, with men-at-arms and knights in the centre. They may also have deployed some archers in the centre of the line. The English men-at-arms in plate and mail were placed shoulder to shoulder four deep. The English and Welsh archers on the flanks drove pointed wooden stakes, or palings, into the ground at an angle to force cavalry to veer off. This use of stakes may have been inspired by the Battle of Nicopolis of 1396, where forces of the Ottoman Empire used the tactic against French cavalry.[c]

The English made their confessions before the battle, as was customary.[20] Henry, worried about the enemy launching surprise raids, and wanting his troops to remain focused, ordered all his men to spend the night before the battle in silence, on pain of having an ear cut off. He told his men that he would rather die in the coming battle than be captured and ransomed.[21]

Henry made a speech emphasising the justness of his cause, and reminding his army of previous great defeats the kings of England had inflicted on the French. The Burgundian sources have him concluding the speech by telling his men that the French had boasted that they would cut off two fingers from the right hand of every archer, so that he could never draw a longbow again. Whether this was true is open to question; as previously noted, death was the normal fate of any soldier who could not be ransomed.[22]

French deployment

The French force was not only larger than the English, their noble men-at-arms would have considered themselves superior to the large number of archers in the English army, whom the French (based on their experience in recent memory of using and facing archers) considered relatively insignificant.[23] For example, the chronicler Edmond de Dyntner stated that there were “ten French nobles against one English”, ignoring the archers completely.[23] Several French accounts emphasise that the French leaders were so eager to defeat the English (and win the ransoms of the English men-at-arms) that they insisted on being in the first line; as one of the contemporary accounts put it: “All the lords wanted to be in the vanguard, against the opinion of the constable and the experienced knights.”[24]

The French were arrayed in three lines or “battles”. The first line was led by Constable d’Albret, Marshal Boucicault, and the Dukes of Orléans and Bourbon, with attached cavalry wings under the Count of Vendôme and Sir Clignet de Brebant. The second line was commanded by the Dukes of Bar and Alençon and the Count of Nevers. The third line was under the Counts of Dammartin and Fauconberg.[25] The Burgundian chronicler, Jean de Wavrin, writes that there were 8,000 men-at-arms, 4,000 archers and 1,500 crossbowmen in the vanguard, with two wings of 600 and 800 mounted men-at-arms, and the main battle having “as many knights, esquires and archers as in the vanguard”, with the rearguard containing “all of the rest of the men-at-arms”.[26] The Herald of Berry uses somewhat different figures of 4,800 men-at-arms in the first line, 3,000 men in the second line, with two “wings” containing 600 mounted men-at-arms each, and a total of “10,000 men-at-arms”,[27] but does not mention a third line.

Thousands of troops appear to have been in the rearguard, containing servants and commoners whom the French were either unable or unwilling to deploy. Wavrin gives the total French army size as 50,000: “They had plenty of archers and crossbowmen but nobody wanted to let them fire [sic]. The reason for this was that the site was so narrow that there was only enough room for the men-at-arms.”[28] A different source says that the French did not even deploy 4,000 of the best crossbowmen “on the pretext they had no need of their help”.[29]

Terrain

The field of battle was arguably the most significant factor in deciding the outcome. The recently ploughed land hemmed in by dense woodland favoured the English, both because of its narrowness, and because of the thick mud through which the French knights had to walk.[30][31] An analysis by Battlefield Detectives has looked at the crowd dynamics of the battlefield.[32]

The Battlefield Detectives episode states that when the density reached four men per square metre, soldiers would not even be able to take full steps forward, slowing the speed of the advance by 70%.[32] Accounts of the battle describe the French engaging the English men-at-arms before being rushed from the sides by the longbowmen as the mêlée developed. The English account in the Gesta Henrici says: “For when some of them, killed when battle was first joined, fall at the front, so great was the undisciplined violence and pressure of the mass of men behind them that the living fell on top of the dead, and others falling on top of the living were killed as well.”[33]

Although the French initially pushed the English back, they became so closely packed that they are described as having trouble using their weapons properly. The French monk of St. Denis says: “Their vanguard, composed of about 5,000 men, found itself at first so tightly packed that those who were in the third rank could scarcely use their swords,”[34] and the Burgundian sources have a similar passage.

As the battle was fought on a recently ploughed field, and there had recently been heavy rain leaving it very muddy, it proved very tiring to walk through in full plate armour. The French monk of St. Denis describes the French troops as “marching through the middle of the mud where they sank up to their knees. So they were already overcome with fatigue even before they advanced against the enemy”. The deep, soft mud particularly favoured the English force because, once knocked to the ground, the heavily armoured French knights had a hard time getting back up to fight in the mêlée. Barker states that some knights, encumbered by their armour, actually drowned in their helmets.[35]

Fighting

Opening moves

“Morning of the Battle of Agincourt, 25th October 1415”, painted by Sir John Gilbert in the 19th century.

On the morning of 25 October, the French were still waiting for additional troops to arrive. The Duke of Brabant (about 2,000 men),[36] the Duke of Anjou (about 600 men),[36] and the Duke of Brittany (6,000 men, according to Monstrelet),[37] were all marching to join the army.

For three hours after sunrise there was no fighting. Military textbooks of the time stated: “Everywhere and on all occasions that foot soldiers march against their enemy face to face, those who march lose and those who remain standing still and holding firm win.”[38] On top of this, the French were expecting thousands of men to join them if they waited. They were blocking Henry’s retreat, and were perfectly happy to wait for as long as it took. There had even been a suggestion that the English would run away rather than give battle when they saw that they would be fighting so many French princes.[39]

Henry’s men, on the other hand, were already very weary from hunger, illness and marching. Even though Henry knew as well as the French did that his army would perform better on the defensive, he was eventually forced to take a calculated risk, and move his army further forward to start the battle.[18] This entailed abandoning his chosen position and pulling out, advancing, and then re-installing the long sharpened wooden stakes pointed outwards toward the enemy, which helped protect the longbowmen from cavalry charges.[40] (The use of stakes was an innovation for the English: during the Battle of Crécy, for example, the archers had been instead protected by pits and other obstacles.[41])

The tightness of the terrain also seems to have restricted the planned deployment of the French forces. The French had originally drawn up a battle plan that had archers and crossbowmen in front of their men-at-arms, with a cavalry force at the rear specifically designed to “fall upon the archers, and use their force to break them,”[42] but in the event, the French archers and crossbowmen were deployed behind and to the sides of the men-at-arms (where they seem to have played almost no part, except possibly for an initial volley of arrows at the start of the battle). The cavalry force, which could have devastated the English line if it had attacked while they moved their stakes, charged only after the initial volley of arrows from the English. It is unclear whether the delay occurred because the French were hoping the English would launch a frontal assault (and were surprised when the English instead started shooting from their new defensive position), or whether the French mounted knights instead did not react quickly enough to the English advance. French chroniclers agree that when the mounted charge did come, it did not contain as many men as it should have; Gilles le Bouvier states that some had wandered off to warm themselves and others were walking or feeding their horses[43]

French cavalry attac

The French cavalry, despite being somewhat disorganised and not at full numbers, charged towards the longbowmen, but it was a disaster, with the French knights unable to outflank the longbowmen (because of the encroaching woodland) and unable to charge through the forest of sharpened stakes that protected the archers. John Keegan argues that the longbows’ main influence on the battle at this point was injuries to horses: armoured only on the head, many horses would have become dangerously out of control when struck in the back or flank from the high-elevation long range shots used as the charge started.[44] The mounted charge and subsequent retreat churned up the already muddy terrain between the French and the English. Juliet Barker quotes a contemporary account by a monk of St. Denis who reports how the wounded and panicking horses galloped through the advancing infantry, scattering them and trampling them down in their headlong flight from the battlefield.[45]

Main French assault

King Henry V at the Battle of Agincourt, 1415, by Sir John Gilbert in the 19th century.

The plate armour of the French men-at-arms allowed them to close the 300 yards or so to the English lines while being under what the French monk of Saint Denis described as “a terrifying hail of arrow shot”. A complete coat of plate was considered such good protection that shields were generally not used,[46] although the Burgundian contemporary sources specifically distinguish between Frenchmen who used shields and those who did not, and Rogers has suggested that the front elements of the French force may have used axes and shields.[47] Modern historians are somewhat divided on how effective the longbow fire would have been against plate armour of the time, with some modern texts suggesting that arrows could not penetrate, especially the better quality steel armour, but others suggesting arrows could penetrate, especially the poorer quality wrought iron armour. Rogers suggests that the longbow could penetrate a wrought iron breastplate at short range and penetrate the thinner armour on the limbs even at 220 yards (200 m). He considers a knight in the best quality steel armour would have been more or less invulnerable to an arrow on the breastplate or top of the helmet, but would still have been vulnerable to shots hitting the limbs, particularly at close range.[48] In any case, to protect themselves as much as possible from the arrows the French had to lower their visors and bend their helmeted heads to avoid being shot in the face—the eye and air-holes in their helmets were among the weakest points in the armour. This head lowered position restricted both their breathing and their vision. Then they had to walk a few hundred yards through thick mud, a press of comrades and wearing armour weighing 50–60 pounds (23–27 kg), gathering sticky clay all the way. Increasingly they had to walk around or over fallen comrades.[49]

The surviving French men-at-arms reached the front of the English line and pushed it back, with the longbowmen on the flanks continuing to shoot at point blank range. When the archers ran out of arrows they dropped their bows and using hatchets, swords and the mallets they had used to drive their stakes in, attacked the now disordered, fatigued and wounded French men-at-arms massed in front of them. The French could not cope with the thousands of lightly armoured longbowmen assailants (who were much less hindered by the mud and weight of their armour) combined with the English men-at-arms. The impact of thousands of arrows, combined with the slog in heavy armour through the mud, the heat and lack of oxygen in plate armour with the visor down, and the crush of their numbers meant the French men-at-arms could “scarcely lift their weapons” when they finally engaged the English line.[50] The exhausted French men-at-arms are described as being knocked to the ground by the English and then unable to get back up. As the mêlée developed, the French second line also joined the attack, but they too were swallowed up, with the narrow terrain meaning the extra numbers could not be used effectively. Rogers suggests that the French at the back of their deep formation would have been attempting to push forward and quite literally add their weight to the advance, without realising that they were hindering the ability of those at the front to manoeuvre and fight, actually pushing them into the English formation of lancepoints. After the initial wave, the French would have had to fight over and on the bodies of those who had fallen before them. In such a “press” of thousands of men, Rogers finds it plausible that a significant number could have suffocated in their armour, as is described by several sources, and is also known to have happened in other battles.[51]

The French men-at-arms were taken prisoner or killed in their thousands. The fighting lasted about three hours, but eventually the leaders of the second line were killed or captured, as those of the first line had been. The English Gesta Henrici describes three great heaps of the slain around the three main English standards.[33] According to contemporary English accounts, Henry was directly involved in the hand-to-hand fighting. Upon hearing that his youngest brother Humphrey, Duke of Gloucester had been wounded in the groin, Henry took his household guard and stood over his brother, in the front rank of the fighting, until Humphrey could be dragged to safety. The king received an axe blow to the head which knocked off a piece of the crown that formed part of his helmet.[52]

Attack on the English baggage train

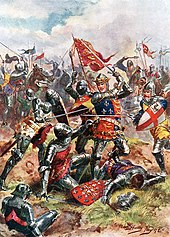
1915 depiction of Henry V at the Battle of Agincourt : The King wears on this surcoat the Royal Arms of England, quartered with the Fleur de Lys of France as a symbol of his claim to the throne of France.

The only French success was an attack on the lightly protected English baggage train, with Ysembart d’Azincourt (leading a small number of men-at-arms and varlets plus about 600 peasants) seizing some of Henry’s personal treasures, including a crown.[53] Whether this was part of a deliberate French plan or an act of local brigandage is unclear from the sources. Certainly, d’Azincourt was a local knight but he may have been chosen to lead the attack because of his local knowledge and the lack of availability of a more senior soldier.[54] In some accounts the attack happened towards the end of the battle, and led the English to think they were being attacked from the rear. Barker, following the Gesta Henrici, believed to have been written by an English chaplain who was actually in the baggage train, concludes that the attack happened at the start of the battle.[54]

Henry orders the killing of the prisoners

Regardless of when the baggage assault happened, at some point after the initial English victory Henry became alarmed that the French were regrouping for another attack. The Gesta Henrici places this after the English had overcome the onslaught of the French men-at-arms and the weary English troops were eyeing the French rearguard (“in incomparable number and still fresh”[33]). Le Fevre and Wavrin similarly say that it was signs of the French rearguard regrouping and “marching forward in battle order” which made the English think they were still in danger.[55]

In any event, Henry ordered the slaughter of what were perhaps several thousand French prisoners, sparing only the most high ranked (presumably those most likely to fetch a large ransom under the chivalric system of warfare). According to most chroniclers, Henry’s fear was that the prisoners (who, in an unusual turn of events, actually outnumbered their captors) would realize their advantage in numbers, rearm themselves with the weapons strewn about the field and overwhelm the exhausted English forces. Although ruthless, Henry’s decision was thus arguably justifiable given the situation of the battle; even the French chroniclers do not criticise him for it.[56] In his study of the battle, John Keegan [57] argued that the main aim was not to actually kill the French knights but rather to terrorise them into submission and quell any possibility they might resume the fight, which would probably have caused the uncommitted French reserve forces to join the fray, as well. Such an event would have posed a mortal risk to the still-outnumbered English and could have easily turned a stunning victory into a mutually-destructive defeat, as the English forces were now largely intermingled with the French and would have suffered grievously from the arrows of their own longbowmen had they needed to resume shooting. Keegan also speculated that due to the relatively low number of archers actually involved in killing the French knights (roughly 200 by his estimate), together with the refusal of the English knights to assist in a duty they saw as distastefully unchivalrous and combined with the sheer difficulty of killing such a large number of prisoners in such a short space of time, the actual number of French knights killed might not have even reached the hundreds before the reserves fled the field and Henry called an end to the slaughter.[58]

Aftermath

The lack of reliable sources makes it impossible to give a precise figure for the French and English casualties (dead, wounded, taken prisoner). However, it is clear that though the English were outnumbered, their losses were far lower than those of the French. The French sources all give 4,000–10,000 French dead, with up to 1,600 English dead. The lowest ratio in these French sources has the French losing six times more men than the English. The English sources vary between about 1,500 and 11,000 for the French dead, with English dead put at no more than 100.[59] Barker identifies from the available records “at least” 112 Englishmen killed in the fighting, including Edward of Norwich, 2nd Duke of York, a grandson of Edward III.[3]

One widely used estimate puts the English casualties at 450, not an insignificant number in an army of about 8,500, but far fewer than the thousands the French lost, nearly all of whom were killed or captured. Using the lowest French estimate of their own dead of 4,000 would imply a ratio of nearly 9 to 1 in favour of the English, or over 10 to 1 if the prisoners are included.[60]

The French suffered heavily. Three dukes, at least eight counts, a viscount, and an archbishop died, along with numerous other nobles. Of the great royal office holders, France lost her Constable, Admiral, Master of the Crossbowmen and prévôt of the marshals.[61] The baillis of nine major northern towns were killed, often along with their sons, relatives and supporters. In the words of Juliet Barker, the battle “cut a great swath through the natural leaders of French society in Artois, Ponthieu, Normandy, Picardy.” [62] Estimates of the number of prisoners vary between 700 and 2,200, amongst them the Duke of Orléans (the famous poet Charles d’Orléans) and Jean Le Maingre (known as Boucicault) Marshal of France.[63]

Although the victory had been militarily decisive, its impact was complex. It did not lead to further English conquests immediately as Henry’s priority was to return to England, which he did on 16 November, to be received in triumph in London on the 23rd.[64] Henry returned a conquering hero, in the eyes of his subjects and European powers outside France, blessed by God. It established the legitimacy of the Lancastrian monarchy and the future campaigns of Henry to pursue his “rights and privileges” in France.[65] Other benefits to the English were longer term. Very quickly after the battle, the fragile truce between the Armagnac and Burgundian factions broke down. The brunt of the battle had fallen on the Armagnacs and it was they who suffered the majority of senior casualties and carried the blame for the defeat. The Burgundians seized on the opportunity and within 10 days of the battle had mustered their armies and marched on Paris.[66] This lack of unity in France allowed Henry eighteen months to prepare militarily and politically for a renewed campaign. When that campaign took place, it was made easier by the damage done to the political and military structures of Normandy by the battle.[67]

Notable casualties

French

Notable casualties (most named by Enguerrand de Monstrelet[68]) include:[69]

Leading officers:[citation needed]

Three dukes:

Seven counts (eight with d’Albret):[citation needed]

and some 90 bannerets and others, including:[citation needed]

English

Notable casualties included:

Prisoners

Among the circa 1,500 prisoners taken by the English, were the following French notables:[citation needed]

Numbers at Agincourt

Anne Curry in her 2005 book Agincourt: A New History, argues (based on research into the surviving administrative records) that the French army was about 12,000 strong, and the English army about 9,000, giving odds of 4–3.[2] By contrast, Juliet Barker in her Agincourt: The King, the Campaign, the Battle (also published in 2005) argues the English and Welsh were outnumbered “at least four to one and possibly as much as six to one”.[75] She suggests figures of about 6,000 for the English and 36,000 for the French, based on the Gesta Henrici‍ ’​s figures of 5,000 archers and 900 men-at-arms for the English, and Jean de Wavrin‘s statement “that the French were six times more numerous than the English”.[76] The 2009 Encyclopædia Britannica uses the figures of about 6,000 for the English and 20,000 to 30,000 for the French. The 1911 Britannica used somewhat different figures of 6,000 archers, 1,000 men-at-arms and “a few thousands of other foot” for the English, with the French outnumbering them by “at least four times”.[77]

With one of the lowest estimates for the size of the French army and also one of the highest estimates for the size of the English army, Curry is currently in a minority in suggesting that the odds were as near equal as 4–3. While not necessarily agreeing with the exact numbers Curry uses, some historians have however given support to her assertion that the French army was much smaller than traditionally thought, and the English somewhat bigger. Bertrand Schnerb, a professor of medieval history at the University of Lille, has said that he thinks the French probably had 12,000–15,000 troops.[78] Ian Mortimer, in his 2009 book 1415: Henry V’s Year of Glory, notes how Curry “minimises French numbers (by limiting her figures to those in the basic army and a few specific additional companies) and maximises English numbers (by assuming the numbers sent home from Harfleur were no greater than sick lists)”, but agrees that previous estimates have exaggerated the odds, and suggests that “the most extreme imbalance which is credible is fifteen thousand French troops against 8,100 English: a ratio of about two-to-one”.[79]

However, Clifford J. Rogers, professor of history at the United States Military Academy at West Point, has recently argued that archival records are too incomplete to substantially change his view that the English were outnumbered about 4–1.[78][80] Juliet Barker also disagrees with Curry’s arguments in the acknowledgements section of her 2005 book on Agincourt, saying: “Surviving administrative records on both sides, but especially the French, are simply too incomplete to support [Curry’s] assertion that nine thousand English were pitted against an army only twelve thousand strong. And if the differential really was as low as three to four then this makes a nonsense of the course of the battle as described by eyewitnesses and contemporaries.”[81]

Those supporting a greater imbalance have generally put more store by contemporary (and especially eyewitness) accounts. The Gesta Henrici gives plausible figures for the English of 5,000 archers and 900 men-at-arms, but Mortimer notes it is “wildly inaccurate” in stating the English were outnumbered 30–1, and there have also been doubts as to how much it was written as propaganda for Henry V. The proportions also seem incorrect, as from surviving records we know that Henry set out with about four times as many archers as men-at-arms, not five and a half times as many. Those who have supported the Gesta figures for the English army have generally thought that although the English army may have left Harfleur with eight or nine thousand men, it is plausible that after weeks of campaigning and disease in hostile territory they would have lost two or three thousand fighting men; however Mortimer states: “Despite the trials of the march, Henry had lost very few men to illness or death; and we have independent testimony that no more than 160 had been captured on the way.” [82]

As Mortimer notes, the Burgundian numbers for the size of the French vanguard of 8,000 men-at-arms in the vanguard with 1,400 (or 2,400) men-at-arms in the wings correspond roughly with the figures of ten thousand men-at-arms recorded by the duke of Berry’s herald. The Burgundians also recorded 4,000 archers and 1,500 crossbowmen in the “vanguard”, which would suggest “fourteen or fifteen thousand fighting men”.[82] (It should be noted that the Burgundians actually give the total size of the French army as an implausible 50,000,[83] and the numbers they use do not correspond closely to the odds they describe. Using very similar numbers, Jean Le Fevre states that the English were outnumbered 3–1, whereas Wavrin states that the English were outnumbered 6–1.[84])

One particular cause of confusion may have been the number of servants on both sides. Mortimer suggests that because there were a much higher proportion of men-at-arms on the French side, the number of non-combatants was much higher. Each man-at-arms could be expected to have a page, who would have ridden one of his spare horses. If the French army had an extra 10,000 mounted men (as opposed to only 1,500 extra for the English), then “the English probably did see an army about three times the size of their own fighting force”.[85]

It is open to debate whether these should all be counted as non-combatants; Rogers (for example) accepts that the French probably had about 10,000 men-at-arms, but explicitly includes one “gros valet” (an armed, armoured and mounted military servant) per French man-at-arms in his calculation of the odds.[86]

Popular representations

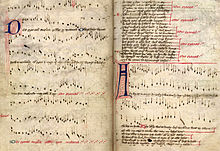
The 15th century Agincourt Carol

Soon after the English victory at Agincourt, a number of popular folk songs were created about the battle, the most famous being the Agincourt Carol, produced in the first half of the 15th century.[87] Other ballads followed, including King Henry Fifth’s Conquest of France, raising the popular prominence of particular events mentioned only in passing by the original chroniclers, such as the gift of tennis balls before the campaign.[88]

The most famous cultural depiction of the battle today, however, is through William Shakespeare‘s Henry V, written in 1599. The play focuses on the pressures of kingship, the tensions between how a king should appear – chivalric, honest and just – and how a king must sometimes act – Machiavellian and ruthless.[89] These tensions are illustrated in the play by Shakespeare’s depiction of Henry’s decision to kill some of the French prisoners, whilst attempting to justify it and distance himself from the event – this moment of the battle is portrayed both as a break with the traditions of chivalry, and as key example of the paradox of kingship.[90] Shakespeare’s depiction of the battle also plays on the theme of modernity – Shakespeare contrasts the modern, English king and his army with the medieval, chivalric, older model of the French.[91] Shakespeare’s play presented Henry as leading a truly English force into battle, playing on the importance of the link between the monarch and the common soldiers in the fight.[92] The original play does not, however, feature any scenes of the actual battle itself, leading critic Rose Zimbardo to characterise it as “full of warfare, yet empty of conflict.”[93]

The play introduced the famous St Crispin’s Day Speech; Shakespeare has Henry give a moving narration to his soldiers just before the battle, urging his “band of brothers” to stand together in the forthcoming fight.[94] One of Shakespeare’s most heroic speeches, critic David Margolies describes how it “oozes honour, military glory, love of country and self-sacrifice”, and it forms one of the first instances of English literature linking solidarity and comradeship to success in battle.[94][95] Partially as a result, the battle was used as a metaphor at the beginning of the First World War, when the British Expeditionary Force‘s attempts to stop the German advances were widely likened to it.[96]

Shakespeare’s version of the battle of Agincourt has been turned into (several minor and) two major films – by Laurence Olivier in 1944, and by Kenneth Branagh in 1989. Made just prior to the invasion of Normandy, Olivier’s gives the battle what Sarah Hatchuel has termed an “exhilarating and heroic” tone, with an artificial, cinematic look to the battle scenes.[97] Branagh’s version gives a longer, more Realist portrayal of the battle itself, drawing on both historical sources and images from the Vietnam and Falkland Wars.[98] In his film adaptation, Peter Babakitis uses digital effects to exaggerate realist features during his battle scenes, producing a more avant-garde interpretation of the fighting at Agincourt.[99] [clarification needed]

The battle remains an important symbol in popular culture. For example, a mock trial of Henry V for the crimes associated with the slaughter of the prisoners was held in Washington, D.C. in March 2010, drawing from both the historical record and Shakespeare’s play. Participating as judges were Justices Samuel Alito and Ruth Bader Ginsburg. The trial ranged widely over whether there was just cause for war and not simply the prisoner issue. Although an audience vote was “too close to call”, Henry was unanimously found guilty by the court on the basis of “evolving standards of civil society”.[100][101][102]